If you are building AI features into a Rails, Node.js, Python, or any other application, you quickly run into a practical problem:
Which AI model should I use?
OpenAI? Claude? Gemini? DeepSeek? Llama? Mistral?
And what happens when your chosen provider is expensive, rate-limited, unavailable, or simply not the best model for a particular task?
This is where OpenRouter becomes interesting.
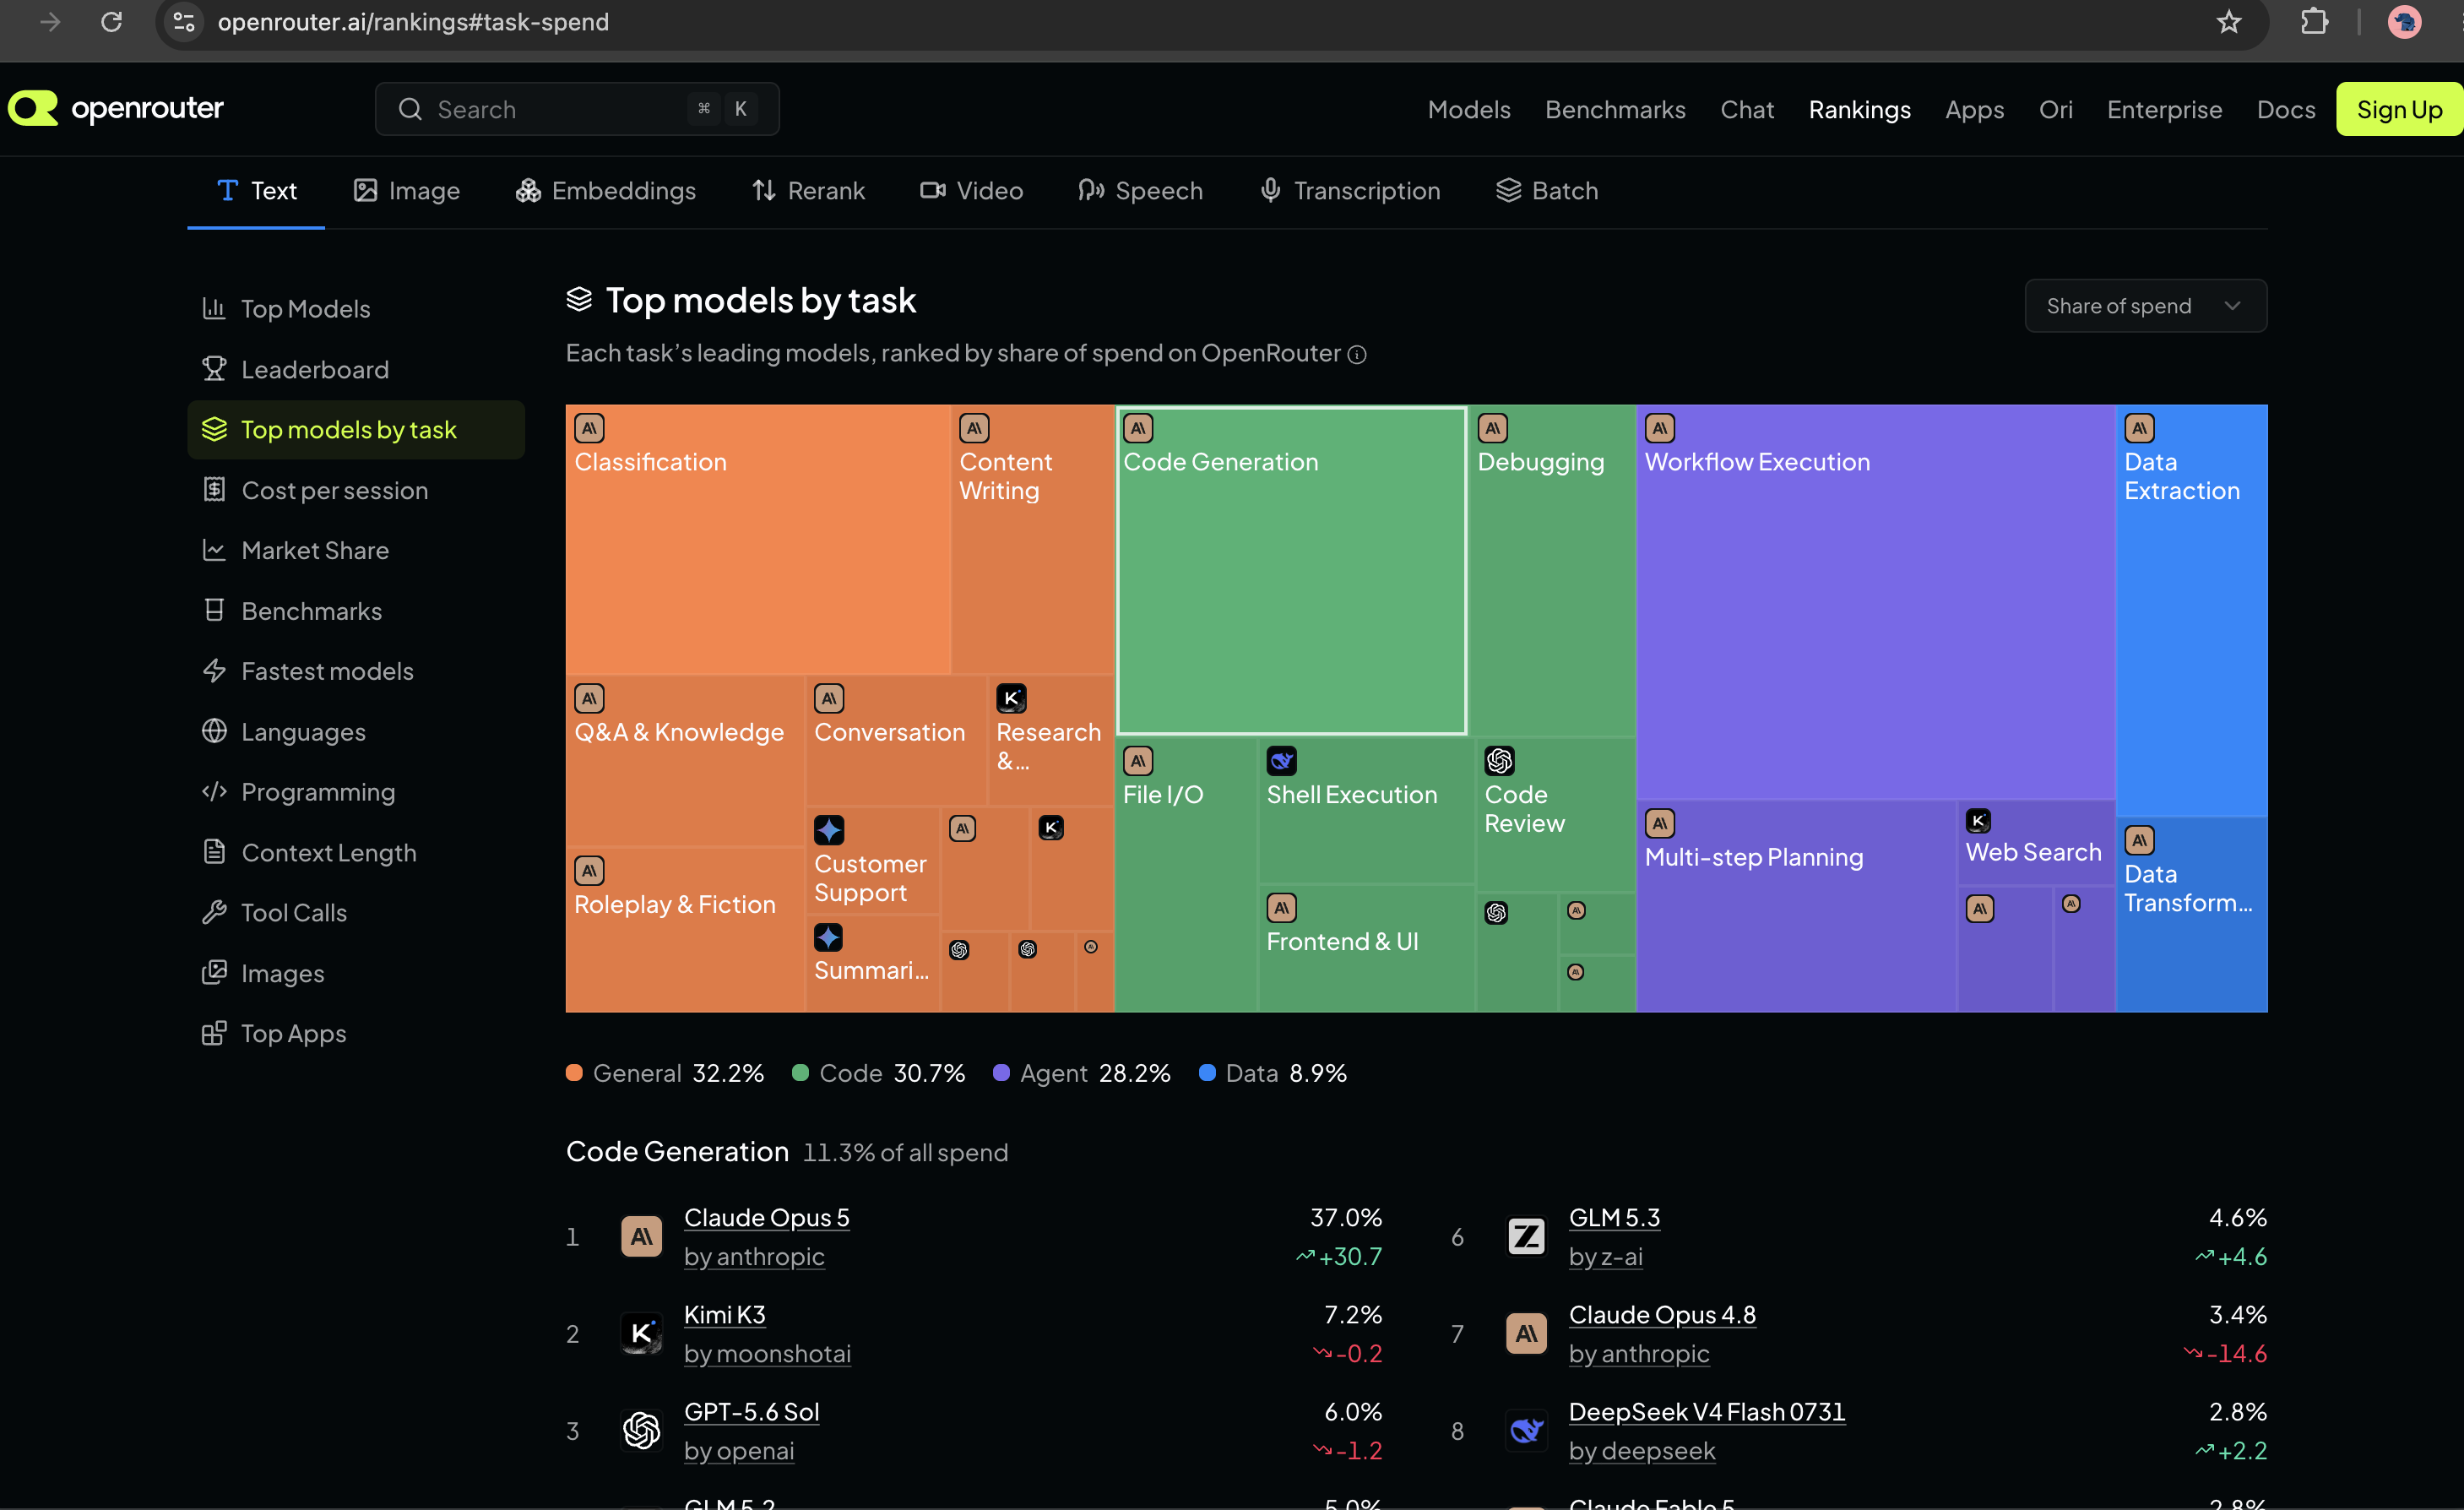
OpenRouter provides a unified API for accessing hundreds of AI models through a single interface. It follows an OpenAI-compatible API style, so applications using the OpenAI SDK can often switch to OpenRouter with very little code change. (OpenRouter)
What is OpenRouter?
Think of OpenRouter as an AI gateway/router sitting between your application and multiple LLM providers.
Instead of:
Your Application
      |
      +----> OpenAI
      |
      +----> Anthropic
      |
      +----> Google
      |
      +----> DeepSeek
you can have:
Your Application
      |
      v
  OpenRouter
      |
      +----> OpenAI
      +----> Anthropic
      +----> Google
      +----> DeepSeek
      +----> Meta
      +----> Other providers
Your application talks to one API, while OpenRouter handles access to the underlying models and providers.
It currently exposes hundreds of models through its API, and the available catalog can be queried programmatically. (OpenRouter)
Why would a developer use it?
The biggest advantage isn’t simply “many models.”
The real advantage is reducing coupling to a single AI provider.
Imagine your Rails application has:
MODEL="some-expensive-model"
Six months later you discover that another model:
performs better for your use case
costs less
has better latency
has higher availability
With a direct provider integration, changing providers can involve SDKs, authentication, request formats, response formats and application-specific code.
With OpenRouter, the model is largely a configuration decision:
MODEL="provider/model-name"
That makes experimentation much easier.
Practical Example: OpenAI-Compatible API
One of the most useful features is OpenAI API compatibility.
For example, using the OpenAI Ruby client, the important difference is the base_url:
The exact Ruby client API can vary by gem version, but the architectural idea is simple:
Keep your application code mostly unchanged and change the endpoint/model configuration.
OpenRouter officially documents using the OpenAI SDK with its API by changing the baseURL to the OpenRouter endpoint. (OpenRouter)
Which ruby gem to use?
1. The Recommended Path: The Official openai Gem (Drop-in Compatibility)
# AI assistant - OpenAI
gem "openai", "< 2.0"
Because OpenRouter mirrors OpenAI’s API structure, the easiest and most stable approach is to use the popular official-adjacent openai gem. You simply swap out the base_url and pass your OpenRouter API key.
My Current Rails Implementation is given below (Edited)
While OpenRouter does not maintain an official, first-party SDK exclusively for Ruby, its API is fully OpenAI-compatible. This gives you three simple ways to integrate OpenRouter into a Ruby application
You can test the same prompt against different models without building three separate integrations.
This is particularly useful during development.
For example:
Task: Generate SQL query from natural language

Model A → Good accuracy, expensive
Model B → Very good accuracy, cheaper
Model C → Fast, acceptable accuracy
Instead of making a permanent decision immediately, you can benchmark them.
That’s a much better engineering approach than blindly choosing a model because it is popular.
This is one of the features I find particularly useful for production systems.
Suppose your primary model is temporarily:
Rate limited
        ↓
Provider outage
        ↓
Model unavailable
OpenRouter can automatically try another model/provider according to your routing configuration. (OpenRouter)
For example:
models:[
"primary-model",
"fallback-model-1",
"fallback-model-2"
]
If the first model fails, OpenRouter can attempt the next one.
This turns your AI integration from:
Application → One AI Provider
into something closer to:
Application
     |
     v
OpenRouter
     |
     +---- Primary
     |
     +---- Fallback
     |
     +---- Another fallback
For production applications, that resilience can be more important than simply having access to many models.
Provider Routing
There is another layer that is easy to overlook.
A model may be available through multiple providers.
OpenRouter can route requests between providers and allows developers to influence routing based on things such as provider order, price, throughput and latency. (OpenRouter)
For example, if your application cares primarily about speed, routing can be configured to prefer higher-throughput providers.
If cost is the priority, you can prioritize price.
That means your architecture can move from:
Use Model X
towards:
Use Model X
through the provider that currently makes the most sense
That is a much more interesting abstraction for production AI systems.
What About Cost?
OpenRouter doesn’t magically make every model free.
The underlying model still has its own pricing.
OpenRouter says it passes through provider pricing while providing unified billing and routing. (OpenRouter)
However, OpenRouter also exposes free models.
For example:
openrouter/free
is available as a free-model option, subject to the applicable limits. (OpenRouter)
This is particularly useful when learning or experimenting.
For example, instead of spending money while learning AI API integration:
Rails App
   ↓
OpenRouter
   ↓
Free/low-cost model
You can first build the feature, understand the API, streaming, prompts and error handling, and only later move to a more capable paid model.
Important: free does not mean unlimited. OpenRouter documents rate limits for free models, and those limits depend on account/credit conditions. (OpenRouter)
🏗️ A Good Architecture for Rails
For a Rails application, I wouldn’t scatter OpenRouter calls throughout controllers.
Instead, create an abstraction:
class AiClient
  def initialize
    @client = OpenAI::Client.new(
      access_token: ENV["OPENROUTER_API_KEY"],
      base_url: "https://openrouter.ai/api/v1"
    )
  end

  def ask(prompt)
    @client.chat(
      parameters: {
        model: ENV.fetch("AI_MODEL"),
        messages: [
          { role: "user", content: prompt }
        ]
      }
    )
  end
end
Then your application does:
response=AiClient.new.ask(
"Summarize this customer feedback"
)
The model becomes configuration:
AI_MODEL=provider/model-name
Now changing the model doesn’t require changing business logic.
That’s the pattern I would recommend for a production Rails application.
Where OpenRouter Makes the Most Sense
I would consider OpenRouter when:
1. You are experimenting with multiple LLMs
You don’t want to build five separate integrations just to compare models.
2. You want provider flexibility
Your application shouldn’t become tightly coupled to one AI company unless there is a strong reason.
3. You need fallback strategies
AI APIs can experience rate limits and provider outages. Model/provider fallback can improve resilience. (OpenRouter)
4. You are cost-conscious
You can compare models and route workloads according to cost/performance requirements.
5. You are building an AI abstraction layer
For example:
Rails Application
       |
       v
    AiClient
       |
       v
   OpenRouter
       |
   +---+---+---+
   |   |   |   |
  GPT Claude Gemini DeepSeek
Your business logic doesn’t need to know which provider actually processed the request.
Should You Always Use OpenRouter?
No.
There are situations where going directly to the provider makes more sense.
For example, if your application is deeply dependent on provider-specific features, you may want the official SDK/API directly.
Also, adding another layer means you should evaluate:
latency
provider availability
data/privacy requirements
supported API features
model-specific behavior
operational dependencies
OpenRouter also provides controls around provider selection and data collection, including options such as Zero Data Retention routing where supported, so these requirements should be evaluated rather than assumed. (OpenRouter)
My Take as a Senior Developer
I wouldn’t look at OpenRouter simply as “a website where I can access different AI models.”
The more interesting way to think about it is:
OpenRouter is an abstraction layer between your application and the rapidly changing LLM ecosystem.
The AI world is moving extremely fast.
Today’s best model may not be tomorrow’s best model.
If your application is tightly coupled to:
Application → Provider SDK → One Model
you have created an architectural dependency.
If instead you build:
Application
     ↓
AI Service / Adapter
     ↓
OpenRouter
     ↓
Multiple Models / Providers
you gain considerably more flexibility.
For me, model experimentation, provider independence, automatic fallback and a consistent API are the strongest reasons to consider OpenRouter.
And for someone learning AI development, it is also a practical way to experiment with different models without writing a completely different integration for every provider.
Bottom line: If you’re building AI features today, don’t think only about which model to use. Think about how easily you can change that model tomorrow. OpenRouter is one practical way to design for that flexibility.
Conceptually, that becomes a pgvector nearest-neighbor query using cosine distance. pgvector supports cosine distance through <=>.
3. Test semantic search
You already have three chunks:
Chunk 1
Ruby blocks are chunks of code passed to methods.
Chunk 2
Ruby modules allow code to be organized and reused.
Chunk 3
Ruby classes define objects and their behavior.
Let’s test with a query that doesn’t use the exact wording from the second chunk.
Run:
bin/rails c
Then:
search=Ai::VectorSearchService.new
Now:
results=search.call(
query:"How can I reuse code in Ruby?"
)
Inspect:
results.map(&:content)
You should ideally see the modules chunk near the top:
"Ruby modules allow code to be organized and reused."
That’s our first semantic retrieval.
4. See the ranking
I want you to see why the result was selected.
Ask for the distance:
results.map do |chunk|
  {
    id: chunk.id,
    content: chunk.content,
    distance: chunk.neighbor_distance
  }
end
Depending on your Neighbor version, the distance accessor may be exposed differently. If neighbor_distance isn’t available, don’t spend time debugging it yet; the returned ordering is the important part for this checkpoint.
A basic test can use a fake embedding service, because we don’t want every test to call the embedding API.
require "test_helper"

class Ai::VectorSearchServiceTest < ActiveSupport::TestCase
  test "returns nearest document chunks" do
    document = Document.create!(title: "Ruby Guide", source: "test")

    document.document_chunks.create!(
      content: "Ruby blocks are passed to methods.",
      chunk_index: 0,
      embedding: Array.new(1024, 0.1)
    )

    document.document_chunks.create!(
      content: "Ruby modules allow code reuse.",
      chunk_index: 1,
      embedding: Array.new(1024, 0.2)
    )

    fake_embedding_service = Minitest::Mock.new

    fake_embedding_service.expect(
      :call,
      Array.new(1024, 0.2),
      text: "How do I reuse Ruby code?"
    )

    service = Ai::VectorSearchService.new(
      embedding_service: fake_embedding_service
    )

    results = service.call(
      query: "How do I reuse Ruby code?",
      limit: 1
    )

    assert_equal 1, results.size
    assert_equal "Ruby modules allow code reuse.", results.first.content

    fake_embedding_service.verify
  end
end
Because our vectors are artificial, this test is mainly verifying the service’s wiring. For higher-confidence semantic-search tests, we’d later use controlled fixtures or a small integration test.
Next – The Actual RAG Answer
We’re now one step away from having a real RAG feature.
Currently:
Question
 ↓
VectorSearchService
 ↓
Relevant chunks
Next we’ll do:
Question
 ↓
VectorSearchService
 ↓
Top 5 chunks
 ↓
PromptBuilder
 ↓
LLM
 ↓
Answer grounded in document
We’ll modify Ai::PromptBuilder so it can accept retrieved context and implement:
Ai::RagService
That will be the point where our Rails app goes from “I can search vectors” to “I have built a RAG application.”
Step 14 – Complete RAG in Rails
Now we have reached the final step of the RAG implementation:
class Ai::PromptBuilder
  SYSTEM_PROMPT = <<~PROMPT
    You are a helpful AI assistant.

    Answer questions clearly and concisely.

    When document context is provided:
    - Use the provided context as the primary source of truth.
    - Do not invent information that is not supported by the context.
    - If the answer cannot be determined from the context, say that you don't have enough information.
  PROMPT

  def initialize(conversation:, context: nil)
    @conversation = conversation
    @context = context
  end

  def build
    messages = [
      {
        role: "system",
        content: SYSTEM_PROMPT.strip
      }
    ]

    if @context.present?
      messages << {
        role: "system",
        content: <<~CONTEXT
          Use the following document context to answer the user's question:

          #{@context}
        CONTEXT
      }
    end

    messages.concat(
      @conversation.messages
        .order(:created_at)
        .map do |message|
          {
            role: message.role,
            content: message.content
          }
        end
    )

    messages
  end
end
result = rag.call(
  conversation: conversation,
  question: "How can Ruby code be reused?"
)
Then:
putsresult[:content]
You should get an answer based on your stored document chunks.
Error: I didn’t see a question in your message, This model is unavailable for free
When I tested result = rag.call(... I get this error:
Error #2

{url: "https://openrouter.ai/api/v1/chat/completions", status: 404, body: {error: {message: "This model is unavailable for free. The paid version is available now - use this slug instead: minimax/minimax-m3", code: 404}, user_id: "user_xxxxx"}} (OpenAI::Errors::NotFoundError)
Our model fallback does not work. So I used another one as our first model from the models array: "nvidia/nemotron-3-super-120b-a12b:free", Then it works. But I get the following result:
Error #1

puts result
{content: "I'm ready to answer your question, but I didn’t see a question in your message. Could you please provide the question you’d like me to answer based on the given context about Ruby modules, blocks, and classes?", model: "nvidia/nemotron-3-super-120b-a12b:free", input_tokens: 139, output_tokens: 151}
Why is it?
There are actually two separate issues here. The first one is very clear from our RagService result.
1. Why the RAG answer says “I didn’t see a question”
Your code currently does this:
result=rag.call(
conversation:conversation,
question:"How can Ruby code be reused?"
)
But in our Ai::RagService, we only use question for retrieval:
chunks=@vector_search_service.call(
query:question,
limit:limit
)
Then we build the prompt from:
Ai::PromptBuilder.new(
conversation:conversation,
context:context
).build
The question itself is never added to the conversation or prompt.
So the LLM receives approximately:
SYSTEM:
You are a helpful AI assistant...

CONTEXT:
Ruby blocks are...
Ruby modules allow code to be organized and reused.
Ruby classes define...

[previous conversation, if any]
but not:
USER:
How can Ruby code be reused?
Therefore the model is actually doing the right thing when it says:
“I didn’t see a question in your message.”
This is our bug.
2. Fix Ai::RagService
We need to make the current question part of the LLM input.
I actually prefer making the question a first-class argument to PromptBuilder rather than appending it afterward.
So our cleaner final API can become:
Ai::PromptBuilder.new(
conversation:conversation,
context:context,
current_question:question
).build
Then PromptBuilder controls the complete LLM prompt.
We’ll do that after confirming the current fix works.
4. About your fallback problem
You’re also correct that the fallback behavior isn’t happening as expected.
Your error:
This model is unavailable for free.
The paid version is available now...
came back as:
OpenAI::Errors::NotFoundError
That’s HTTP 404.
OpenRouter’s current documentation says its models array should trigger fallback when the primary model returns an error, and when using the OpenAI SDK it should be supplied through extra_body. (OpenRouter)
However, there’s an important detail in our current Ruby SDK usage.
The latest OpenAI Ruby SDK documentation says undocumented request parameters such as OpenRouter’s models extension should be passed using:
request_options: {
extra_body: {
models: [...]
}
}
not simply:
extra_body: {
models: [...]
}
The SDK documents extra_body specifically under request_options. (GitHub)
So our earlier code was likely passing the OpenRouter extension in the wrong place.
5. Fix Ai::Client fallback request
Change this:
response=@client.chat.completions.create(
model:MODELS.first,
messages:messages,
extra_body: {
models:MODELS.drop(1)
}
)
to:
response=@client.chat.completions.create(
model:MODELS.first,
messages:messages,
request_options: {
extra_body: {
models:MODELS.drop(1)
}
}
)
That’s the key fix.
The OpenAI Ruby SDK explicitly documents request_options.extra_body for passing provider-specific/undocumented request parameters.
6. Test the fallback independently
Before retesting RAG, let’s isolate fallback.
Temporarily make:
MODELS= [
"an-invalid-or-unavailable-model",
"nvidia/nemotron-3-super-120b-a12b:free"
].freeze
Then:
client = Ai::Client.new

result = client.chat(
  messages: [
    {
      role: "user",
      content: "Why is Node.js commonly used as a backend?"
    }
  ]
)
Then:
putsresult[:content]
putsresult[:model]
We want:
requested primary → fails
fallback → succeeds
result[:model]
=> "nvidia/nemotron-3-super-120b-a12b:free"
If that works, restore your real MODELS.
This is a much better test than testing fallback through the full RAG stack.
* Now Let’s Move On to Our Development.
14.4 See the actual retrieved context
Before trusting the final answer, inspect retrieval independently:
search = Ai::VectorSearchService.new

chunks = search.call(
  query: "How can Ruby code be reused?",
  limit: 3
)
Then:
chunks.eachdo |chunk|
puts"-----"
putschunk.content
end
You should see something like:
-----
Ruby modules allow code to be organized and reused.
-----
Ruby classes define objects and their behavior.
That’s the crucial RAG mechanism.
The model didn’t search PostgreSQL.
Rails searched PostgreSQL first and gave the model the relevant information.
14.5 Connect RAG to the chat flow
Right now our application uses:
Ai::ChatService
for normal chat.
We can keep that and add a dedicated RAG path.
For example, create an endpoint/action later such as:
             DOCUMENT INGESTION

PDF / Document
      ↓
Text Extraction
      ↓
Chunking
      ↓
EmbeddingService
      ↓
Embedding Model
      ↓
vector(1024)
      ↓
DocumentChunk
      ↓
PostgreSQL + pgvector
14.12 The answer you should memorize
Question:
“Explain how you implemented RAG in Rails.”
You can now say:
“I split documents into chunks and generated embeddings for each chunk. I stored those embeddings in PostgreSQL using pgvector. At query time, I embed the user’s question and perform cosine similarity search to retrieve the most relevant chunks. I then inject those chunks as context into the prompt and send the augmented prompt to the LLM. I keep retrieval, prompt construction and provider communication behind separate Rails services.”
That’s already enough material for a serious Senior Rails + AI int. discussion.
Now, we’ll consider RAG mechanically complete and move to the next major bootcamp topic: AI Agents + Tool Calling, where we’ll turn the assistant from:
Question → Answer
into:
Question
   ↓
Agent
   ├── Search docs
   ├── Search products
   ├── Find order
   └── Execute business action
That is where your Rails business-logic and API design experience becomes especially valuable.
One important correction before we code: the free model list you fetched earlier contains no free embedding model slug. OpenRouter currently lists liquid/lfm2.5-embedding-350m as a free embedding model, producing 1,024-dimensional vectors. OpenRouter’s embeddings API is OpenAI-compatible, so we can use the same Ruby SDK/base URL. (OpenRouter)
That means our existing vector(1536) column is the wrong dimension for the free embedding model we’ll use. We’ll fix that now.
def embed(text:)
  response = @client.embeddings.create(
    model: EMBEDDING_MODEL,
    input: text
  )

  {
    embedding: response.data.first.embedding,
    model: response.model,
    input_tokens: response.usage&.prompt_tokens
  }
end
So your client now has two responsibilities:
chat()
embed()
Both communicate with the same OpenRouter endpoint, but use different models/endpoints. OpenRouter provides an OpenAI-compatible /embeddings API for this. (OpenRouter)
Step 4 – Test the raw embedding request
Open Rails console:
bin/rails c
Then:
client=Ai::Client.new
Now:
result = client.embed(
  text: "Ruby on Rails is a web application framework."
)
Inspect:
result.keys
You should get:
[:embedding, :model, :input_tokens]
Now:
result[:embedding].length
You should get:
1024
This is an important RAG checkpoint.
You’ve just proven:
text
↓
embedding model
↓
1024 numbers
Now inspect the first few values:
result[:embedding].first(5)
You’ll see floating-point numbers.
Don’t worry about the actual values. Their position in vector space is what matters.
Step 5 – Create Ai::EmbeddingService
Now we introduce the application-level service.
Create:
app/services/ai/embedding_service.rb
Use:
class Ai::EmbeddingService
  def initialize(ai_client: Ai::Client.new)
    @ai_client = ai_client
  end

  def call(text:)
    result = @ai_client.embed(text: text)

    result[:embedding]
  end
end
Why create another service when Ai::Client already has embed?
Because these are different responsibilities:
Ai::Client
How do I communicate with OpenRouter?
Ai::EmbeddingService
How does our application generate an embedding?
That distinction becomes useful once we introduce:
We now have our first actual vector stored in PostgreSQL.
Error: I cannot update embedding vector column with Ruby Array embedding data
I have tested to storing the embedding. But it seems to be Rails does not know / there is a Type mismatch for embedding ruby array data and db vector data type
Question
   ↓
Query embedding
   ↓
pgvector
   ↓
ORDER BY cosine distance
   ↓
Top K chunks
That is the point where RAG becomes real.
Then we’ll build Ai::VectorSearchService and make the first semantic search against PostgreSQL – the most important practical RAG step after embeddings.
We’ll move quickly, but this time keep each milestone runnable. Since you already have PostgreSQL and a working Rails 8.1 app, pgvector is a natural fit: it stores vectors alongside normal PostgreSQL data and supports cosine similarity plus exact and approximate nearest-neighbor search. (GitHub)
Step 13A – Install and enable pgvector
1. Check your PostgreSQL version
Run:
psql --version
Then check whether the extension is already installed:
bin/rails dbconsole
Inside PostgreSQL:
SELECT extname, extversion
FROM pg_extension
WHERE extname = 'vector';
If you get a row
For example:
vector | 0.8.6
you’re ready.
If you get no rows
You need to install the extension on your PostgreSQL installation.
Since you’re on macOS, if PostgreSQL was installed via Homebrew:
brew install pgvector
The pgvector project currently documents Homebrew installation for PostgreSQL 17/18 formulas. (GitHub)
Then restart PostgreSQL if required by your installation:
brew services restart postgresql@14
Use your actual PostgreSQL version if different.
Step 13B – Enable pgvector in Rails
Once PostgreSQL has the extension available, exit psql:
\q
Generate the migration:
bin/rails generate migration EnablePgvector
Open the migration and use:
class EnablePgvector < ActiveRecord::Migration[8.1]
  def change
    enable_extension "vector"
  end
end
Then:
bin/rails db:migrate
Error: PG::UndefinedFile: ERROR: could not open extension control file "/opt/homebrew/share/postgresql@14/extension/vector.control": No such file or director
This error occurs because the pgvector extension is not installed or cannot be found in the directory of your specific Homebrew-managed PostgreSQL 14 installation.
Do:
# 1. Clone the pgvector repository
cd /tmp
git clone --branch v0.8.6 https://github.com/pgvector/pgvector.git
cd pgvector

# 2. Explicitly point to your PostgreSQL 14 pg_config binary
export PG_CONFIG=/opt/homebrew/opt/postgresql@14/bin/pg_config

# 3. Build and install the extension
make
make install # may need sudo

# Verify the Installation: after the installation completes successfully, check if the vector.control file is present in the target directory
ls /opt/homebrew/share/postgresql@14/extension/vector.control
Verify:
➜  ai_assistant git:(main) rails dbconsole
psql (14.17 (Homebrew))
Type "help" for help.

ai_assistant_development=# SELECT extname, extversion
FROM pg_extension
WHERE extname = 'vector';
 extname | extversion
---------+------------
(0 rows)

ai_assistant_development=#
\q
➜  ai_assistant git:(main) ✗ brew services restart postgresql@14
Stopping `postgresql@14`... (might take a while)
==> Successfully stopped `postgresql@14` (label: sh.brew.postgresql@14)
==> Successfully started `postgresql@14` (label: sh.brew.postgresql@14)
➜  ai_assistant git:(main) ✗ rails dbconsole
psql (14.17 (Homebrew))
Type "help" for help.

ai_assistant_development=# SELECT extname, extversion
FROM pg_extension
WHERE extname = 'vector';
 extname | extversion
---------+------------
 vector  | 0.8.6
(1 row)
Chunk text
   ↓
Embedding API
   ↓
[0.021, -0.318, ...]
   ↓
PostgreSQL vector column
We’ll use 1536 dimensions initially, because we’ll use an embedding model that produces 1536-dimensional vectors. The actual dimension must match the embedding model you choose; pgvector requires the declared vector dimension to match stored vectors.
Step 13D – Create Document
Run:
bin/rails g model Document title:string source:string
Then:
bin/rails db:migrate
Open:
app/models/document.rb
Change it to:
class Document < ApplicationRecord
  has_many :document_chunks, dependent: :destroy

  validates :title, presence: true
end
Step 13E – Create DocumentChunk
Generate it:
bin/rails g model DocumentChunk \
  document:references \
  content:text \
  chunk_index:integer
Then don’t migrate yet.
We need to add the vector column manually because Rails’ generator doesn’t know which embedding dimension we want.
Open the generated migration and make it:
class CreateDocumentChunks < ActiveRecord::Migration[8.1]
  def change
    create_table :document_chunks do |t|
      t.references :document, null: false, foreign_key: true
      t.text :content, null: false
      t.integer :chunk_index, null: false
      t.vector :embedding, limit: 1536

      t.timestamps
    end

    add_index(
      :document_chunks,
      [:document_id, :chunk_index],
      unique: true
    )
  end
end
Depending on the pgvector Rails integration available in your environment, t.vector may not be recognized. If that happens, we’ll use:
-- create_table(:document_chunks)
bin/rails aborted!
StandardError: An error has occurred, this and all later migrations canceled: (StandardError)

undefined method 'vector' for an instance of ActiveRecord::ConnectionAdapters::PostgreSQL::TableDefinition
Do:
rails g migration addEmbeddingToDocumentChunks

# add
add_column :document_chunks, :embedding, :vector, limit: 1536

# do
rails db:migrate -t
Step 13F – Model association
Open:
app/models/document_chunk.rb
Use:
class DocumentChunk < ApplicationRecord
  belongs_to :document

  validates :content, presence: true
  validates :chunk_index, presence: true
end
Step 13G – Verify the database
Run:
bin/rails dbconsole
Then:
\d document_chunks
You should have:
ai_assistant_development=# \d document_chunks
                                          Table "public.document_chunks"
   Column    |              Type              | Collation | Nullable |                   Default
-------------+--------------------------------+-----------+----------+---------------------------------------------
 id          | bigint                         |           | not null | nextval('document_chunks_id_seq'::regclass)
 document_id | bigint                         |           | not null |
 content     | text                           |           | not null |
 chunk_index | integer                        |           | not null |
 created_at  | timestamp(6) without time zone |           | not null |
 updated_at  | timestamp(6) without time zone |           | not null |
 embedding   | vector                         |           |          |
Indexes:
    "document_chunks_pkey" PRIMARY KEY, btree (id)
    "index_document_chunks_on_document_id" btree (document_id)
    "index_document_chunks_on_document_id_and_chunk_index" UNIQUE, btree (document_id, chunk_index)
Foreign-key constraints:
    "fk_rails_99b41ada32" FOREIGN KEY (document_id) REFERENCES documents(id)
And:
SELECT vector_dims(
  '[1,2,3]'::vector
);
should return:
3
That proves the extension itself is working.
Exit:
\q
Step 13H – Create your first document manually
Before worrying about PDFs, parsers, Sidekiq, etc., let’s prove the RAG data model.
document.document_chunks.create!(
  content: "Ruby blocks are chunks of code passed to methods.",
  chunk_index: 0
)

document.document_chunks.create!(
  content: "Ruby modules allow code to be organized and reused.",
  chunk_index: 1
)

document.document_chunks.create!(
  content: "Ruby classes define objects and their behavior.",
  chunk_index: 2
)
Check:
document.document_chunks.count
Expected:
3
Step 13I – What we’ve built
Our database is now:
documents
----------------
id
title
source

        │
        │ 1 → many
        ▼

document_chunks
----------------
id
document_id
content
chunk_index
embedding
The crucial field is:
embedding
which will eventually contain:
[0.012, -0.883, 0.217, ...]
Int. Checkpoint
You should now be able to explain:
Why don’t we put the embedding on documents?
Because a document is usually too large to embed as one semantic unit.
We split it into chunks and embed each chunk independently:
Document
  ↓
Chunks
  ↓
Embeddings
That lets retrieval find the relevant section instead of returning the entire document.
One important design choice
We’re not adding an HNSW index yet.
An HNSW (Hierarchical Navigable Small World) index is a high-speed graph-based algorithm used to find similar items in large collections of high-dimensional data. It is widely used in vector databases for AI tasks like semantic search and recommendation systems.
pgvector supports exact nearest-neighbor search by default, and approximate indexes such as HNSW and IVFFlat become useful as the dataset grows. HNSW generally offers a strong speed/recall tradeoff but costs more memory and has a slower build.
IVFFlat (Inverted File with Flat compression) is a type of database index used to speed up similarity searches for high-dimensional vectors
For our small learning dataset:
exact search first
Once we have real embeddings and enough data:
HNSW index
We’ll deliberately compare both, which makes a good senior-level discussion.
We’ll create an Ai::EmbeddingService, generate a real embedding through our current provider setup, store it in PostgreSQL, and then perform our first semantic similarity search. That will be the point where we can honestly say we’ve built RAG mechanics rather than just knowing the definition.
We have enough practical experience with SSE right now. We don’t need to perfect the transport layer, lets move on to improve our production error handling architecture.
Step 12 – Production Hardening of the AI Integration
class Ai::Error < StandardError
end

class Ai::ProviderError < Ai::Error
end

class Ai::RateLimitError < Ai::Error
end

class Ai::TimeoutError < Ai::Error
end
This gives our application its own error vocabulary instead of exposing SDK/provider exceptions everywhere.
The exact exception classes can depend on the SDK/version, so inspect the exception raised by your installed openai gem rather than blindly copying provider-specific classes.
“I distinguish transient failures from permanent failures. For transient failures, I use a bounded number of retries with exponential (delay: 1,2,4,8,16 seconds) backoff.”
Step 13: Add AI Observability with admin Dashboard
Instead of merely saying we support observability, let’s build an actual AI Admin / Observability dashboard into the app. This will make the project much stronger because you can demonstrate that we thought beyond “call the LLM.”
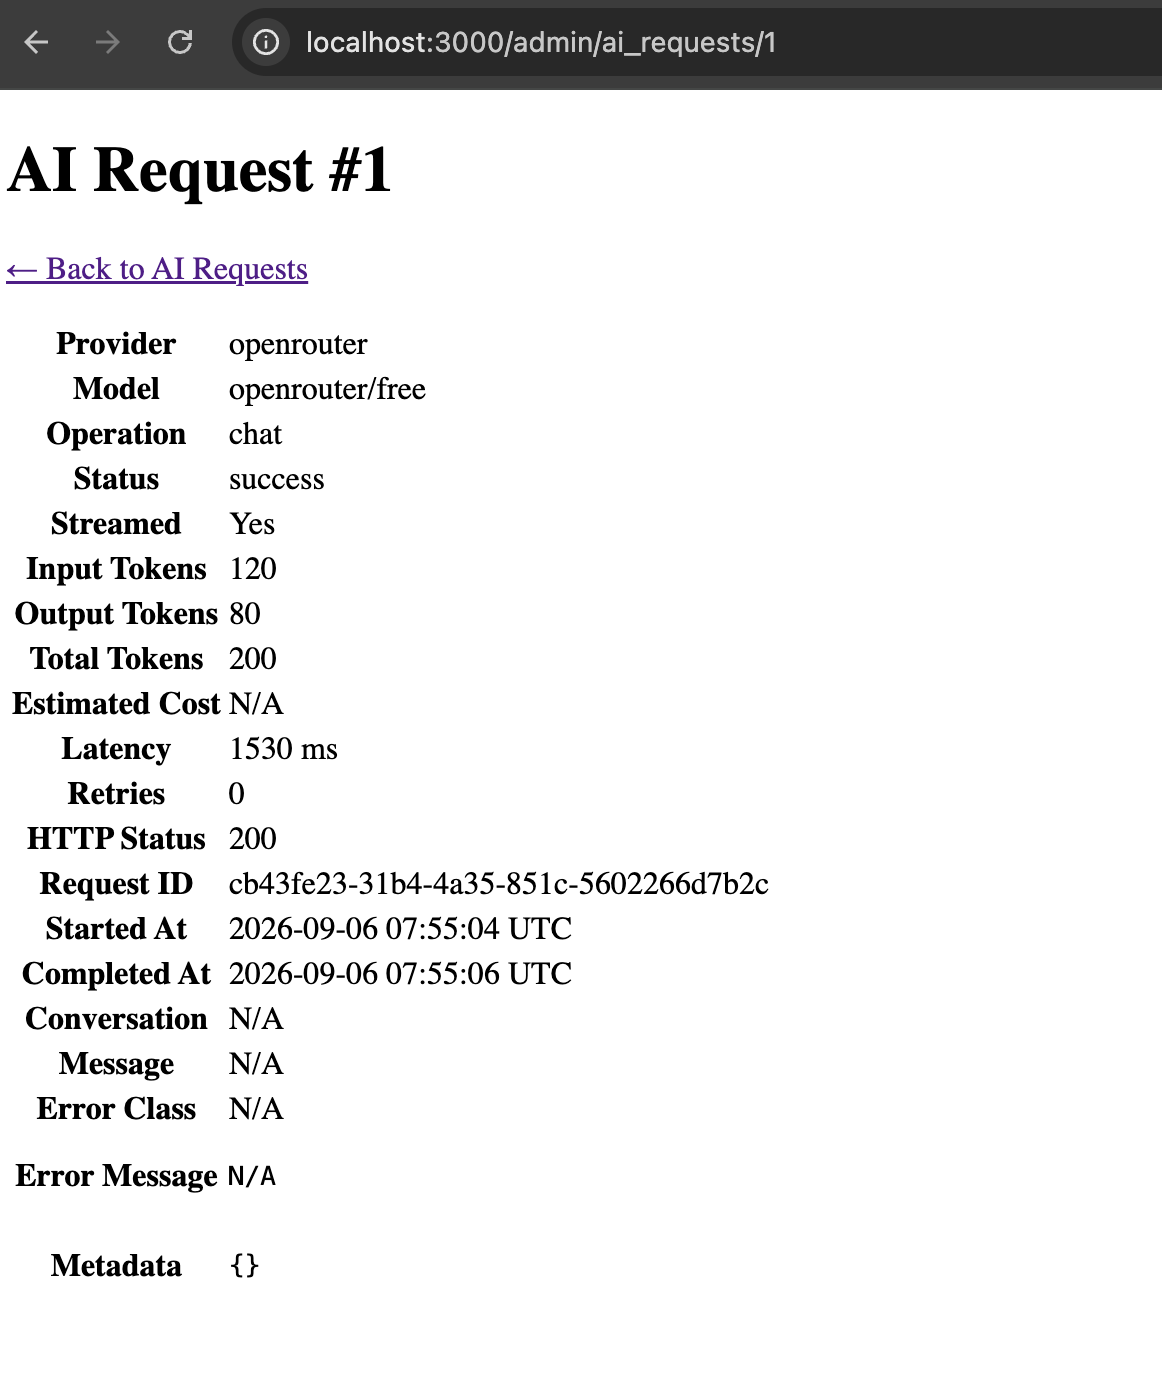
We will track:
AI Request
├── provider
├── model
├── operation
├── status
├── conversation
├── message
├── input tokens
├── output tokens
├── estimated cost
├── latency
├── started/completed timestamps
├── retry count
├── HTTP status
├── error class
├── error message
├── request ID
├── streamed?
└── metadata
And the admin UI will have:
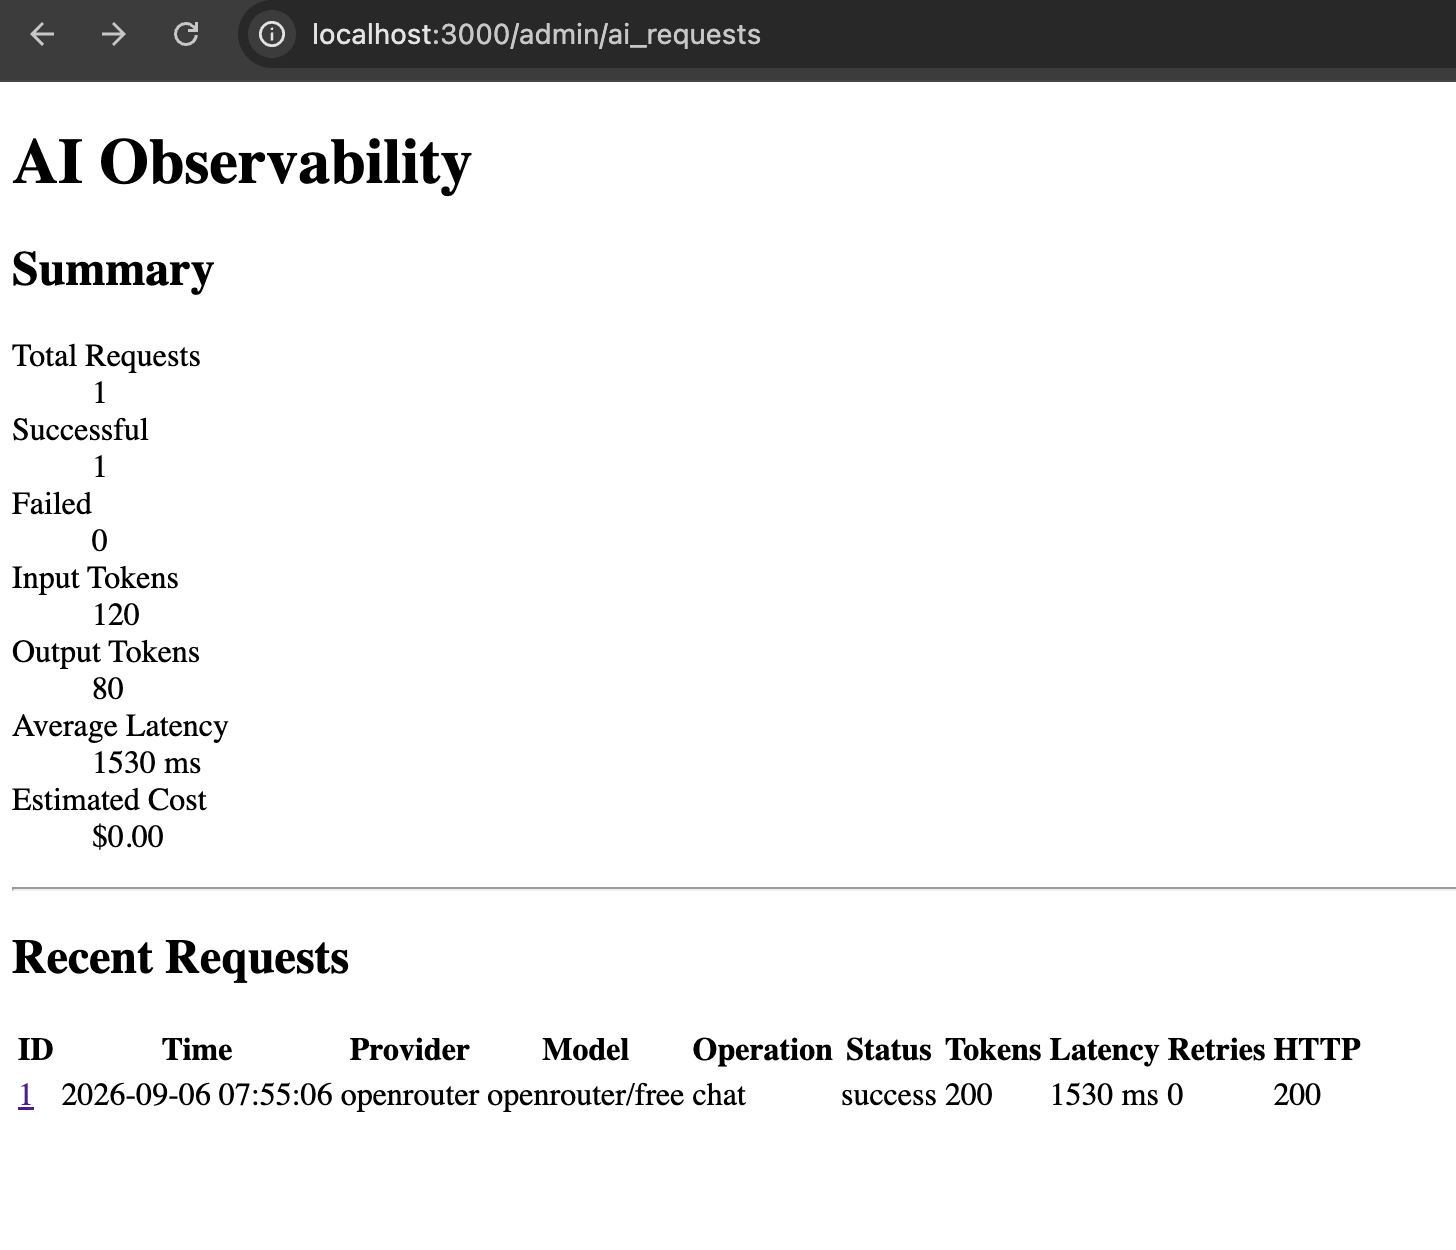
/admin/ai_requests

AI Observability
-------------------------------------------------
Total Requests       127
Successful           119
Failed                 8
Total Input Tokens  45,230
Total Output Tokens 18,921
Avg Latency          2.34 sec
Estimated Cost       $0.00 / N/A
-------------------------------------------------

Recent AI Requests
-------------------------------------------------
Time | Model | Status | Tokens | Latency | Error
-------------------------------------------------
...
Then clicking a request gives the complete details.
Step 12A – Create AiRequest
We’ll call the model AiRequest.
This is not the AI message itself.
Remember:
Message
    ↓
What the user/assistant said

AiRequest
    ↓
What happened while talking to the LLM
namespace :admin do
  resources :ai_requests, only: %i[index show]
end
So your routes become something like:
Rails.application.routes.draw do
  resources :conversations, only: [:create, :show] do
    resources :messages, only: [:create]
  end

  namespace :admin do
    resources :ai_requests, only: %i[index show]
  end

  root "conversations#new"
end
Check:
bin/rails routes | grep ai_requests
You should get:
/admin/ai_requests
/admin/ai_requests/:id
Step 12I – Admin Controller
Open:
app/controllers/admin/ai_requests_controller.rb
Use:
class Admin::AiRequestsController < ApplicationController
  before_action :authenticate_admin!

  def index
    @ai_requests = AiRequest
      .includes(:conversation, :message)
      .recent
      .limit(100)

    @total_requests = AiRequest.count

    @successful_requests =
      AiRequest.successful.count

    @failed_requests =
      AiRequest.failed_requests.count

    @total_input_tokens =
      AiRequest.sum(:input_tokens)

    @total_output_tokens =
      AiRequest.sum(:output_tokens)

    @average_latency =
      AiRequest.where.not(latency_ms: nil).average(:latency_ms)

    @estimated_cost =
      AiRequest.sum(:estimated_cost)
  end

  def show
    @ai_request = AiRequest.includes(
      :conversation,
      :message
    ).find(params[:id])
  end

  private

  def authenticate_admin!
    authenticate_or_request_with_http_basic("AI Admin") do |username, password|
      username == Rails.application.credentials.dig(:admin, :username) &&
        password == Rails.application.credentials.dig(:admin, :password)
    end
  end
end
This means the admin dashboard isn’t publicly accessible.
here only to demonstrate recording unexpected failures.
In the final production version, we’ll distinguish:
timeout
rate limit
provider error
invalid response
unexpected application bug
and map them to the proper AiRequest.status.
That’s coming immediately after this.
Why this dashboard is worth having
You now have a tangible answer to questions like:
How would you monitor an AI application?
You can say:
“I record each AI invocation separately from the conversation message itself. I track provider, model, status, latency, token consumption, retries, HTTP status and error information, then expose that through an internal observability dashboard.”
Then show page:
/admin/ai_requests
That’s much stronger than saying:
“I would use logging.”
One thing I deliberately did NOT add
I don’t recommend storing the complete prompt by default in AiRequest.
Why?
Because prompts can contain:
PII
customer data
confidential company information
secrets
Instead we can later store safe metadata such as:
{
"message_count":8,
"prompt_tokens":1200,
"temperature":0.2
}
and keep sensitive content under the normal conversation access controls.
Issue 1:Fix AI Response: User Safety
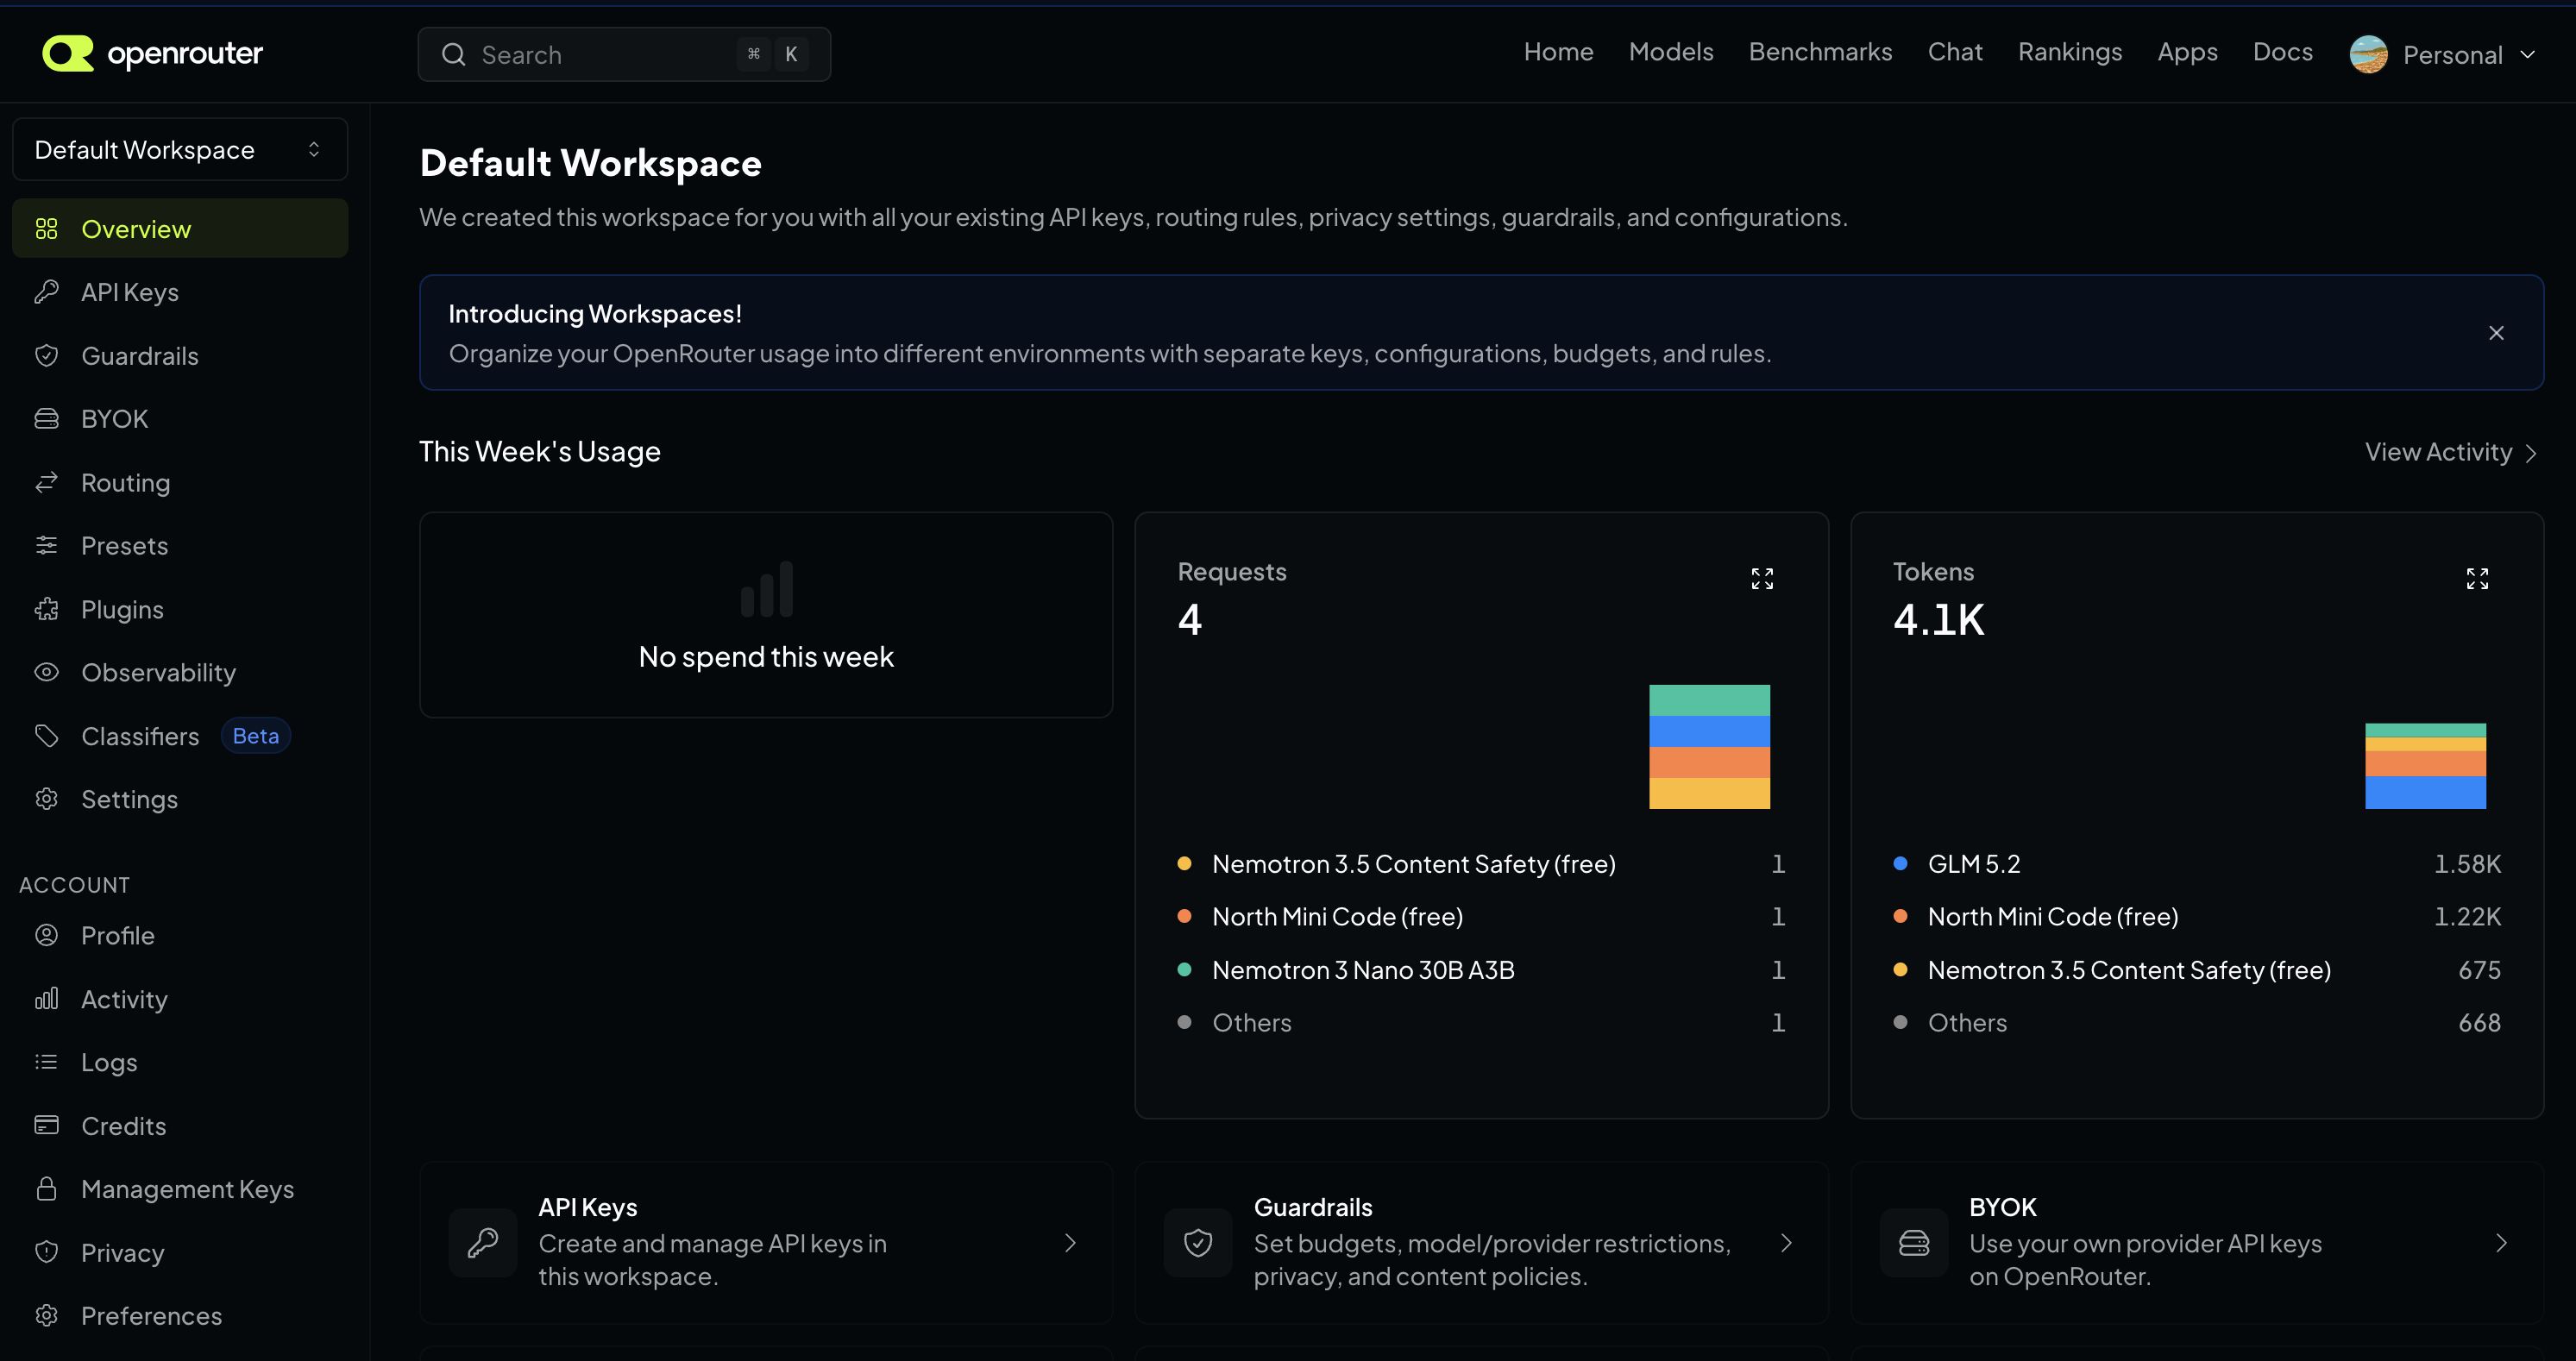
Currently when I tested I get the AI Response like: User Safety: safeResponse Safety: safe
This is a model-selection problem, not a Rails problem.
The response:
User Safety: safeResponse Safety: safe
is characteristic of a content-safety/guardrail model, not a normal conversational model. OpenRouter currently lists Nemotron 3.5 Content Safety (free) as a moderation model whose intended output is exactly safety classifications such as User Safety and Response Safety. (OpenRouter)
Because we’re using:
MODEL="openrouter/free"
OpenRouter is free to route that request to an available free model. The free-model router is explicitly designed to select among available free models, so you shouldn’t use it when you need a stable application behavior. (OpenRouter)
Fix: choose an actual chat model
For our course, let’s use a specific free conversational model instead of:
MODEL="openrouter/free"
A good current option is:
MODEL="openai/gpt-oss-20b:free"
OpenRouter lists free models separately, including general-purpose models; the exact free catalog changes over time.
Change Ai::Client
Open:
app/services/ai/client.rb
Change:
MODEL="openrouter/free"
to:
MODEL="openai/gpt-oss-20b:free"
Then test:
bin/rails c
client=Ai::Client.new
result=client.chat(
messages: [
{
role:"user",
content:"Why Node.js as a backend?"
}
]
)
putsresult[:content]
We should now get an actual explanatory answer rather than the safety classification.
Why I want a specific model for our project
This is actually a valuable AI engineering lesson.
Current approach
Ai::Client
↓
openrouter/free
↓
??? model
The model can change depending on routing.
Better application architecture
Ai::Client
↓
specific model
↓
predictable behavior
For production systems, model choice should generally be deliberate rather than an accidental consequence of a router.
The openrouter/free router is useful for experimentation, but for our course we’ll use an explicit free model so our behavior stays understandable. OpenRouter itself recommends openrouter/free as a convenient way to sample available free models, which is precisely why it shouldn’t be treated as a fixed model identity.
One more thing: our RAG work needs an embedding model
Don’t use the chat model for embeddings.
We’ll have:
Chat:
openai/gpt-oss-20b:free
Embeddings:
separate embedding model
OpenRouter currently lists free embedding models as well, including NVIDIA’s Nemotron 3 Embed 1B, which is specifically intended for retrieval/RAG. (OpenRouter)
We’ll choose the embedding model separately when we implement Ai::EmbeddingService.
For now
Make this one-line change:
MODEL="openai/gpt-oss-20b:free"
After that, we’ll continue with Step 13 – generating embeddings and storing the first real vector in document_chunks.
Issue 2: OpenAI::Errors::NotFoundError
Our server Log:
OpenAI::Errors::NotFoundError ({url: "https://openrouter.ai/api/v1/chat/completions", status: 404, body: {error: {message: "This model is unavailable for free. The paid version is available now - use this slug instead: openai/gpt-oss-20b", code: 404}, user_id: ...
Since we’re using the openai Ruby SDK, our rescue layer should use OpenAI::Errors::*, not Faraday exceptions. The SDK maps HTTP status codes such as 400, 401, 403, 404, 409, 422, 429 and 500+ into its own typed exceptions, and it has separate APIConnectionError / APITimeoutError classes. (https://github.com/openai/openai-ruby/blob/main/lib/openai/errors.rb)
Also, our 404 message tells us something important:
OpenRouter’s current free catalog does include openai/gpt-oss-20b:free, but free endpoints can change availability. (OpenRouter)
Our earlier 404 specifically said that the endpoint was unavailable for free at that moment and suggested the paid slug. Since OpenRouter currently lists the :free variant as free, this looks like provider/availability inconsistency, not that our slug was fundamentally wrong. OpenRouter also notes that free variants are rate-limited and availability can vary. (OpenRouter)
1. Fix the model
Let’s use the explicit free model again:
MODEL="openai/gpt-oss-20b:free"
OpenRouter currently lists that exact slug as free with zero input/output pricing. (OpenRouter)
If that endpoint temporarily fails, we can switch to another currently listed free model rather than using openrouter/free.
2. Fix Ai::Client error handling
Also change our Ai::Client chat rescues from: Faraday::TooManyRequestsError
Faraday::TimeoutError
Faraday::Error
to: similar to: OpenAI::Errors::NotFoundError etc,

check: https://github.com/openai/openai-ruby/blob/main/lib/openai/errors.rb
Let’s use the actual SDK error hierarchy.
The important classes are:
OpenAI::Errors::BadRequestError
OpenAI::Errors::AuthenticationError
OpenAI::Errors::PermissionDeniedError
OpenAI::Errors::NotFoundError
OpenAI::Errors::ConflictError
OpenAI::Errors::UnprocessableEntityError
OpenAI::Errors::RateLimitError
OpenAI::Errors::InternalServerError
OpenAI::Errors::APIConnectionError
OpenAI::Errors::APITimeoutError
The current SDK maps HTTP 404 → NotFoundError, 429 → RateLimitError, and 500+ → InternalServerError. (GitHub)
So replace our old Faraday rescues entirely.
app/services/ai/client.rb
Use:
class Ai::Client
  MODEL = "openai/gpt-oss-20b:free"
  BASE_URL = "https://openrouter.ai/api/v1"

  def initialize
    api_key = Rails.application.credentials.dig(:openrouter, :api_key)

    raise "OpenRouter API key is missing" if api_key.blank?

    @client = OpenAI::Client.new(
      api_key: api_key,
      base_url: BASE_URL
    )
  end

  def chat(messages:)
    response = @client.chat.completions.create(
      model: MODEL,
      messages: messages
    )

    {
      content: response.choices.first.message.content,
      model: response.model,
      input_tokens: response.usage&.prompt_tokens,
      output_tokens: response.usage&.completion_tokens
    }
  rescue OpenAI::Errors::RateLimitError => e
    raise Ai::RateLimitError, e.message

  rescue OpenAI::Errors::APITimeoutError => e
    raise Ai::TimeoutError, e.message

  rescue OpenAI::Errors::APIConnectionError => e
    raise Ai::ProviderError, e.message

  rescue OpenAI::Errors::BadRequestError,
          OpenAI::Errors::AuthenticationError,
          OpenAI::Errors::PermissionDeniedError,
          OpenAI::Errors::NotFoundError,
          OpenAI::Errors::ConflictError,
          OpenAI::Errors::UnprocessableEntityError,
          OpenAI::Errors::InternalServerError,
          OpenAI::Errors::APIStatusError => e
    raise Ai::ProviderError, e.message
  end
end
The specific NotFoundError you just encountered will therefore be caught here:
Now let’s implement streaming. OpenRouter supports Server-Sent Events (SSE) when stream: true, and the current Ruby SDK exposes Chat Completions streaming through stream_raw; its higher-level stream helper is not available in every released SDK version. (OpenRouter)
We’ll keep the implementation practical and compatible with the SDK behavior you’re using.
Step 9 – Stream the AI response
What changes?
Currently:
Browser
  ↓
POST
  ↓
Rails waits for entire LLM response
  ↓
redirect
Ai::Client.new.stream_chat(messages: messages) do |delta|
  print delta
  $stdout.flush
end
You should see the answer appearing progressively:
Ruby is a programming language...
instead of getting the entire answer at once.
Why $stdout.flush?
Ruby can buffer stdout. Flushing makes each chunk visible immediately in the console.
9.2 Now expose streaming from Rails
Instead of making MessagesController#create wait for the completed response, we’ll create a streaming endpoint.
Open:
config/routes.rb
Add:
resources :conversations, only: [:create, :show] do
  resources :messages, only: [:create]
end

get "/conversations/:conversation_id/messages/stream",
    to: "messages#stream",
    as: :conversation_messages_stream
9.3 Add the streaming controller action
Open:
app/controllers/messages_controller.rb
Add:
includeActionController::Live
and:
def stream
  conversation = Conversation.find(params[:conversation_id])

  response.headers["Content-Type"] = "text/event-stream"
  response.headers["Cache-Control"] = "no-cache"
  response.headers["X-Accel-Buffering"] = "no"

  sse = SSE.new(response.stream)

  messages = Ai::PromptBuilder
    .new(conversation: conversation)
    .build

  content = +""

  begin
    Ai::Client.new.stream_chat(messages: messages) do |delta|
      next if delta.blank?

      content << delta

      sse.write(
        { content: delta },
        event: "message"
      )
    end

    sse.write(
      { done: true },
      event: "done"
    )
  ensure
    sse.close
    response.stream.close
  end
end
But Rails doesn’t provide SSE automatically.
Add:
includeActionController::Live
and use Rails’ ActionController::Live::SSE if available in our Rails 8.1 setup, or otherwise we can use the standard SSE format directly. Rails 8.1’s Live controller infrastructure is the relevant mechanism here.
To avoid another dependency, let’s actually use the raw SSE format ourselves.
For our application, we’ll eventually use a Stimulus controller rather than inline JavaScript.
9.7 Don’t spend time styling this
Our immediate objective is proving:
LLM → SSE → Browser
Once you can see the response arriving incrementally, we’ve achieved the important part.
9.8 Commit
Once Ruby streaming works:
git add app/services/ai/client.rb
git commit -m"feat: stream LLM responses"
git push
Then we’ll wire the browser properly.
Int. knowledge from this step
You should now be able to explain:
What is SSE?
A persistent HTTP connection where the server pushes events to the client.
Why use it for AI?
Because LLM output naturally arrives incrementally, and streaming improves perceived latency.
Why not Action Cable?
WebSockets are bidirectional; SSE is simpler when the server primarily needs to push generated output to the browser.
Where does the LLM stream end?
At the Rails server, which consumes the provider’s SSE stream and forwards its own stream to the browser.
OpenRouter documents its AI streaming as SSE, while the Ruby SDK provides streaming chat-completion chunks through stream_raw.
Next step
Since ActionController::Live::SSE exists in Rails 8.1, let’s test the controller before committing.
One important point first: don’t test this through bin/rails server with WEBrick. Rails documents that WEBrick buffers responses, so Live streaming won’t behave correctly. Use our normal Puma server instead. (Ruby on Rails Guides)
1. First verify the route
Run:
bin/rails routes | grep stream
You should see our route, something like:
conversation_messages_stream
GET /conversations/:conversation_id/messages/stream
Then get a conversation ID:
bin/rails c
Conversation.last.id
For example:
1
Exit:
exit
2. Test with curl first
This is the easiest way to prove that the Rails endpoint is actually streaming.
But I prefer curl -N for the first test because the browser doesn’t give you a very useful raw view of SSE events.
Rails’ documentation uses essentially this same pattern – writing to response.stream periodically and closing the stream in ensure. (Ruby on Rails Guides)
One architectural correction before we commit
Don’t commit our current streaming implementation yet.
That is the version worth keeping in our portfolio and discussing in an int. scenario. Rails requires the response headers to be set before the first stream write and requires the stream to be closed when finished. (Ruby on Rails API)
the next step will be to connect the actual user message → streaming endpoint → browser UI rather than having a standalone stream endpoint.
Debug:ActionController::Live::ClientDisconnected – 500 Internal Server Error
Yes – very likely from our rescue behavior, but the deeper issue is that ActionController::Live::ClientDisconnected is not the same exception as IOError in Rails 8.1.
does not necessarily catch the exception you’re seeing.
Why the 500 appears
Our stream is working, then eventually the client closes the connection – or example:
browser finishes and closes the SSE connection
EventSource.close() is called
browser navigates/reloads
user closes the tab
network connection disappears
Rails detects that the client is gone while processing the Live response and raises:
ActionController::Live::ClientDisconnected
Rails’ Live processing happens in a separate thread, and once the response has been committed Rails handles exceptions differently from a normal controller request. (Ruby on Rails API)
Don’t interpret ClientDisconnected as an application failure.
It’s closer to:
Rails: "I'm streaming."
Browser: "I'm no longer listening."
Rails: "Okay."
For SSE, that’s a normal lifecycle event.
Why you’re seeing Completed 500
This is the part that initially looks strange.
With ActionController::Live, Rails starts processing the action in a separate thread. When an exception occurs after the response has already been committed/started streaming, Rails can’t behave like a normal controller request with a fresh 500 response. Rails’ Live implementation has special handling for committed responses and closes the stream after logging the exception.
So our log can be misleading:
Completed 500 Internal Server Error
ActionController::Live::ClientDisconnected
even though:
the user received the streamed answer successfully,
the connection closed normally afterward.
That’s exactly why I would treat ClientDisconnected separately from genuine application errors.
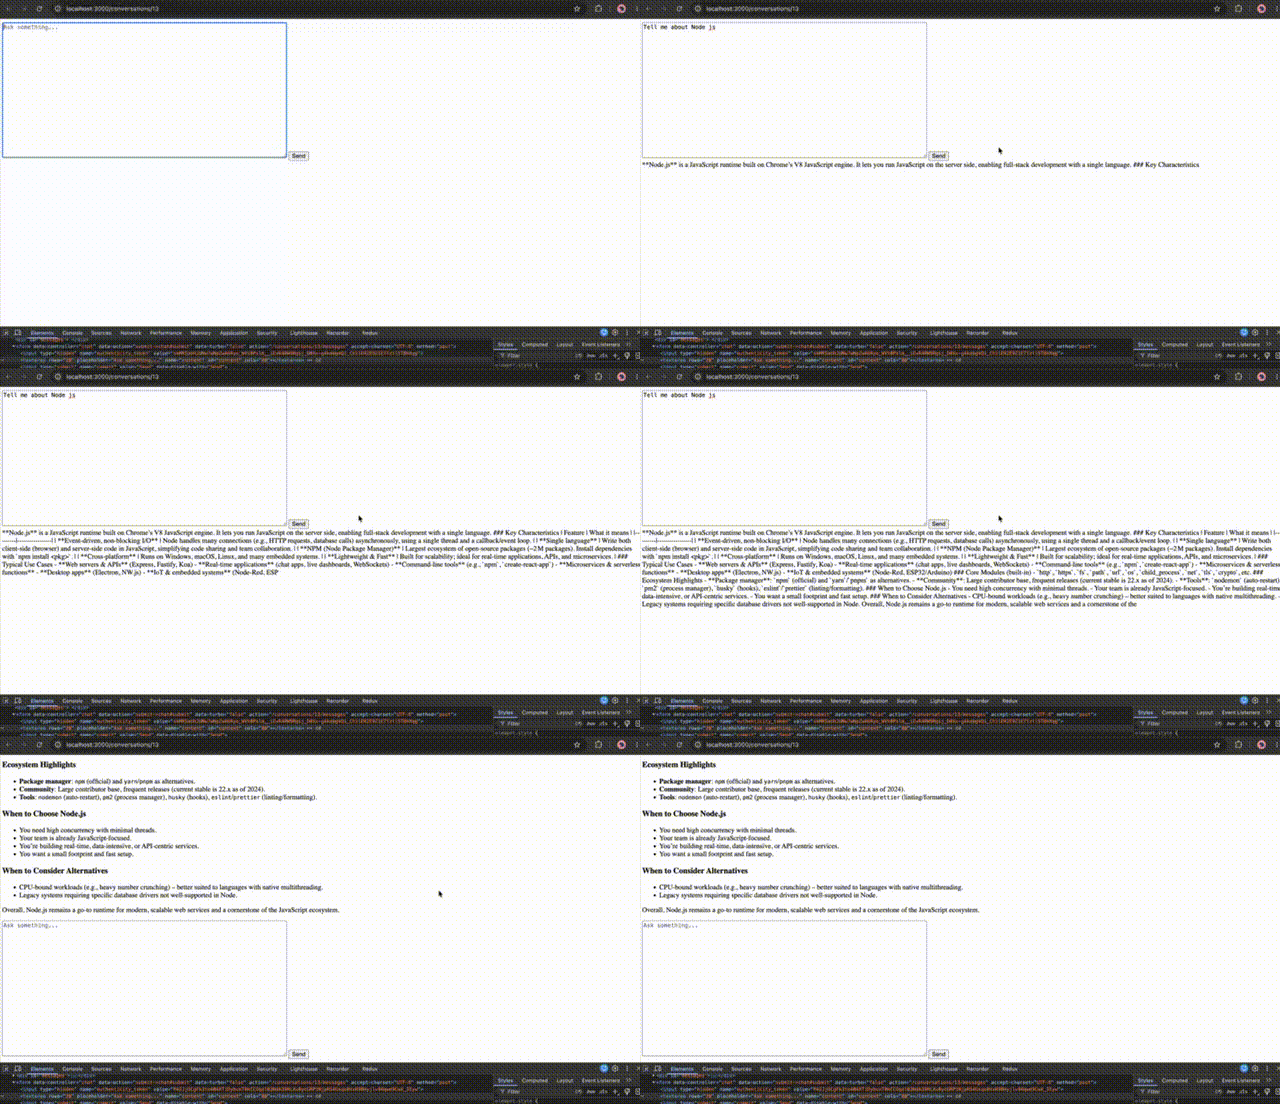
Fix Streaming issue: After entering the question the page get stuck
Our server logs are as follows:

Started POST "/conversations"
Processing by ConversationsController#create as TURBO_STREAM
Parameters: {"...., "conversation" => {"title" => "Tell me about Node js"}, "commit" => "Start conversation"}

Then goes to
Started GET "/conversations/13"
Processing by ConversationsController#show as TURBO_STREAM
Parameters: {"id" => "13"}
Rendering conversations/show.html.erb
200 OK
Then the page stuck on the Form: form_with in the conversations/show.html.erb. the div streaming-response is blank and it is not going to messages controller#stream or I think it is not executing the chat_controller.js also.
Yes – the server logs strongly suggest the problem is before MessagesController#stream. The conversation page loads correctly, then the form submission isn’t triggering our Stimulus chat#submit.
The likely culprit is Turbo + Stimulus registration, not SSE.
Depending on the Rails 8 application template/setup, your index.js may use automatic controller loading instead. The important thing is that chat_controller.js is being registered under:
chat
3. Check application.js
Open:
app/javascript/application.js
You should have the normal Rails setup, typically something along the lines of:
import"@hotwired/turbo-rails"
import"controllers"
The important line is:
import"controllers"
Without it, your Stimulus controllers won’t be registered.
In this session we will be building prompt builder to build the prompt that we send to the AI model. We save every conversation in memory and create a chat feature backend architecture.
Step 7 – Conversation Memory + Prompt Builder
Right now our Ai::ChatService sends only:
current user message
So this:
User: My name is Abhilash.
User: What is my name?
doesn’t reliably work as a conversation because the second request doesn’t include the first message.
The client should now know nothing about conversations.
It simply receives:
messages= [
{ role:"system", content:"..." },
{ role:"user", content:"..." },
{ role:"assistant", content:"..." }
]
2. Create PromptBuilder
Create:
app/services/ai/prompt_builder.rb
Add:
class Ai::PromptBuilder
SYSTEM_PROMPT = <<~PROMPT
You are a helpful AI assistant.
Answer clearly and concisely.
If you are unsure about something, say so.
PROMPT
def initialize(conversation:)
@conversation = conversation
end
def build
[
{
role: "system",
content: SYSTEM_PROMPT.strip
},
*@conversation.messages.order(:created_at).map do |message|
{
role: message.role,
content: message.content
}
end
]
end
end
Now our database becomes the source of conversation history.
3. Update Ai::ChatService
Change it to:
class Ai::ChatService
def initialize(
ai_client: Ai::Client.new,
prompt_builder_class: Ai::PromptBuilder
)
@ai_client = ai_client
@prompt_builder_class = prompt_builder_class
end
def call(conversation:, user_message:)
conversation.transaction do
conversation.messages.create!(
role: :user,
content: user_message
)
messages = @prompt_builder_class
.new(conversation: conversation)
.build
result = @ai_client.chat(messages: messages)
conversation.messages.create!(
role: :assistant,
content: result[:content],
model: result[:model],
input_tokens: result[:input_tokens],
output_tokens: result[:output_tokens]
)
end
end
end
ai-assistant(dev):031> puts conversation.messages.map {|m| "Role: #{m.role}\n Content: #{m.content}" }.join("\n")
Role: user
Content: My name is Adam Bean
Role: assistant
Content: Hello Adam Bean! How can I assist you today?
Role: user
Content: What is my name?
Role: assistant
Content: Your name is Adam Bean.
=> nil
This is our first real conversation memory implementation.
The LLM did not magically remember the first request.
Rails retrieved the previous messages and sent them again.
This is one of the reasons production AI systems eventually introduce:
conversation summarization
+
recent-message window
+
RAG
Note: We’ll address this later.
Next Major Step – Chat UI
Now we have the backend flow:
User
↓
ChatService
↓
PromptBuilder
↓
LLM
↓
PostgreSQL
The next thing we’ll build is the actual Rails chat interface:
┌──────────────────────────────┐
│ AI Assistant │
├──────────────────────────────┤
│ You: What is Ruby? │
│ │
│ AI: Ruby is... │
│ │
│ You: Explain blocks. │
│ │
│ AI: A block is... │
├──────────────────────────────┤
│ [ Ask something... ] [Send] │
└──────────────────────────────┘
We’ll use Rails + Turbo/Stimulus, then add streaming immediately after that.
That will turn the backend we’ve built into an actual usable AI application.
Let’s move straight to the Chat UI + controller flow, then we can add streaming. We’ll keep this as one cohesive implementation step.
Step 8 – Build the Rails Chat UI
Our backend already does:
Conversation
↓
ChatService
↓
PromptBuilder
↓
Ai::Client
↓
LLM
↓
Message
Now we’ll expose it through HTTP.
8.1 Generate the controller
Run:
bin/rails g controller Conversations show
This gives us a starting point:
app/controllers/conversations_controller.rb
app/views/conversations/show.html.erb
But we also need an endpoint for sending messages.
8.2 Define routes
Open:
config/routes.rb
Use:
Rails.application.routes.draw do
resources :conversations, only: [:create, :show] do
resources :messages, only: [:create]
end
root "conversations#new"
end
We don’t have new yet, so let’s instead make a simple root action ourselves.
Change to:
Rails.application.routes.draw do
resources :conversations, only: [:create, :show] do
resources :messages, only: [:create]
end
root "conversations#new"
end
Then generate new:
bin/rails g controller Conversations new
8.3 Conversation controller
Open:
app/controllers/conversations_controller.rb
Use:
class ConversationsController < ApplicationController
def new
@conversation = Conversation.new
end
def create
@conversation = Conversation.create!(title: params[:title].presence || "New conversation")
redirect_to conversation_path(@conversation)
end
def show
@conversation = Conversation.find(params[:id])
@messages = @conversation.messages.order(:created_at)
end
end
For now we’re deliberately keeping authentication out of the project.
Later we’ll add authorization when we make this production-oriented.
8.4 Create the messages controller
Run:
bin/rails g controller Messages
Open:
app/controllers/messages_controller.rb
Add:
class MessagesController < ApplicationController
def create
conversation = Conversation.find(params[:conversation_id])
Ai::ChatService.new.call(
conversation: conversation,
user_message: params.require(:content)
)
redirect_to conversation_path(conversation)
end
end
The request flow is now:
POST /conversations/:id/messages
↓
MessagesController
↓
Ai::ChatService
↓
LLM
8.5 Build the new conversation page
Open:
app/views/conversations/new.html.erb
<h1>AI Assistant</h1>
<%= form_with model: @conversation, local: true do |form| %>
Don’t spend time on styling yet. We care about architecture first.
Fix Chat UI Markdown problem
If we use the following for showing the content:
<p><%= simple_format(message.content) %></p>
Or
<p><%= sanitize(message.content) %></p>
The issue is that sanitize is not a Markdown renderer.
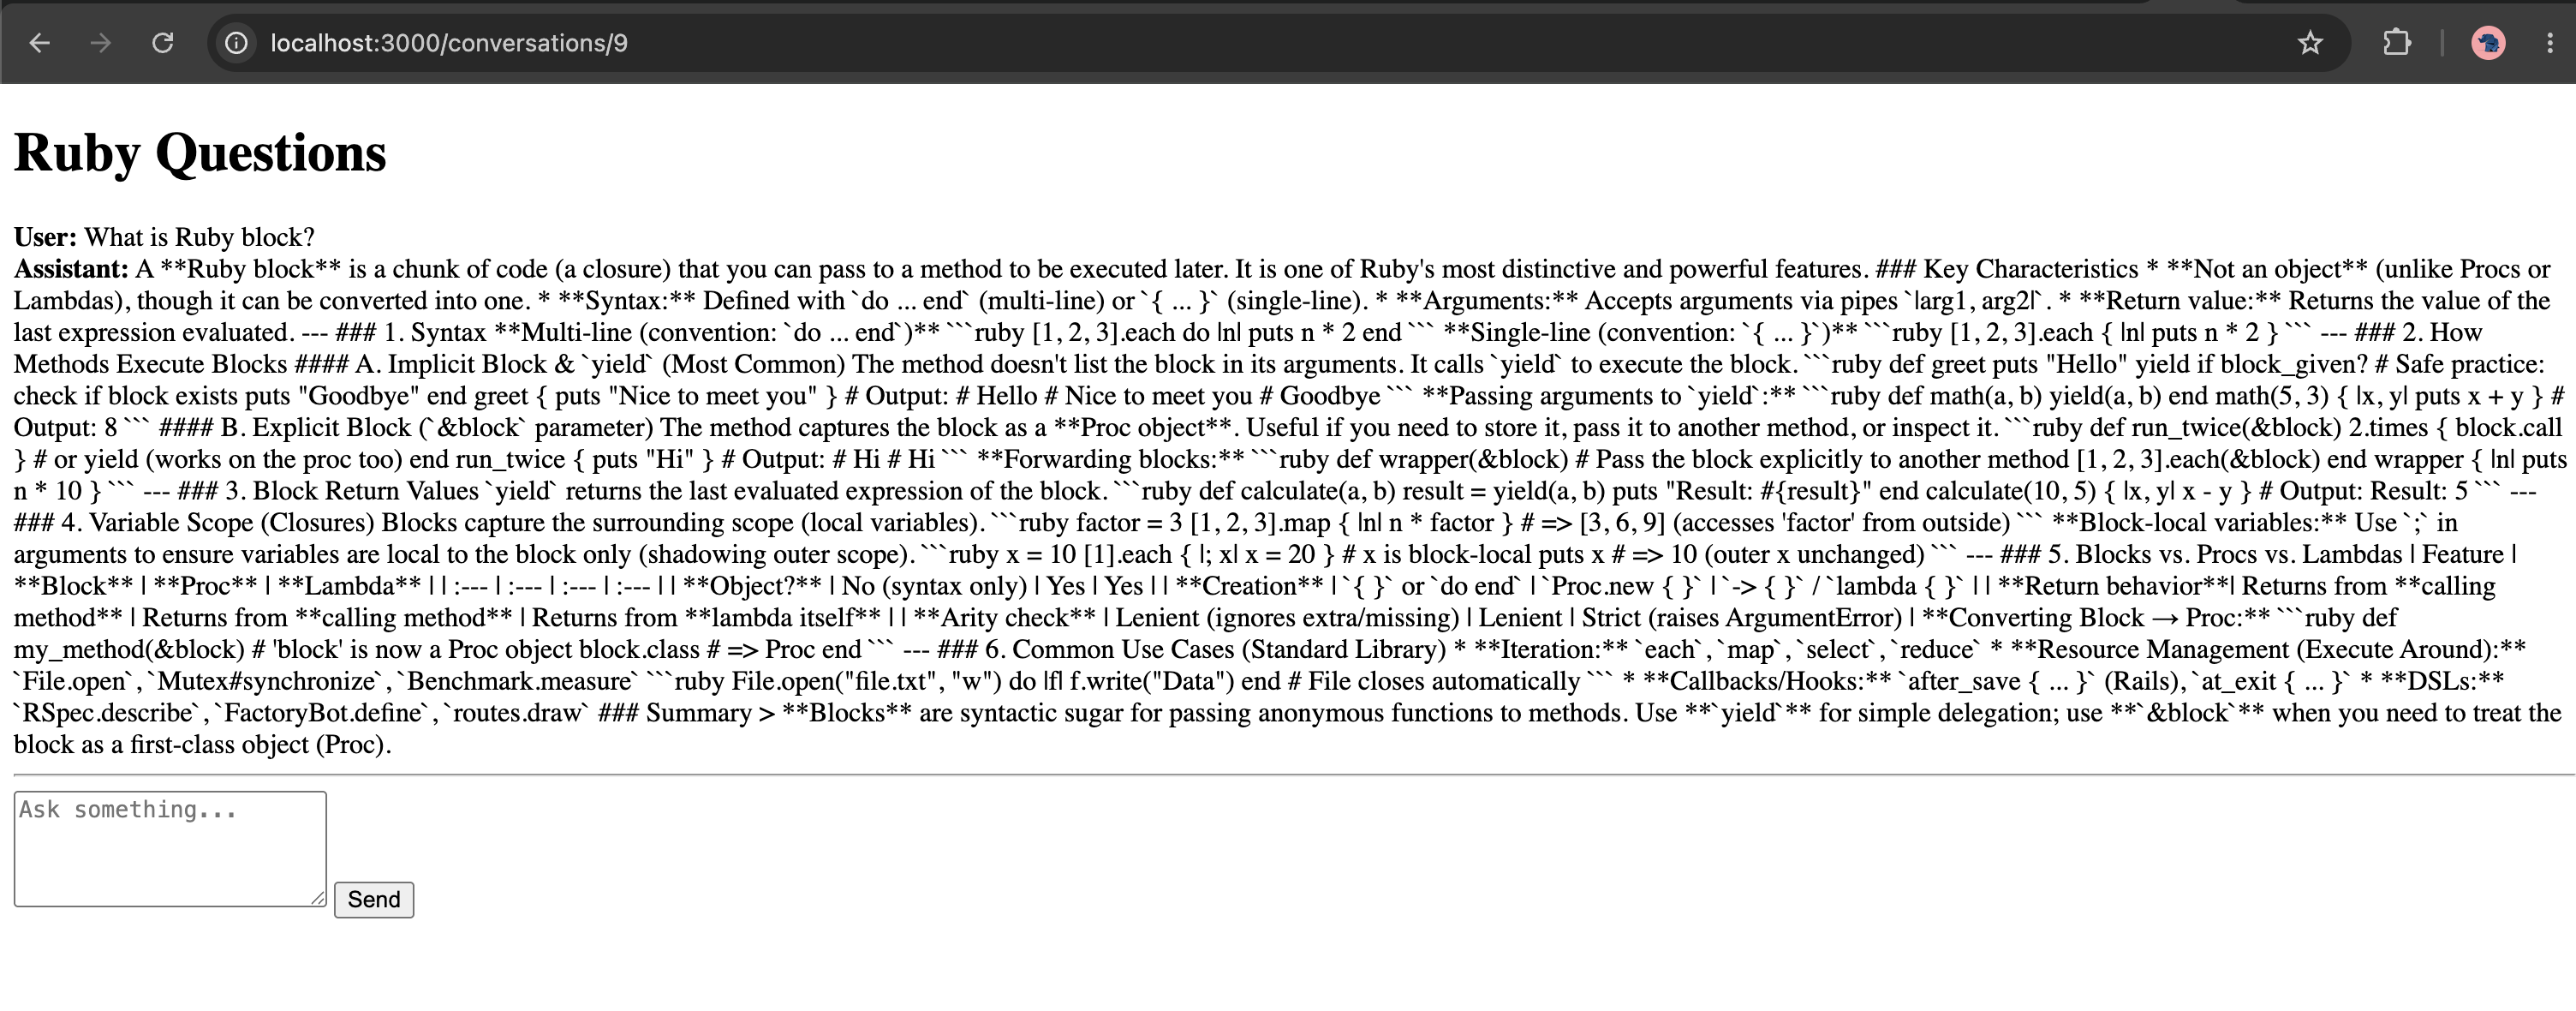
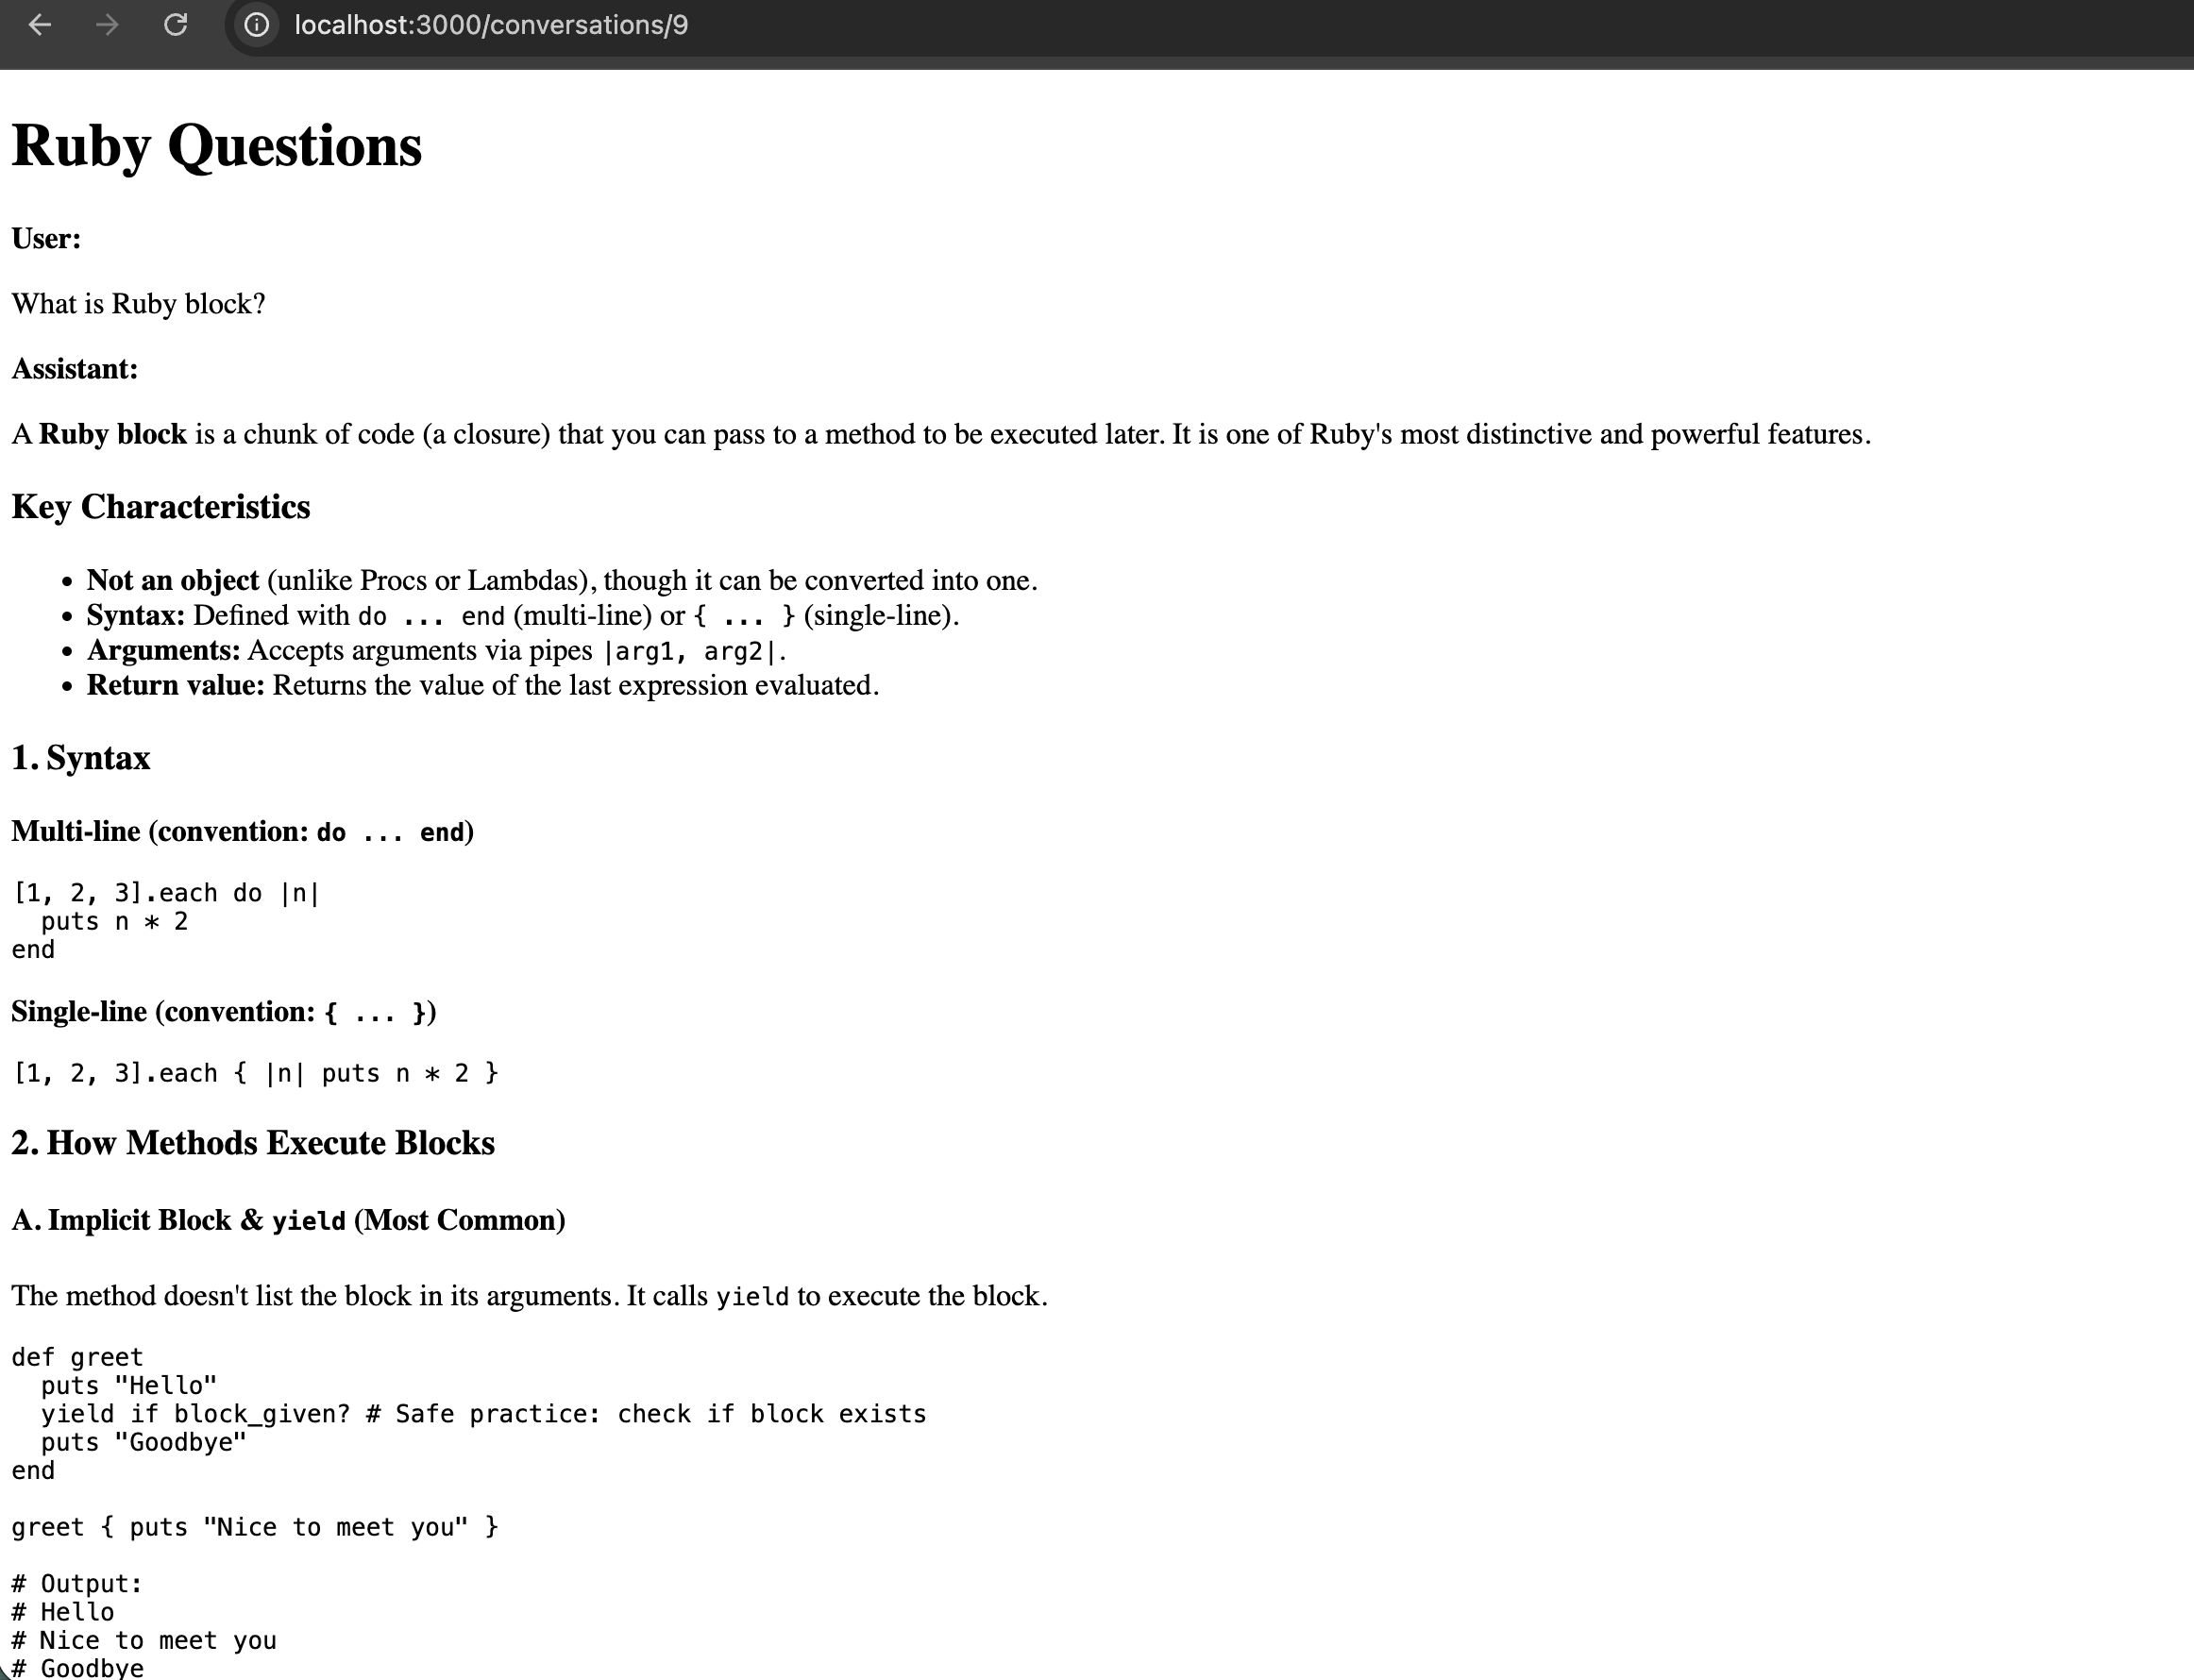
Our LLM is returning Markdown:
**Ruby block**
### Key Characteristics
* Not an object
Rails’ sanitize only sanitizes HTML that already exists. It doesn’t convert Markdown → HTML.
So this:
<%= sanitize(message.content) %>
won’t turn:
**Ruby**
into:
<strong>Ruby</strong>
Recommended approach
For an AI chat application, use:
LLM Markdown
↓
Markdown renderer
↓
HTML
↓
sanitize
↓
Browser
1. Add a Markdown gem
For Rails, a simple choice is commonmarker.
Add to Gemfile:
gem"commonmarker"
Then:
bundle install
2. Create a Markdown helper
Create:
app/helpers/markdown_helper.rb
module MarkdownHelper
def render_markdown(text)
html = Commonmarker.to_html(text.to_s)
sanitize(
html,
tags: %w[
p
br
strong
em
del
h1
h2
h3
h4
ul
ol
li
blockquote
pre
code
a
],
attributes: %w[href title]
)
end
end
We’ll use the Rails 8.1 stack appropriately and discuss SSE vs Turbo Streams vs Action Cable, rather than merely copying a ChatGPT-style implementation.
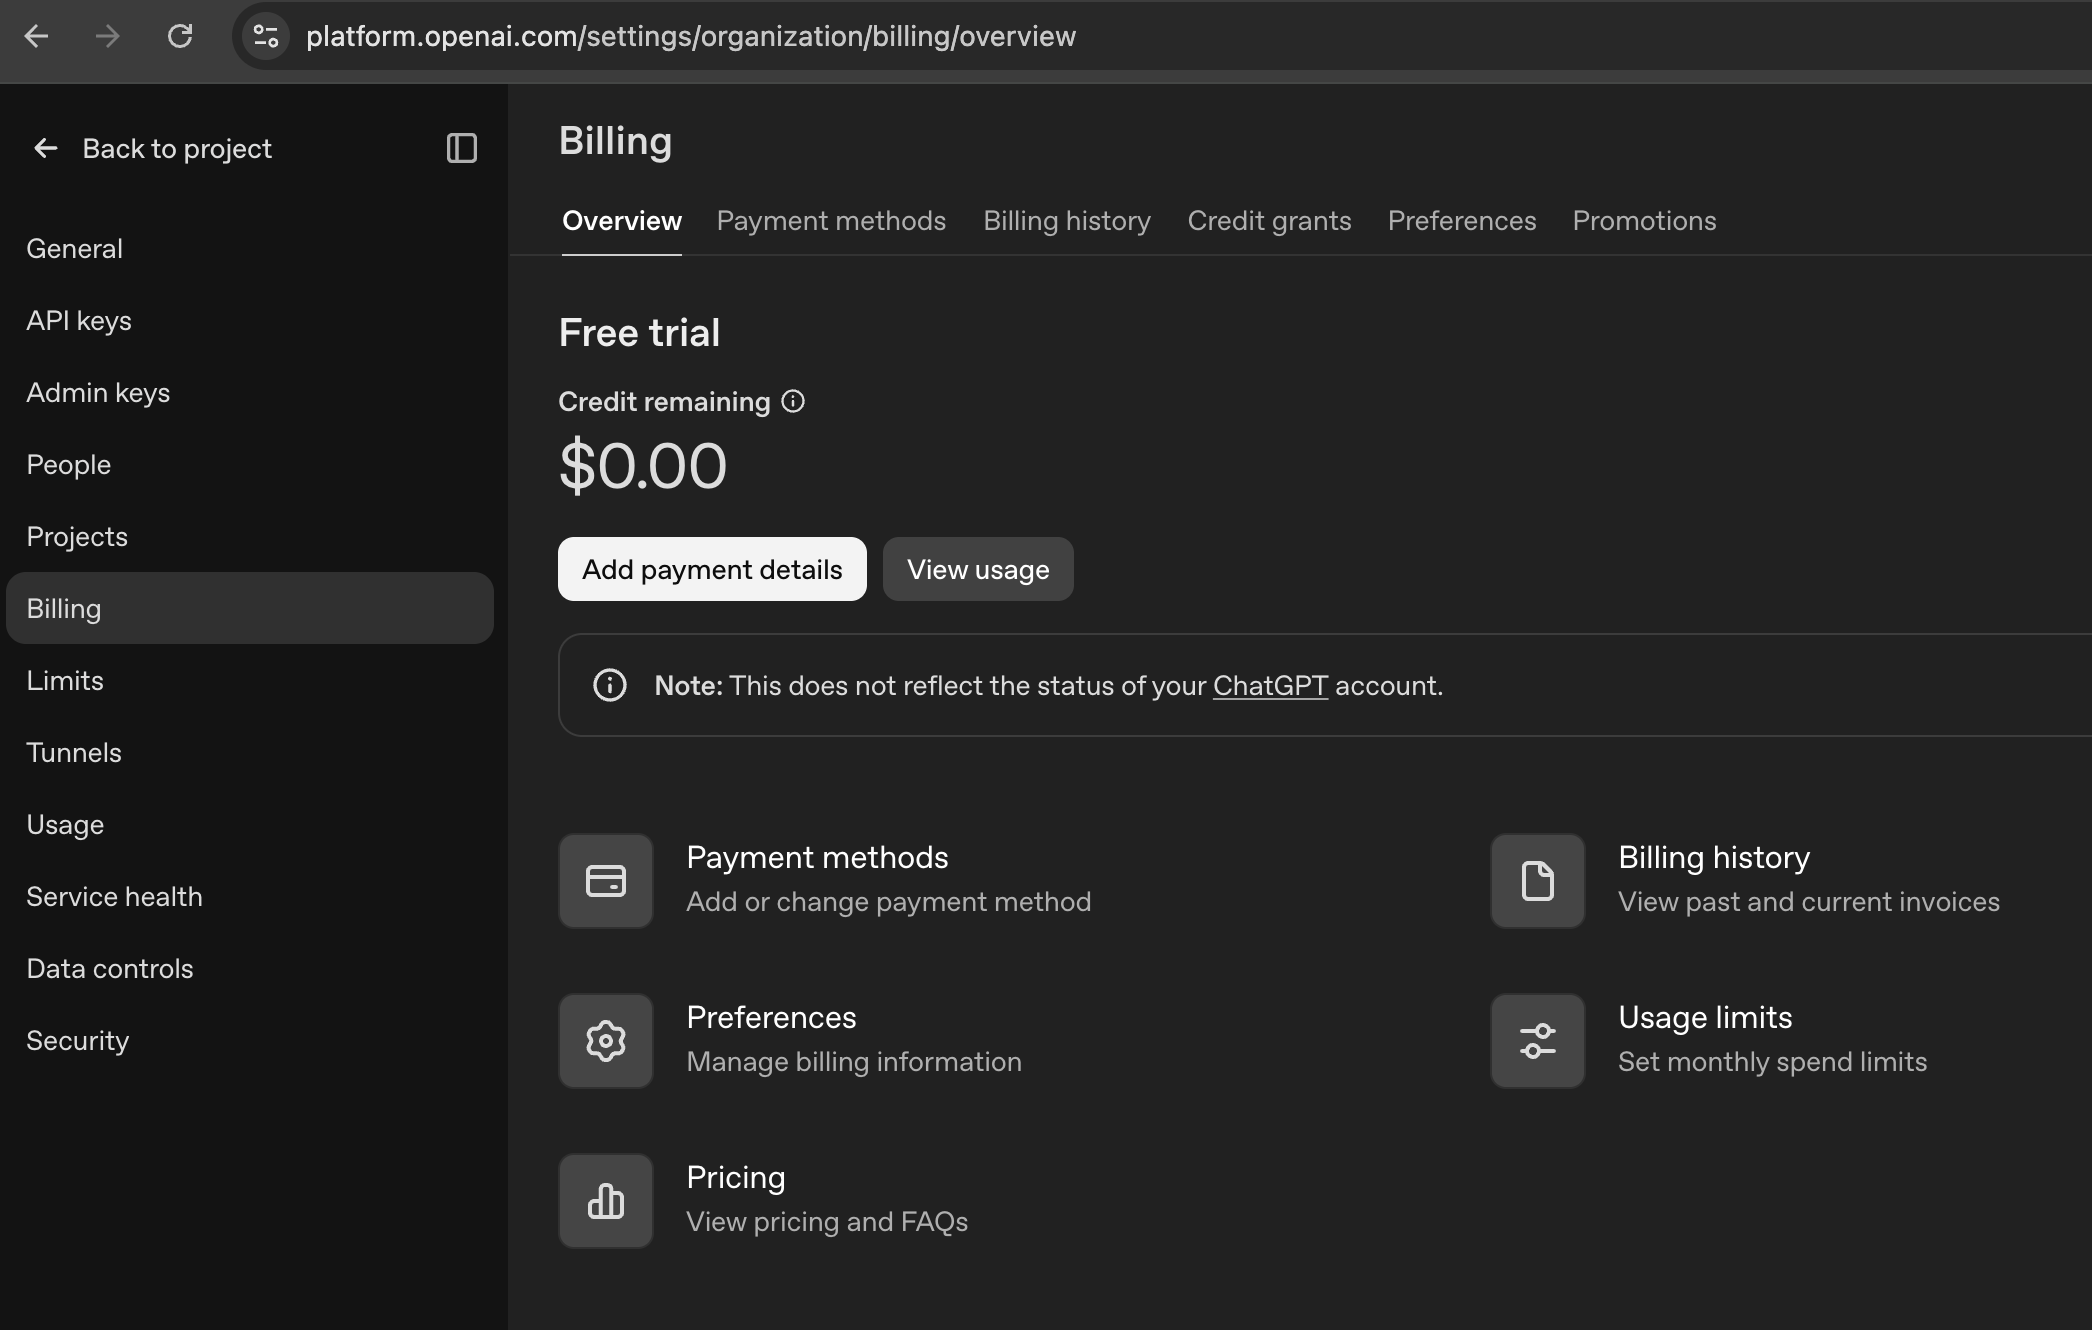
We had a problem making a LLM request to get the response due to the lack of remaining credits in the last part. Let’s solve it in this part using OpenRouter APIs. You can read more about this here: Openrouter ai- one api for multiple ai models
Let’s switch now to OpenRouter’s free-model tier rather than DeepSeek directly. As of April 2026, OpenRouter offers free models at $0 input/output pricing and its openrouter/free router automatically selects an available free model; the free plan currently has a 50-requests/day limit. (OpenRouter)
This is actually a useful improvement for our bootcamp because OpenRouter exposes an OpenAI-compatible API, so we can keep the openai Ruby SDK and change only the endpoint + API key + model. (OpenRouter)
Step 5.17 – Switch Ai::Client to OpenRouter Free
We are not changing our Rails architecture:
Rails
↓
Ai::Client
↓
OpenAI-compatible SDK
↓
OpenRouter
↓
Free LLM
1. Create an OpenRouter API key
Create an account at OpenRouter and create an API key.
It should look approximately like:
sk-or-v1-...
OpenRouter documents this flow in its free-model quickstart. (OpenRouter)
Do not paste the key here.
2. Change Rails credentials
We currently have:
openai:
api_key: ...
Let’s change this to:
openrouter:
api_key: OUR_OPENROUTER_KEY
Run:
bin/rails credentials:edit
Change:
openai:
api_key: ...
to:
openrouter:
api_key: ...
Save and exit.
3. Update Ai::Client
Open:
app/services/ai/client.rb
For now, use:
class Ai::Client
MODEL = "openrouter/free"
BASE_URL = "https://openrouter.ai/api/v1"
def initialize
@api_key = Rails.application.credentials.dig(:openrouter, :api_key)
raise "OpenRouter API key is missing" if @api_key.blank?
@client = OpenAI::Client.new(
api_key: @api_key,
base_url: BASE_URL
)
end
def chat(message:)
@client.chat.completions.create(
model: MODEL,
messages: [
{
role: "user",
content: message
}
]
)
end
end
OpenRouter explicitly documents using an OpenAI-compatible client by changing the base URL to:
https://openrouter.ai/api/v1
and then using the OpenAI-style chat completions API. (OpenRouter)
Important change
Previously we were using:
@client.responses.create(...)
Now we’re using:
@client.chat.completions.create(...)
That’s intentional. OpenRouter supports Responses API for its free router, but its OpenAI-compatible chat-completions interface is the simplest and most broadly compatible path for this exercise.
OpenRouter currently lists multiple free models, including OpenAI’s gpt-oss-20b and NVIDIA Nemotron variants. (OpenRouter)
We won’t hard-code a specific free model yet because the free-model pool changes over time. openrouter/free is specifically designed to route requests to an available free model.
8. One important lesson
This change demonstrates a valuable architectural idea:
The LLM provider should be an implementation detail behind our AI service boundary.
Today:
Ai::Client → OpenRouter
Later:
Ai::Client → OpenAI
or:
Ai::Client → Anthropic
without changing:
Conversation
Message
ChatService
Controllers
UI
That’s exactly why we created Ai::Client before integrating the provider.
Stop here
Do these steps in order:
bin/rails credentials:edit
Set:
openrouter:
api_key: OUR_OPENROUTER_KEY
Then update Ai::Client as shown above and run:
bin/rails c
client=Ai::Client.new
response=client.chat(
message:"Explain Ruby blocks in simple terms."
)
Then:
response.choices.first.message.content
Once that works, check the output:
➜ ai_assistant git:(main) ✗ rails c
Loading development environment (Rails 8.1.3.1)
ai-assistant(dev):001> client = Ai::Client.new
=>
#<Ai::Client:0x000000012d5ca138
...
ai-assistant(dev):002* response = client.chat(
ai-assistant(dev):003* message: "How can I become an expert in Ruby language"
ai-assistant(dev):004> )
=>
#<OpenAI::Models::Chat::ChatCompletion:0x22c8 {id: "gen-1786952686-y1YoZ2KFkNMw6Le1xdp5", choices: [{finish_reason: :stop, index: 0, logpr...
ai-assistant(dev):005> response.choices.first.message.content
ai-assistant(dev):006>
=> "User Safety: safe" # our api not started working
ai-assistant(dev):002> conversation = Conversation.first
ai-assistant(dev):003* conversation.messages.order(:created_at).each do |message|
ai-assistant(dev):004* puts "#{message.role}: #{message.content}"
ai-assistant(dev):005> end
Message Load (9.9ms) SELECT "messages".* FROM "messages" WHERE "messages"."conversation_id" = 1 ORDER BY "messages"."created_at" ASC /*application='AiAssistant'*/
user: What is Ruby? # our api not started working
user: What is Ruby? # our api not started working
user: What is Ruby? in 20 words
assistant: Ruby is a dynamic, object‑oriented language emphasizing developer happiness, known for elegant syntax and powerful, full‑featured, open‑source web framework Rails.
OpenRouter free model works!
Then we’ll immediately proceed to the next step: cleanly extracting the provider response and mapping it into our Message model, which is where the application starts becoming a real AI chat application rather than just an API experiment.
Create AI Chat Service, Store Messages
Now make the LLM response usable by Rails, persist it as a Message and introduce Ai::ChatService.
This is the point where our app changes from:
Rails → LLM API
to:
Rails
↓
ChatService
↓
Ai::Client
↓
LLM
↓
ChatService
↓
Message
↓
PostgreSQL
OpenRouter’s OpenAI-compatible API returns the normal chat-completions shape with choices[0].message.content, and the OpenAI Ruby SDK exposes typed response objects with hash-style access as well. (OpenRouter)
Step 6 – Clean up Ai::Client
We don’t want the rest of the application knowing about:
response.choices.first.message.content
That’s provider/SDK-specific knowledge.
Change app/services/ai/client.rb to:
class Ai::Client
MODEL = "openrouter/free"
BASE_URL = "https://openrouter.ai/api/v1"
def initialize
api_key = Rails.application.credentials.dig(:openrouter, :api_key)
raise "OpenRouter API key is missing" if api_key.blank?
@client = OpenAI::Client.new(
api_key: api_key,
base_url: BASE_URL
)
end
def chat(message:)
response = @client.chat.completions.create(
model: MODEL,
messages: [
{
role: "user",
content: message
}
]
)
{
content: response.choices.first.message.content,
model: response.model,
input_tokens: response.usage.prompt_tokens,
output_tokens: response.usage.completion_tokens
}
end
end
Now Ai::Client has a clean contract:
{
content:"...",
model:"...",
input_tokens:123,
output_tokens:456
}
The rest of Rails doesn’t care whether the provider uses choices, output_text, or something else.
Why this abstraction matters
Today:
Ai::Client → OpenRouter
Tomorrow:
Ai::Client → OpenAI
The rest of your application doesn’t change.
Step 7 – Test the new client
Run:
bin/rails c
Then:
client=Ai::Client.new
Then:
result=client.chat(message:"Explain Ruby blocks in two sentences.")
Inspect:
result
You should get something like:
{
content:"...",
model:"...",
input_tokens:20,
output_tokens:40
}
This is our internal application-level response.
Step 8 – Create Ai::ChatService
Now create:
app/services/ai/chat_service.rb
Code:
class Ai::ChatService
def initialize(ai_client: Ai::Client.new)
@ai_client = ai_client
end
def call(conversation:, user_message:)
user_message_record = conversation.messages.create!(
role: :user,
content: user_message
)
result = @ai_client.chat(message: user_message)
assistant_message = conversation.messages.create!(
role: :assistant,
content: result[:content],
model: result[:model],
input_tokens: result[:input_tokens],
output_tokens: result[:output_tokens]
)
{
user_message: user_message_record,
assistant_message: assistant_message
}
end
end
This class is now responsible for the application workflow.
Notice the separation:
Ai::Client
How do I talk to the LLM provider?
Ai::ChatService
What should happen when a user sends a chat message?
This tells us what the client’s constructor expects.
Also try:
OpenAI::Client.instance_methods(false)
We’re learning to inspect a Ruby library rather than treating it as magic.
Step 5.14 – Create the OpenAI client
Now let’s modify:
app/services/ai/client.rb
We’ll start with:
class Ai::Client
def initialize
@api_key = Rails.application.credentials.dig(:openai, :api_key)
raise "OpenAI API key is missing" if @api_key.blank?
@client = OpenAI::Client.new(api_key: @api_key)
end
end
The Ruby OpenAI SDK’s API can change between versions, so don’t blindly copy the exact request syntax from older tutorials. That’s why we’re checking the version we’ve actually installed before writing the API call.
Now we’ve:
“OpenAI client initialized.”
We’ll make our first actual LLM request and inspect the complete response, including:
response
model
output
usage
input tokens
output tokens
That will lead directly into why we added those fields to our Message model.
@client=OpenAI::Client.new(api_key:@api_key)
We’ll use our installed SDK’s API, not older ruby-openai examples. The current official openai Ruby SDK documents OpenAI::Client.new(api_key: ...) and the Responses API as the current interface. (GitHub)
Step 5.16 – Make the First Real LLM Request
For this step, we’ll do one simple request and inspect the response.
We are not integrating it with Conversation or Message yet.
Our goal is:
Rails console
↓
Ai::Client
↓
OpenAI Responses API
↓
LLM
↓
Response
1. Add a chat method
Open:
app/services/ai/client.rb
Change it to:
class Ai::Client
def initialize
@api_key = Rails.application.credentials.dig(:openai, :api_key)
raise "OpenAI API key is missing" if @api_key.blank?
@client = OpenAI::Client.new(api_key: @api_key)
end
def chat(message)
@client.responses.create(
model: "gpt-5.2",
input: message
)
end
end
The SDK’s current Responses API accepts model and input for creating a response. (GitHub)
Why input: message?
We’re deliberately starting with the simplest possible request:
input:"Explain Ruby blocks in simple terms"
Later we’ll send structured conversation history:
input: [
{ role::system, content:"..." },
{ role::user, content:"..." }
]
The Responses API supports both simple input and structured message input. (GitHub)
2. Start Rails console
bin/rails c
Create the client:
client=Ai::Client.new
Now make the request:
response=client.chat(
message:"Explain Ruby blocks in simple terms."
)
This is the moment our application makes an actual network request.
3. Inspect the response
First:
response.class
Then:
response
Don’t worry if the output is large.
The current official Ruby SDK returns typed response objects and the response contains the generated output plus metadata such as usage. (GitHub)
But if you get the following output, we can change the model which has free API calls:
ai-assistant(dev):013> client = Ai::Client.new
ai-assistant(dev):003> res = ai.chat('I want to be a expert in Ruby language')
app/services/ai/client.rb:11:in 'Ai::Client#chat': {url: "https://api.openai.com/v1/responses", status: 429, body: {error: {message: "You have no credits remaining. Add credits to continue using the API at https://platform.openai.com/settings/organization/billing/.", type: "insufficient_quota", param: nil, code: "credit_balance_exhausted"}}} (OpenAI::Errors::RateLimitError)
from (ai-assistant):3:in '<compiled>'
Yes – the error makes sense and there is an important distinction here:
Our ChatGPT subscription and OpenAI API billing are separate.
So even if you can use ChatGPT normally, that does not give your Ruby application free API calls. OpenAI explicitly says ChatGPT and API billing are managed separately. (OpenAI Help Center)
Why you’re seeing You have no credits remaining
Your Rails code is calling the OpenAI API, not ChatGPT:
Rails app
↓
OpenAI API
↓
API billing / credits
The API account associated with your key currently has no usable credits. OpenAI’s current prepaid-billing documentation says API requests stop once the available credit balance is exhausted. (OpenAI Help Center)
“But aren’t basic models free?”
Not generally for the API.
There may be specific free/trial allocations or products with included usage, but you should not assume that a model being available in ChatGPT means the API is free.
For our Rails application, we’re using:
OpenAI::Client
which consumes API usage and is metered separately.
What I recommend for our course
I don’t think we should spend money just to continue learning unless you’re comfortable doing so.
We have three practical paths:
Option 1 – Add a small API balance
Open your OpenAI API billing overview and check your balance. New API users currently use prepaid billing and the documented minimum purchase is $5, with $10 as the default purchase amount. (OpenAI Help Center)
For this course a small balance should be plenty for experimentation because our prompts will be tiny.
Option 2 – Use another provider with a free tier
We could temporarily use a provider that offers some free API usage, while keeping the same architecture:
Ai::Client
↓
Provider
↓
LLM
This is actually useful because later we’ll make our architecture provider-agnostic.
Option 3 – Run a local model
We can install something like Ollama and run an LLM locally:
Rails
↓
Ai::Client
↓
localhost
↓
Local LLM
Advantages:
no API credits
no network dependency
no per-token cost
great for development
The downside is that the model quality may differ from hosted models, and local inference requires reasonable hardware.
One important thing for our architecture
Don’t change this:
Ai::Client
The fact that OpenAI isn’t currently usable doesn’t mean we should redesign the application.
We specifically created:
Rails
↓
Ai::Client
↓
Provider
so that later we can switch:
Ai::Client
↓
OpenAI
to:
Ai::Client
↓
Anthropic
or:
Ai::Client
↓
Ollama
without rewriting our Rails application.
That’s actually an important senior-level design lesson.
What we can do now?
Since our objective is learning AI engineering, not spending money on API calls, first check your API billing page.
If it shows:
Free trial credit remaining: $0.00
then the error is fully explained. OpenAI’s billing documentation uses exactly this sort of balance indicator. (OpenAI Help Center)
We can then decide between a small API credit or a local/free-tier provider.
For this course, I slightly prefer keeping OpenAI as the first provider so you learn the real production API flow, then later we’ll add a second provider/local model to demonstrate the abstraction properly.
4. Get the generated text
Try:
response.output_text
You should get a normal answer such as:
A Ruby block is a chunk of code that can be passed to a method...
This is the first important distinction:
response
↓
entire API response
response.output_text
↓
just the model's text
Don’t immediately throw away the full response. We need the metadata later.
5. Inspect the model
Try:
response.model
This tells you which model actually generated the response.
That’s relevant to our messages.model column.
6. Inspect usage
Now:
response.usage
You should see token-related information.
Inspect it:
response.usage.input_tokens
and:
response.usage.output_tokens
These are directly related to the fields we added earlier:
messages
-------------------
input_tokens
output_tokens
So our database design is now connected to a real API response.
LLM response
│
├── model
├── output text
└── usage
├── input_tokens
└── output_tokens
The SDK’s response models expose usage information as part of the response. (GitHub)
7. One very important experiment
Ask a second question:
response2=client.chat(
message:"What is my name?"
)
You’ll probably notice the model doesn’t know your name from the previous request.
That’s intentional.
We made two independent requests:
Request 1
"Explain Ruby blocks"
Request 2
"What is my name?"
The LLM does not automatically receive our previous request.
This is going to become extremely important when we implement:
Conversation
   ↓
Messages
   ↓
Prompt Builder
   ↓
LLM
Our Rails application will be responsible for providing the appropriate conversation context.
Don’t paste our API key or any sensitive output anywhere.
Now: “Our First LLM request works.”
Then we’ll do the next important step: inspect the raw response structure and improve Ai::Client so it returns a clean Ruby object to the rest of our Rails application.
Now let’s move to the next step: make the Message model production-friendly.
We’ll start with the most important field: role.
Step 3 – Design Message.role
Currently our database allows:
role = anything
For example:
"user"
"assistant"
"system"
"foo"
"hello"
"something-invalid"
That’s not what we want.
Our AI application has a defined set of roles:
user
assistant
system
Later, when we introduce tool calling, we may also need to represent tool messages depending on the provider/API design. But for our current application, we’ll keep the persisted roles to these three.
Why use a string instead of an integer?
You may remember our previous discussion about Rails enums.
We could store:
0 = user
1 = assistant
2 = system
But for an AI application, I prefer a string-backed enum.
Database:
role
---------
user
assistant
system
instead of:
role
---------
0
1
2
Why?
1. Database is self-describing
When you run:
SELECTroleFROM messages;
you immediately see:
user
assistant
assistant
user
system
2. Easier debugging
When you’re debugging an AI conversation, the actual value is obvious.
3. Safer for external APIs
LLM APIs already use strings such as:
{
"role":"user"
}
So our database representation matches the domain.
Step 3A – Add the Rails enum
Open:
app/models/message.rb
Currently you should have something like:
classMessage<ApplicationRecord
belongs_to:conversation
end
Change it to:
classMessage<ApplicationRecord
belongs_to:conversation
enum:role, {
user:"user",
assistant:"assistant",
system:"system"
}, validate:true
end
Understand this carefully
This:
enum:role, {
user:"user",
assistant:"assistant",
system:"system"
}, validate:true
doesn’t mean PostgreSQL has an enum type. We’re using a Rails enum backed by a string column.
PostgreSQL still has:
role character varying
Rails gives us a domain API on top of it.
Step 3B – Test the enum
Start Rails console:
bin/rails console
Find our message:
message=Message.first
Check:
message.role
You should get:
"user"
Now:
message.user?
Expected:
true
And:
message.assistant?
Expected:
false
Step 3C – Test the scopes
Rails also gives us useful scopes.
Try:
Message.user
and:
Message.assistant
and:
Message.system
For example:
Message.user
roughly translates to:
SELECT*
FROM messages
WHERErole='user';
This is one of the benefits of using an enum.
Step 3D – Test invalid values
Now try:
Message.new(
conversation:Conversation.first,
role:"something_else",
content:"test"
)
Because we specified:
validate:true
Rails should treat the role as invalid.
Check:
message=Message.new(
conversation:Conversation.first,
role:"something_else",
content:"test"
)
message.valid?
Expected:
false
Then:
message.errors.full_messages
You should see an error indicating that the role is not included in the allowed values.
Why validate: true?
This is worth understanding: Without validation, Rails enum behavior can raise an ArgumentError when assigning an invalid value.
With:
validate:true
we get normal ActiveRecord validation behavior:
message.valid?
→false
and:
message.errors
contains the validation error.
That’s generally more convenient when the model is receiving user/application input.
Step 3E – One more important layer: Database constraint
There is a subtle issue here.
Rails validation protects you when data enters through Rails.
But PostgreSQL doesn’t know that only these values are valid:
ERROR: new row for relation "messages" violates check constraint "messages_role_check"
That’s exactly what we want.
The database is now protecting the data.
Why is this important?
Suppose an int. asks:
“Why do you have both Rails validation and a PostgreSQL constraint?”
A strong senior-level answer would be:
“Rails validations provide application-level feedback and are useful for normal model operations, but they’re not a database integrity guarantee because data can enter through other paths. For important invariants such as message roles, I also enforce the constraint at the PostgreSQL level.”
That’s a much stronger answer than:
“Because Rails has validations.”
4.8 One more design question: content
We’re making:
change_column_null:messages, :content, false
But should an AI message be allowed to contain an empty string?
For example:
content:""
NOT NULL allows that.
So:
NULL NO
"" technically allowed
"Hello" YES
Whether empty content should be allowed is an application-level business rule.
We can later decide whether to add:
validates:content, presence:true
But don’t add that yet.
There are legitimate AI API situations where a message may not have ordinary text content – for example, tool-related or structured content. We’ll revisit our message representation when we implement tool calling.
We don’t want the application to fail mysteriously later.
Add:
class Ai::Client
  def initialize
    @api_key = Rails.application.credentials.dig(:openai, :api_key)

    raise "OpenAI API key is missing" if @api_key.blank?
  end
end
Now:
Ai::Client.new
will fail immediately if the key isn’t configured. This is called fail-fast configuration.
5.10 Test the client
Run:
bin/rails console
Then:
client=Ai::Client.new
If everything is configured correctly, it should return: