Integrate AI with Rails: AI bootcamp for Developers – Day 6 – Build the Rails Chat UI | Prompt Builder | Chat Memory

In this session we will be building prompt builder to build the prompt that we send to the AI model. We save every conversation in memory and create a chat feature backend architecture.

Step 7 – Conversation Memory + Prompt Builder

Right now our Ai::ChatService sends only:

current user message

So this:

User: My name is Abhilash.
User: What is my name?

doesn’t reliably work as a conversation because the second request doesn’t include the first message.

We need:

Conversation
   ↓
Messages
   ↓
Prompt Builder
   ↓
LLM

1. Change Ai::Client to accept messages

Open:

app/services/ai/client.rb

Change chat from:

def chat(message:)
  ...
end

to:

def chat(messages:)
  response = @client.chat.completions.create(
    model: MODEL,
    messages: messages
  )

  {
    content: response.choices.first.message.content,
    model: response.model,
    input_tokens: response.usage.prompt_tokens,
    output_tokens: response.usage.completion_tokens
  }
end

The client should now know nothing about conversations.

It simply receives:

messages = [
{ role: "system", content: "..." },
{ role: "user", content: "..." },
{ role: "assistant", content: "..." }
]

2. Create PromptBuilder

Create:

app/services/ai/prompt_builder.rb

Add:

class Ai::PromptBuilder
  SYSTEM_PROMPT = <<~PROMPT
    You are a helpful AI assistant.
    Answer clearly and concisely.
    If you are unsure about something, say so.
  PROMPT

  def initialize(conversation:)
    @conversation = conversation
  end

  def build
    [
      {
        role: "system",
        content: SYSTEM_PROMPT.strip
      },
      *@conversation.messages.order(:created_at).map do |message|
        {
          role: message.role,
          content: message.content
        }
      end
    ]
  end
end

Now our database becomes the source of conversation history.

3. Update Ai::ChatService

Change it to:

class Ai::ChatService
  def initialize(
    ai_client: Ai::Client.new,
    prompt_builder_class: Ai::PromptBuilder
  )
    @ai_client = ai_client
    @prompt_builder_class = prompt_builder_class
  end

  def call(conversation:, user_message:)
    conversation.transaction do
      conversation.messages.create!(
        role: :user,
        content: user_message
      )

      messages = @prompt_builder_class
        .new(conversation: conversation)
        .build

      result = @ai_client.chat(messages: messages)

      conversation.messages.create!(
        role: :assistant,
        content: result[:content],
        model: result[:model],
        input_tokens: result[:input_tokens],
        output_tokens: result[:output_tokens]
      )
    end
  end
end

Notice the order:

1. Save user message
2. Load conversation history
3. Build LLM messages
4. Call LLM
5. Save assistant response

4. Test it manually

Run:

bin/rails c

Create a fresh conversation:

conversation = Conversation.create!(title: "Memory Test")

First question:

Ai::ChatService.new.call(
conversation: conversation,
user_message: "My name is Abhilash."
)

Then:

Ai::ChatService.new.call(
conversation: conversation,
user_message: "What is my name?"
)

Now, we should see approximately:

ai-assistant(dev):031> puts conversation.messages.map {|m| "Role: #{m.role}\n Content: #{m.content}" }.join("\n")
Role: user
 Content: My name is Adam Bean
Role: assistant
 Content: Hello Adam Bean! How can I assist you today?

Role: user
 Content: What is my name?
Role: assistant
 Content: Your name is Adam Bean.
=> nil

This is our first real conversation memory implementation.

The LLM did not magically remember the first request.

Rails retrieved the previous messages and sent them again.

That’s a very important int. concept.

5. Understand the architecture

We now have:

                    Conversation
                         │
                         ▼
                    ChatService
                         │
             ┌───────────┴───────────┐
             ▼                       ▼
       PromptBuilder            Ai::Client
             │                       │
             │ messages              │
             └───────────┬───────────┘
                         ▼
                       LLM
                         │
                         ▼
                  Assistant Message
                         │
                         ▼
                    PostgreSQL

The responsibilities are now nicely separated:

Conversation

Persistence.

PromptBuilder

Converts application state into LLM input.

Ai::Client

Talks to the provider.

ChatService

Orchestrates the workflow.

Now we built a solid Rails architecture.

6. Important problem: context growth

Our current implementation sends:

every previous message

on every request.

That eventually becomes:

Message 1
Message 2
...
Message 500
+
New Message

Problems:

  • more tokens
  • more cost
  • more latency
  • eventually context-window limits

This is one of the reasons production AI systems eventually introduce:

conversation summarization
+
recent-message window
+
RAG

Note: We’ll address this later.

Next Major Step – Chat UI

Now we have the backend flow:

User
ChatService
PromptBuilder
LLM
PostgreSQL

The next thing we’ll build is the actual Rails chat interface:

┌──────────────────────────────┐
│ AI Assistant │
├──────────────────────────────┤
│ You: What is Ruby? │
│ │
│ AI: Ruby is... │
│ │
│ You: Explain blocks. │
│ │
│ AI: A block is... │
├──────────────────────────────┤
│ [ Ask something... ] [Send] │
└──────────────────────────────┘

We’ll use Rails + Turbo/Stimulus, then add streaming immediately after that.

That will turn the backend we’ve built into an actual usable AI application.


Let’s move straight to the Chat UI + controller flow, then we can add streaming. We’ll keep this as one cohesive implementation step.

Step 8 – Build the Rails Chat UI

Our backend already does:

Conversation
ChatService
PromptBuilder
Ai::Client
LLM
Message

Now we’ll expose it through HTTP.

8.1 Generate the controller

Run:

bin/rails g controller Conversations show

This gives us a starting point:

app/controllers/conversations_controller.rb
app/views/conversations/show.html.erb

But we also need an endpoint for sending messages.

8.2 Define routes

Open:

config/routes.rb

Use:

Rails.application.routes.draw do
  resources :conversations, only: [:create, :show] do
    resources :messages, only: [:create]
  end

  root "conversations#new"
end

We don’t have new yet, so let’s instead make a simple root action ourselves.

Change to:

Rails.application.routes.draw do
  resources :conversations, only: [:create, :show] do
    resources :messages, only: [:create]
  end

  root "conversations#new"
end

Then generate new:

bin/rails g controller Conversations new

8.3 Conversation controller

Open:

app/controllers/conversations_controller.rb

Use:

class ConversationsController < ApplicationController
  def new
    @conversation = Conversation.new
  end

  def create
    @conversation = Conversation.create!(title: params[:title].presence || "New conversation")

    redirect_to conversation_path(@conversation)
  end

  def show
    @conversation = Conversation.find(params[:id])
    @messages = @conversation.messages.order(:created_at)
  end
end

For now we’re deliberately keeping authentication out of the project.

Later we’ll add authorization when we make this production-oriented.


8.4 Create the messages controller

Run:

bin/rails g controller Messages

Open:

app/controllers/messages_controller.rb

Add:

class MessagesController < ApplicationController
  def create
    conversation = Conversation.find(params[:conversation_id])

    Ai::ChatService.new.call(
      conversation: conversation,
      user_message: params.require(:content)
    )

    redirect_to conversation_path(conversation)
  end
end

The request flow is now:

POST /conversations/:id/messages
MessagesController
Ai::ChatService
LLM

8.5 Build the new conversation page

Open:

app/views/conversations/new.html.erb
<h1>AI Assistant</h1>
<%= form_with model: @conversation, local: true do |form| %>
<%= form.text_field :title, placeholder: "Conversation title" %>
<%= form.submit "Start conversation" %>
<% end %>

Now run:

bin/rails server

Open:

http://localhost:3000

Create a conversation.


8.6 Build the chat page

Open:

app/views/conversations/show.html.erb

Use:

<h1><%= @conversation.title %></h1>

<div id="messages">
  <% @messages.each do |message| %>
    <div>
      <strong><%= message.role.capitalize %>:</strong>
      <%= message.content %>
    </div>
  <% end %>
</div>

<hr>

<%= form_with url: conversation_messages_path(@conversation), method: :post, local: true do |form| %>
  <%= form.text_area :content, rows: 4, placeholder: "Ask something..." %>

  <%= form.submit "Send" %>
<% end %>

Now we have an actual chat interface.


8.7 Test the complete flow

Open:

http://localhost:3000

Create:

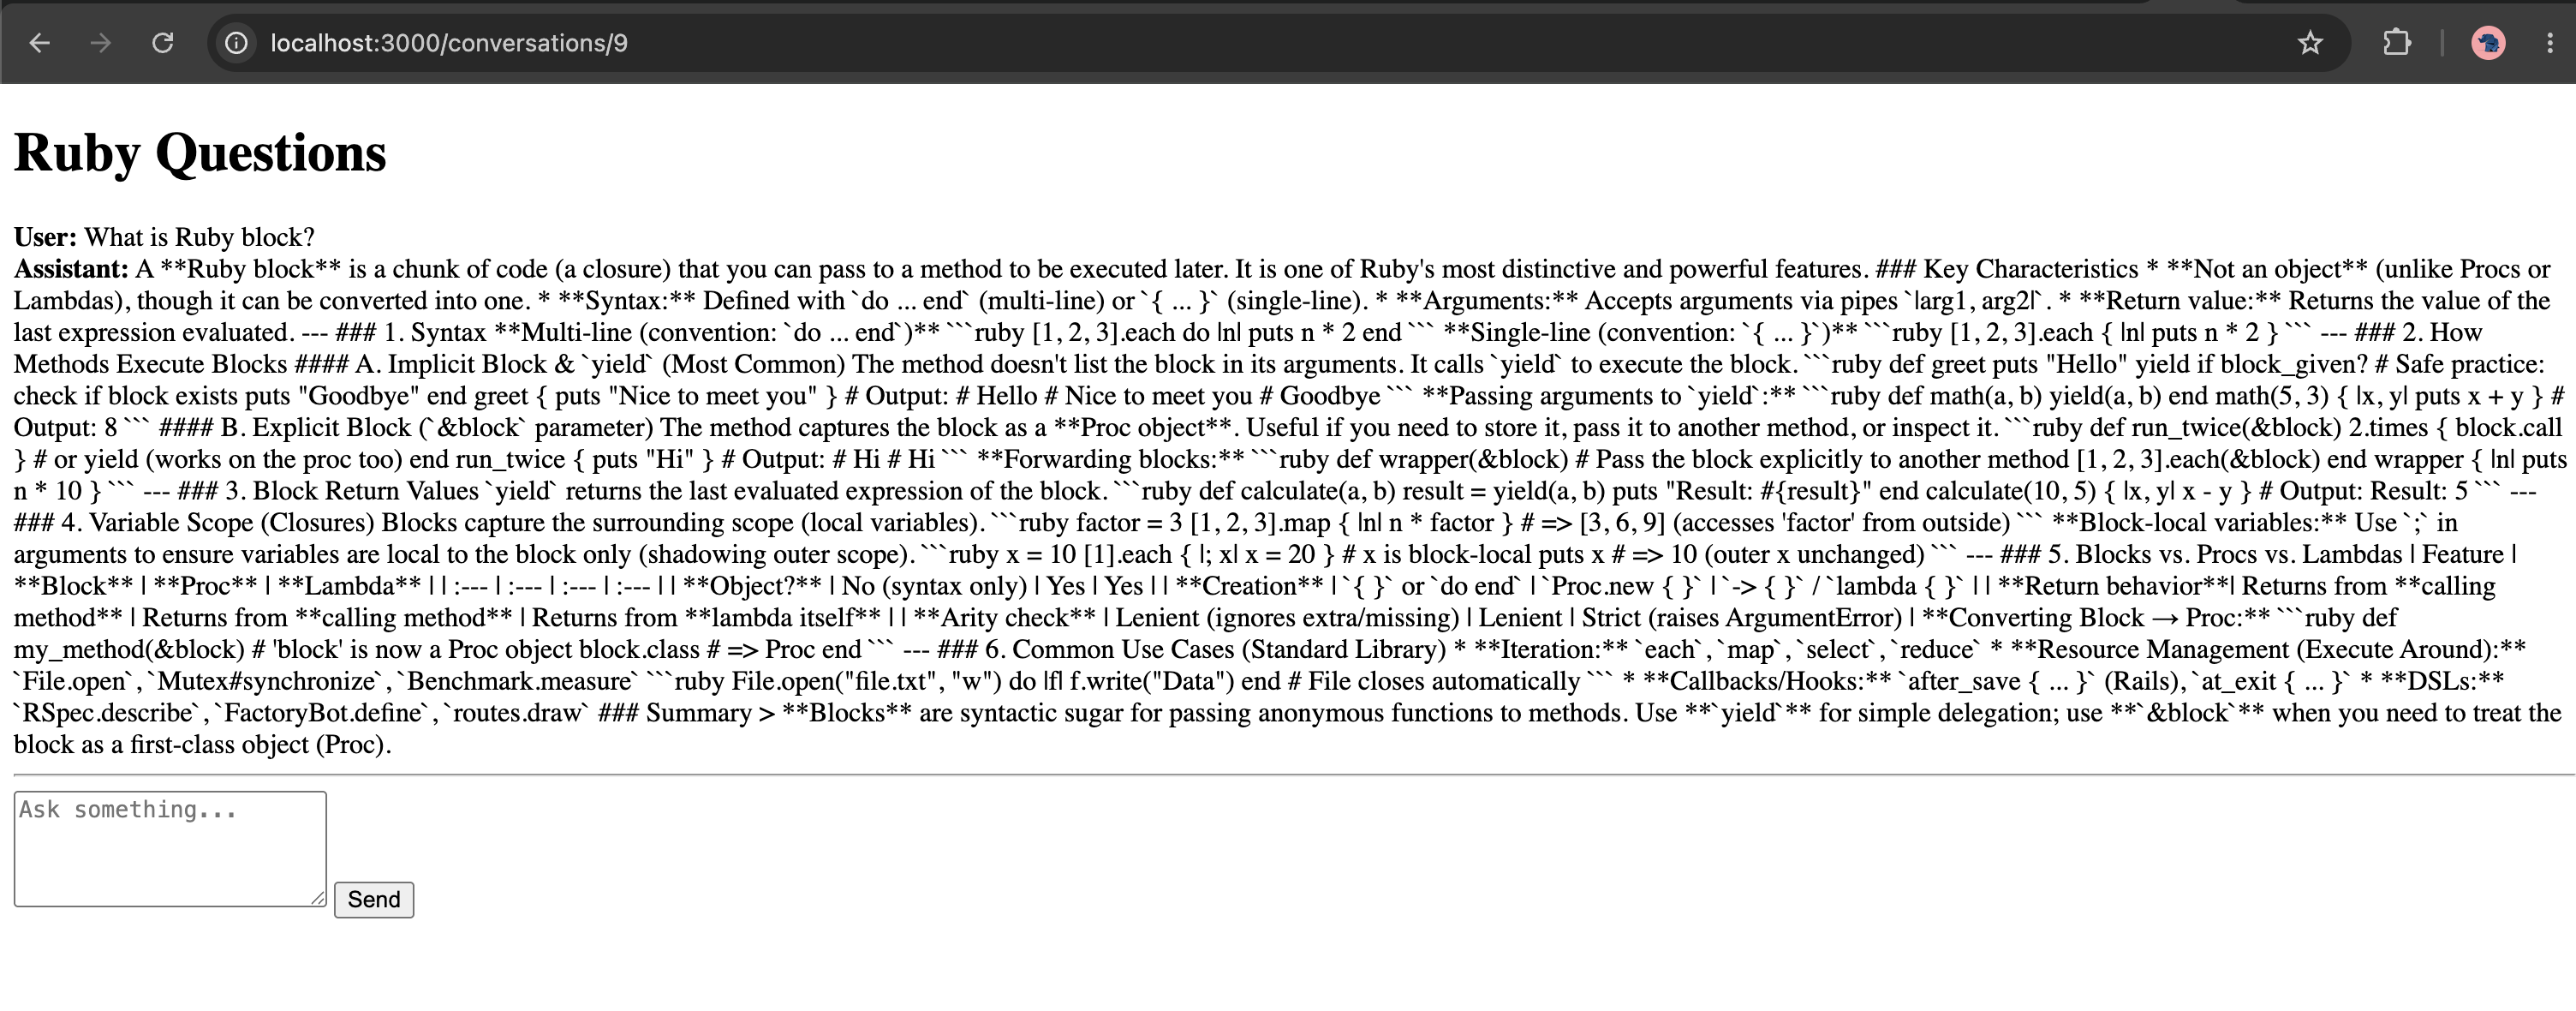
Ruby Questions

Then ask:

What is a Ruby block?

The flow should be:

Browser
   ↓
POST /conversations/1/messages
   ↓
MessagesController
   ↓
Ai::ChatService
   ↓
PromptBuilder
   ↓
OpenRouter
   ↓
Assistant response
   ↓
Message saved
   ↓
Redirect
   ↓
Conversation page

You should see:

User: What is a Ruby block?
Assistant: ...

Then ask:

Can you show me an example?

Rails should send the previous conversation history through PromptBuilder.


8.8 One important issue with our current implementation

We’re currently doing:

Ai::ChatService.new.call(...)

inside the HTTP request.

That means:

Browser
  ↓
Rails request
  ↓
wait for LLM
  ↓
save response
  ↓
response

If the LLM takes 8 seconds, our web request can take 8 seconds.

That’s acceptable for our learning version, but not what we ultimately want.

The next step is streaming.


8.9 Also notice an architectural limitation

Right now we’re doing:

redirect_to conversation_path(conversation)

After the LLM finishes.

That’s why the user sees:

wait...
wait...
wait...
complete response

ChatGPT-style applications instead do:

User message
      ↓
LLM starts generating
      ↓
token
      ↓
token
      ↓
token
      ↓
browser updates

We’ll implement that next.


8.10 Add a little UI structure

We can improve the view slightly now:

<h1><%= @conversation.title %></h1>

<div id="messages">
  <% @messages.each do |message| %>
    <article class="message <%= message.role %>">
      <strong><%= message.role.capitalize %></strong>
      <p><%= simple_format(message.content) %></p>
    </article>
  <% end %>
</div>

<%= form_with url: conversation_messages_path(@conversation), method: :post, local: true do |form| %>
  <%= form.text_area :content,
      rows: 4,
      placeholder: "Ask something..." %>

  <%= form.submit "Send" %>
<% end %>

Don’t spend time on styling yet. We care about architecture first.


Fix Chat UI Markdown problem

If we use the following for showing the content:

<p><%= simple_format(message.content) %></p>
Or
<p><%= sanitize(message.content) %></p>

The issue is that sanitize is not a Markdown renderer.

Our LLM is returning Markdown:

**Ruby block**
### Key Characteristics
* Not an object

Rails’ sanitize only sanitizes HTML that already exists. It doesn’t convert Markdown → HTML.

So this:

<%= sanitize(message.content) %>

won’t turn:

**Ruby**

into:

<strong>Ruby</strong>

Recommended approach

For an AI chat application, use:

LLM Markdown
Markdown renderer
HTML
sanitize
Browser

1. Add a Markdown gem

For Rails, a simple choice is commonmarker.

Add to Gemfile:

gem "commonmarker"

Then:

bundle install

2. Create a Markdown helper

Create:

app/helpers/markdown_helper.rb
module MarkdownHelper
  def render_markdown(text)
    html = Commonmarker.to_html(text.to_s)

    sanitize(
      html,
      tags: %w[
        p
        br
        strong
        em
        del
        h1
        h2
        h3
        h4
        ul
        ol
        li
        blockquote
        pre
        code
        a
      ],
      attributes: %w[href title]
    )
  end
end

The important distinction is:

Commonmarker.to_html(...)

does the Markdown conversion.

Then:

sanitize(...)

does the HTML security filtering.

3. Change your view

Currently you probably have:

<p><%= simple_format(message.content) %></p>

or:

<%= sanitize(message.content) %>

Change it to:

<div class="message-content">
<%= render_markdown(message.content) %>
</div>

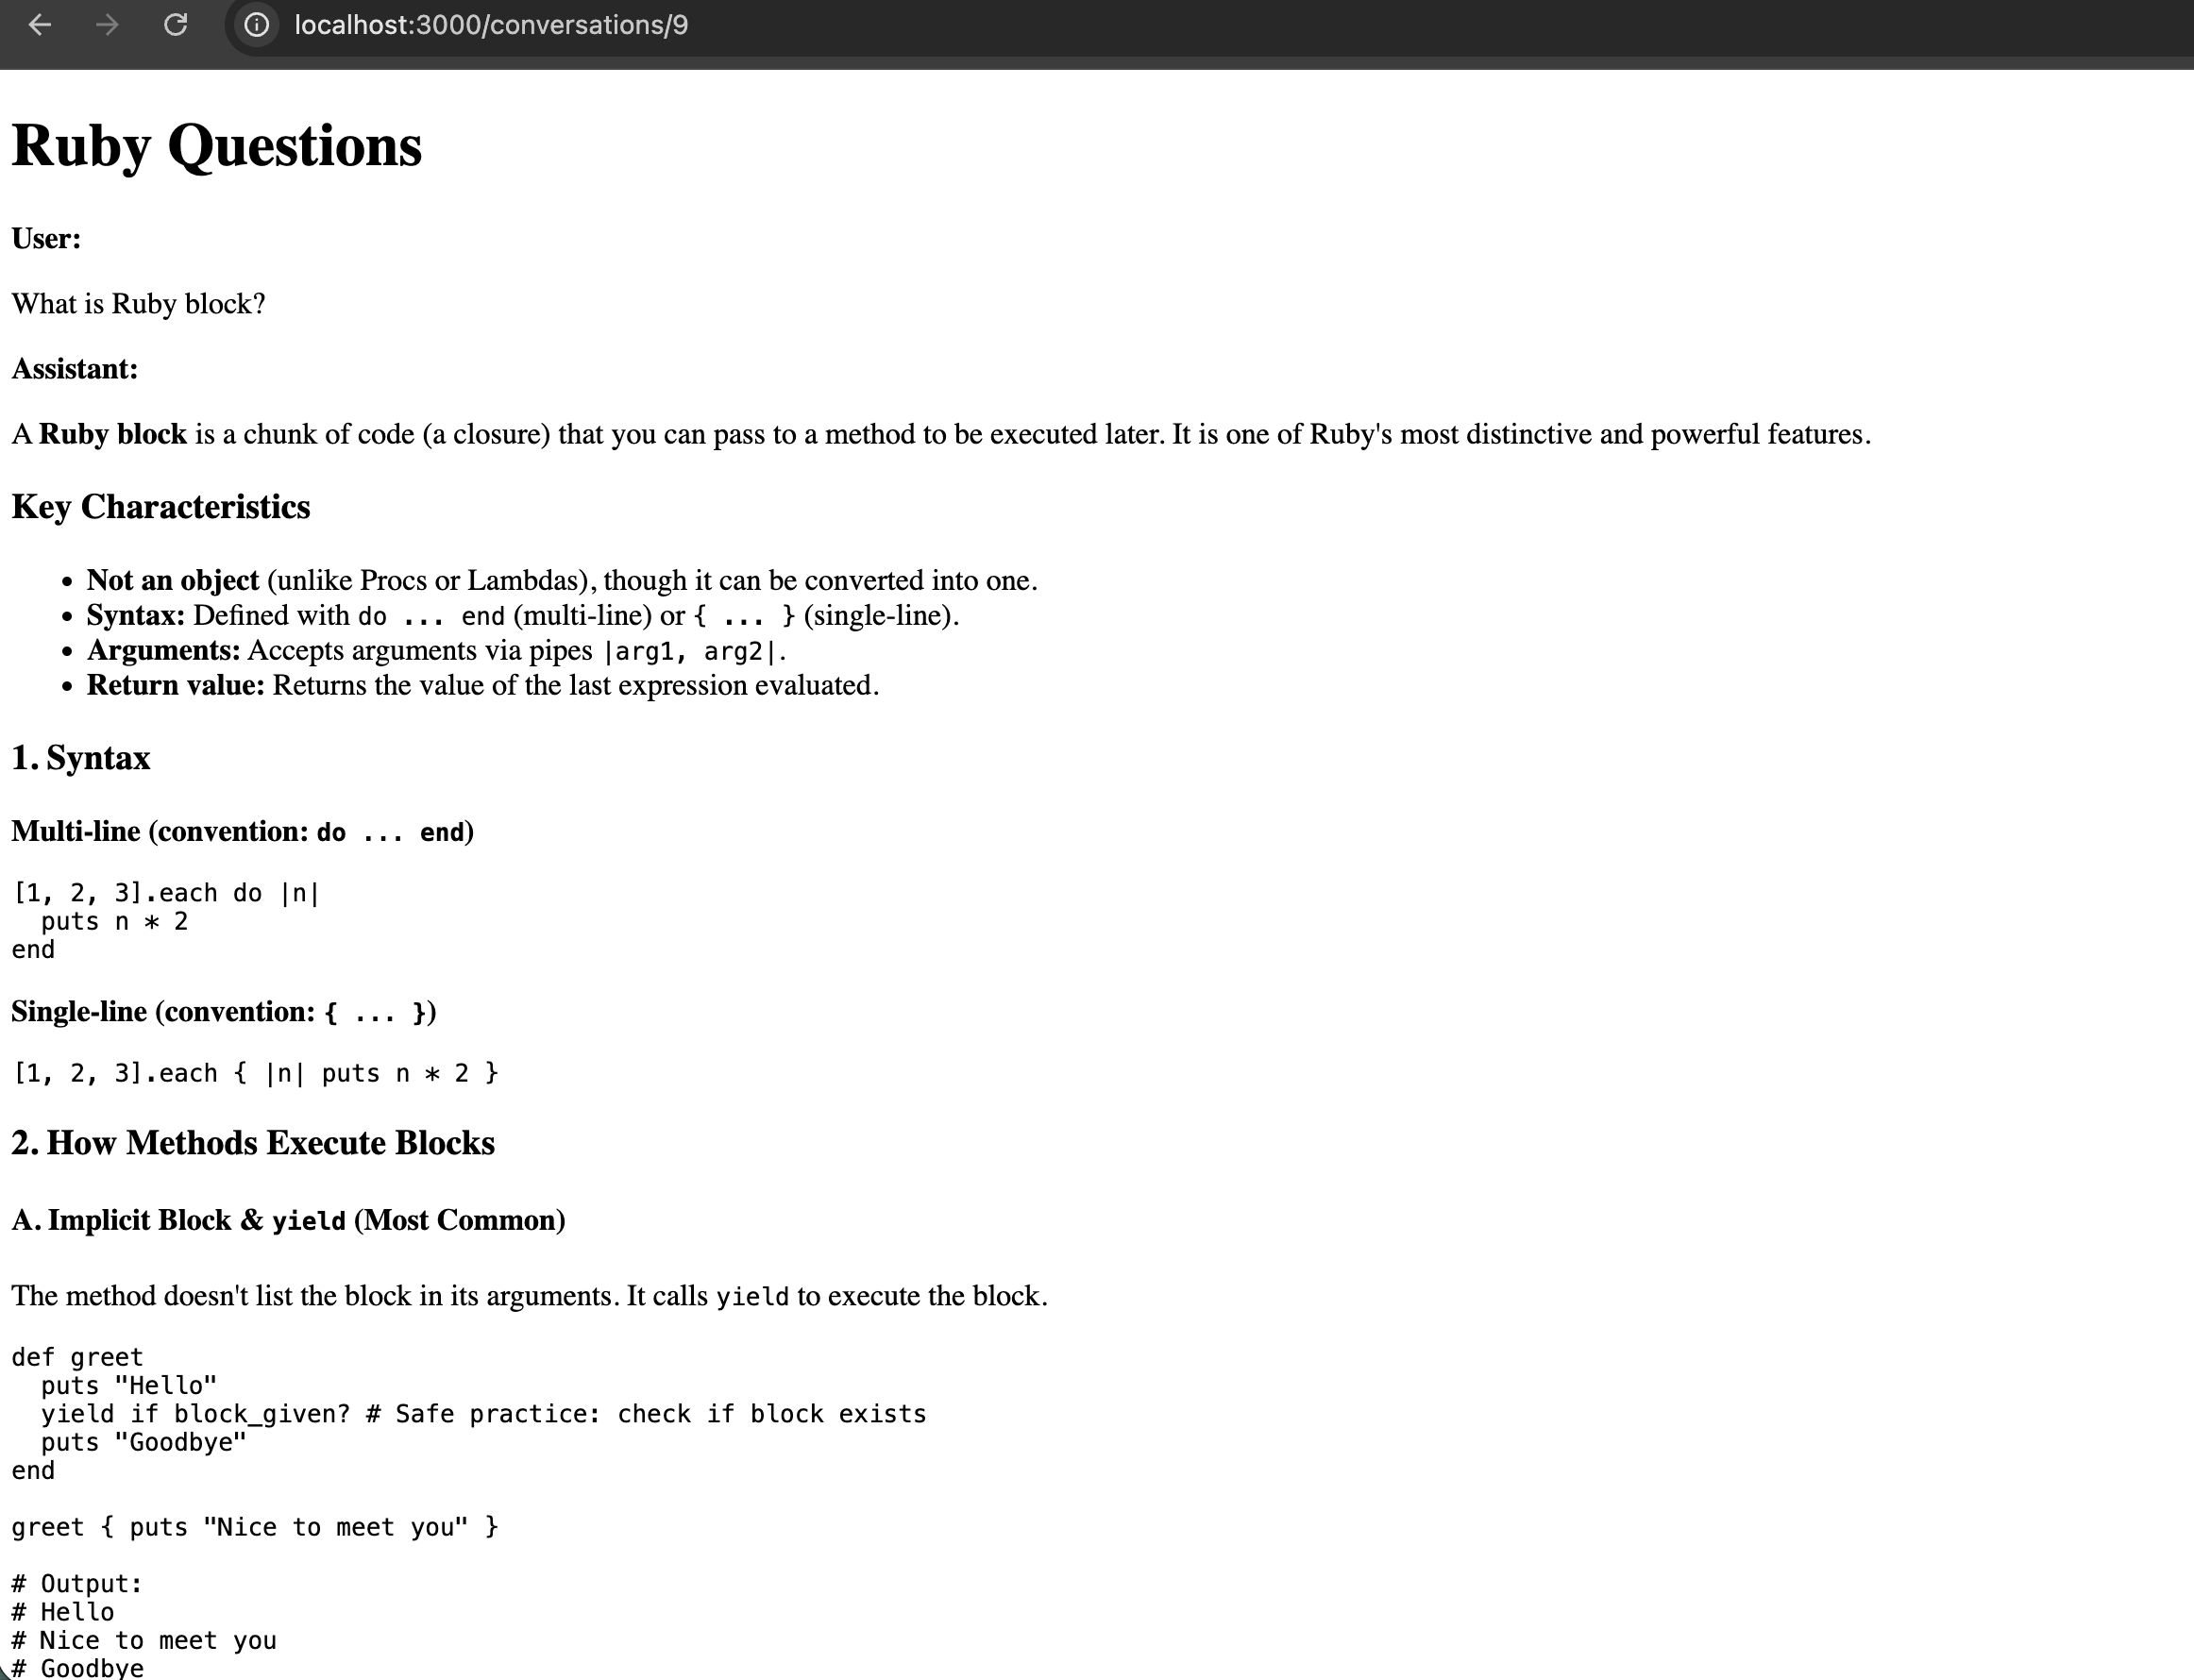
Now your response:

A **Ruby block** is...
### Key Characteristics
* Not an object
* Can be passed to a method

will render approximately as:

A Ruby block is…

4. Important security point

Do not do this:

<%= raw(Commonmarker.to_html(message.content)) %>

without sanitization.

The LLM output is still untrusted input.

Keep:

sanitize(Commonmarker.to_html(text))

as your pipeline.

That’s a good senior-level AI security practice:

LLM output
Markdown parser
HTML
Sanitizer
Browser

What we’ve built so far

We’re no longer just experimenting with an API.

We now have:

                    Rails AI Assistant

Browser
   │
   ▼
Conversation UI
   │
   ▼
MessagesController
   │
   ▼
Ai::ChatService
   │
   ├── Conversation history
   │
   ▼
Ai::PromptBuilder
   │
   ▼
Ai::Client
   │
   ▼
OpenRouter
   │
   ▼
Free LLM
   │
   ▼
Message
   │
   ▼
PostgreSQL

That is already something we can discuss in a senior int.

Check our code in this repo: https://github.com/abhilashak/ai_assistant


Next: Step 9 – Streaming

We’ll now replace:

submit → wait → redirect

with:

submit
Rails
LLM streaming
token-by-token response
browser

We’ll use the Rails 8.1 stack appropriately and discuss SSE vs Turbo Streams vs Action Cable, rather than merely copying a ChatGPT-style implementation.

Happy AI Integration!

Integrate AI with Rails: AI bootcamp for Developers – Day 4 -Practical Course – Part 2

Now let’s move to the next step: make the Message model production-friendly.

We’ll start with the most important field: role.

Step 3 – Design Message.role

Currently our database allows:

role = anything

For example:

"user"
"assistant"
"system"
"foo"
"hello"
"something-invalid"

That’s not what we want.

Our AI application has a defined set of roles:

user
assistant
system

Later, when we introduce tool calling, we may also need to represent tool messages depending on the provider/API design. But for our current application, we’ll keep the persisted roles to these three.

Why use a string instead of an integer?

You may remember our previous discussion about Rails enums.

We could store:

0 = user
1 = assistant
2 = system

But for an AI application, I prefer a string-backed enum.

Database:

role
---------
user
assistant
system

instead of:

role
---------
0
1
2

Why?

1. Database is self-describing

When you run:

SELECT role FROM messages;

you immediately see:

user
assistant
assistant
user
system

2. Easier debugging

When you’re debugging an AI conversation, the actual value is obvious.

3. Safer for external APIs

LLM APIs already use strings such as:

{
"role": "user"
}

So our database representation matches the domain.

Step 3A – Add the Rails enum

Open:

app/models/message.rb

Currently you should have something like:

class Message < ApplicationRecord
belongs_to :conversation
end

Change it to:

class Message < ApplicationRecord
belongs_to :conversation
enum :role, {
user: "user",
assistant: "assistant",
system: "system"
}, validate: true
end

Understand this carefully

This:

enum :role, {
user: "user",
assistant: "assistant",
system: "system"
}, validate: true

doesn’t mean PostgreSQL has an enum type. We’re using a Rails enum backed by a string column.

PostgreSQL still has:

role character varying

Rails gives us a domain API on top of it.

Step 3B – Test the enum

Start Rails console:

bin/rails console

Find our message:

message = Message.first

Check:

message.role

You should get:

"user"

Now:

message.user?

Expected:

true

And:

message.assistant?

Expected:

false

Step 3C – Test the scopes

Rails also gives us useful scopes.

Try:

Message.user

and:

Message.assistant

and:

Message.system

For example:

Message.user

roughly translates to:

SELECT *
FROM messages
WHERE role = 'user';

This is one of the benefits of using an enum.

Step 3D – Test invalid values

Now try:

Message.new(
conversation: Conversation.first,
role: "something_else",
content: "test"
)

Because we specified:

validate: true

Rails should treat the role as invalid.

Check:

message = Message.new(
conversation: Conversation.first,
role: "something_else",
content: "test"
)
message.valid?

Expected:

false

Then:

message.errors.full_messages

You should see an error indicating that the role is not included in the allowed values.

Why validate: true?

This is worth understanding: Without validation, Rails enum behavior can raise an ArgumentError when assigning an invalid value.

With:

validate: true

we get normal ActiveRecord validation behavior:

message.valid?
false

and:

message.errors

contains the validation error.

That’s generally more convenient when the model is receiving user/application input.

Step 3E – One more important layer: Database constraint

There is a subtle issue here.

Rails validation protects you when data enters through Rails.

But PostgreSQL doesn’t know that only these values are valid:

user
assistant
system

Someone could execute:

INSERT INTO messages (conversation_id, role, content)
VALUES (1, 'invalid', '...');

directly against PostgreSQL.

The database would currently allow it.

This leads to an important senior-engineering principle:

Application-level validation and database-level integrity are complementary.

We’ll add a database constraint.

But don’t do that yet. First make sure the Rails enum works.

After that, we’re finally ready for the exciting part:

Rails
Ai::Client
LLM API
Real AI response

Now let’s strengthen the model at the database level.

You currently have Rails validation:

enum :role, {
user: "user",
assistant: "assistant",
system: "system"
}, validate: true

That’s good, but a senior Rails application shouldn’t rely only on model validation for important data integrity.

Step 4 – Add Database Constraints

We want PostgreSQL itself to enforce:

role MUST be:
user
assistant
system

and:

content MUST NOT be NULL
role MUST NOT be NULL

This gives us two layers:

Rails
Model validation
PostgreSQL
Database constraint

4.1 Why NULL matters

Currently this is possible at the database level:

role = NULL

But an AI message without a role doesn’t make sense.

Likewise:

content = NULL

doesn’t represent a meaningful message.

So we’ll make both required.

4.2 Create a new migration

Don’t modify the old migration because it has already been executed and committed.

Generate a new migration:

bin/rails generate migration AddMessageConstraints

Rails should create:

db/migrate/XXXXXXXXXXXXXX_add_message_constraints.rb

Open that file.

4.3 Add NOT NULL constraints

Put this inside change:

class AddMessageConstraints < ActiveRecord::Migration[8.1]
def change
change_column_null :messages, :role, false
change_column_null :messages, :content, false
end
end

So conceptually:

def change
change_column_null :messages, :role, false
change_column_null :messages, :content, false
end

4.4 Add PostgreSQL CHECK constraint

Now we want PostgreSQL to enforce:

role IN ('user', 'assistant', 'system')

Add:

add_check_constraint(
:messages,
"role IN ('user', 'assistant', 'system')",
name: "messages_role_check"
)

Our migration becomes:

class AddMessageConstraints < ActiveRecord::Migration[8.1]
def change
change_column_null :messages, :role, false
change_column_null :messages, :content, false
add_check_constraint(
:messages,
"role IN ('user', 'assistant', 'system')",
name: "messages_role_check"
)
end
end

4.5 Run the migration

Execute:

bin/rails db:migrate

You should see Rails successfully applying the migration.

4.6 Inspect PostgreSQL

This is worth doing because understand what’s actually happening underneath Rails.

Run:

bin/rails dbconsole

Then:

\d messages

Look toward the bottom.

You should see a check constraint similar to:

messages_role_check
CHECK ((role)::text = ANY (...))

The exact display can vary by PostgreSQL version.

Also check:

\d+ messages

4.7 Test the database constraint

Now let’s prove that PostgreSQL protects us even if Rails is bypassed.

Inside psql, try:

INSERT INTO messages
(conversation_id, role, content, created_at, updated_at)
VALUES
(1, 'invalid', 'This should fail', NOW(), NOW());

You should get an error similar to:

ERROR: new row for relation "messages" violates check constraint "messages_role_check"

That’s exactly what we want.

The database is now protecting the data.

Why is this important?

Suppose an int. asks:

“Why do you have both Rails validation and a PostgreSQL constraint?”

A strong senior-level answer would be:

“Rails validations provide application-level feedback and are useful for normal model operations, but they’re not a database integrity guarantee because data can enter through other paths. For important invariants such as message roles, I also enforce the constraint at the PostgreSQL level.”

That’s a much stronger answer than:

“Because Rails has validations.”

4.8 One more design question: content

We’re making:

change_column_null :messages, :content, false

But should an AI message be allowed to contain an empty string?

For example:

content: ""

NOT NULL allows that.

So:

NULL NO
"" technically allowed
"Hello" YES

Whether empty content should be allowed is an application-level business rule.

We can later decide whether to add:

validates :content, presence: true

But don’t add that yet.

There are legitimate AI API situations where a message may not have ordinary text content – for example, tool-related or structured content. We’ll revisit our message representation when we implement tool calling.

4.9 Test a valid message

Exit psql:

\q

Then:

bin/rails c

Run:

conversation = Conversation.first

Then:

message = conversation.messages.create(
role: :user,
content: "What is Ruby?"
)

Check:

message.persisted?

You should get:

true

And:

message.role

should return:

"user"

Stop Here

Please do these in order:

bin/rails generate migration AddMessageConstraints

Edit the migration with the constraints above.

Then:

bin/rails db:migrate

Verify with:

bin/rails dbconsole
\d messages

Then test the invalid role directly in PostgreSQL.

Finally:

git add app/models/message.rb db/migrate
git commit -m "feat: validate message roles"
git push

NOW: “Message constraints are done.”

Then we move to the big milestone: Our First Real LLM API Call


Excellent. We now have a clean foundation:

Ruby 3.4.1
Rails 8.1
PostgreSQL
Conversation
└── Message
├── role
├── content
├── model
├── input_tokens
└── output_tokens
Ai::Client

Now we reach the first real AI step.

Step 5 – Make Our First LLM API Call

We’re going to do this in a deliberately controlled way.

Don’t build the Chat UI yet.

First, we need to understand:

Ruby
Ai::Client
HTTP request
LLM provider
HTTP response
Ruby

Once we understand this, we’ll wrap it nicely into Rails architecture.

5.1 First decision – which provider?

For this practical course, let’s start with OpenAI.

Not because you must use OpenAI in production, but because it gives us a straightforward API to understand the fundamentals.

Later we’ll discuss:

Rails
├── OpenAI
├── Anthropic
└── Gemini

and how to design our Ai::Client so that we’re not tightly coupled to one provider.

5.2 Before writing code – understand the request

Conceptually, we’re going to send something like:

POST /v1/responses
{
"model": "...",
"input": "Explain Ruby blocks in simple terms."
}

The provider’s server processes the request:

Rails
│ HTTPS
OpenAI API
LLM
Response

The important thing to understand is:

An LLM API is an HTTP API.

The Ruby SDK is just a convenient abstraction around HTTP.

5.3 Check our Ai::Client

You already created:

app/services/ai/client.rb

Open it.

If it currently contains nothing useful, that’s completely fine.

For now, make it:

# app/services/ai/client.rb

class Ai::Client
end

Don’t add API code yet.

5.4 Configure the API key securely

Do not put our API key in Ruby source code.

We have two common approaches:

Environment variables

or:

Rails encrypted credentials

For this project, I’m going to use Rails encrypted credentials because it’s a good opportunity to understand how Rails handles secrets.

5.5 Create Rails encrypted credentials

Run:

➜  ai_assistant git:(main) ✗ VISUAL="code --wait" rails credentials:edit

Rails will open our configured editor.

Add:

openai:
api_key: OUR_OPENAI_API_KEY

For example:

openai:
api_key: sk-xxxxxxxxxxxxxxxx

Use our actual API key locally, but never paste it into this conversation or commit it to GitHub.

Save and close the editor

What’s actually happening?

Rails creates/uses:

config/credentials.yml.enc

This file is encrypted.

Our encryption key is stored separately in:

config/master.key

The important rule is:

config/credentials.yml.enc
COMMIT
GitHub

is okay.

But:

config/master.key

should never be committed to GitHub.

Check:

git status

You should not see:

config/master.key

as a file to commit.

5.6 Verify Rails can read the key

Run:

bin/rails console

Then:

Rails.application.credentials.dig(:openai, :api_key)

You should get our key back, just verify that it returns a string rather than nil.

Then:

exit

5.7 Why use dig?

Our credentials structure is:

openai:
api_key: ...

which Rails exposes approximately as:

{
openai: {
api_key: "..."
}
}

So:

Rails.application.credentials.dig(:openai, :api_key)

means:

credentials
openai
api_key

This is cleaner than accessing nested values manually.

5.8 Now configure Ai::Client

Open:

app/services/ai/client.rb

Change it to:

class Ai::Client
def initialize
@api_key = Rails.application.credentials.dig(:openai, :api_key)
end
end

Now the client knows how to retrieve its secret.

5.9 Add a safety check

We don’t want the application to fail mysteriously later.

Add:

class Ai::Client
  def initialize
    @api_key = Rails.application.credentials.dig(:openai, :api_key)

    raise "OpenAI API key is missing" if @api_key.blank?
  end
end

Now:

Ai::Client.new

will fail immediately if the key isn’t configured. This is called fail-fast configuration.

5.10 Test the client

Run:

bin/rails console

Then:

client = Ai::Client.new

If everything is configured correctly, it should return:

#<Ai::Client:0x...>

No API request has happened yet.

We’re only testing:

Rails credentials
Ai::Client

Check our code in this repo: https://github.com/abhilashak/ai_assistant


Stop Here

Don’t make the API request yet.

complete only these steps first:

1. Configure credentials

bin/rails credentials:edit

with:

openai:
api_key: OUR_KEY

2. Verify:

bin/rails console
Rails.application.credentials.dig(:openai, :api_key)

Don’t show me the key.

3. Update:

app/services/ai/client.rb

to:

class Ai::Client
def initialize
@api_key = Rails.application.credentials.dig(:openai, :api_key)
raise "OpenAI API key is missing" if @api_key.blank?
end
end

4. Test:

client = Ai::Client.new

Now: “Ai::Client credentials is done.”

Next topic: Step 5.11: install/configure the OpenAI Ruby client and make the first actual LLM request.

to be continued ..

Learn AI with Rails: AI Bootcamp for Developers – RAG, Embeddings & Vector Databases – Day 3

RAG is one of the first things we’d understand. Most AI products are not just “ChatGPT wrappers.” They become valuable because they answer questions about company-specific data.

Examples:

  • Internal documentation
  • HR policies
  • Product manuals
  • Customer support articles
  • Legal contracts
  • Medical records
  • Source code
  • Jira tickets
  • Slack messages
  • GitHub repositories

ChatGPT doesn’t know these documents. That’s where RAG comes in.


Goal

By the end of today, you should confidently answer:

  • What is RAG?
  • Why do we need RAG?
  • What are embeddings?
  • Why can’t we just send an entire PDF to the LLM?
  • What is semantic search?
  • What is a vector database?
  • Why is pgvector popular in Rails?
  • How would you build a document chat system?

Part 1 – Why LLMs Alone Are Not Enough

Imagine you build an HR chatbot.

The user asks:

“How many annual leave days do employees receive?”

Your company’s HR policy says:

24 days.

But the LLM was trained months ago and has never seen your HR document.

Without access to your data, it has to guess—or say it doesn’t know.

This is the fundamental problem RAG solves.


Part 2 – What is RAG?

RAG = Retrieval-Augmented Generation

Break it down:

  • Retrieval → Find relevant information.
  • Augmented → Add that information to the prompt.
  • Generation → The LLM generates the final answer using that context.

The key idea:

The LLM isn’t expected to know everything—it is given the right information at request time.

High-Level Flow

User Question
Retrieve Relevant Documents
Add Documents to Prompt
LLM Generates Answer
User

Notice that the LLM doesn’t search your database directly.

Your Rails application retrieves the data first.

Int. Question

What is RAG?

A strong answer:

Retrieval-Augmented Generation is a technique where relevant external information is retrieved first and then supplied to the language model as context, allowing it to answer questions using current or private data.


Part 3 – Why Not Paste the Entire PDF?

A common beginner idea is:

“I’ll upload the whole manual to ChatGPT.”

Let’s say your PDF is:

  • 800 pages
  • 350,000 words

Problems:

1. Context Window Limits

The entire document may not fit into the model’s context window.

2. Cost

More tokens = higher API cost.

3. Speed

Larger prompts take longer to process.

4. Noise

Most of the document is irrelevant to the user’s question.

If someone asks:

“How do I reset my password?”

Why send 800 pages?

You only need the page that explains password resets.


Part 4 – The RAG Pipeline

This is one of the most important diagrams to remember.

PDF
Extract Text
Split into Chunks
Generate Embeddings
Store in Vector Database
──────────────
User Question
Generate Query Embedding
Similarity Search
Top Matching Chunks
LLM
Answer

Every production RAG system follows a variation of this flow.


Part 5 – What Are Chunks?

Large documents are split into smaller pieces.

Example:

Instead of:

Employee Handbook
(350 pages)

Split into:

Chunk 1
Company Introduction
---------------
Chunk 2
Leave Policy
---------------
Chunk 3
Medical Insurance
---------------
Chunk 4
Travel Policy

Now retrieval becomes efficient.

Why Not One Sentence Per Chunk?

Very small chunks:

  • lose context

Very large chunks:

  • increase cost
  • contain unrelated information

Chunk size is a trade-off.


Part 6 – What Are Embeddings?

This is the concept that many developers initially find abstract.

Think of an embedding as a numeric representation of meaning.

The model converts text into a list of numbers.

For example (illustrative only):

"Ruby on Rails"
[0.12, -0.44, 0.91, ...]

Another phrase:

"Rails Framework"
[0.13, -0.43, 0.90, ...]

Even though the wording is different, the vectors end up close together because they have similar meaning.

The exact numbers don’t matter—you just need to know that similar meanings produce similar vectors.

Think of a Map

Imagine a map.

Nearby cities are close.

Faraway cities are distant.

Embeddings work similarly.

Ruby
Rails
Sinatra
Python
Cooking
Football

Ruby and Rails are “near” each other.

Cooking is far away.

The model has learned semantic relationships.

Int. Question

What is an embedding?

Good answer:

An embedding is a numerical vector that represents the semantic meaning of text, allowing similar concepts to be located near each other in vector space.


Part 7 – Semantic Search

Traditional SQL search:

WHERE title LIKE '%Rails%'

This only matches literal text.

Suppose your document says:

Ruby web framework

The user searches:

Rails

A keyword search may miss it.

Semantic search compares meaning, not exact words.

Example:

Document:

Ruby web framework

Query:

Rails

Keyword search: ❌ No match (depending on the implementation)

Semantic search: ✅ High similarity because the concepts are closely related.

Rails Analogy

Traditional search:

LIKE
ILIKE

Semantic search:

Embedding
Vector Similarity
Closest Meaning

That’s the major difference.


Part 8 – Vector Databases

Where do we store embeddings?

Inside a vector database.

Popular options:

  • pgvector (PostgreSQL extension)
  • Pinecone
  • Qdrant
  • Weaviate
  • Milvus

Why pgvector Is Popular in Rails

Because many Rails applications already use PostgreSQL.

Instead of introducing another database, you can extend PostgreSQL with vector support.

Benefits:

  • One database
  • Familiar tooling
  • ActiveRecord support
  • Simpler backups
  • Easier deployment

For many Rails applications, pgvector is an excellent first choice.

How Similarity Search Works

Suppose the user asks:

Password reset

The query becomes an embedding.

The database compares it with stored document embeddings.

Password Policy
0.98
-----------
Leave Policy
0.31
-----------
Travel Policy
0.22
-----------
Insurance
0.12

The most similar chunks are returned.

Those chunks are added to the prompt.


Part 9 – Complete Rails Architecture

A production Rails application might look like this:

Browser
Rails Controller
Question Service
Embedding API
pgvector Search
Top 5 Chunks
Prompt Builder
LLM API
Answer
Store Conversation
Browser

Notice that Rails coordinates every step.

The LLM is only responsible for generating the final answer.


Part 10 – RAG vs Fine-Tuning

A very common interview question.

RAG

  • External knowledge
  • Easy to update
  • Great for company documents
  • No model retraining

Fine-Tuning

  • Changes model behaviour
  • Expensive
  • Longer process
  • Better for specialised tasks or consistent output style

Rule of thumb:

If the knowledge changes frequently (documentation, policies, support articles), use RAG.


Part 11 – Example: Company Wiki Chatbot

Suppose your company has:

  • 2,000 documentation pages

The user asks:

“How do I deploy staging?”

Flow:

User
Embedding
Vector Search
Deployment Guide
LLM
Answer

The LLM answers using your company’s deployment guide rather than guessing.


Part 12 – Where Does Sidekiq Fit?

Another practical interview topic.

Generating embeddings for thousands of documents can take time.

A common approach:

PDF Uploaded
Active Job / Sidekiq
Extract Text
Split Chunks
Generate Embeddings
Store in pgvector

Keep the upload request fast and process indexing asynchronously.


Part 13 – Common RAG Mistakes

Sending Entire Documents: Slow and expensive.

Tiny Chunks: Not enough context.

Huge Chunks: Too much irrelevant information.

Never Updating Embeddings: If documents change, regenerate the affected embeddings.

Blind Trust: Retrieved text can also be outdated or incorrect.

Validate your data sources and refresh them when needed.

Imp. Questions

Practice answering these.

Fundamentals

  1. What is RAG?
  2. Why do we need RAG?
  3. Why can’t ChatGPT answer company-specific questions by default?
  4. Why not send an entire PDF?

Embeddings

  1. What is an embedding?
  2. Why are embeddings useful?
  3. What is semantic search?

Databases

  1. What is a vector database?
  2. Why use pgvector?
  3. How does similarity search work?

Rails

  1. Where would Sidekiq fit?
  2. How would you build a document chatbot?
  3. Would you store conversations?
  4. How would you update embeddings when documents change?

Practical Exercise 1

Think about a support portal.

The documents include:

  • Refund policy
  • Shipping policy
  • Returns
  • Coupons
  • Warranty

Now answer:

“My order arrived damaged.”

Which document(s) should your RAG system retrieve before asking the LLM to generate a response?

Explain why.


Practical Exercise 2

Design the Rails models for a document chat system.

For example, think about models such as:

  • Document
  • DocumentChunk
  • Conversation
  • Message

What responsibilities should each have?


Practical Exercise 3

Sketch a background job flow.

When a user uploads a PDF:

  1. What happens immediately?
  2. What should Sidekiq handle?
  3. When are embeddings created?
  4. When are they stored?
  5. What happens if embedding generation fails?

Think in terms of a production-ready system rather than just happy-path code.


Homework

  1. Draw the complete RAG pipeline from memory.
  2. Explain embeddings in your own words without using AI jargon.
  3. Explain semantic search versus keyword search.
  4. Explain why pgvector is a good fit for many Rails applications.
  5. Describe how Sidekiq helps during document ingestion.
  6. Answer all 14 interview questions aloud.

Int. Challenge

Imagine you’re asked this in an interview:

“We have a Rails application with 500,000 product manuals. Users should be able to ask questions about any manual. Design the system.”

A strong answer would include:

  • Rails as the orchestration layer
  • Background jobs for document ingestion
  • Chunking strategy
  • Embedding generation
  • pgvector (or another vector database)
  • Similarity search
  • Prompt construction
  • LLM generation
  • Conversation storage
  • Caching and monitoring
  • Security and access control (users should only retrieve documents they are authorized to access)

This kind of end-to-end system design discussion is what distinguishes a senior engineer from someone who has only experimented with AI APIs.


Day 4 Preview

Tomorrow we move from concepts to implementation:

Building AI Features in Ruby on Rails

We’ll cover:

  • AI architecture in Rails
  • Choosing Ruby AI libraries and SDKs
  • Service objects for AI integration
  • Streaming AI responses
  • Background jobs with Sidekiq
  • Conversation storage
  • Cost optimization
  • Error handling
  • Designing a production-ready AI service layer
  • A complete Rails AI project structure suitable for real-world applications

From Day 4 onward, the bootcamp becomes much more code-focused and closely aligned with the kinds of AI features senior Rails developers build in production.


Happy AI Learning! 🚀

Fixing PostgreSQL Startup Issues on macOS (Homebrew): A Real-World Troubleshooting Guide

Introduction

Recently, I encountered an interesting PostgreSQL issue on my MacBook.

PostgreSQL was installed via Homebrew and worked perfectly on one macOS user account. However, when switching to another account on the same machine, I was unable to connect to PostgreSQL using psql.

The error looked like this:

psql postgres
psql: error: connection to server on socket "/tmp/.s.PGSQL.5432" failed:
No such file or directory
Is the server running locally and accepting connections on that socket?

This article walks through the investigation, root cause analysis, and final solution.


Understanding the Error

When PostgreSQL starts successfully, it creates a Unix socket file:

/tmp/.s.PGSQL.5432

The psql client uses this socket by default to connect to the local PostgreSQL server.

The error indicates one of two possibilities:

  1. PostgreSQL is not running.
  2. PostgreSQL is running but not listening on the expected socket.

In my case, PostgreSQL was simply not running for the current macOS user account.


Initial Verification

Verify PostgreSQL Client Installation

which psql

Output:

/opt/homebrew/bin/psql

Check version:

psql --version

Output:

psql (PostgreSQL) 14.17 (Homebrew)

This confirmed that PostgreSQL client tools were correctly installed.

Verify Installed PostgreSQL Version

brew list | grep postgres

Output:

postgresql@14

Check Whether PostgreSQL Is Running

pg_isready

Output:

/tmp:5432 - no response

This confirmed that PostgreSQL was not accepting connections.

Manual Startup Worked

Interestingly, PostgreSQL could be started manually:

/opt/homebrew/opt/postgresql@14/bin/pg_ctl \
-D /opt/homebrew/var/postgresql@14 \
-l /opt/homebrew/var/log/postgresql.log start

Output:

waiting for server to start.... done
server started

This was a critical clue.

It told us:

  • PostgreSQL binaries were healthy.
  • Database files were healthy.
  • Data directory was healthy.
  • The issue was likely related to Homebrew services or macOS LaunchAgents.

Investigating Homebrew Services

Checking service status:

brew services list

Output:

Name Status User
postgresql@14 error 78 abhilash

Attempting to start the service:

brew services start postgresql@14

Result:

Bootstrap failed: 5: Input/output error
launchctl bootstrap gui/501

This indicated a problem with the macOS LaunchAgent used by Homebrew.


Root Cause

Homebrew services rely on macOS launchctl.

Each macOS user account gets its own LaunchAgents configuration.

Although PostgreSQL was installed globally under Homebrew, the LaunchAgent configuration for this specific user account had become corrupted or stale.

As a result:

  • Manual startup worked.
  • Automatic startup through Homebrew failed.

Fixing the LaunchAgent

Stop Existing Service

brew services stop postgresql@14

Remove Existing LaunchAgent

rm ~/Library/LaunchAgents/homebrew.mxcl.postgresql@14.plist

Clean Up Homebrew Services

brew services cleanup

Verify Ownership

ls -ld /opt/homebrew/var/postgresql@14

If ownership is incorrect:

sudo chown -R $(whoami):staff /opt/homebrew/var/postgresql@14

Recreate the Service

After cleanup:

brew services start postgresql@14

Output:

Successfully started `postgresql@14`

Checking status:

brew services list

Output:

postgresql@14 started

Success!


Verifying PostgreSQL Is Running

pg_isready

Output:

/tmp:5432 - accepting connections

Connecting:

psql postgres

Output:

postgres=#

PostgreSQL was now functioning normally.


Understanding a New Error

While reviewing PostgreSQL logs, I noticed:

FATAL: database "abhilash" does not exist

At first glance, this looked concerning.

However, this is normal behavior.

When you run:

psql

PostgreSQL automatically tries to connect to a database matching your operating system username.

For example:

macOS username = abhilash

PostgreSQL attempts:

CONNECT TO abhilash;

Since that database didn’t exist, PostgreSQL logged:

FATAL: database "abhilash" does not exist

Creating a Personal Database

To make plain psql work:

CREATE DATABASE abhilash;

Now simply running:

psql

works because PostgreSQL can find a matching database.


Key Lessons Learned

1. Verify Whether PostgreSQL Is Actually Running

pg_isready

is often the fastest diagnostic tool.

2. Manual Startup Helps Isolate the Problem

If pg_ctl start works, your PostgreSQL installation and data files are probably fine.

3. Homebrew Services Depend on macOS LaunchAgents

A corrupted LaunchAgent can prevent PostgreSQL from auto-starting even when PostgreSQL itself is healthy.

4. Don’t Reinstall Immediately

Many developers jump directly to:

brew uninstall postgresql
brew install postgresql

In this case, reinstalling would not have fixed the issue and could have introduced additional problems.

5. Read the PostgreSQL Logs

Logs quickly reveal whether you’re dealing with:

  • Permission issues
  • Missing databases
  • Port conflicts
  • Startup failures
  • Authentication errors

Final Verification Checklist

brew services list
pg_isready
psql postgres

Expected results:

postgresql@14 started
/tmp:5432 - accepting connections
postgres=#

At this point, PostgreSQL is healthy and configured to start automatically after reboot.


Conclusion

What initially appeared to be a PostgreSQL installation problem turned out to be a macOS LaunchAgent issue specific to one user account.

By methodically checking:

  • PostgreSQL installation
  • Server status
  • Homebrew services
  • LaunchAgent configuration
  • PostgreSQL logs

we were able to restore automatic startup without reinstalling PostgreSQL or risking data loss.

This experience serves as a reminder that startup problems are often service-management issues rather than database issues.

Happy Debugging! 🚀

GCP Cloud SQL Disaster Recovery: A Practical Guide for Developers

When a production database goes down – whether from a bad migration, an accidental DROP TABLE, or a rogue script – the clock starts ticking. Every minute of downtime is lost revenue, broken trust, and a very stressful Slack channel.

This post walks through how Google Cloud SQL’s backup and recovery features work, common disaster scenarios, and the recovery playbook a developer should follow for each. The examples use a typical SaaS application backed by PostgreSQL on Cloud SQL, but the principles apply broadly.

Cloud SQL Backup Fundamentals

Before anything goes wrong, you need to understand what Cloud SQL gives you out of the box and what you need to configure yourself.

Automated Backups

Cloud SQL can take daily automated backups of your instance. These are full snapshots of the entire database and are retained for a configurable window (default 7 days, max 365).

# gcloud: verify automated backups are enabled
gcloud sql instances describe my-instance \
  --format="value(settings.backupConfiguration)"

Key settings to configure:

SettingRecommendationWhy
backupConfiguration.enabledtrueNon-negotiable for production
backupConfiguration.startTimeOff-peak hours (e.g. 04:00 UTC)Minimizes performance impact
backupConfiguration.backupRetentionSettings.retainedBackups14-30Gives you a wider recovery window
backupConfiguration.pointInTimeRecoveryEnabledtrueEnables PITR (see below)
backupConfiguration.transactionLogRetentionDays7How far back PITR can reach

Point-in-Time Recovery (PITR)

Automated backups give you daily snapshots. PITR fills the gaps by continuously archiving write-ahead logs (WAL for PostgreSQL, binary logs for MySQL). This lets you restore to any second within the retention window — not just to the time of the last backup.

# Enable PITR on an existing instance
gcloud sql instances patch my-instance \
  --enable-point-in-time-recovery \
  --retained-transaction-log-days=7

PITR is the single most important setting for disaster recovery. Without it, you lose every write between your last automated backup and the incident.

On-Demand Backups

You can trigger a backup manually before risky operations:

gcloud sql backups create --instance=my-instance \
  --description="pre-migration-backup-2026-04-08"

Rule of thumb: always take an on-demand backup before running migrations, bulk data operations, or any ad-hoc SQL against production.


Disaster Scenarios and Recovery Playbooks

Scenario 1: Accidental Table Drop or Data Deletion

What happened: A developer ran a DROP TABLE or DELETE FROM without a WHERE clause against production. Maybe it was a script meant for staging. Maybe an AI-generated SQL statement was executed without review.

Impact: One or more tables are gone or empty. The application is throwing 500s.

Recovery options:

Option A: PITR (best if available)

Restore to the moment just before the destructive command. You’ll need the approximate timestamp.

# Restore to a clone instance first — never restore directly over production
gcloud sql instances clone my-instance my-instance-recovery \
  --point-in-time="2026-04-08T10:59:00Z"

This creates a new instance with the database state at that exact second. You can then:

  1. Verify the data on the clone
  2. Export the affected tables from the clone
  3. Import them back into the production instance
# Export a specific table from the recovery clone
gcloud sql export sql my-instance-recovery gs://my-bucket/recovery/users-table.sql \
  --database=myapp_production \
  --table=users

# Import into production
gcloud sql import sql my-instance gs://my-bucket/recovery/users-table.sql \
  --database=myapp_production

Option B: Restore from automated backup

If PITR is not enabled, restore the most recent automated backup that predates the incident.

# List available backups
gcloud sql backups list --instance=my-instance

# Restore a specific backup (this overwrites the instance)
gcloud sql backups restore BACKUP_ID --restore-instance=my-instance

Warning: Restoring a backup directly onto your production instance overwrites everything. All writes since that backup are lost. Prefer cloning to a recovery instance first.

The data gap problem:

When you restore from a backup taken at, say, 4:00 AM, but the incident happened at 11:00 AM, you lose 7 hours of data. This is the gap you’ll need to address manually. Common strategies:

  • Application-level event logs: If your app publishes events to a message queue (Kafka, Pub/Sub), you can replay them.
  • Analytics replicas: If you replicate data to BigQuery, Snowflake, or another analytics store, you can query the missing records from there and re-import them.
  • Audit tables: If your application logs changes to an audit table in a separate database, those records survive.
-- Example: querying BigQuery for records created during the gap window
SELECT *
FROM `project.dataset.user_actions`
WHERE created_at BETWEEN TIMESTAMP('2026-04-08 04:00:00', 'America/Vancouver')
  AND TIMESTAMP('2026-04-08 11:00:00', 'America/Vancouver')
  AND action_type = 'account_status_change'

You then re-ingest these records into production, typically via a script run in your application’s console or through a migration task.


Scenario 2: Interrupted Background Job

What happened: A critical scheduled job — say, one that generates weekly records for all active users — was running when the incident occurred. The database was restored from backup, but the job was killed mid-execution. Some users got their records; others didn’t.

Impact: No application errors (the data that exists is valid), but there’s a silent gap. Some users are missing records they should have.

Recovery playbook:

Step 1 — Quantify the gap

Before doing anything, measure what’s missing:

# Find users who should have a record but don't
target_date = Date.parse('2026-05-30')
users_missing = User.where(status: ['active', 'subscribed'])
  .where.not(id: WeeklyRecord.where(week_date: target_date).select(:user_id))
users_missing.count

Record the count. You’ll need it for verification later.

Step 2 – Understand the generation logic

Before re-running anything, understand what the job does:

  • Does it check for existing records before creating? (idempotent?)
  • Does it behave differently based on user status? (e.g., suspended users get a different treatment)
  • Does it trigger side effects? (emails, webhooks, billing)

If the job is idempotent — meaning running it twice for the same user produces the same result without duplicates — you can safely re-run it for all users, not just the ones missing records. This is simpler and safer than trying to target only the gap.

Step 3 – Re-run with guardrails

Write a targeted script rather than re-triggering the entire job:

target_date = Date.parse('2026-05-30')
# Pre-check
baseline_count = WeeklyRecord.where(week_date: target_date).count
puts "Records before: #{baseline_count}"
# Find and process missing users
users_missing = User.where(status: ['active', 'subscribed'])
.where.not(id: WeeklyRecord.where(week_date: target_date).select(:user_id))
puts "Users missing records: #{users_missing.count}"
users_missing.find_each do |user|
WeeklyRecordGenerator.new(user).generate(target_date)
rescue => e
puts "Failed for User ##{user.id}: #{e.message}"
end
# Post-check
new_count = WeeklyRecord.where(week_date: target_date).count
puts "Records after: #{new_count}"
puts "Delta: #{new_count - baseline_count}"

Step 4 – Verify

Check that:

  • The record count increased by the expected amount
  • No duplicates were created
  • No users are still missing records
  • Any status-dependent logic was applied correctly (e.g., suspended users got the right treatment)

Scenario 3: Corrupted Data from a Bad Migration

What happened: A migration altered a column type, dropped a constraint, or backfilled data incorrectly. The application is running but producing wrong results.

Impact: Data is present but incorrect. This is often harder to detect than missing data.

Recovery playbook:

  1. Don’t panic-restore. If the app is functional (just producing wrong data), you have time to assess.
  2. Clone to a recovery instance from a backup predating the migration: gcloud sql instances clone my-instance pre-migration-clone \ --point-in-time="2026-04-07T23:00:00Z"
  3. Diff the data between production and the clone to understand exactly what changed: -- Compare row counts SELECT 'production' as source, count(*) FROM production.orders UNION ALL SELECT 'backup' as source, count(*) FROM backup_clone.orders; -- Find rows that differ SELECT p.id, p.amount as prod_amount, b.amount as backup_amount FROM production.orders p JOIN backup_clone.orders b ON p.id = b.id WHERE p.amount != b.amount;
  4. Write a targeted fix rather than a full restore (which would lose post-migration legitimate writes).
  5. Write a rollback migration if the schema change itself was the problem.

Scenario 4: Full Instance Failure

What happened: The Cloud SQL instance is unreachable – maybe a zone outage, maybe accidental instance deletion.

Recovery options:

If the instance still exists (zone outage):

Cloud SQL instances configured for high availability will automatically failover to a standby in another zone. If you don’t have HA enabled:

# Enable HA (requires instance restart)
gcloud sql instances patch my-instance --availability-type=REGIONAL

If the instance was deleted:

Deleted instances can be recovered within a limited window if deletion protection wasn’t bypassed:

# Enable deletion protection
gcloud sql instances patch my-instance --deletion-protection

If truly gone, restore from the most recent backup to a new instance:

gcloud sql instances create my-instance-restored \
--source-backup=BACKUP_ID \
--tier=db-custom-4-16384 \
--region=us-west1

Then update your application’s database connection string to point to the new instance.


Prevention Checklist

The best disaster recovery is the one you never need. Here’s what to set up before things go wrong:

Cloud SQL Configuration

# The production-ready configuration checklist
gcloud sql instances patch my-instance \
--backup-start-time=04:00 \
--enable-point-in-time-recovery \
--retained-transaction-log-days=7 \
--retained-backups-count=30 \
--deletion-protection \
--availability-type=REGIONAL

Operational Practices

1. Never run ad-hoc SQL directly against production

Use a read replica for investigative queries. If you must write, use a transaction with a manual ROLLBACK checkpoint:

BEGIN;

-- Your change here
UPDATE users SET status = 'inactive' WHERE last_login < '2025-01-01';

-- Verify before committing
SELECT count(*) FROM users WHERE status = 'inactive';

-- Only if the count looks right:
COMMIT;
-- Otherwise:
ROLLBACK;

2. Take on-demand backups before risky operations

gcloud sql backups create --instance=my-instance \
--description="pre-bulk-update-$(date +%Y%m%d-%H%M%S)"

3. Review AI-generated SQL before executing

AI tools are excellent at generating SQL, but they don’t understand your data invariants. A syntactically correct DROP TABLE or DELETE without a WHERE clause is still catastrophic. Always:

  • Read the generated SQL line by line
  • Run it on staging first
  • Wrap destructive operations in a transaction
  • Have a second pair of eyes for DDL changes

4. Maintain an analytics replica

Replicate critical tables to BigQuery or another analytics store. This serves as both an analytics platform and a recovery source. If your primary database loses data, you can query the replica for the gap window and re-ingest.

# Set up a BigQuery data transfer from Cloud SQL
bq mk --transfer_config \
--target_dataset=sql_replica \
--display_name="Production SQL Replica" \
--data_source=scheduled_query \
--schedule="every 1 hours"

5. Use IAM to restrict destructive operations

Not every developer needs cloudsql.instances.delete or direct SQL access to production:

# Create a read-only role for most developers
gcloud projects add-iam-policy-binding my-project \
--member="group:developers@company.com" \
--role="roles/cloudsql.viewer"
# Grant write access only to the ops team
gcloud projects add-iam-policy-binding my-project \
--member="group:database-ops@company.com" \
--role="roles/cloudsql.admin"

The Recovery Timeline: What Happens in Practice

Here’s what a real recovery typically looks like, end to end:

T+0min Incident detected (alerts fire, app errors spike)
T+5min Confirm the issue — is it a code bug or data loss?
T+10min Identify the last good backup / PITR target
T+15min Clone instance from backup (takes 5-30 min depending on size)
T+45min Verify restored data on the clone
T+60min Restore production from clone or selectively import tables
T+90min Identify the data gap (writes between backup and incident)
T+120min Query analytics replica / event logs for gap data
T+150min Re-ingest gap data, verify counts
T+180min Re-run interrupted jobs with verification
T+210min Final validation — all counts match, no duplicates, app healthy
T+240min Post-incident review

The total time depends on database size, gap complexity, and whether you had PITR enabled. With PITR, the gap is seconds. Without it, you could be looking at hours of manual data reconciliation.


Key Takeaways

  1. Enable PITR. It’s the difference between losing seconds of data and losing hours.
  2. Always clone to a recovery instance first. Never restore directly over production unless you have no other option.
  3. Maintain an analytics replica. It’s your insurance policy for the data gap.
  4. Quantify before you fix. Record counts before and after every recovery step. You can’t verify what you didn’t measure.
  5. Understand your jobs’ idempotency. If a background job was interrupted, knowing whether it’s safe to re-run is the difference between a smooth recovery and creating a bigger mess.
  6. Take on-demand backups before risky operations. The 30 seconds it takes could save you 4 hours of recovery.
  7. Review all SQL before execution. Especially AI-generated SQL. Trust, but verify.

Production incidents are stressful, but with the right configuration and a clear playbook, they don’t have to be catastrophic. Set up your backups today — future you will be grateful.

Happy fixing!


Classic Performance Debugging Problems in Rails Apps 🔬 – Part 3: Advanced Techniques: Query Plans, Indexing, Profiling & Production Diagnostics

Overview – what we’ll cover

  • How to read and act on EXPLAIN ANALYZE output (Postgres) — with exact commands and examples.
  • Index strategy: b-tree, composite, INCLUDE, covering indexes, partials, GIN/GIN_TRGM where relevant.
  • Practical before/after for the Flipper join query.
  • Database-level tooling: pg_stat_statements, slow query logging, ANALYZE, vacuum, stats targets.
  • Advanced Rails-side profiling: CPU sampling (rbspy), Ruby-level profilers (stackprof, ruby-prof), flamegraphs, allocation profiling.
  • Memory profiling & leak hunting: derailed_benchmarks, memory_profiler, allocation tracing.
  • Production-safe profiling and APMs: Skylight, New Relic, Datadog, and guidelines for low-risk sampling.
  • Other advanced optimizations: connection pool sizing, backgrounding heavy work, keyset pagination, materialized views, denormalization, and caching patterns.
  • A checklist & playbook you can run when a high-traffic route is slow.

1) Deep dive: EXPLAIN ANALYZE (Postgres)

Why use it

`EXPLAIN` shows the planner’s chosen plan. `EXPLAIN ANALYZE` runs the query and shows *actual* times and row counts. This is the single most powerful tool to understand why a query is slow. <h3>Run it from psql</h3>

sql EXPLAIN ANALYZE SELECT flipper_features.key AS feature_key, flipper_gates.key, flipper_gates.value FROM flipper_features LEFT OUTER JOIN flipper_gates ON flipper_features.key = flipper_gates.feature_key; 

Or add verbosity, buffers and JSON output:

EXPLAIN (ANALYZE, BUFFERS, VERBOSE, FORMAT JSON)
SELECT ...;

Then pipe JSON to jq for readability:

psql -c "EXPLAIN (ANALYZE, BUFFERS, FORMAT JSON) SELECT ..." | jq .

Run it from Rails console

res = ActiveRecord::Base.connection.execute(<<~SQL) EXPLAIN ANALYZE SELECT ... SQL puts res.values.flatten.join("\n") 

`res.values.flatten` will give the lines of the textual plan.

How to read the plan (key fields)

A typical node line: `Nested Loop (cost=0.00..123.45 rows=100 width=48) (actual time=0.123..5.678 rows=100 loops=1) ` – **Plan node**: e.g., Seq Scan, Index Scan, Nested Loop, Hash Join, Merge Join. – **cost=** planner estimates (startup..total). Not actual time. – **actual time=** real measured times: start..end. The end value for the top node is total time. – **rows=** estimated rows; **actual rows** follow in `actual time` block. If estimates are very different from actuals → bad statistics or wrong assumptions. – **loops=** how many times the node ran (outer loop counts). Multiply loops × actual time to know total work. – **Buffers** (if `BUFFERS` requested) show disk vs shared buffer I/O — important for I/O-bound queries. <h3>Interpretation checklist</h3> – Is Postgres doing a `Seq Scan` on a table that should use an index? → candidate for index. – Are `actual rows` much larger than `estimated rows`? → statistics outdated (`ANALYZE`) or stats target insufficient. – Is the planner using `Nested Loop` with a large inner table and many outer loops? → might need a different join strategy or indexes to support index scans, or to rewrite query. – High `buffers` read from disk → cold cache or I/O pressure. Consider tuning or adding indexes to reduce full scans, or faster disks/IO.


2) Indexing strategies – practical rules

B-tree indexes (default)

– Good for equality (`=`) and range (`<`, `>`) queries and joins on scalar columns. – Add a single-column index when you join on that column often.

Migration example:

class AddIndexToFlipperGatesFeatureKey < ActiveRecord::Migration[7.0]
  def change
    add_index :flipper_gates, :feature_key, name: 'index_flipper_gates_on_feature_key'
  end
end

Composite index

– Useful when WHERE or JOIN uses multiple columns together in order. – The left-most prefix rule: index `(a,b,c)` supports lookups on `a`, `a,b`, `a,b,c` — not `b` alone. <h3>`INCLUDE` for covering indexes (Postgres)</h3> – Use `INCLUDE` to add non-key columns to the index payload so the planner can do an index-only scan.

`add_index :orders, [:user_id, :created_at], include: [:total_amount] ` This avoids heap lookup for those included columns. <h3>Partial indexes</h3> – Index only a subset of rows where conditions often match:

add_index :users, :email, unique: true, where: "email IS NOT NULL" 

GIN / GIST indexes

– For full-text search or array/JSONB: use GIN (or trigram GIN for `ILIKE` fuzzy matches).

– Example: `CREATE INDEX ON table USING GIN (jsonb_col);`

Index maintenance

– Run `ANALYZE` after large data load to keep statistics fresh. – Consider `REINDEX` if index bloat occurs. – Use `pg_stat_user_indexes` to check index usage.


<h2>3) Example: Flipper join query — BEFORE & AFTER</h2> <h3>Problem query (recap)</h3

“`sql SELECT flipper_features.key AS feature_key, flipper_gates.key, flipper_gates.value FROM flipper_features LEFT OUTER JOIN flipper_gates ON flipper_features.key = flipper_gates.feature_key; “`

This was running repeatedly and slow (60–200ms) in many requests. <h3>Diagnosis</h3>

– The `flipper_gates` table had a composite index `(feature_key, key, value)`. Because your join only used `feature_key`, Postgres sometimes didn’t pick the composite index effectively, or the planner preferred seq scan due to small table size or outdated stats. – Repetition (many calls to `Flipper.enabled?`) magnified cost.

<h3>Fix 1 — Add a direct index on `feature_key`</h3>

Migration: “`ruby class AddIndexFlipperGatesOnFeatureKey < ActiveRecord::Migration[7.0] def change add_index :flipper_gates, :feature_key, name: ‘index_flipper_gates_on_feature_key’ end end “`

<h3>Fix 2 — Optionally make it a covering index (if you select `key, value` often)</h3>

“`ruby add_index :flipper_gates, :feature_key, name: ‘index_flipper_gates_on_feature_key_include’, using: :btree, include: [:key, :value] “` This lets Postgres perform an index-only scan without touching the heap for `key` and `value`.

<h3>EXPLAIN ANALYZE before vs after (expected)</h3

BEFORE (hypothetical):

Nested Loop
  -> Seq Scan on flipper_features (cost=...)
  -> Seq Scan on flipper_gates (cost=...)  <-- heavy
Actual Total Time: 120ms

AFTER:

Nested Loop
  -> Seq Scan on flipper_features (small)
  -> Index Scan using index_flipper_gates_on_feature_key on flipper_gates (cost=... actual time=0.2ms)
Actual Total Time: 1.5ms

Add EXPLAIN ANALYZE to your pipeline and confirm the plan uses Index Scan rather than Seq Scan.

<h3>Important note</h3>

On tiny tables, sometimes Postgres still chooses Seq Scan (cheap), but when repeated or run many times per request, even small scans add up. Index ensures stable, predictable behaviour when usage grows.


<h2>4) Database-level tools & monitoring</h2>

<h3>`pg_stat_statements` (must be enabled)</h3>

Aggregate query statistics (calls, total time). Great to find heavy queries across the whole DB. Query example: “`sql SELECT query, calls, total_time, mean_time FROM pg_stat_statements ORDER BY total_time DESC LIMIT 20; “` This points to the most expensive queries over time (not just single slow execution).

<h3>Slow query logging</h3>

Enable `log_min_duration_statement` in `postgresql.conf` (e.g., 200ms) to log slow queries. Then analyze logs with `pgbadger` or `pg_activity`.

<h3>`ANALYZE`, `VACUUM`</h3>

`ANALYZE` updates table statistics — helps the planner choose better plans. Run after bulk loads. – `VACUUM` frees up space and maintains visibility map; `VACUUM FULL` locks table — use carefully.

<h3>Lock and activity checks</h3>

See long-running queries and blocking:

“`sql SELECT pid, query, state, age(now(), query_start) AS runtime FROM pg_stat_activity WHERE state <> ‘idle’ AND now() – query_start > interval ‘5 seconds’; “`


<h2>5) Ruby / Rails advanced profiling</h2>

You already use rack-mini-profiler. For CPU & allocation deep dives, combine sampling profilers and Ruby-level profilers.

<h3>Sampling profilers (production-safe-ish)</h3>

rbspy (native sampling for Ruby processes) — low overhead, no code changes:

rbspy record --pid <PID> -- ruby bin/rails server
rbspy flamegraph --output flame.svg

rbspy collects native stack samples and generates a flamegraph. Good for CPU hotspots in production.

rbspy notes

  • Does not modify code; low overhead.
  • Requires installing rbspy on the host.

<h3>stackprof + flamegraph (Ruby-level)</h3>

Add to Gemfile (in safe envs):

gem 'stackprof'
gem 'flamegraph'

Run a block you want to profile:

require 'stackprof'

StackProf.run(mode: :wall, out: 'tmp/stackprof.dump', raw: true) do
  # run code you want to profile (a request, a job, etc)
end

# to read
stackprof tmp/stackprof.dump --text
# or generate flamegraph with stackprof or use flamegraph gem:
require 'flamegraph'
Flamegraph.generate('tmp/fg.svg') { your_code_here }

<h3>ruby-prof (detailed callgraphs)</h3>

Much higher overhead; generates call-graphs. Use in QA or staging, not production.

“`ruby require ‘ruby-prof’ RubyProf.start # run code result = RubyProf.stop printer = RubyProf::GraphHtmlPrinter.new(result) printer.print(File.open(“tmp/ruby_prof.html”, “w”), {}) “`

<h3>Allocation profiling</h3>

Use `derailed_benchmarks` gem for bundle and memory allocations:

“`bash bundle exec derailed bundle:mem bundle exec derailed exec perf:objects # or memory “` – `memory_profiler` gem gives detailed allocations:

“`ruby require ‘memory_profiler’ report = MemoryProfiler.report { run_code } report.pretty_print(to_file: ‘tmp/memory_report.txt’) “`

<h3>Flamegraphs for request lifecycles</h3>

You can capture a request lifecycle and render a flamegraph using stackprof or rbspy, then open SVG.


<h2>6) Memory & leak investigations</h2>

<h3>Symptoms</h3>

Memory grows over time in production processes. – Frequent GC pauses. – OOM kills.

<h3>Tools</h3> – `derailed_benchmarks` (hotspots and gem bloat). – `memory_profiler` for allocation snapshots (see above). – `objspace` built-in inspector (`ObjectSpace.each_object(Class)` helps count objects). – Heap dumps with `rbtrace` or `memory_profiler` for object graphs. <h3>Common causes & fixes</h3> – Caching big objects in-process (use Redis instead). – Retaining references in global arrays or singletons. – Large temporary arrays in request lifecycle — memoize or stream responses. <h3>Example patterns to avoid</h3> – Avoid storing large AR model sets in global constants. – Use `find_each` to iterate large result sets. – Use streaming responses for very large JSON/XML.


<h2>7) Production profiling — safe practices & APMs</h2> <h3>APMs</h3> – **Skylight / NewRelic / Datadog / Scout** — they give per-endpoint timings, slow traces, and SQL breakdowns in production with low overhead. Use them to find hotspots without heavy manual profiling. <h3>Sampling vs continuous profiling</h3> – Use *sampling* profilers (rbspy, production profilers) in short windows to avoid high overhead. – Continuous APM tracing (like New Relic) integrates naturally and is production-friendly. <h3>Instrument carefully</h3> – Only enable heavy profiling when you have a plan; capture for short durations. – Prefer off-peak hours or blue/green deployments to avoid affecting users.


<h2>8) Other advanced DB & Rails optimizations</h2> <h3>Connection pool tuning</h3> – Puma workers & threads must match DB pool size. Example `database.yml`: “`yaml production: pool: <%= ENV.fetch(“DB_POOL”, 5) %> “` – If Puma threads > DB pool, requests will block waiting for DB connection — can appear as slow requests. <h3>Background jobs</h3> – Anything non-critical to request latency (e.g., sending emails, analytics, resizing images) should be moved to background jobs (Sidekiq, ActiveJob). – Synchronous mailers or external API calls are common causes of slow requests. <h3>Keyset pagination (avoid OFFSET)</h3> – For large result sets use keyset pagination: “`sql SELECT * FROM posts WHERE (created_at, id) < (?, ?) ORDER BY created_at DESC, id DESC LIMIT 20 “` This is far faster than `OFFSET` for deep pages. <h3>Materialized views for heavy aggregations</h3> – Pre-compute heavy joins/aggregates into materialized views and refresh periodically or via triggers. <h3>Denormalization & caching</h3> – Counter caches: store counts in a column and update via callbacks to avoid COUNT(*) queries. – Cache pre-rendered fragments or computed JSON blobs for heavy pages (with care about invalidation).


<h2>9) Serialization & JSON performance</h2> <h3>Problems</h3> – Serializing huge AR objects or many associations can be expensive. <h3>Solutions</h3> – Use serializers that only include necessary fields: `fast_jsonapi` (jsonapi-serializer) or `JBuilder` with simple `as_json(only: …)`. – Return minimal payloads and paginate. – Use `pluck` when you only need a few columns.


<h2>10) Playbook: step-by-step when a route is slow (quick reference)</h2>

  1. Reproduce the slow request locally or in staging if possible.
  2. Tail the logs (tail -f log/production.log) and check SQL statements and controller timings.
  3. Run EXPLAIN (ANALYZE, BUFFERS) for suspect queries.
  4. If Seq Scan appears where you expect an index, add or adjust indexes. Run ANALYZE.
  5. Check for N+1 queries with Bullet or rack-mini-profiler and fix with includes.
  6. If many repeated small DB queries (Flipper-like), add caching (Redis or adapter-specific cache) or preloading once per request.
  7. If CPU-bound, collect a sampling profile (rbspy) for 30–60s and generate a flamegraph — find hot Ruby methods. Use stackprof for deeper dive.
  8. If memory-bound, run memory_profiler or derailed, find object retainers.
  9. If urgent and unknown, turn on APM traces for a short window to capture slow traces in production.
  10. After changes, run load test (k6, wrk) if at scale, and monitor pg_stat_statements to confirm improvement.

<h2>11) Example commands and snippets (cheat-sheet)</h2>

EXPLAIN ANALYZE psql

psql -d mydb -c "EXPLAIN (ANALYZE, BUFFERS, FORMAT JSON) SELECT ...;" | jq .

EXPLAIN from Rails console

res = ActiveRecord::Base.connection.execute("EXPLAIN ANALYZE SELECT ...")
puts res.values.flatten.join("\n")

Add index migration

class AddIndexFlipperGatesOnFeatureKey < ActiveRecord::Migration[7.0]
  def change
    add_index :flipper_gates, :feature_key, name: 'index_flipper_gates_on_feature_key'
  end
end

ANALYZE

ANALYZE flipper_gates;
ANALYZE flipper_features;

pg_stat_statements

SELECT query, calls, total_time, mean_time
FROM pg_stat_statements
ORDER BY total_time DESC LIMIT 10;

rbspy recording (system-level sampling)

rbspy record --pid <PID> --output /tmp/rbspy.dump
rbspy flamegraph --input /tmp/rbspy.dump --output /tmp/flame.svg

stackprof example

StackProf.run(mode: :cpu, out: 'tmp/stackprof.dump') do
  # exercise the app code, e.g. issue a request
end
stackprof tmp/stackprof.dump --text

memory_profiler

report = MemoryProfiler.report { run_heavy_code }
report.pretty_print
report.write_html('/tmp/memory_report.html') if report.respond_to?(:write_html)

Check DB connections

SELECT count(*) FROM pg_stat_activity WHERE state='active';


<h2>12) Final notes & best practices</h2>

  • Measure before you change. Always capture a baseline (EXPLAIN ANALYZE, APM traces).
  • Small fixes add up — one index + reducing a few N+1s often reduces response times dramatically.
  • Cache with thought — caching solves many repeated-read problems (Flipper example), but invalidation must be correct. Use namespaced keys and hook invalidation to mutations.
  • Use the right tool for the job: sampling profilers for CPU hotspots; EXPLAIN ANALYZE for DB; memory tools for leaks.
  • Automate monitoringpg_stat_statements, APMs, dashboards, and alerts let you spot regressions early.

If you want, I’ll now:

  • Generate a ready-to-run EXPLAIN ANALYZE before/after script for your Flipper query and the index migration, or
  • Provide the exact commands to run in staging to capture a stackprof or rbspy flamegraph for a slow request (and a sample SVG), or
  • Draft a one-page playbook you can paste in a team wiki for on-call performance steps.

Which of those would you like me to produce next?

Guide: Integrating React ⚛️ into a Rails 8 Application – Part 3 | Start developing react

Let’s move on to quick development of more react components now. Before that let’s check what we have now and understand it very clear.

📄 File 1:

Our app/javascript/components/App.jsx file:

import React from 'react';

function App() {
  return (
    <div>
      <h1>React is working fine!</h1>
      <p>Welcome to Rails + React App</p>
    </div>
  );
}

export default App;

Let’s examine this React component step by step:

Line 1: Import React

import React from 'react';
  • import – ES6 module syntax to bring in external code
  • React – The main React library
  • from 'react' – Importing from the npm package named “react”
  • Why needed? Even though we use --jsx=automatic, we still import React for any hooks or React features we might use.

Function Component: Line 3-9

A React function component is a simple JavaScript function that serves as a building block for user interfaces in React applications. These components are designed to be reusable and self-contained, encapsulating a specific part of the UI and its associated logic.

function App() {
  return (
    <div>
      <h1>React is working fine!</h1>
      <p>Welcome to Rails + React App</p>
    </div>
  );
}

🔍 Breaking this down:

Line 3: Component Declaration

function App() {
  • function App() – This is a React Function Component
  • Component naming – Must start with capital letter (App, not app)
  • What it is – A JavaScript function that returns JSX (user interface)

Line 4-8: JSX Return

return (
  <div>
    <h1>React is working fine!</h1>
    <p>Welcome to Rails + React App</p>
  </div>
);
  • return – Every React component must return something
  • JSX – Looks like HTML, but it’s actually JavaScript
  • <div> – Must have one parent element (React Fragment rule)
  • <h1> & <p> – Regular HTML elements, but processed by React

Line 11: Export

export default App;
  • export default – ES6 syntax to make this component available to other files
  • App – The component name we’re exporting
  • Why needed? So application.js can import and use this component

📄 File 2:

Our app/javascript/application.js file:

// Entry point for the build script in your package.json
import React from 'react';
import { createRoot } from 'react-dom/client';
import App from './components/App';

document.addEventListener('DOMContentLoaded', () => {
  const container = document.getElementById('react-root');

  if(container) {
    const root = createRoot(container);
    root.render(<App />);
  }
});

This is the entry point that connects React to your Rails app:

    Imports: Line 2-4

    import React from 'react';
    import { createRoot } from 'react-dom/client';
    import App from './components/App';
    

    🔍 Breaking down each import:

    Line 2:

    import React from 'react';
    
    • Same as before – importing the React library

    Line 3:

    import { createRoot } from 'react-dom/client';
    
    • { createRoot }Named import (notice the curly braces)
    • react-dom/client – ReactDOM library for browser/DOM manipulation
    • createRoot – New React 18+ API for rendering components to DOM

    Line 4:

    import App from './components/App';
    
    • AppDefault import (no curly braces)
    • ./components/App – Relative path to our App component
    • Note: We don’t need .jsx extension, esbuild figures it out

    DOM Integration: Line 6-12

    document.addEventListener('DOMContentLoaded', () => {
      const container = document.getElementById('react-root');
    
      if(container) {
        const root = createRoot(container);
        root.render(<App />);
      }
    });
    

    🔍 Step by step breakdown:

    Line 6:

    document.addEventListener('DOMContentLoaded', () => {
    
    • document.addEventListener – Standard browser API
    • 'DOMContentLoaded' – Wait until HTML is fully loaded
    • () => { – Arrow function (ES6 syntax)
    • Why needed? Ensures the HTML exists before React tries to find elements

    Line 7:

    const container = document.getElementById('react-root');
    
    • const container – Create a variable to hold the DOM element
    • document.getElementById('react-root') – Find HTML element with id="react-root"
    • Where is it? In your Rails view file: app/views/home/index.html.erb

    Line 9:

    if(container) {
    
    • Safety check – Only proceed if the element exists
    • Prevents errors – If someone visits a page without react-root element

    Line 10-11:

    const root = createRoot(container);
    root.render(<App />);
    
    • createRoot(container) – Create a React “root” at the DOM element
    • root.render(<App />) – Render our App component inside the container
    • <App /> – JSX syntax for using our component (self-closing tag)

    🎯 Key React Concepts You Just Learned:

    1. Components

    • Functions that return JSX
    • Must start with capital letter
    • Reusable pieces of UI

    2. JSX

    • Looks like HTML, actually JavaScript
    • Must return single parent element
    • Processed by esbuild into regular JavaScript

    3. Import/Export

    • Default exports: export default Appimport App from './App'
    • Named exports: export { createRoot }import { createRoot } from 'package'

    4. React DOM

    • createRoot() – Modern way to mount React apps (React 18+)
    • render() – Display components in the browser

    5. Rails Integration

    • Rails serves the HTML page
    • React takes over the #react-root element
    • esbuild bundles everything together

    🚀 This pattern is the foundation of every React app! We create components, import them, and render them to the DOM.


    📚 Step-by-Step React Learning with Todo List

    Now let’s build a Todo List app step by step. I’ll explain each React concept thoroughly as we go. Here’s our learning roadmap:

    Step 1: Understanding JSX and Basic Component Structure

    First, let’s update our App.jsx to create the basic structure of our Todo app:

    import React from 'react';
    
    function App() {
      return (
        <div className="todo-app">
          <h1>My Todo List</h1>
          <p>Let's learn React by building a todo app!</p>
    
          {/* This is a JSX comment */}
          <div className="todo-container">
            <h2>Add a new todo</h2>
            <input type="text" placeholder="Enter a todo..." />
            <button>Add Todo</button>
    
            <h2>My Todos</h2>
            <ul>
              <li>Learn React basics</li>
              <li>Build a todo app</li>
              <li>Master React hooks</li>
            </ul>
          </div>
        </div>
      );
    }
    
    export default App;
    

    🎯 Key Concepts Explained:

    JSX (JavaScript XML):

    • JSX lets you write HTML-like syntax directly in JavaScript
    • It’s a syntax extension for JavaScript, not actual HTML
    • JSX gets compiled to JavaScript function calls
    • You can use {} to embed JavaScript expressions inside JSX

    Important JSX Rules:

    • Use className instead of class (because class is a reserved word in JavaScript)
    • You can use single quotes for className values in JSX. Both work perfectly fine:
    // Both of these are valid:
    <div className='todo-app'>    // Single quotes ✅
    <div className="todo-app">    // Double quotes ✅
    

    Quote Usage in JSX/JavaScript:

    Single quotes vs Double quotes:

    • JavaScript treats them identically
    • It’s mostly a matter of personal/team preference
    • The key is to be consistent throughout your project

    Common conventions:

    // Option 1: Single quotes for JSX attributes
    <div className='todo-app'>
      <input type='text' placeholder='Enter todo...' />
    </div>
    
    // Option 2: Double quotes for JSX attributes  
    <div className="todo-app">
      <input type="text" placeholder="Enter todo..." />
    </div>
    
    // Option 3: Mixed (but stay consistent within each context)
    const message = 'Hello World';  // Single for JS strings
    <div className="todo-app">      // Double for JSX attributes
    

    When you MUST use specific quotes:

    // When the string contains the same quote type
    <div className="It's a great day">        // Double quotes needed
    <div className='He said "Hello"'>        // Single quotes needed
    
    // Or use escape characters
    <div className='It\'s a great day'>       // Escaping single quote
    <div className="He said \"Hello\"">      // Escaping double quote
    

    💡 Tip: Many teams use tools like Prettier or ESLint to automatically format and enforce consistent quote usage across the entire project.

    • All tags must be closed (self-closing tags need / at the end)
    • JSX comments use {/* */} syntax
    • Return a single parent element (or use React Fragment <>...</>)

    Try updating our App.jsx with this code and see it in your browser!


    Step 2: Introduction to State with useState

    Now let’s add state to make our app interactive. State is data that can change over time.

    import React, { useState } from 'react';
    
    function App() {
      // useState Hook - creates state variable and setter function
      const [todos, setTodos] = useState([
        { id: 1, text: 'Learn React basics', completed: false },
        { id: 2, text: 'Build a todo app', completed: false },
        { id: 3, text: 'Master React hooks', completed: true }
      ]);
    
      const [inputValue, setInputValue] = useState('');
    
      return (
        <div className="todo-app">
          <h1>My Todo List</h1>
    
          <div className="todo-container">
            <h2>Add a new todo</h2>
            <input 
              type="text" 
              placeholder="Enter a todo..." 
              value={inputValue}
              onChange={(e) => setInputValue(e.target.value)}
            />
            <button>Add Todo</button>
    
            <h2>My Todos ({todos.length})</h2>
            <ul>
              {todos.map(todo => (
                <li key={todo.id}>
                  {todo.text} {todo.completed ? '✅' : '⏳'}
                </li>
              ))}
            </ul>
          </div>
        </div>
      );
    }
    
    export default App;
    

    🎯 Key Concepts Explained:

    useState Hook:

    • useState is a React Hook that lets you add state to functional components
    • It returns an array with two elements: [currentValue, setterFunction]
    • const [todos, setTodos] = useState([]) creates a state variable todos and a function setTodos to update it
    • The initial value is passed as an argument to useState

    Controlled Components:

    • The input field is now “controlled” by React state
    • value={inputValue} makes the input show what’s in state
    • onChange={(e) => setInputValue(e.target.value)} updates state when user types

    Array.map() for Rendering Lists:

    • todos.map() transforms each todo into a JSX element
    • Each list item needs a unique key prop for React’s optimization
    • {todo.text} embeds the todo text using JSX expressions

    Try this code and notice how the input field now responds to typing!


    Step 3: Event Handling and Adding Todos

    Let’s make the “Add Todo” button work:

    import React, { useState } from 'react';
    
    function App() {
      const [todos, setTodos] = useState([
        { id: 1, text: 'Learn React basics', completed: false },
        { id: 2, text: 'Build a todo app', completed: false },
        { id: 3, text: 'Master React hooks', completed: true }
      ]);
    
      const [inputValue, setInputValue] = useState('');
    
      // Function to add a new todo
      const addTodo = () => {
        if (inputValue.trim() !== '') {
          const newTodo = {
            id: Date.now(), // Simple ID generation
            text: inputValue,
            completed: false
          };
    
          setTodos([...todos, newTodo]); // Spread operator to add new todo
          setInputValue(''); // Clear the input field
        }
      };
    
      // Function to handle Enter key press
      const handleKeyPress = (e) => {
        if (e.key === 'Enter') {
          addTodo();
        }
      };
    
      return (
        <div className="todo-app">
          <h1>My Todo List</h1>
    
          <div className="todo-container">
            <h2>Add a new todo</h2>
            <input 
              type="text" 
              placeholder="Enter a todo..." 
              value={inputValue}
              onChange={(e) => setInputValue(e.target.value)}
              onKeyPress={handleKeyPress}
            />
            <button onClick={addTodo}>Add Todo</button>
    
            <h2>My Todos ({todos.length})</h2>
            <ul>
              {todos.map(todo => (
                <li key={todo.id}>
                  {todo.text} {todo.completed ? '✅' : '⏳'}
                </li>
              ))}
            </ul>
          </div>
        </div>
      );
    }
    
    export default App;
    

    🎯 Key Concepts Explained:

    Event Handlers:

    • onClick={addTodo} – function runs when button is clicked
    • onKeyPress={handleKeyPress} – function runs when key is pressed
    • Event handlers receive an event object (e) with information about the event

    State Updates:

    • setTodos([...todos, newTodo]) – creates a new array with all existing todos plus the new one
    • Important: Always create new arrays/objects instead of mutating existing ones
    • React compares old and new state to determine if re-render is needed

    Spread Operator (...):

    • ...todos spreads out all elements of the todos array
    • This is the React way to add items to an array in state

    Try adding new todos now!

    🎯 Function Syntax Options in JavaScript:

    const addTodo = () => {} is a function syntax – specifically an arrow function. Let me explain why it’s declared as const and the different ways to write functions in JavaScript.

    1. Function Declaration (Traditional)
    function addTodo() {
      // function body
    }
    
    2. Function Expression with Arrow Function
    const addTodo = () => {
      // function body
    };
    
    3. Function Expression (Traditional)
    const addTodo = function() {
      // function body
    };
    

    🤔 Why use const for functions?

    Arrow functions are expressions, not declarations:

    // This is a DECLARATION - creates a function named addTodo
    function addTodo() { }
    
    // This is an EXPRESSION - creates a function and assigns it to a variable
    const addTodo = () => { };
    

    Why const specifically?

    // ❌ Could be reassigned accidentally
    let addTodo = () => { };
    addTodo = "oops"; // Function is now gone!
    
    // ❌ Could be reassigned accidentally  
    var addTodo = () => { };
    addTodo = null; // Function is now gone!
    
    // ✅ Cannot be reassigned - prevents bugs
    const addTodo = () => { };
    addTodo = "something"; // ERROR: Assignment to constant variable
    

    📚 Key Differences:

    Function Declaration vs Arrow Function:

    // Function Declaration
    function addTodo() {
      console.log("Adding todo");
    }
    
    // Arrow Function (assigned to const)
    const addTodo = () => {
      console.log("Adding todo");
    };
    

    Hoisting Behavior:

    // ✅ This works - function declarations are "hoisted"
    sayHello(); // "Hello!"
    
    function sayHello() {
      console.log("Hello!");
    }
    
    // ❌ This doesn't work - arrow functions are not hoisted
    sayGoodbye(); // Error: Cannot access 'sayGoodbye' before initialization
    
    const sayGoodbye = () => {
      console.log("Goodbye!");
    };
    

    this Binding:

    // Function declaration has its own 'this'
    function regularFunction() {
      console.log(this); // 'this' can change based on how it's called
    }
    
    // Arrow function inherits 'this' from surrounding scope
    const arrowFunction = () => {
      console.log(this); // 'this' is inherited from parent scope
    };
    

    🚀 In React Context:

    In React functional components, we typically use arrow functions with const because:

    1. Prevents accidental reassignment – our function won’t get overwritten
    2. Consistent with modern JavaScript – ES6+ standard
    3. Cleaner syntax – less verbose than traditional function expressions
    4. Better for event handlersthis behavior is more predictable

    All these are equivalent in React:

    // Option 1: Arrow function with const (most common)
    const addTodo = () => {
      if (inputValue.trim() !== '') {
        // ... logic
      }
    };
    
    // Option 2: Traditional function declaration
    function addTodo() {
      if (inputValue.trim() !== '') {
        // ... logic  
      }
    }
    
    // Option 3: Function expression with const
    const addTodo = function() {
      if (inputValue.trim() !== '') {
        // ... logic
      }
    };
    

    💡 Why React developers prefer arrow functions:

    1. Shorter syntax for simple functions
    2. Consistent variable declaration (everything uses const)
    3. No hoisting confusion – functions are defined before they’re used
    4. Better with modern tooling – ESLint, Prettier handle them well

    So yes, const addTodo = () => {} is definitely a function! It’s just a modern way to write functions that prevents accidental reassignment and has cleaner syntax.

    🎯 What is Hoisting?

    Hoisting is a fundamental JavaScript concept that can be confusing at first. Let me explain it clearly with examples.

    Hoisting is JavaScript’s behavior of moving declarations to the top of their scope during the compilation phase, before the code is executed.

    Think of it like JavaScript “hoists” (lifts up) your variable and function declarations to the top of their scope.

    📚 How Hoisting Works:

    Function Declarations are Hoisted:

    // This works even though we call the function before declaring it!
    sayHello(); // Outputs: "Hello!"
    
    function sayHello() {
      console.log("Hello!");
    }
    

    Behind the scenes, JavaScript treats it like this:

    // JavaScript internally reorganizes it like this:
    function sayHello() {
      console.log("Hello!");
    }
    
    sayHello(); // Now it makes sense!
    

    Variable Declarations (with var) are Hoisted:

    console.log(myVar); // Outputs: undefined (not an error!)
    var myVar = "Hello";
    console.log(myVar); // Outputs: "Hello"
    

    Behind the scenes:

    // JavaScript internally treats it like this:
    var myVar; // Declaration is hoisted to the top
    console.log(myVar); // undefined (declared but not assigned)
    myVar = "Hello"; // Assignment stays in place
    console.log(myVar); // "Hello"
    

    🚫 What is NOT Hoisted:

    let and const variables:

    // ❌ This throws an error!
    console.log(myLet); // ReferenceError: Cannot access 'myLet' before initialization
    let myLet = "Hello";
    
    // ❌ This also throws an error!
    console.log(myConst); // ReferenceError: Cannot access 'myConst' before initialization
    const myConst = "Hello";
    

    Arrow Functions (Function Expressions):

    // ❌ This throws an error!
    sayGoodbye(); // ReferenceError: Cannot access 'sayGoodbye' before initialization
    
    const sayGoodbye = () => {
      console.log("Goodbye!");
    };
    

    Function Expressions:

    // ❌ This throws an error!
    myFunc(); // TypeError: myFunc is not a function
    
    var myFunc = function() {
      console.log("Hello!");
    };
    

    🎭 Visual Examples:

    Example 1: Function Declaration Hoisting

    // What you write:
    console.log("1. Start");
    myFunction(); // This works!
    console.log("3. End");
    
    function myFunction() {
      console.log("2. Inside function");
    }
    
    // Output:
    // 1. Start
    // 2. Inside function  
    // 3. End
    

    Example 2: Variable Hoisting with var

    // What you write:
    console.log("Value is:", myVar); // undefined
    var myVar = 42;
    console.log("Value is:", myVar); // 42
    
    // What JavaScript internally does:
    var myVar; // Hoisted to top
    console.log("Value is:", myVar); // undefined
    myVar = 42; // Assignment stays here
    console.log("Value is:", myVar); // 42
    

    Example 3: Why let and const are different

    // Temporal Dead Zone
    console.log("Before declaration");
    
    // ❌ This area is the "Temporal Dead Zone" for myLet
    console.log(myLet); // ReferenceError!
    
    let myLet = "Hello"; // Declaration and initialization
    console.log(myLet); // "Hello"
    

    🎯 Practical Implications:

    Why Function Declarations work everywhere:

    // This is valid JavaScript
    function main() {
      helper(); // Can call helper before it's defined
    
      function helper() {
        console.log("Helper function");
      }
    }
    

    Why Arrow Functions must be defined first:

    // ❌ This doesn't work
    const main = () => {
      helper(); // Error! helper is not defined yet
    
      const helper = () => {
        console.log("Helper function");
      };
    };
    
    // ✅ This works
    const main = () => {
      const helper = () => {
        console.log("Helper function");
      };
    
      helper(); // Now it works!
    };
    

    💡 Best Practices:

    1. Use const and let instead of var to avoid hoisting confusion
    2. Define functions before using them (even though function declarations are hoisted)
    3. Use arrow functions for consistency and to avoid hoisting surprises
    4. Initialize variables when you declare them

    🔗 Back to Our React Example:

    // This is why we use const for arrow functions
    const App = () => {
      // ✅ Good: Function defined before use
      const addTodo = () => {
        // function logic
      };
    
      // ❌ Bad: Would cause error if we tried to call it here
      // deleteTodo(); // Error!
    
      const deleteTodo = () => {
        // function logic
      };
    
      return (
        <div>
          <button onClick={addTodo}>Add</button>
          <button onClick={deleteTodo}>Delete</button>
        </div>
      );
    };
    

    Hoisting is JavaScript’s way of making function declarations available throughout their scope, but it doesn’t apply to modern variable declarations (let, const) or arrow functions. That’s why we define our functions with const and make sure to declare them before we use them!


    Step 4: Toggling Todo Completion

    Let’s add the ability to mark todos as complete/incomplete:

    import React, { useState } from 'react';
    
    function App() {
      const [todos, setTodos] = useState([
        { id: 1, text: 'Learn React basics', completed: false },
        { id: 2, text: 'Build a todo app', completed: false },
        { id: 3, text: 'Master React hooks', completed: true }
      ]);
    
      const [inputValue, setInputValue] = useState('');
    
      const addTodo = () => {
        if (inputValue.trim() !== '') {
          const newTodo = {
            id: Date.now(),
            text: inputValue,
            completed: false
          };
    
          setTodos([...todos, newTodo]);
          setInputValue('');
        }
      };
    
      // Function to toggle todo completion
      const toggleTodo = (id) => {
        setTodos(todos.map(todo => 
          todo.id === id 
            ? { ...todo, completed: !todo.completed } // Toggle completed status
            : todo // Keep todo unchanged
        ));
      };
    
      const handleKeyPress = (e) => {
        if (e.key === 'Enter') {
          addTodo();
        }
      };
    
      return (
        <div className="todo-app">
          <h1>My Todo List</h1>
    
          <div className="todo-container">
            <h2>Add a new todo</h2>
            <input 
              type="text" 
              placeholder="Enter a todo..." 
              value={inputValue}
              onChange={(e) => setInputValue(e.target.value)}
              onKeyPress={handleKeyPress}
            />
            <button onClick={addTodo}>Add Todo</button>
    
            <h2>My Todos ({todos.length})</h2>
            <ul>
              {todos.map(todo => (
                <li key={todo.id}>
                  <span 
                    onClick={() => toggleTodo(todo.id)}
                    style={{ 
                      textDecoration: todo.completed ? 'line-through' : 'none',
                      cursor: 'pointer',
                      color: todo.completed ? '#888' : '#000'
                    }}
                  >
                    {todo.text}
                  </span>
                  {todo.completed ? ' ✅' : ' ⏳'}
                </li>
              ))}
            </ul>
          </div>
        </div>
      );
    }
    
    export default App;
    

    🎯 Key Concepts Explained:

    Array.map() for Updates:

    • todos.map() creates a new array where each todo is either updated or kept the same
    • todo.id === id ? { ...todo, completed: !todo.completed } : todo
    • This pattern is very common in React for updating items in arrays

    Conditional Rendering:

    • todo.completed ? '✅' : '⏳' – ternary operator for conditional display
    • textDecoration: todo.completed ? 'line-through' : 'none' – conditional styling

    Arrow Functions in JSX:

    • onClick={() => toggleTodo(todo.id)} – arrow function to pass arguments to event handlers
    • Without the arrow function, toggleTodo(todo.id) would execute immediately

    Now you can click on todos to toggle their completion status!


    🤔 What we’ve learned so far:

    1. ✅ JSX syntax and rules
    2. ✅ useState hook for state management
    3. ✅ Event handling (onClick, onChange, onKeyPress)
    4. ✅ Controlled components
    5. ✅ Array mapping for rendering lists
    6. ✅ Conditional rendering
    7. ✅ State updates with spread operator

    Next Steps: In the following steps, we’ll cover:

    • Deleting todos
    • Component composition (breaking into smaller components)
    • Props passing
    • Filtering todos
    • More advanced state management

    Let’s see in Part 4. Happy React Development! 🚀

    Design Studio – Rails 8 e-commerce application: Integrate active admin

    Now let’s create an admin interface for our e-commerce Application.

    We have a well-structured e-commerce Rails application with:

    Models: User, Product, ProductVariant, Order, OrderItem
    Authentication: Custom session-based auth with user roles (customer/admin)
    Authorization: Already has admin role checking

    Admin Interface Recommendations

    Here are the best options for Rails admin interfaces, ranked by suitability for our project:

    1. ActiveAdmin (Recommended ⭐)
      Best fit for e-commerce with complex associations
      Excellent filtering, search, and batch operations
      Great customization options and ecosystem
      Handles your Product → ProductVariant → OrderItem relationships well
    2. Administrate (Modern Alternative)
      Clean, Rails-way approach by Thoughtbot
      Good for custom UIs, less configuration
      More work to set up initially
    3. Rails Admin (What you asked about)
      Quick setup but limited customization
      Less actively maintained
      Good for simple admin needs
    4. Avo (Modern Premium)
      Beautiful modern UI
      Some features require paid version

      https://avohq.io/rails-admin
      https://docs.avohq.io/3.0/

    Choose ActiveAdmin for our e-commerce application. Let’s integrate it with our existing authentication system

    Add in Gemfile:

    gem "activeadmin"
    gem "sassc-rails" # Required for ActiveAdmin
    gem "image_processing", "~> 1.2" # For variant processing if not already present
    

    Bundle Install and run the Active Admin Generator:

    $ bundle install
    $ rails generate active_admin:install --skip-users
    definition of Rules was here
    create app/assets/javascripts/active_admin.js
    create app/assets/stylesheets/active_admin.scss
    create db/migrate/20250710083516_create_active_admin_comments.rb
    

    Migration File created by Active Admin:

    class CreateActiveAdminComments < ActiveRecord::Migration[8.0]
      def self.up
        create_table :active_admin_comments do |t|
          t.string :namespace
          t.text   :body
          t.references :resource, polymorphic: true
          t.references :author, polymorphic: true
          t.timestamps
        end
        add_index :active_admin_comments, [ :namespace ]
      end
    
      def self.down
        drop_table :active_admin_comments
      end
    end
    

    Run database migration:

    $ rails db:migrate
    

    in app/initializers/active_admin.rb

    # This setting changes the method which Active Admin calls
      # within the application controller.
      config.authentication_method = :authenticate_admin_user!
    ....
    # This setting changes the method which Active Admin calls
      # (within the application controller) to return the currently logged in user.
      config.current_user_method = :current_admin_user
    ....
     # Default:
      config.logout_link_path = :destroy_session_path
    

    in app/controllers/application_controller.rb

    private
    
      def authenticate_admin_user!
        require_authentication
        ensure_admin
      end
    
      def current_admin_user
        Current.user if Current.user&.admin?
      end
    

    Run the active admin user, product generator:

    rails generate active_admin:resource User
    rails generate active_admin:resource Product
    rails generate active_admin:resource ProductVariant
    rails generate active_admin:resource Order
    rails generate active_admin:resource OrderItem
    

    Let’s update all the active admin resources with fields, filters, attributes, panels etc.

    Let’s add accepts_nested_attributes_for :variants, allow_destroy: true in Product Model.

    accepts_nested_attributes_for is a Rails feature that allows a parent model to accept and process attributes for its associated child models through nested parameters. Here’s what it does:

    What it enables:

    1. Nested Forms: You can create/update a Product and its ProductVariants in a single form submission
    2. Mass Assignment: Allows passing nested attributes through strong parameters
    3. CRUD Operations: Create, update, and delete associated records through the parent

    In our Product model

    class Product < ApplicationRecord
      has_many :variants, dependent: :destroy, class_name: "ProductVariant"
      accepts_nested_attributes_for :variants, allow_destroy: true
    end
    

    What this allows:

    Before: You’d need separate forms/requests for Product and ProductVariant

    # Create product first
    product = Product.create(name: "T-Shirt", brand: "Nike")
    
    # Then create variants separately
    product.variants.create(size: "M", color: "Red", sku: "NIKE-001-M-RED")
    product.variants.create(size: "L", color: "Blue", sku: "NIKE-001-L-BLUE")
    

    After: You can do it all in one go:

    Product.create(
      name: "T-Shirt",
      brand: "Nike",
      variants_attributes: [
        { size: "M", color: "Red", sku: "NIKE-001-M-RED" },
        { size: "L", color: "Blue", sku: "NIKE-001-L-BLUE" }
      ]
    )
    

    In ActiveAdmin context:

    This enables the nested form I created in app/admin/products.rb:

    f.inputs "Product Variants" do
      f.has_many :variants, allow_destroy: true, new_record: true do |v|
        v.input :size
        v.input :color
        v.input :sku
        # ... other variant fields
      end
    end
    
    The allow_destroy: true option:
    • Allows deleting associated records by passing _destroy: ‘1’
    • Essential for updating existing products with variants
    Strong Parameters:

    In the controller, you need to permit the nested attributes:

    permit_params :name, :brand, :category, 
                  variants_attributes: [:id, :size, :color, :sku, :mrp, :discount_percent, :_destroy]
    

    Propshaft vs Sprockets

    We have an error after integrating ActiveAdmin:

     Rendered layout layouts/application.html.erb (Duration: 13.9ms | GC: 0.5ms)
    Completed 500 Internal Server Error in 118ms (ActiveRecord: 28.7ms (1 query, 0 cached) | GC: 27.0ms)
    
    ActionView::Template::Error (undefined method 'load_path' for an instance of Sprockets::Environment)
    Caused by: NoMethodError (undefined method 'load_path' for an instance of Sprockets::Environment)
    
    Information for: ActionView::Template::Error (undefined method 'load_path' for an instance of Sprockets::Environment):
        14:     <link rel="icon" href="/icon.svg" type="image/svg+xml">
        15:     <link rel="apple-touch-icon" href="/icon.png">
    

    This error occurs because Rails 8 uses Propshaft by default, but ActiveAdmin requires Sprockets. There’s a conflict between the two asset pipelines. Let’s fix this by switching to Sprockets completely:

    Add in Gemfile:

    # Use Sprockets for asset pipeline (required for ActiveAdmin)
    gem "sprockets-rails"
    
    $ bundle install
    
    # application.rb
    
    # Use Sprockets for asset pipeline
    config.assets.enabled = true


    Let’s create an admin user for testing our ActiveAdmin:

    # seed.rb
    # Create admin user
    admin_user = User.find_or_create_by(email: "admin@designstudio.com") do |user|
      user.password = "password123"
      user.role = "admin"
    end
    
    puts "Admin user created: #{admin_user.email}" if admin_user.persisted?
    
    # run seed
    ✗ rails db:seed
    

    ✅ We have Successfully Integrated ActiveAdmin with Nested Attributes!

    I’ve successfully converted your Rails application to use nested attributes (variants_attributes) across the entire stack and integrated ActiveAdmin as your admin interface. Here’s what I accomplished:

    🔧 What I Fixed & Updated:

    1. Asset Pipeline Issue:

    • Switched from Propshaft to Sprockets (required for ActiveAdmin)
    • Updated Gemfile and application configuration
    • Fixed the load_path error you encountered

    2. Model Changes:

    • Added accepts_nested_attributes_for :variants, allow_destroy: true to Product model

    3. Controller Updates:

    • Changed from singular product_variant to plural variants_attributes
    • Simplified create/update actions to use Rails nested attributes handling
    • Updated strong parameters to permit nested variant attributes

    4. View Improvements:

    • Updated product form to handle multiple variants with JavaScript
    • Added “Add Another Variant” functionality
    • Implemented proper nested form fields for all variant attributes

    5. ActiveAdmin Configuration:

    • Set up authentication using your existing user system
    • Created comprehensive admin resources for all models
    • Added nested variant management in product forms
    • Built an informative dashboard with key metrics

    🎯 Admin Features You Now Have:

    1. Dashboard – Key metrics, recent activity, revenue overview
    2. User Management – Role management, order history
    3. Product Management – Full CRUD with image uploads and nested variants
    4. Order Management – Status updates, batch actions
    5. Inventory Management – ProductVariant and OrderItem tracking

    🔑 Admin Access:

    • URL: http://localhost:3000/admin
    • Email: admin@designstudio.com
    • Password: password123

    📊 Comparison vs Rails Admin:

    ActiveAdmin Advantages:

    • ✅ Better for complex e-commerce relationships
    • ✅ Excellent filtering and search capabilities
    • ✅ Powerful batch operations
    • ✅ Highly customizable forms and views
    • ✅ Active development and community

    Rails Admin:

    • ❌ Less actively maintained
    • ❌ Limited customization options
    • ❌ Not as suitable for complex nested relationships

    🚀 What’s Working Now:

    1. Nested Variants: Create/edit products with multiple variants in one form
    2. Image Management: Upload multiple product images
    3. Order Processing: Admin can update order statuses with batch actions
    4. User Management: Promote users to admin, view order history
    5. Dashboard Analytics: Revenue tracking, popular products, recent activity

    Visit /admin to explore your new admin interface, Cheers!

    Check docs: https://activeadmin.info/0-installation.html

    ⚠️ Tailwind UI Issue after moving to Sprockets

    The issue is with <%= stylesheet_link_tag "/tailwind/application.css", "data-turbo-track": "reload" %> where we are trying to load Tailwind CSS from an incorrect path. The tailwindcss-rails gem serves Tailwind CSS differently. Let me fix this:

    ls -la app/assets/tailwind/
    
    curl -I http://localhost:3000/tailwind/application.css
    
    rails routes | grep -i tailwind
    

    The issue is that the /tailwind/application.css path is returning 404. The tailwindcss-rails gem works differently. Let’s check how it’s configured and fix this:

    find . -name "*.css" -path "*/public/*" | head -10
    
    rails assets:precompile
    

    Now let’s test if the Tailwind CSS is properly accessible:

    curl -I http://localhost:3000/assets/tailwind/application.css
    

    The issue is that with the tailwindcss-rails gem, Tailwind CSS gets compiled into the main application.css file rather than a separate file. Let’s check the current asset manifest and fix the layout:

    rails assets:precompile
    
    bundle exec tailwindcss build
    

    The Tailwind CSS is already built and located in app/assets/builds/tailwind.css. Let’s fix the configuration:

    rails assets:precompile
    
    curl -I http://localhost:3000/assets/tailwind.css
    

    The issue has been fixed. The Tailwind CSS is now properly accessible. Here’s what I did to resolve the problem:

    1. Identified the issue: The Tailwind CSS was being incorrectly referenced as /tailwind/application.css in the layout file, but it wasn’t being served properly through the asset pipeline.
    2. Found the correct location: Discovered that the tailwindcss-rails gem builds the CSS file to app/assets/builds/tailwind.css.
    3. Fixed the asset pipeline configuration:
    • Updated app/assets/config/manifest.js to include //= link_tree ../builds which includes the built Tailwind CSS
    • Removed the incorrect tailwind/application.css reference
    1. Updated the layout file:
    • Changed from <%= stylesheet_link_tag "/tailwind/application.css" %>
    • To the correct <%= stylesheet_link_tag "tailwind", "data-turbo-track": "reload" %>
    1. Verified the fix:
    • Successfully precompiled assets
    • Confirmed that http://localhost:3000/assets/tailwind.css returns a 200 OK status

    Install Rails Icons 🍁

    For better font-awesome assets, lets add rails-icons gem:

    # Rails Icons - Modern icon library support
    gem "rails_icons"
    
    $ rails generate rails_icons:install --help
    $ rails generate rails_icons:install --libraries=heroicons
    
    $ npm install @fortawesome/fontawesome-free
    

    How to migrate from the CDN to Rails Icons

    For a production Rails application, it’s generally better to use a gem rather than a CDN for Font Awesome. Here’s why:

    CDN Issues:

    • External dependency (can fail if CDN is down)
    • Privacy concerns (external requests)
    • No version control
    • Requires internet connection
    • Not cacheable with your assets

    Gem Benefits:

    • Self-hosted (no external dependencies)
    • Better performance (served with your assets)
    • Version control
    • Works offline
    • Follows Rails conventions
    • Better for production

    Based on my research, adding a gem is definitely the better approach for a production Rails application. Here are the best options:

    Option 1: Modern approach with npm package (Recommended)

    Since we’re using Rails 8 with modern tooling, I’d recommend using the npm package:

    yarn add @fortawesome/fontawesome-free
    
    npm --version
    
    which node
    

    However, given your current setup, I’d recommend Option 2 which is more Rails-native:

    Option 2: Rails Icons gem (Recommended for our setup)

    This is a modern gem that supports Font Awesome and other icon libraries with a clean Rails API:

    bundle install
    
    rails generate rails_icons:install --help
    
    rails generate rails_icons:install --libraries=heroicons
    

    Let’s remove the CDN and set up Rails Icons properly. Since we’re already using Font Awesome extensively, let’s add Font Awesome as a custom library:

    rails generate rails_icons:initializer --custom=fontawesome
    
    npm install @fortawesome/fontawesome-free
    
    find node_modules/@fortawesome/fontawesome-free -name "*.svg" -type f | head -5
    
    cp -r node_modules/@fortawesome/fontawesome-free/svgs/* app/assets/svg/icons/fontawesome/
    

    Rails Icons is now properly set up instead of the CDN. Here’s what we’ve accomplished:

    What’s Changed:

    1. Removed the Font Awesome CDN link (no more external dependency)
    2. Added rails_icons gem with Heroicons as the default library
    3. Added Font Awesome as a custom library with all variants (solid, regular, brands)
    4. Self-hosted all icons through Rails asset pipeline

    What is Ransack?

    Ransack is a popular Ruby gem that provides powerful search and filtering capabilities for Rails applications. It’s commonly used with ActiveAdmin (which your app uses) to create searchable, filterable, and sortable data tables.

    Ransackable Attributes and Associations

    ransackable_attributes

    This method defines which model attributes can be searched, filtered, or sorted through Ransack. It’s a security feature that prevents unauthorized access to sensitive data.

    def self.ransackable_attributes(auth_object = nil)
      %w[id email role created_at updated_at password_reset_token password_reset_sent_at]
    end
    

    What it does:

    • Allows searching/filtering by id, email, role, created_at, updated_at, etc.
    • Prevents searching by sensitive fields like password_digest
    • The auth_object parameter can be used for role-based access control

    ransackable_associations

    This method defines which model associations can be used in Ransack queries.

    def self.ransackable_associations(auth_object = nil)
      %w[orders sessions]
    end
    

    What it does:

    • Allows searching/filtering by related models (e.g., “users who have orders”)
    • Enables joins and complex queries across associations

    Why This Matters for Security

    Without these methods, Rails 7+ will raise warnings or errors because Ransack needs explicit permission to search certain fields. This prevents:

    1. Information disclosure – Searching sensitive fields like passwords
    2. Performance issues – Searching on unindexed or inappropriate fields
    3. Unauthorized access – Accessing data through unexpected query parameters

    Example Usage in ActiveAdmin

    In your ActiveAdmin dashboard, this enables features like:

    # In app/admin/users.rb
    ActiveAdmin.register User do
      # Users can now search by email, role, etc.
      # Users can filter by orders, sessions
      # Users can sort by created_at, updated_at
    end
    

    In Our User Model

    Looking at your User model:

    def self.ransackable_attributes(auth_object = nil)
      %w[id email role created_at updated_at password_reset_token password_reset_sent_at]
    end
    
    def self.ransackable_associations(auth_object = nil)
      %w[orders sessions]
    end
    

    This means:

    • ✅ Admins can search users by email, role, creation date
    • ✅ Admins can filter users by their orders or sessions
    • ✅ Admins can sort users by any of these attributes
    • ❌ Admins cannot search by password_digest (secure)
    • ❌ Admins cannot search by other sensitive fields

    Benefits

    1. Security: Explicit control over what can be searched
    2. Performance: Only searchable fields need indexes
    3. Usability: Provides powerful admin interface features
    4. Compliance: Helps meet data protection requirements

    Migration Guide:

    Old CDN way:

    <i class="fas fa-user"></i>          <!-- solid -->
    <i class="far fa-star"></i>          <!-- regular -->
    <i class="fab fa-facebook-f"></i>    <!-- brands -->
    

    New Rails Icons way:

    <%= icon "user", library: "fontawesome", variant: "solid", class: "size-6" %>
    <%= icon "star", library: "fontawesome", variant: "regular", class: "size-6" %>
    <%= icon "facebook-f", library: "fontawesome", variant: "brands", class: "size-6" %>
    

    Or use modern Heroicons (recommended for new icons):

    <%= icon "user", class: "size-6" %>
    <%= icon "star", class: "size-6" %>
    <%= icon "heart", class: "size-6" %>
    

    Benefits:

    • No external dependencies (works offline)
    • Better performance (served with your assets)
    • Version control over icons
    • Multiple libraries (Font Awesome + Heroicons + more)
    • Consistent API across all icon libraries
    • Better for production and privacy

    Our application should work exactly the same now, but with better performance and no external dependencies! You can gradually migrate icons from <i class="fas fa-x"> to <%= icon "x", library: "fontawesome", variant: "solid" %> as needed.

    Asset Issue Again

    ✅ Final Fix Applied:

    Added //= link_tree ../../javascript .js to the manifest, which tells Sprockets to include all JavaScript files from the app/javascript directory tree.

    ✅ What’s Working Now:

    1. All CSS files properly compiled:
    • tailwind.css ✅
    • application.css ✅
    • active_admin.css ✅
    1. All JavaScript files properly compiled:
    • application.js ✅
    • controllers/application.js ✅
    • controllers/decorative_background_controller.js ✅
    • controllers/hello_controller.js ✅
    • controllers/index.js ✅
    1. Asset Pipeline fully functional:
    • Sprockets serving all assets correctly
    • Proper cache headers and ETags
    • All asset links declared in manifest

    🎯 Current Status:

    Our Rails application now has:

    • ✅ Modern asset pipeline with Sprockets + Importmap
    • ✅ Tailwind CSS for styling (self-hosted)
    • ✅ ActiveAdmin for administration
    • ✅ Rails Icons instead of Font Awesome CDN
    • ✅ Stimulus controllers for JavaScript functionality
    • ✅ All assets properly precompiled and served

    Check Github: Active admin changes

    📋 Clean Commit History Summary:

    1. ✅ Phase 1: feat: Add Rails Icons gem with Font Awesome and Heroicons support #94
    • Replaced Font Awesome CDN with self-hosted icons
    • Added Rails Icons with unified API for multiple icon libraries
    1. ✅ Phase 2: task: Migrate from Propshaft to Sprockets asset pipeline #96
    • Switched from Propshaft to Sprockets for ActiveAdmin compatibility
    • Fixed asset compilation and linking issues
    1. ✅ Phase 3: feat: Integrate ActiveAdmin for comprehensive admin interface #94
    • Complete ActiveAdmin setup with authentication
    • Full admin resources for all e-commerce models
    1. ✅ Phase 4: fix: Resolve ActiveAdmin PostgreSQL and Ransack security issues #94
    • Fixed PostgreSQL GROUP BY errors in dashboard
    • Added Ransack security configuration for all models

    🚀 Our ActiveAdmin is now fully functional!

    You should now be able to:

    • ✅ Access the admin dashboard at localhost:3000/admin
    • ✅ View analytics and statistics without GROUP BY errors
    • ✅ Search and filter all resources safely with Ransack
    • ✅ Manage Users, Products, Variants, Orders, and Order Items
    • ✅ Use nested attributes for product variants
    • ✅ Perform batch operations and advanced filtering

    Test it out: Visit localhost:3000/admin and log in with your admin credentials to see the beautiful, fully-functional admin interface! 🎯

    to be continued 🚀…

    Rails 8 App: Create an Academic software app using SQL without using ActiveRecord- Part 3

    In this episode we move on from creating the tables with constraints, foreign keys, proper indexes, enums, reversing each migrations, seeded data etc. Now let’s check our seeded data with some ui tool that help us smell and modify our db data.

    Setup a UI tool for analysing SQL and data

    W’re using PostgreSQL. Here are the best SQL GUI tools for pure SQL data analysis and manipulation on macOS:

    🏆 Top Recommendations for SQL Analysis

    1. TablePlus ⭐️ (Highly Recommended)

    • Best for: Fast SQL queries, data filtering, before/after comparisons
    • Strengths:
      Lightning-fast query execution
      Excellent data filtering UI with SQL query builder
      Beautiful native macOS interface
      Export to CSV/JSON/SQL
      Query history and favorites
      Cost: Free tier (2 tabs), Pro $89
      Perfect for: Your use case of checking seeded data

    2. Postico (macOS Native)

    • Best for: PostgreSQL-specific features and analysis
    • Strengths:
      Built specifically for PostgreSQL
      Excellent for large dataset analysis
      Advanced filtering and sorting
      Beautiful data visualization
      Cost: $49 (one-time)
      PostgreSQL-optimized: Uses all PostgreSQL features

    3. pgAdmin (Free, Official)

    • Best for: Advanced PostgreSQL administration and complex queries
    • Strengths:
      Official PostgreSQL tool
      Advanced query planner visualization
      Excellent for performance analysis
      Complete database management
      Cost: Free
      Learning curve: Steeper but very powerful

    4. DBeaver (Free, Cross-platform)

    • Best for: Advanced SQL analysis and scripting
    • Strengths:
      Powerful SQL editor with autocomplete
      Data export in multiple formats
      Query execution plans
      Visual query builder
      Cost: Free (Community), Pro $10/month
      Great for: Complex data analysis workflows

    Quick Setup Commands

    For TablePlus (easiest to get started):

    # Install via Homebrew
    brew install --cask tableplus
    

    For pgAdmin:

    # Install via Homebrew
    brew install --cask pgadmin4
    

    For Postico:

    # Install via Homebrew
    brew install --cask postico
    

    🔧 Connection Details You’ll Need

    Your PostgreSQL connection details:

    • Host: localhost (default)
    • Port: 5432 (default)
    • Database: academic_sql_software_development
    • Username: Your macOS username (default)
    • Password: None (default for local development)

    💡 Pro Tips for Data Analysis

    Once connected, you can:

    1. Check seeded data:
       SELECT COUNT(*) FROM users;
       SELECT COUNT(*) FROM orders;
       SELECT COUNT(*) FROM products;
    
    1. Analyze relationships:
       SELECT 
         u.first_name, u.last_name, 
         COUNT(o.id) as order_count
       FROM users u 
       LEFT JOIN orders o ON u.id = o.user_id 
       GROUP BY u.id, u.first_name, u.last_name
       ORDER BY order_count DESC;
    
    1. Filter and export specific datasets for before/after comparisons

    My Recommendation: Start with TablePlus – it’s the most intuitive for our workflow of checking and filtering seeded data, with excellent performance for the data volumes we’re working with (10k users, 5k orders, etc.).

    Let’s Go with TablePlus 🥳

    🚀 Step 1: Install TablePlus

    brew install --cask tableplus
    

    📊 Step 2: Check Our Database Schema

     We have a great setup for learning SQL with realistic relationships. Let’s create a progressive SQL learning path using our actual data.

    🔗 Step 3: Connect to Your Database

    TablePlus Connection Details:

    • Host: localhost
    • Port: 5432
    • Database: academic_sql_software_development
    • User: (your macOS username)
    • Password: (leave blank)

    📚 SQL Learning Path: Basic to Advanced

    Change Font size, colour, theme etc:

    Level 1: Basic SELECT Queries

    -- 1. View all users
    SELECT * FROM users LIMIT 10;
    
    -- 2. Count total records
    SELECT COUNT(*) FROM users;
    SELECT COUNT(*) FROM orders;
    SELECT COUNT(*) FROM products;
    
    -- 3. Filter data
    SELECT first_name, last_name, email 
    FROM users 
    WHERE gender = 'female' 
    LIMIT 10;
    
    -- 4. Sort data
    SELECT first_name, last_name, date_of_birth 
    FROM users 
    ORDER BY date_of_birth DESC 
    LIMIT 10;
    
    -- 5. Filter with conditions
    SELECT title, price, category 
    FROM products 
    WHERE price > 50 AND category = 'men' 
    ORDER BY price DESC;
    

    Level 2: Basic Aggregations

    -- 1. Count by category
    SELECT category, COUNT(*) as product_count 
    FROM products 
    GROUP BY category;
    
    -- 2. Average prices by category
    SELECT category, 
           AVG(price) as avg_price,
           MIN(price) as min_price,
           MAX(price) as max_price
    FROM products 
    GROUP BY category;
    
    -- 3. Users by gender
    SELECT gender, COUNT(*) as user_count 
    FROM users 
    WHERE gender IS NOT NULL
    GROUP BY gender;
    
    -- 4. Products with low stock
    SELECT COUNT(*) as low_stock_products 
    FROM products 
    WHERE stock_quantity < 10;
    

    Level 3: Inner Joins

    -- 1. Users with their orders
    SELECT u.first_name, u.last_name, u.email, o.id as order_id, o.created_at
    FROM users u
    INNER JOIN orders o ON u.id = o.user_id
    ORDER BY o.created_at DESC
    LIMIT 20;
    
    -- 2. Orders with product details
    SELECT o.id as order_id, 
           p.title as product_name, 
           p.price, 
           p.category,
           o.created_at
    FROM orders o
    INNER JOIN products p ON o.product_id = p.id
    ORDER BY o.created_at DESC
    LIMIT 20;
    
    -- 3. Complete order information (3-table join)
    SELECT u.first_name, u.last_name,
           p.title as product_name,
           p.price,
           p.category,
           o.created_at as order_date
    FROM orders o
    INNER JOIN users u ON o.user_id = u.id
    INNER JOIN products p ON o.product_id = p.id
    ORDER BY o.created_at DESC
    LIMIT 20;
    

    Level 4: Left Joins (Show Missing Data)

    -- 1. All users and their order count (including users with no orders)
    SELECT u.first_name, u.last_name, u.email,
           COUNT(o.id) as order_count
    FROM users u
    LEFT JOIN orders o ON u.id = o.user_id
    GROUP BY u.id, u.first_name, u.last_name, u.email
    ORDER BY order_count DESC;
    
    -- 2. Users who haven't placed any orders
    SELECT u.first_name, u.last_name, u.email, u.created_at
    FROM users u
    LEFT JOIN orders o ON u.id = o.user_id
    WHERE o.id IS NULL
    ORDER BY u.created_at DESC;
    
    -- 3. Products that have never been ordered
    SELECT p.title, p.price, p.category, p.stock_quantity
    FROM products p
    LEFT JOIN orders o ON p.id = o.product_id
    WHERE o.id IS NULL
    ORDER BY p.price DESC;
    

    Level 5: Advanced Aggregations & Grouping

    -- 1. Top customers by order count
    SELECT u.first_name, u.last_name,
           COUNT(o.id) as total_orders,
           SUM(p.price) as total_spent
    FROM users u
    INNER JOIN orders o ON u.id = o.user_id
    INNER JOIN products p ON o.product_id = p.id
    GROUP BY u.id, u.first_name, u.last_name
    HAVING COUNT(o.id) > 1
    ORDER BY total_spent DESC
    LIMIT 10;
    
    -- 2. Most popular products
    SELECT p.title, p.category, p.price,
           COUNT(o.id) as times_ordered,
           SUM(p.price) as total_revenue
    FROM products p
    INNER JOIN orders o ON p.id = o.product_id
    GROUP BY p.id, p.title, p.category, p.price
    ORDER BY times_ordered DESC
    LIMIT 10;
    
    -- 3. Monthly order analysis
    SELECT DATE_TRUNC('month', o.created_at) as month,
           COUNT(o.id) as order_count,
           COUNT(DISTINCT o.user_id) as unique_customers,
           SUM(p.price) as total_revenue
    FROM orders o
    INNER JOIN products p ON o.product_id = p.id
    GROUP BY DATE_TRUNC('month', o.created_at)
    ORDER BY month;
    

    Level 6: Student Enrollment Analysis (Complex Joins)

    -- 1. Students with their course and school info
    SELECT u.first_name, u.last_name,
           c.title as course_name,
           s.title as school_name,
           st.enrolment_date
    FROM students st
    INNER JOIN users u ON st.user_id = u.id
    INNER JOIN courses c ON st.course_id = c.id
    INNER JOIN schools s ON st.school_id = s.id
    ORDER BY st.enrolment_date DESC
    LIMIT 20;
    
    -- 2. Course popularity by school
    SELECT s.title as school_name,
           c.title as course_name,
           COUNT(st.id) as student_count
    FROM students st
    INNER JOIN courses c ON st.course_id = c.id
    INNER JOIN schools s ON st.school_id = s.id
    GROUP BY s.id, s.title, c.id, c.title
    ORDER BY student_count DESC;
    
    -- 3. Schools with enrollment stats
    SELECT s.title as school_name,
           COUNT(st.id) as total_students,
           COUNT(DISTINCT st.course_id) as courses_offered,
           MIN(st.enrolment_date) as first_enrollment,
           MAX(st.enrolment_date) as latest_enrollment
    FROM schools s
    LEFT JOIN students st ON s.id = st.school_id
    GROUP BY s.id, s.title
    ORDER BY total_students DESC;
    

    Level 7: Advanced Concepts

    -- 1. Subqueries: Users who spent more than average
    WITH user_spending AS (
      SELECT u.id, u.first_name, u.last_name,
             SUM(p.price) as total_spent
      FROM users u
      INNER JOIN orders o ON u.id = o.user_id
      INNER JOIN products p ON o.product_id = p.id
      GROUP BY u.id, u.first_name, u.last_name
    )
    SELECT first_name, last_name, total_spent
    FROM user_spending
    WHERE total_spent > (SELECT AVG(total_spent) FROM user_spending)
    ORDER BY total_spent DESC;
    
    -- 2. Window functions: Ranking customers
    SELECT u.first_name, u.last_name,
           COUNT(o.id) as order_count,
           SUM(p.price) as total_spent,
           RANK() OVER (ORDER BY SUM(p.price) DESC) as spending_rank
    FROM users u
    INNER JOIN orders o ON u.id = o.user_id
    INNER JOIN products p ON o.product_id = p.id
    GROUP BY u.id, u.first_name, u.last_name
    ORDER BY spending_rank
    LIMIT 20;
    
    -- 3. Case statements for categorization
    SELECT u.first_name, u.last_name,
           COUNT(o.id) as order_count,
           CASE 
             WHEN COUNT(o.id) >= 5 THEN 'VIP Customer'
             WHEN COUNT(o.id) >= 2 THEN 'Regular Customer'
             ELSE 'New Customer'
           END as customer_type
    FROM users u
    LEFT JOIN orders o ON u.id = o.user_id
    GROUP BY u.id, u.first_name, u.last_name
    ORDER BY order_count DESC;
    

    Level 8: Self-Joins & Advanced Analysis

    -- 1. Find users enrolled in the same course (pseudo self-join)
    SELECT DISTINCT 
           u1.first_name || ' ' || u1.last_name as student1,
           u2.first_name || ' ' || u2.last_name as student2,
           c.title as course_name
    FROM students s1
    INNER JOIN students s2 ON s1.course_id = s2.course_id AND s1.user_id < s2.user_id
    INNER JOIN users u1 ON s1.user_id = u1.id
    INNER JOIN users u2 ON s2.user_id = u2.id
    INNER JOIN courses c ON s1.course_id = c.id
    ORDER BY c.title, student1
    LIMIT 20;
    
    -- 2. Complex business question: Multi-role users
    SELECT u.first_name, u.last_name, u.email,
           COUNT(DISTINCT o.id) as orders_placed,
           COUNT(DISTINCT st.id) as courses_enrolled,
           CASE 
             WHEN COUNT(DISTINCT o.id) > 0 AND COUNT(DISTINCT st.id) > 0 THEN 'Customer & Student'
             WHEN COUNT(DISTINCT o.id) > 0 THEN 'Customer Only'
             WHEN COUNT(DISTINCT st.id) > 0 THEN 'Student Only'
             ELSE 'No Activity'
           END as user_type
    FROM users u
    LEFT JOIN orders o ON u.id = o.user_id
    LEFT JOIN students st ON u.id = st.user_id
    GROUP BY u.id, u.first_name, u.last_name, u.email
    ORDER BY orders_placed DESC, courses_enrolled DESC;
    

    🎯 Our Learning Strategy:

    1. Start with Level 1-2 in TablePlus to get comfortable
    2. Progress through each level – try to understand each query before moving on
    3. Modify the queries – change filters, add fields, etc.
    4. Create your own variations based on business questions

    to be continued … 🚀

    Rails 8 App: Create an Academic software app using SQL without using ActiveRecord- Part 2 | students | courses | schools

    Design: Our Students Table -> course -> school

    We need a UNIQUE constraint on user_id because:

    • One student per user (user_id should be unique)
    • Multiple students per course (course_id can be repeated)

    Check Migration Files:

    Key Changes:

    1. ✅ Added UNIQUE constraint: CONSTRAINT uk_students_user_id UNIQUE (user_id)
    2. 🔧 Fixed typos:
    • TIMSTAMPTIMESTAMP
    • stidentsstudents

    📈 Optimized indexes: No need for user_id index since UNIQUE creates one automatically

    Business Logic Validation:

    • user_id: One student per user ✅
    • course_id: Multiple students per course ✅
    • school_id: Multiple students per school ✅

    This ensures referential integrity and business rules are enforced at the database level!


    📁 Schema Storage Options:

    Rails allows you to store the schema in SQL format instead of the default Ruby format. Let me explain the options and why you’d choose each:

    1. Ruby Format (Default)

    # db/schema.rb
    ActiveRecord::Schema[8.0].define(version: 2025_07_09_074552) do
      enable_extension "pg_catalog.plpgsql"
    
      create_table "users", force: :cascade do |t|
        t.string "first_name", limit: 100, null: false
        t.string "email", limit: 150, null: false
        t.datetime "created_at", null: false
        t.index ["email"], name: "idx_users_email"
      end
    end
    

    2. SQL Format

    -- db/structure.sql
    CREATE EXTENSION IF NOT EXISTS pg_catalog.plpgsql;
    
    CREATE TYPE gender_enum AS ENUM ('male', 'female', 'not-specified');
    
    CREATE TABLE users (
        id bigserial PRIMARY KEY,
        first_name varchar(100) NOT NULL,
        email varchar(150) NOT NULL,
        created_at timestamp NOT NULL DEFAULT CURRENT_TIMESTAMP
    );
    
    CREATE UNIQUE INDEX idx_users_email ON users(email);
    

    Check structure.sql File: Github: db/structure.sql

    🔧 How to Switch to SQL Format:

    Add this to config/application.rb:

    module AcademicSqlSoftware
      class Application < Rails::Application
        # ... existing config ...
    
        # Use SQL format for schema
        config.active_record.schema_format = :sql
      end
    end
    

    Then regenerate the schema:

    # Generate SQL schema file
    rails db:schema:dump
    

    This will create db/structure.sql instead of db/schema.rb.

    Comparison Table:

    FeatureRuby Format (schema.rb)SQL Format (structure.sql)
    Default✅ Yes❌ No
    Database Agnostic✅ Yes❌ No (DB-specific)
    Custom SQL Features❌ Limited✅ Full support
    Views❌ No✅ Yes
    Stored Procedures❌ No✅ Yes
    Triggers❌ No✅ Yes
    Custom Types/ENUMs❌ Limited✅ Full support
    Partial Indexes❌ Limited✅ Yes
    Check Constraints❌ Limited✅ Yes
    Version Control✅ Easy to diff⚠️ Harder to diff
    Readability✅ Ruby-like⚠️ Raw SQL

    When to Use Each:

    Choose SQL Format When:

    • ✅ Using PostgreSQL-specific features (ENUMs, arrays, JSONB operators)
    • ✅ Need database views, triggers, or stored procedures
    • ✅ Using complex constraints (CHECK, partial indexes)
    • ✅ Working with custom data types
    • ✅ Team is SQL-proficient

    Choose Ruby Format When:

    • ✅ Want database portability (switching between PostgreSQL/MySQL/SQLite)
    • ✅ Team prefers Ruby syntax
    • ✅ Using standard Rails features only
    • ✅ Need easier version control diffs

    For Our Project:

    I recommend SQL format because you’re using:

    • ✅ PostgreSQL ENUMs (gender_enum, category_enum) – Rails 8 supports this
    • ✅ Custom constraints (CHECK (price > 0)) – Rails 8 supports this
    • ✅ Complex foreign key relationships
    • ✅ Raw SQL migrations

    Our config/application.rb should include:

    config.active_record.schema_format = :sql
    

    Then run:

    rails db:schema:dump
    

    This will give us full control over PostgreSQL features while maintaining schema consistency! 🎯

    🌱 Seed Data

    1. Let’s refactor the seed file into modular components. I’ll create separate seeder classes for each model type and organize them properly.

    2. Let’s me create individual seeder classes for each model, the seeders for the dependent models (orders and students), refactor the main seeds.rb file to use the new modular structure, create a documentation file for the new modular structure.

    3. I’ve successfully refactored our seed file into a modular, maintainable architecture. Here’s what we’ve created:

    🎯 Modular Seed System Overview

    📁 File Structure:

    db/
    ├── seeds.rb                    # Main orchestrator (now 20 lines vs 246!)
    └── seeds/
        ├── README.md              # Complete documentation
        ├── base_seeder.rb         # Shared functionality & config
        ├── users_seeder.rb        # User creation logic
        ├── products_seeder.rb     # Product creation logic  
        ├── courses_seeder.rb      # Course creation logic
        ├── schools_seeder.rb      # School creation logic
        ├── orders_seeder.rb       # Order creation (with dependencies)
        └── students_seeder.rb     # Student creation (with constraints)
    

    Key Benefits:

    ✅ Separation of Concerns:
    • Each model has its own dedicated seeder class
    • Clear responsibility boundaries
    • Easy to modify individual model generation
    ✅ Maintainability:
    • Single file changes vs monolithic seed file
    • Inheritance from BaseSeeder for shared functionality
    • Comprehensive documentation
    ✅ Flexibility:
    • Easy to add new models
    • Environment-specific configuration
    • Configurable record counts
    ✅ Robustness:
    • Proper dependency handling
    • Constraint compliance (stock, unique keys)
    • Error handling and validation

    📋 Usage Examples:

    # Basic seeding
    rails db:seed
    
    # Clear data first
    CLEAR_DATA=true rails db:seed
    
    # Scale up for testing
    # Edit USERS_COUNT in base_seeder.rb then:
    rails db:seed
    

    Check my Github Seed File: Seed File – Academic SQL App

    🛠️ Commit the Refactored System:

    # Stage all the new modular files
    git add db/seeds.rb \
            db/seeds/
    
    # Commit with comprehensive message
    git commit -m "Refactor seed system into modular architecture" -m "
    
    Modular Structure:
    - Split monolithic seeds.rb into focused seeder classes
    - Create BaseSeeder with shared functionality and configuration
    - Separate concerns: each model has dedicated seeder
    - Add comprehensive documentation in seeds/README.md
    
    Benefits:
    - Maintainability: Easy to modify individual model generation
    - Flexibility: Simple to add new models or adjust data
    - Robustness: Proper dependency handling and constraint compliance
    - Testability: Individual seeders can be tested in isolation
    
    Features:
    - Environment-specific behavior (auto-clear in development)
    - Smart constraint handling (stock validation, unique keys)
    - Progress indicators and comprehensive reporting
    - Configurable record counts via constants
    
    Files:
    - db/seeds.rb: Main orchestrator (20 lines vs 246)
    - db/seeds/base_seeder.rb: Shared functionality & config
    - db/seeds/*_seeder.rb: Individual model seeders
    - db/seeds/README.md: Complete documentation
    
    The system is now ready for production use and easy to extend."
    

    🎉 What We Can Do Now:

    Scale Easily:

    # In base_seeder.rb - change these and run rails db:seed
    USERS_COUNT = 10_000
    PRODUCTS_COUNT = 1_000  
    ORDERS_COUNT = 50_000
    

    Add New Models: Create new_model_seeder.rb, inherit from BaseSeeder, add to orchestration.

    Customize Data: Edit individual seeder constants and attribute methods.

    Test Components:

    users = UsersSeeder.create_users
    products = ProductsSeeder.create_products
    

    Our seed system is now enterprise-ready with clean architecture, comprehensive documentation, and infinite scalability! 🚀

    Possible Refactoring

    Now Let’s move the helper methods to a dedicated helper folder for better organization. I’ll create a helpers directory and move the shared utility methods there.

    Here’s how to refactor your seed helper methods into a new helpers folder under db/seeds:

    1. Create a directory:
      db/seeds/helpers/
    2. Move all shared/random data methods (like random_gender, random_category, etc.) into a module, e.g. db/seeds/helpers/data_generators.rb:
    # db/seeds/helpers/data_generators.rb
    module DataGenerators
      def random_gender
        ['male', 'female', 'not-specified'].sample
      end
    
      def random_category
        ['men', 'women', 'kids', 'infants'].sample
      end
    
      def random_date_of_birth
        Date.today - rand(18..80).years - rand(365).days
      end
    
      def random_phone
        "+1#{rand(100..999)}-#{rand(100..999)}-#{rand(1000..9999)}"
      end
    
      def random_price
        [9.99, 19.99, 29.99, 49.99, 99.99, 199.99, 299.99, 499.99].sample
      end
    
      def random_stock
        [0, 5, 10, 25, 50, 100, 500].sample
      end
    
      def random_past_date(days_ago_max = 365)
        Date.today - rand(1..days_ago_max).days
      end
    end
    
    1. In your seeders and base seeder, require and include the helper:
    # At the top of each seeder or in base_seeder.rb
    require_relative 'helpers/data_generators'
    
    class UsersSeeder < BaseSeeder
      extend DataGenerators
      # ... now you can call random_gender, random_category, etc.
    end
    
    1. Remove the helper methods from BaseSeeder and use the module instead.

    Summary:

    • Move all shared/random data methods to db/seeds/helpers/data_generators.rb as a module.
    • require_relative and extend or include the module in your seeders.
    • This keeps your seed logic clean and DRY!

    Our BaseSeeder still contains all the random data and progress helper methods, which are now in db/seeds/helpers/data_generators.rb and db/seeds/helpers/ui_helpers.rb.

    Here’s what we should do:

    • Remove all the methods at the bottom of BaseSeeder that are now in the helpers.
    • At the top of base_seeder.rb, require the helper modules.
    • If you want to use the helpers as class methods, use extend for each module.

    Here’s the refactor plan:

    1. Remove:
    • random_gender
    • random_category
    • random_date_of_birth
    • random_phone
    • random_price
    • random_stock
    • random_past_date
    • progress_indicator
    1. Add at the top:
       require_relative 'helpers/data_generators'
       require_relative 'helpers/ui_helpers'
       extend DataGenerators
       extend UiHelpers
    

    Changes Made:

    1. In UiHelpers:
      • Removed the hardcoded print_summary and print_verification methods.
      • Ensured print_summary_box and print_verification_stats are ready to accept data.
    2. In BaseSeeder:
      • Now dynamically creates a summary_data hash with the final record counts.
      • Creates a verification_stats hash with key metrics.
      • Calls UiHelpers.print_summary_box and UiHelpers.print_verification_stats, passing in the data.

    Benefits of this Refactor:

    • More Flexible: You can now easily add or remove items from the summary and verification sections just by changing the hashes in BaseSeeder.
    • Decoupled: The UiHelpers module is now purely for presentation and has no knowledge of your specific models.
    • Cleaner Code: The logic is now clearly separated—BaseSeeder gathers the data, and UiHelpers displays it.

    Now the BaseSeeder is clean and only contains orchestration logic and configuration. All random data and UI/progress helpers are now properly delegated to the new helper modules.

    We can now use these helpers in any seeder by calling random_gender,  progress_indicator, etc., thanks to the extend statements. This makes our seed system much more modular, maintainable, and DRY!

    That’s a great suggestion for further refactoring. It makes sense to keep all data-related logic, including aggregation for summaries, within the DataGenerators helper.

    Let’s proceed. I’ll move the hash construction into new methods inside db/seeds/helpers/data_generators.rb and then update BaseSeeder to call them.
    Now that the data generation has been moved, I’ll update the BaseSeeder to call the new methods.

    Issues Fixed:

    1. UiHelpers method calls: All seeder files were calling progress_indicator directly, but since the methods in UiHelpers are defined as class methods, they needed to be prefixed with UiHelpers.. Fixed in:
    • UsersSeeder
    • ProductsSeeder
    • CoursesSeeder
    • SchoolsSeeder
    • OrdersSeeder
    • StudentsSeeder
    1. DataGenerators references: The BaseSeeder was trying to call DataGenerators.summary_data and DataGenerators.verification_stats, but that file was deleted. I updated it to use the local summary_data and verification_stats methods that were already defined in the BaseSeeder class.

    Seeding Results:

    • 10,000 users created
    • 1,000 products created
    • 50 courses created
    • 25 schools created
    • 5,000 orders created
    • 5,000 students created

    The verification stats show proper data relationships:

    • 4,004 users have orders
    • 647 products have been ordered
    • 756 products are active
    • 200 students per school (average)
    • 100 students per course (average)

    Final Architecture:

    1. DataGenerators: Is now responsible for all data-related tasks, including generating random primitive data (random_phone) and creating aggregated summary data (summary_data, verification_stats).
    2. UiHelpers: Is responsible for all presentation logic, taking data as input and printing it to the console in a formatted way.
    3. Individual Seeders (UsersSeeder, etc.): Responsible for the business logic of creating a specific type of record, using helpers for data and UI.
    4. BaseSeeder: The main orchestrator. It knows the correct order to call the individual seeders and delegates all data and UI tasks to the appropriate helpers.
    5. seeds.rb: The single entry point that kicks off the entire process.

    to be continued … 🚀