Guide: Creating React Native βš›οΈ App For Our Design Studio Application – Part 1

The guide is for creating a React Native app for our design studio web application made with Ruby On Rails 8. Let me start by explaining the fundamentals and then walk you through the entire setup process.

What is React Native? πŸ€”

React Native is a framework developed by Facebook (now Meta) that allows you to build mobile applications using JavaScript and React. It enables you to write code once and deploy it on both iOS and Android platforms.

Why Use React Native? 🎯

Key Benefits:

  • Cross-Platform Development: Write once, run on both iOS and Android
  • Code Reusability: Share up to 90% of code between platforms
  • Native Performance: Uses native components, not webviews
  • Hot Reloading: See changes instantly during development
  • Large Community: Extensive libraries and community support
  • Cost-Effective: Faster development with smaller teams
  • Facebook Backing: Strong ecosystem and continuous updates

React Native vs React: Key Differences πŸ“Š

AspectReactReact Native
Target PlatformWeb browsersMobile devices (iOS/Android)
DOMVirtual DOMNative components
StylingCSSStyleSheet API (CSS-like)
ComponentsHTML elements (<div>, <p>, etc.)Native components (<View>, <Text>, etc.)
NavigationReact RouterReact Navigation
DeploymentWeb serversApp stores
DevelopmentBrowser dev toolsMobile simulators/devices

Setting Up Your React Native Development Environment πŸ› οΈ

Let me guide you through creating your React Native app step by step:

Step 1: Install Prerequisites

First, let’s check your current setup and install the necessary tools:
Ran tool

We’ll need to install several tools. Let me guide you through each one:

1. Node.js & npm/yarn

# Check if Node.js is installed
node --version
npm --version

# If not installed, download from https://nodejs.org/
# Or install via Homebrew (recommended for macOS):
brew install node

2. React Native CLI

npm install -g @react-native-community/cli

3. For iOS Development (macOS only):

# Install Xcode from Mac App Store

# Install CocoaPods
# Homebrew
brew install cocoapods

# Later
# Update with Homebrew
brew upgrade cocoapods

# OR use ruby gem
sudo gem install cocoapods

4. For Android Development:

  • Install Android Studio
  • Set up Android SDK
  • Configure environment variables

Step 2: Create Your React Native App

Let’s navigate to our react folder and create the app. Let’s create our React Native app for the design studio.

Run these commands in our terminal:

# Navigate to your react directory
cd ~/react

# Create a new React Native app
npx react-native init DesignStudioApp

# Navigate to the new app directory
cd DesignStudioApp

πŸŽ‰ Our DesignStudioApp has been created successfully!

What Happened

The React Native CLI successfully:

  • βœ… Downloaded the template
  • βœ… Copied template files
  • βœ… Processed the template
  • βœ… Installed dependencies
  • βœ… Initialized Git repository

βœ…  CocoaPods is Already Installed!

CocoaPods version 1.16.2_1 is properly installed via Homebrew in our system.

CocoaPods manages dependencies for your Xcode projects.

You specify the dependencies for your project in a simple text file: your Podfile. CocoaPods recursively resolves dependencies between libraries, fetches source code for all dependencies, and creates and maintains an Xcode workspace to build your project. The latest released Xcode versions and the prior version are supported.

What This Means πŸ“‹

CocoaPods Installation Details:

  • βœ… Version: 1.16.2_1 (latest stable)
  • βœ… Location: /opt/homebrew/Cellar/cocoapods/1.16.2_1/
  • βœ… Main Command: pod is available
  • βœ… Complete Installation: All necessary files are present
# Let's Verify CocoaPods is Working 
pod --version
1.16.2

Now Let’s Try Installing iOS Dependencies πŸ“±

Since CocoaPods is working, let’s try to install the iOS dependencies for our DesignStudioApp:

cd DesignStudioApp/ios && pod install
....
[Hermes] Using release tarball from URL: https://repo1.maven.org/maven2/com/facebook/react/react-native-artifacts/0.80.1/react-native-artifacts-0.80.1-hermes-ios-debug.tar.gz

Step 3: Understanding the Project Structure πŸ“

After creating the app, you’ll see this structure:

DesignStudioApp/
β”œβ”€β”€ android/          # Android-specific code
β”œβ”€β”€ ios/              # iOS-specific code
β”œβ”€β”€ node_modules/     # Dependencies
β”œβ”€β”€ src/              # Your app source code (you'll create this)
β”œβ”€β”€ App.tsx           # Main app component
β”œβ”€β”€ index.js          # Entry point
β”œβ”€β”€ package.json      # Dependencies and scripts
β”œβ”€β”€ metro.config.js   # Metro bundler configuration
└── ...

Step 4: Key Files Explained πŸ“

App.tsx – Main component (like App.js in React web)
index.js – Entry point that registers your app
package.json – Dependencies and scripts
android/ & ios/ – Platform-specific native code

Step 5: Running Your App (No XCode installed) πŸš€

For iOS Simulator:

# Make sure you're in the DesignStudioApp directory
npx react-native run-ios

Install Xcode: Xcode Component Selection for React Native Development πŸ› οΈ

For React Native development, you should select BOTH:

βœ… Required Components:

  • macOS15.5 (built-in) – βœ… Select this
  • iOS 18.5 – βœ… Select this (Essential for React Native)

Why You Need Both πŸ“±

ComponentWhy You Need ItWhat It Provides
macOS15.5Basic development toolsXcode IDE, build tools, debugger
iOS 18.5iOS app developmentiOS Simulator, iOS SDK, device support

Select BOTH components because:

  1. macOS15.5 (built-in) βœ…
  • Core Xcode functionality
  • Build tools and compiler
  • Essential for any development
  1. iOS 18.5 βœ…
  • iOS Simulator – Test your React Native app
  • iOS SDK – Required for building iOS apps
  • Device support – Deploy to real iPhones

Step-by-Step Instructions πŸ“‹

Point System to Full Xcode Installation
sudo xcode-select --switch /Applications/Xcode.app/Contents/Developer

xcode-select --print-path

xcodebuild -version
Xcode 16.4

Now Try:

# Install iOS Dependencies Again
cd DesignStudioApp && cd ios && pod install

πŸŽ‰ CocoaPods Installation Complete!

All iOS dependencies have been successfully installed!

What Just Happened βœ…

  • βœ… 74 dependencies installed from Podfile
  • βœ… 73 total pods installed successfully
  • βœ… React Native modules all configured
  • βœ… Hermes engine installed (JavaScript engine)
  • βœ… Xcode workspace created

Hermes is an open-source JavaScript engine optimized for React Native. For many apps, using Hermes will result in improved start-up time, decreased memory usage, and smaller app size when compared to JavaScriptCore. Hermes is used by default by React Native and no additional configuration is required to enable it.

Important Note πŸ“

The system created a .xcworkspace file – this is what you’ll use instead of .xcodeproj from now on.

# Step 5: Now Let's Run Your App on iOS! 

βœ— npx react-native run-ios
info Found Xcode workspace "DesignStudioApp.xcworkspace"
info No booted devices or simulators found. Launching first available simulator...
info Launching iPhone 16 Pro (iOS 18.5)
info Building (using "xcodebuild -workspace DesignStudioApp.xcworkspace -configuration Debug -scheme DesignStudioApp -destination id=XXXX-XXXXX-XXXX-XXXX

Step 1: Install iOS Dependencies πŸ“¦

Open your terminal and run these commands:

# Navigate to your app directory
cd ~/react/DesignStudioApp

# Install iOS dependencies
cd ios && pod install && cd ..

This will install all the necessary iOS libraries and dependencies.

Step 2: Run the iOS App πŸ“±

Option A: Use React Native CLI (Recommended)

Open a new terminal window (keep Metro running in the first one) and run:

cd ~/react/DesignStudioApp
npx react-native run-ios

Option B: Use Xcode Directly

# Open the iOS project in Xcode
cd ~/react/DesignStudioApp
xed ios/DesignStudioApp.xcworkspace

Then press the “Run” button (▢️) in Xcode.

What Should Happen 🎯

  1. iOS Simulator opensA virtual iPhone will appear
  2. App builds – You’ll see build progress in terminal
  3. App launches – Your DesignStudioApp will open in the simulator
  4. Metro connects – The app connects to the development server

Expected Output πŸ“±

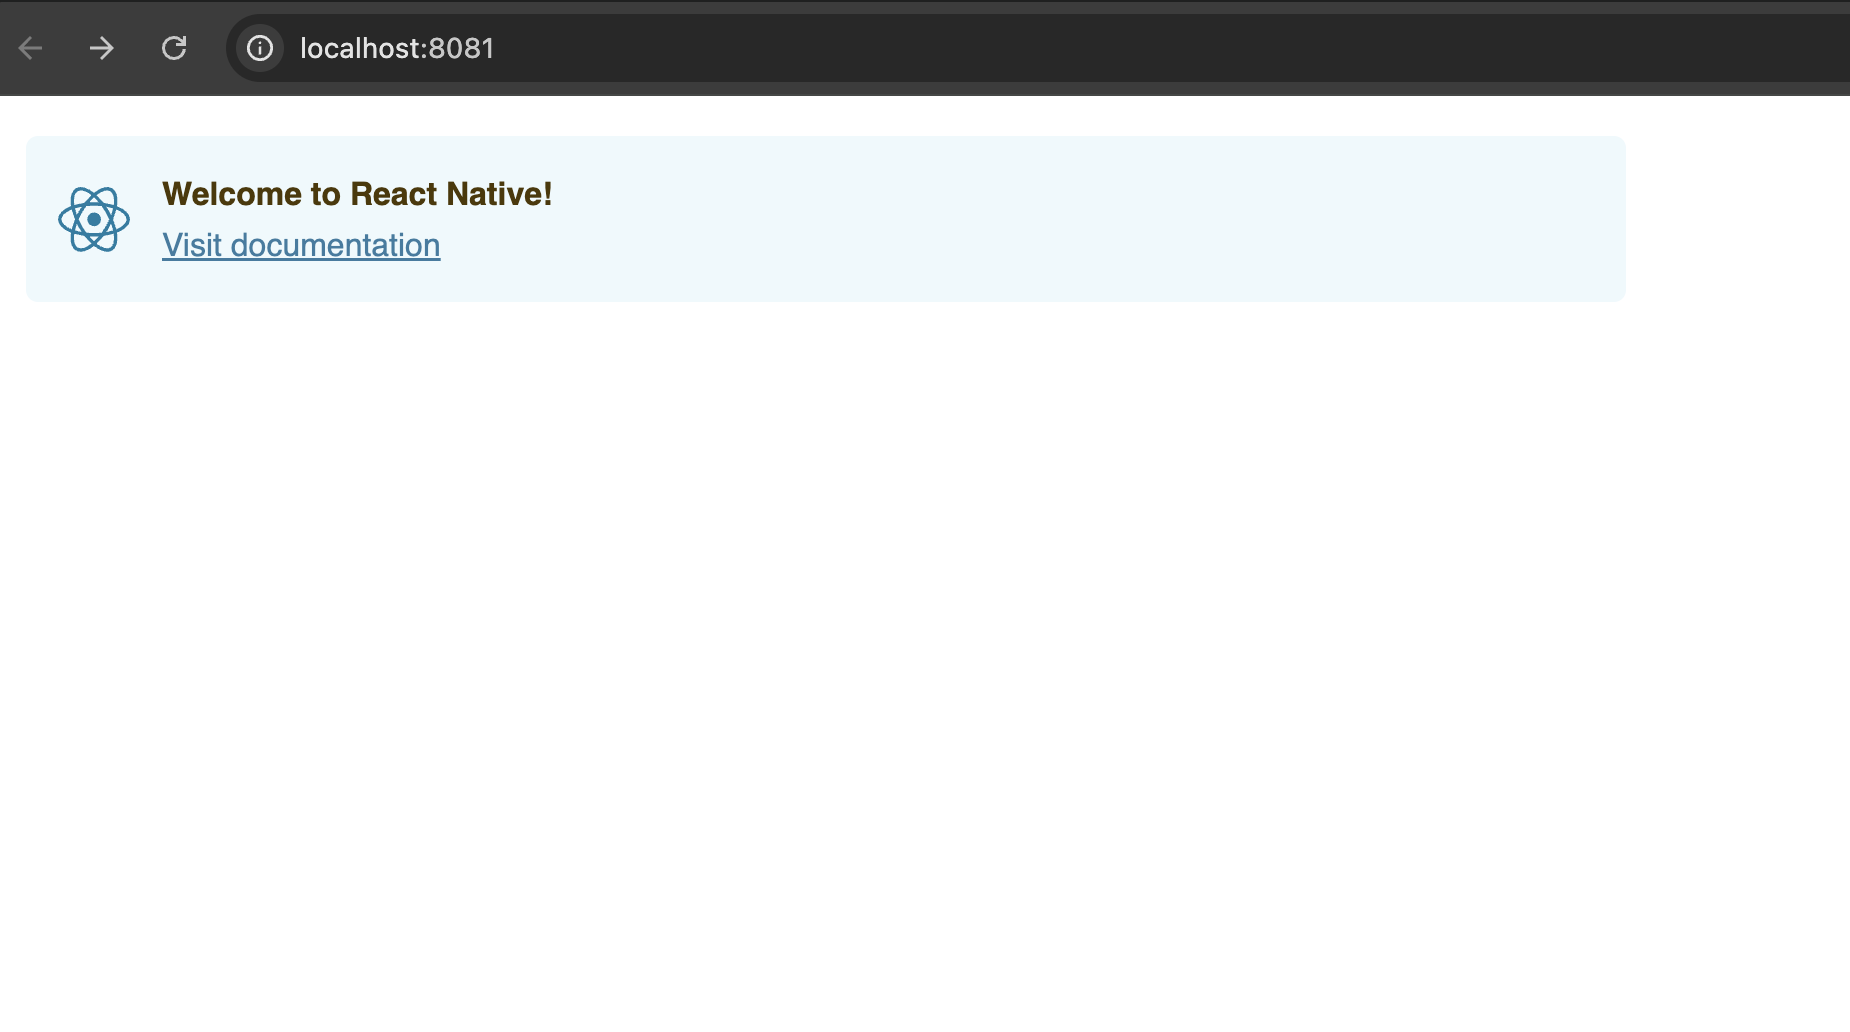
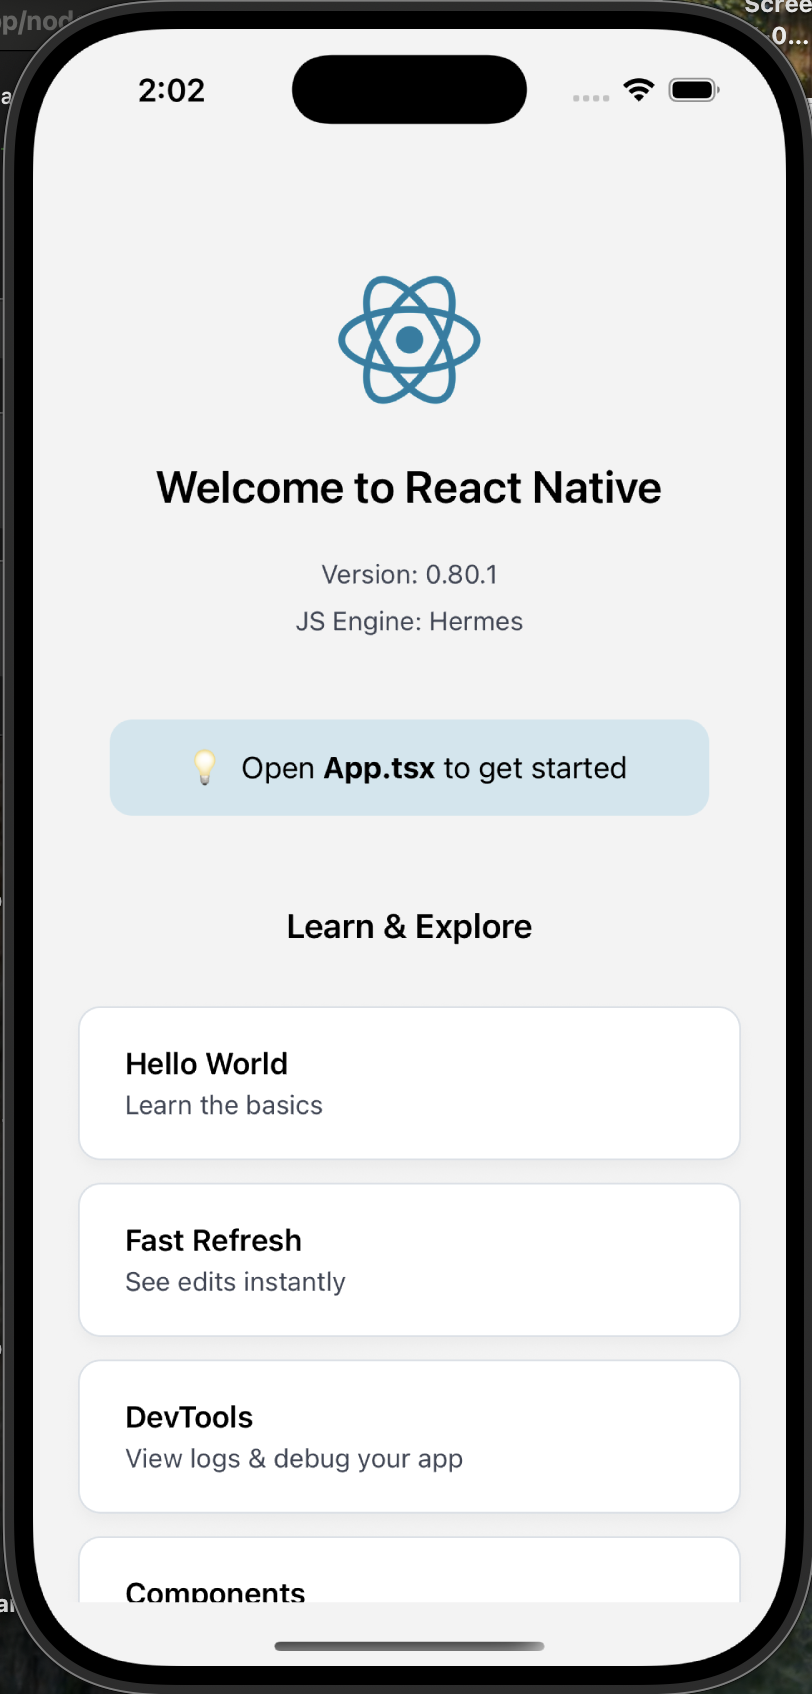
You should see the default React Native welcome screen with:

  • React Native logo
  • “Welcome to React Native” message
  • Various getting started links
  • Debug information

Common Issues & Solutions πŸ”§

Issue 1: “No iOS Simulator Available”

# List available simulators
xcrun simctl list devices

# If no simulators, create one in Xcode:
# Xcode > Window > Devices and Simulators > Create Simulator

Issue 2: “Build Failed”

# Clean and rebuild
cd ~/react/DesignStudioApp
npx react-native run-ios --clean

Issue 3: “Metro not responding” – not used metro

# Reset Metro cache
npx react-native start --reset-cache

Quick Commands Summary πŸ“

# Terminal 1: Start Metro
cd ~/react/DesignStudioApp
npx react-native start

# Terminal 2: Run iOS app
cd ~/react/DesignStudioApp
npx react-native run-ios

What You’ll See πŸ‘€

Your app should display:

  • React Native welcome screen
  • “Welcome to React Native” text
  • Various learning resources
  • Debug information

Testing Your App πŸ§ͺ

Once running, you can:

  • ⌘+D – Open developer menu
  • ⌘+R – Reload the app
  • ⌘+T – Open new simulator
  • Shake gesture – Open dev menu on device

Next Steps After Success πŸš€

Once your app is running:

  1. Edit App.tsx – Make changes to see hot reload
  2. Add navigation – React Navigation
  3. Add UI components – For your design studio
  4. Add features – Camera, image picker, etc.

Run These Commands Now! πŸ’»

Open your terminal and execute:

cd ~/react/DesignStudioApp
cd ios && pod install && cd ..
npx react-native run-ios

This should launch your DesignStudioApp in the iOS simulator! πŸŽ‰

For Android Emulator:

# Start Android emulator first, then:
npx react-native run-android

Step 6: Understanding Core Components πŸ“±

Let me show you the main React Native components we’ll use:

Basic Components:

  • <View> – Like <div> in React web
  • <Text> – Like <p> or <span> in React web
  • <Image> – For displaying images
  • <ScrollView> – Scrollable container
  • <TouchableOpacity> – Touchable button
  • <TextInput> – Input field
  • <FlatList> – Efficient list rendering

Example App.tsx:

import React from 'react';
import {
  SafeAreaView,
  ScrollView,
  StatusBar,
  StyleSheet,
  Text,
  View,
  TouchableOpacity,
  Image,
} from 'react-native';

const App = () => {
  return (
    <SafeAreaView style={styles.container}>
      <StatusBar barStyle="dark-content" />
      <ScrollView contentInsetAdjustmentBehavior="automatic">
        <View style={styles.header}>
          <Text style={styles.title}>Design Studio App</Text>
          <Text style={styles.subtitle}>Welcome to your creative space</Text>
        </View>

        <View style={styles.content}>
          <TouchableOpacity style={styles.button}>
            <Text style={styles.buttonText}>Get Started</Text>
          </TouchableOpacity>
        </View>
      </ScrollView>
    </SafeAreaView>
  );
};

const styles = StyleSheet.create({
  container: {
    flex: 1,
    backgroundColor: '#f8f9fa',
  },
  header: {
    padding: 24,
    alignItems: 'center',
  },
  title: {
    fontSize: 24,
    fontWeight: 'bold',
    color: '#333',
  },
  subtitle: {
    fontSize: 16,
    color: '#666',
    marginTop: 8,
  },
  content: {
    padding: 24,
  },
  button: {
    backgroundColor: '#007AFF',
    padding: 16,
    borderRadius: 8,
    alignItems: 'center',
  },
  buttonText: {
    color: 'white',
    fontSize: 18,
    fontWeight: '600',
  },
});

export default App;

Step 7: Styling in React Native 🎨

React Native uses a StyleSheet API similar to CSS:

import { StyleSheet } from 'react-native';

const styles = StyleSheet.create({
  container: {
    flex: 1,              // Like flex: 1 in CSS
    backgroundColor: '#fff',
    padding: 20,
  },
  text: {
    fontSize: 16,
    color: '#333',
    textAlign: 'center',
  },
});

Key Styling Differences:

  • Use backgroundColor instead of background-color
  • Use flexDirection instead of flex-direction
  • All style properties are camelCase
  • No cascade – styles are component-specific

Step 8: Development Tools πŸ”§

Metro Bundler – Automatically starts when you run the app
React Native Debugger – For debugging
Flipper – Advanced debugging tool

Step 9: Common Commands πŸ’»

# Start Metro bundler
npx react-native start

# Run on iOS
npx react-native run-ios

# Run on Android
npx react-native run-android

# Clear cache
npx react-native start --reset-cache

# Install dependencies
npm install
# or
yarn install

Step 10: Next Steps for Our Design Studio App 🎨

For the design studio app, you might want to add:

  1. Navigation – React Navigation
  2. UI Components – NativeBase, React Native Elements
  3. Image Handling – React Native Image Picker
  4. Animations – React Native Reanimated
  5. State Management – Redux Toolkit or Zustand
  6. Network Requests – Axios or fetch
  7. Storage – AsyncStorage

To get started right now, run these commands in your terminal:

cd ~/react/DesignStudioApp

npx react-native run-ios  # or run-android

This will create and run our first React Native app! πŸŽ‰

Check our App in Github: https://github.com/MIRA-Designs/DesignStudioMobileApp

Issues: https://github.com/MIRA-Designs/DesignStudioMobileApp/issues


What is NPX? πŸ€”

NPX is a package runner tool that comes with npm (Node Package Manager). It was introduced in npm version 5.2.0 and is now a standard part of the npm ecosystem.

NPX Full Name:

  • NPX = Node Package eXecute
  • It’s a command-line tool for executing npm packages

How NPX Works πŸ”§

Basic Concept:

Instead of installing packages globally, npx allows you to:

  • Run packages directly without installing them permanently
  • Execute the latest version of a package
  • Avoid global installation clutter

NPX vs NPM Installation:

MethodCommandWhat Happens
Traditionalnpm install -g create-react-app
create-react-app my-app
Installs globally, then runs
NPXnpx create-react-app my-appDownloads, runs, then removes

Why Use NPX? 🎯

1. No Global Installation Required

# Old way - install globally first
npm install -g create-react-app
create-react-app my-app

# NPX way - run directly
npx create-react-app my-app

2. Always Latest Version

# NPX ensures you get the latest version
npx create-react-app my-app

# vs global install might be outdated
npm install -g create-react-app  # Might be old version
create-react-app my-app

3. Saves Disk Space

  • No need to store packages globally
  • Temporary downloads are cleaned up automatically

4. Avoids Version Conflicts

  • Different projects can use different versions
  • No global version conflicts

Common NPX Use Cases πŸ“±

1. Creating Projects

# React Native
npx react-native init MyApp

# React Web App
npx create-react-app my-web-app

# Next.js
npx create-next-app my-next-app

# Vue.js
npx create-vue my-vue-app

# Expo (React Native)
npx create-expo-app my-expo-app

2. Running Development Tools

# TypeScript compiler
npx tsc --init

# Linting
npx eslint .

# Testing
npx jest

# Package auditing
npx npm-check-updates

3. One-time Scripts

# Check bundle size
npx bundlesize

# Generate documentation
npx jsdoc

# Code formatting
npx prettier --write .

How NPX Works Behind the Scenes πŸ”

When you run npx some-package:

  1. Checks locally – Is the package in node_modules/.bin?
  2. Checks globally – Is it installed globally?
  3. Downloads temporarily – If not found, downloads to temp folder
  4. Executes – Runs the package
  5. Cleans up – Removes temporary files

Example Flow:

npx create-react-app my-app
  1. βœ… Check: Is create-react-app in local node_modules? No.
  2. βœ… Check: Is it installed globally? No.
  3. ⬇️ Download: Downloads latest create-react-app to temp folder
  4. ▢️ Execute: Runs create-react-app my-app
  5. πŸ—‘οΈ Cleanup: Removes temporary files

NPX Command Options πŸ› οΈ

Basic Syntax:

npx [options] <command>[@version] [command-args...]

Useful Options:

# Force download (ignore local/global)
npx --ignore-existing create-react-app my-app

# Use specific version
npx create-react-app@4.0.0 my-app

# Check what would be executed
npx --version create-react-app

# Run from specific package
npx -p typescript tsc --init

NPX vs NPM: Key Differences πŸ“Š

AspectNPMNPX
PurposePackage managerPackage executor
Installationnpm installNo installation needed
StoragePermanent (node_modules)Temporary
UsageInstall, then runRun directly
UpdatesManual (npm update)Always latest

Real-World Examples 🌟

For Our React Native Project:

# Create the app
npx react-native init DesignStudioApp

# Instead of:
npm install -g @react-native-community/cli
react-native init DesignStudioApp

Development Workflow:

# Start Metro bundler
npx react-native start

# Run on iOS
npx react-native run-ios

# Run on Android
npx react-native run-android

Other Useful Commands:

# Check React Native version
npx react-native --version

# Upgrade React Native
npx react-native upgrade

# Doctor (check environment)
npx react-native doctor

Benefits Summary πŸŽ‰

For Developers:

  • βœ… Cleaner system – No global package clutter
  • βœ… Always updated – Latest versions automatically
  • βœ… Faster setup – No pre-installation needed
  • βœ… Less conflicts – No version conflicts

For Projects:

  • βœ… Consistent environments – Everyone uses same versions
  • βœ… Easier setup – New team members can start quickly
  • βœ… Better CI/CD – Consistent builds

Pro Tips πŸ’‘

  1. Use NPX for project creation – Always use npx for scaffolding tools
  2. Check before installing globally – Ask yourself: “Do I need this globally?”
  3. Use specific versions when needednpx package@version
  4. Great for CI/CD – Ensures consistent tool versions

NPX is essentially a way to “try before you buy” – run packages without the commitment of installing them permanently! It’s become an essential tool in modern JavaScript development. πŸš€


Let’s see in Part 2.. Happy React Native Development πŸš€

πŸ“¦ Sprockets vs 🧡 Propshaft in Ruby on Rails 7/8 – What’s the Difference?

When working with asset pipelines in Ruby on Rails 7 and 8, you might encounter Sprockets and Propshaftβ€”two asset handling libraries. While both aim to serve static assets like JavaScript, CSS, images, and fonts, they do so in different ways.

This post will walk you through what each does, how they differ, and when you might want to use one over the other.


πŸ“¦ What is Sprockets?

Sprockets is the original Rails asset pipeline system, introduced way back in Rails 3.1. It allows developers to:

  • Concatenate and minify JavaScript and CSS
  • Preprocess assets using things like SCSS, CoffeeScript, ERB, etc.
  • Fingerprint assets for cache busting
  • Compile assets at deploy time

It works well for traditional Rails applications where the frontend and backend are tightly coupled.

Pros:

  • Mature and stable
  • Rich preprocessing pipeline (SCSS, CoffeeScript, ERB, etc.)
  • Supports advanced directives like //= require_tree .

Cons:

  • Complex internal logic
  • Slower compilation times
  • Relies on a manifest file that can get messy
  • Tightly coupled with older Rails asset practices

🧡 What is Propshaft?

Propshaft is the newer asset pipeline introduced by the Rails team as an alternative to Sprockets. It focuses on simplicity and modern best practices. Propshaft was added as an optional asset pipeline starting in Rails 7 and is included by default in some new apps.

Design Philosophy:
Propshaft aims to work like a static file server with fingerprinting and logical path mapping, rather than a full asset compiler.

Key Features:

  • Uses logical paths (e.g., /assets/application.css)
  • No preprocessing pipeline by default (but supports it via extensions like Tailwind or Sass)
  • Supports digesting (fingerprinting) of assets
  • Leaner and faster than Sprockets
  • Easier to integrate with modern JavaScript bundlers (like importmaps, esbuild, or webpack)

Pros:

  • Lightweight and fast
  • Easier to debug
  • Works great with importmaps and Hotwire
  • Modern, forward-looking approach

Cons:

  • No advanced preprocessing by default
  • Limited plugin ecosystem (still maturing)
  • Doesn’t support old Sprockets directives

πŸ” Key Differences at a Glance

FeatureSprocketsPropshaft
Introduced InRails 3.1Rails 7
Default in RailsRails 6 and earlierOptional from Rails 7+
Preprocessing SupportYes (SCSS, ERB, CoffeeScript, etc.)No (only raw assets by default)
SpeedSlowerFaster
Configuration ComplexityHigherMinimal
Plugin EcosystemLarge and matureNew and growing
Use With Importmaps/HotwireCan work, but heavierIdeal
DebuggingHarder due to complexityEasier

🧰 When Should You Use Sprockets?

Choose Sprockets if:

  • You are upgrading a legacy Rails app
  • Your project already relies on Sprockets
  • You use heavy asset preprocessing
  • You need compatibility with gems that depend on Sprockets

⚑ When Should You Use Propshaft?

Choose Propshaft if:

  • You are starting a new Rails 7/8 project
  • You use Importmaps or Hotwire/Turbo
  • You prefer faster and simpler asset handling
  • You don’t need complex preprocessing

Propshaft pairs particularly well with modern frontend workflows like Tailwind CSS (via build tools) or StimulusJS (with importmaps).

πŸ› οΈ Switching from Sprockets to Propshaft

If you’re migrating, here are basic steps:

  1. Remove sprockets-rails gem from your Gemfile: # Gemfile # gem "sprockets-rails"
  2. Add propshaft: gem "propshaft"
  3. Update config/application.rb: config.assets.resolver = Propshaft::Resolver.new( paths: [Rails.root.join("app/assets")] )
  4. Remove app/assets/config/manifest.js (used by Sprockets)
  5. Move all assets to the correct logical paths under app/assets
  6. Use digested URLs as needed (asset_path("application.css") etc.)

πŸ§ͺ Real Example in Rails 8

Here’s how your application.html.erb might look using Propshaft:

<%= stylesheet_link_tag "application", "data-turbo-track": "reload" %>
<%= javascript_include_tag "application", "data-turbo-track": "reload", defer: true %>

And your app/assets/builds/application.css could be compiled via Tailwind or SCSS using a toolchain.


🧠 Final Thoughts

Sprockets has served Rails well for over a decade, but Propshaft is the new lightweight future. If you’re starting fresh, Propshaft is a strong choice, especially when used alongside Hotwire, Importmaps, or modern JS bundlers.

However, don’t feel pressured to switch if your current Sprockets setup works fineβ€”Rails continues to support both.


✨ TL;DR

  • Sprockets = older, feature-rich, best for legacy apps
  • Propshaft = newer, minimal, better for modern workflows

Choose based on your app’s needs and complexity. Cheers! πŸš€

Design Studio – Rails 8 e-commerce application: Integrate active admin

Now let’s create an admin interface for our e-commerce Application.

We have a well-structured e-commerce Rails application with:

Models: User, Product, ProductVariant, Order, OrderItem
Authentication: Custom session-based auth with user roles (customer/admin)
Authorization: Already has admin role checking

Admin Interface Recommendations

Here are the best options for Rails admin interfaces, ranked by suitability for our project:

  1. ActiveAdmin (Recommended ⭐)
    Best fit for e-commerce with complex associations
    Excellent filtering, search, and batch operations
    Great customization options and ecosystem
    Handles your Product β†’ ProductVariant β†’ OrderItem relationships well
  2. Administrate (Modern Alternative)
    Clean, Rails-way approach by Thoughtbot
    Good for custom UIs, less configuration
    More work to set up initially
  3. Rails Admin (What you asked about)
    Quick setup but limited customization
    Less actively maintained
    Good for simple admin needs
  4. Avo (Modern Premium)
    Beautiful modern UI
    Some features require paid version

    https://avohq.io/rails-admin
    https://docs.avohq.io/3.0/

Choose ActiveAdmin for our e-commerce application. Let’s integrate it with our existing authentication system

Add in Gemfile:

gem "activeadmin"
gem "sassc-rails" # Required for ActiveAdmin
gem "image_processing", "~> 1.2" # For variant processing if not already present

Bundle Install and run the Active Admin Generator:

$ bundle install
$ rails generate active_admin:install --skip-users
definition of Rules was here
create app/assets/javascripts/active_admin.js
create app/assets/stylesheets/active_admin.scss
create db/migrate/20250710083516_create_active_admin_comments.rb

Migration File created by Active Admin:

class CreateActiveAdminComments < ActiveRecord::Migration[8.0]
  def self.up
    create_table :active_admin_comments do |t|
      t.string :namespace
      t.text   :body
      t.references :resource, polymorphic: true
      t.references :author, polymorphic: true
      t.timestamps
    end
    add_index :active_admin_comments, [ :namespace ]
  end

  def self.down
    drop_table :active_admin_comments
  end
end

Run database migration:

$ rails db:migrate

in app/initializers/active_admin.rb

# This setting changes the method which Active Admin calls
  # within the application controller.
  config.authentication_method = :authenticate_admin_user!
....
# This setting changes the method which Active Admin calls
  # (within the application controller) to return the currently logged in user.
  config.current_user_method = :current_admin_user
....
 # Default:
  config.logout_link_path = :destroy_session_path

in app/controllers/application_controller.rb

private

  def authenticate_admin_user!
    require_authentication
    ensure_admin
  end

  def current_admin_user
    Current.user if Current.user&.admin?
  end

Run the active admin user, product generator:

rails generate active_admin:resource User
rails generate active_admin:resource Product
rails generate active_admin:resource ProductVariant
rails generate active_admin:resource Order
rails generate active_admin:resource OrderItem

Let’s update all the active admin resources with fields, filters, attributes, panels etc.

Let’s add accepts_nested_attributes_for :variants, allow_destroy: true in Product Model.

accepts_nested_attributes_for is a Rails feature that allows a parent model to accept and process attributes for its associated child models through nested parameters. Here’s what it does:

What it enables:

  1. Nested Forms: You can create/update a Product and its ProductVariants in a single form submission
  2. Mass Assignment: Allows passing nested attributes through strong parameters
  3. CRUD Operations: Create, update, and delete associated records through the parent

In our Product model

class Product < ApplicationRecord
  has_many :variants, dependent: :destroy, class_name: "ProductVariant"
  accepts_nested_attributes_for :variants, allow_destroy: true
end

What this allows:

Before: You’d need separate forms/requests for Product and ProductVariant

# Create product first
product = Product.create(name: "T-Shirt", brand: "Nike")

# Then create variants separately
product.variants.create(size: "M", color: "Red", sku: "NIKE-001-M-RED")
product.variants.create(size: "L", color: "Blue", sku: "NIKE-001-L-BLUE")

After: You can do it all in one go:

Product.create(
  name: "T-Shirt",
  brand: "Nike",
  variants_attributes: [
    { size: "M", color: "Red", sku: "NIKE-001-M-RED" },
    { size: "L", color: "Blue", sku: "NIKE-001-L-BLUE" }
  ]
)

In ActiveAdmin context:

This enables the nested form I created in app/admin/products.rb:

f.inputs "Product Variants" do
  f.has_many :variants, allow_destroy: true, new_record: true do |v|
    v.input :size
    v.input :color
    v.input :sku
    # ... other variant fields
  end
end
The allow_destroy: true option:
  • Allows deleting associated records by passing _destroy: ‘1’
  • Essential for updating existing products with variants
Strong Parameters:

In the controller, you need to permit the nested attributes:

permit_params :name, :brand, :category, 
              variants_attributes: [:id, :size, :color, :sku, :mrp, :discount_percent, :_destroy]

Propshaft vs Sprockets

We have an error after integrating ActiveAdmin:

 Rendered layout layouts/application.html.erb (Duration: 13.9ms | GC: 0.5ms)
Completed 500 Internal Server Error in 118ms (ActiveRecord: 28.7ms (1 query, 0 cached) | GC: 27.0ms)

ActionView::Template::Error (undefined method 'load_path' for an instance of Sprockets::Environment)
Caused by: NoMethodError (undefined method 'load_path' for an instance of Sprockets::Environment)

Information for: ActionView::Template::Error (undefined method 'load_path' for an instance of Sprockets::Environment):
    14:     <link rel="icon" href="/icon.svg" type="image/svg+xml">
    15:     <link rel="apple-touch-icon" href="/icon.png">

This error occurs because Rails 8 uses Propshaft by default, but ActiveAdmin requires Sprockets. There’s a conflict between the two asset pipelines. Let’s fix this by switching to Sprockets completely:

Add in Gemfile:

# Use Sprockets for asset pipeline (required for ActiveAdmin)
gem "sprockets-rails"

$ bundle install

# application.rb

# Use Sprockets for asset pipeline
config.assets.enabled = true

Let’s create an admin user for testing our ActiveAdmin:

# seed.rb
# Create admin user
admin_user = User.find_or_create_by(email: "admin@designstudio.com") do |user|
  user.password = "password123"
  user.role = "admin"
end

puts "Admin user created: #{admin_user.email}" if admin_user.persisted?

# run seed
βœ— rails db:seed

βœ… We have Successfully Integrated ActiveAdmin with Nested Attributes!

I’ve successfully converted your Rails application to use nested attributes (variants_attributes) across the entire stack and integrated ActiveAdmin as your admin interface. Here’s what I accomplished:

πŸ”§ What I Fixed & Updated:

1. Asset Pipeline Issue:

  • Switched from Propshaft to Sprockets (required for ActiveAdmin)
  • Updated Gemfile and application configuration
  • Fixed the load_path error you encountered

2. Model Changes:

  • Added accepts_nested_attributes_for :variants, allow_destroy: true to Product model

3. Controller Updates:

  • Changed from singular product_variant to plural variants_attributes
  • Simplified create/update actions to use Rails nested attributes handling
  • Updated strong parameters to permit nested variant attributes

4. View Improvements:

  • Updated product form to handle multiple variants with JavaScript
  • Added “Add Another Variant” functionality
  • Implemented proper nested form fields for all variant attributes

5. ActiveAdmin Configuration:

  • Set up authentication using your existing user system
  • Created comprehensive admin resources for all models
  • Added nested variant management in product forms
  • Built an informative dashboard with key metrics

🎯 Admin Features You Now Have:

  1. Dashboard – Key metrics, recent activity, revenue overview
  2. User Management – Role management, order history
  3. Product Management – Full CRUD with image uploads and nested variants
  4. Order Management – Status updates, batch actions
  5. Inventory Management – ProductVariant and OrderItem tracking

πŸ”‘ Admin Access:

  • URL: http://localhost:3000/admin
  • Email: admin@designstudio.com
  • Password: password123

πŸ“Š Comparison vs Rails Admin:

ActiveAdmin Advantages:

  • βœ… Better for complex e-commerce relationships
  • βœ… Excellent filtering and search capabilities
  • βœ… Powerful batch operations
  • βœ… Highly customizable forms and views
  • βœ… Active development and community

Rails Admin:

  • ❌ Less actively maintained
  • ❌ Limited customization options
  • ❌ Not as suitable for complex nested relationships

πŸš€ What’s Working Now:

  1. Nested Variants: Create/edit products with multiple variants in one form
  2. Image Management: Upload multiple product images
  3. Order Processing: Admin can update order statuses with batch actions
  4. User Management: Promote users to admin, view order history
  5. Dashboard Analytics: Revenue tracking, popular products, recent activity

Visit /admin to explore your new admin interface, Cheers!

Check docs: https://activeadmin.info/0-installation.html

⚠️ Tailwind UI Issue after moving to Sprockets

The issue is with <%= stylesheet_link_tag "/tailwind/application.css", "data-turbo-track": "reload" %> where we are trying to load Tailwind CSS from an incorrect path. The tailwindcss-rails gem serves Tailwind CSS differently. Let me fix this:

ls -la app/assets/tailwind/
curl -I http://localhost:3000/tailwind/application.css
rails routes | grep -i tailwind

The issue is that the /tailwind/application.css path is returning 404. The tailwindcss-rails gem works differently. Let’s check how it’s configured and fix this:

find . -name "*.css" -path "*/public/*" | head -10
rails assets:precompile

Now let’s test if the Tailwind CSS is properly accessible:

curl -I http://localhost:3000/assets/tailwind/application.css

The issue is that with the tailwindcss-rails gem, Tailwind CSS gets compiled into the main application.css file rather than a separate file. Let’s check the current asset manifest and fix the layout:

rails assets:precompile
bundle exec tailwindcss build

The Tailwind CSS is already built and located in app/assets/builds/tailwind.css. Let’s fix the configuration:

rails assets:precompile
curl -I http://localhost:3000/assets/tailwind.css

The issue has been fixed. The Tailwind CSS is now properly accessible. Here’s what I did to resolve the problem:

  1. Identified the issue: The Tailwind CSS was being incorrectly referenced as /tailwind/application.css in the layout file, but it wasn’t being served properly through the asset pipeline.
  2. Found the correct location: Discovered that the tailwindcss-rails gem builds the CSS file to app/assets/builds/tailwind.css.
  3. Fixed the asset pipeline configuration:
  • Updated app/assets/config/manifest.js to include //= link_tree ../builds which includes the built Tailwind CSS
  • Removed the incorrect tailwind/application.css reference
  1. Updated the layout file:
  • Changed from <%= stylesheet_link_tag "/tailwind/application.css" %>
  • To the correct <%= stylesheet_link_tag "tailwind", "data-turbo-track": "reload" %>
  1. Verified the fix:
  • Successfully precompiled assets
  • Confirmed that http://localhost:3000/assets/tailwind.css returns a 200 OK status

Install Rails Icons 🍁

For better font-awesome assets, lets add rails-icons gem:

# Rails Icons - Modern icon library support
gem "rails_icons"

$ rails generate rails_icons:install --help
$ rails generate rails_icons:install --libraries=heroicons

$ npm install @fortawesome/fontawesome-free

How to migrate from the CDN to Rails Icons

For a production Rails application, it’s generally better to use a gem rather than a CDN for Font Awesome. Here’s why:

CDN Issues:

  • External dependency (can fail if CDN is down)
  • Privacy concerns (external requests)
  • No version control
  • Requires internet connection
  • Not cacheable with your assets

Gem Benefits:

  • Self-hosted (no external dependencies)
  • Better performance (served with your assets)
  • Version control
  • Works offline
  • Follows Rails conventions
  • Better for production

Based on my research, adding a gem is definitely the better approach for a production Rails application. Here are the best options:

Option 1: Modern approach with npm package (Recommended)

Since we’re using Rails 8 with modern tooling, I’d recommend using the npm package:

yarn add @fortawesome/fontawesome-free
npm --version
which node

However, given your current setup, I’d recommend Option 2 which is more Rails-native:

Option 2: Rails Icons gem (Recommended for our setup)

This is a modern gem that supports Font Awesome and other icon libraries with a clean Rails API:

bundle install
rails generate rails_icons:install --help
rails generate rails_icons:install --libraries=heroicons

Let’s remove the CDN and set up Rails Icons properly. Since we’re already using Font Awesome extensively, let’s add Font Awesome as a custom library:

rails generate rails_icons:initializer --custom=fontawesome
npm install @fortawesome/fontawesome-free
find node_modules/@fortawesome/fontawesome-free -name "*.svg" -type f | head -5
cp -r node_modules/@fortawesome/fontawesome-free/svgs/* app/assets/svg/icons/fontawesome/

βœ… Rails Icons is now properly set up instead of the CDN. Here’s what we’ve accomplished:

What’s Changed:

  1. βœ… Removed the Font Awesome CDN link (no more external dependency)
  2. βœ… Added rails_icons gem with Heroicons as the default library
  3. βœ… Added Font Awesome as a custom library with all variants (solid, regular, brands)
  4. βœ… Self-hosted all icons through Rails asset pipeline

What is Ransack?

Ransack is a popular Ruby gem that provides powerful search and filtering capabilities for Rails applications. It’s commonly used with ActiveAdmin (which your app uses) to create searchable, filterable, and sortable data tables.

Ransackable Attributes and Associations

ransackable_attributes

This method defines which model attributes can be searched, filtered, or sorted through Ransack. It’s a security feature that prevents unauthorized access to sensitive data.

def self.ransackable_attributes(auth_object = nil)
  %w[id email role created_at updated_at password_reset_token password_reset_sent_at]
end

What it does:

  • Allows searching/filtering by id, email, role, created_at, updated_at, etc.
  • Prevents searching by sensitive fields like password_digest
  • The auth_object parameter can be used for role-based access control

ransackable_associations

This method defines which model associations can be used in Ransack queries.

def self.ransackable_associations(auth_object = nil)
  %w[orders sessions]
end

What it does:

  • Allows searching/filtering by related models (e.g., “users who have orders”)
  • Enables joins and complex queries across associations

Why This Matters for Security

Without these methods, Rails 7+ will raise warnings or errors because Ransack needs explicit permission to search certain fields. This prevents:

  1. Information disclosure – Searching sensitive fields like passwords
  2. Performance issues – Searching on unindexed or inappropriate fields
  3. Unauthorized access – Accessing data through unexpected query parameters

Example Usage in ActiveAdmin

In your ActiveAdmin dashboard, this enables features like:

# In app/admin/users.rb
ActiveAdmin.register User do
  # Users can now search by email, role, etc.
  # Users can filter by orders, sessions
  # Users can sort by created_at, updated_at
end

In Our User Model

Looking at your User model:

def self.ransackable_attributes(auth_object = nil)
  %w[id email role created_at updated_at password_reset_token password_reset_sent_at]
end

def self.ransackable_associations(auth_object = nil)
  %w[orders sessions]
end

This means:

  • βœ… Admins can search users by email, role, creation date
  • βœ… Admins can filter users by their orders or sessions
  • βœ… Admins can sort users by any of these attributes
  • ❌ Admins cannot search by password_digest (secure)
  • ❌ Admins cannot search by other sensitive fields

Benefits

  1. Security: Explicit control over what can be searched
  2. Performance: Only searchable fields need indexes
  3. Usability: Provides powerful admin interface features
  4. Compliance: Helps meet data protection requirements

Migration Guide:

Old CDN way:

<i class="fas fa-user"></i>          <!-- solid -->
<i class="far fa-star"></i>          <!-- regular -->
<i class="fab fa-facebook-f"></i>    <!-- brands -->

New Rails Icons way:

<%= icon "user", library: "fontawesome", variant: "solid", class: "size-6" %>
<%= icon "star", library: "fontawesome", variant: "regular", class: "size-6" %>
<%= icon "facebook-f", library: "fontawesome", variant: "brands", class: "size-6" %>

Or use modern Heroicons (recommended for new icons):

<%= icon "user", class: "size-6" %>
<%= icon "star", class: "size-6" %>
<%= icon "heart", class: "size-6" %>

Benefits:

  • βœ… No external dependencies (works offline)
  • βœ… Better performance (served with your assets)
  • βœ… Version control over icons
  • βœ… Multiple libraries (Font Awesome + Heroicons + more)
  • βœ… Consistent API across all icon libraries
  • βœ… Better for production and privacy

Our application should work exactly the same now, but with better performance and no external dependencies! You can gradually migrate icons from <i class="fas fa-x"> to <%= icon "x", library: "fontawesome", variant: "solid" %> as needed.

Asset Issue Again

βœ… Final Fix Applied:

Added //= link_tree ../../javascript .js to the manifest, which tells Sprockets to include all JavaScript files from the app/javascript directory tree.

βœ… What’s Working Now:

  1. All CSS files properly compiled:
  • tailwind.css βœ…
  • application.css βœ…
  • active_admin.css βœ…
  1. All JavaScript files properly compiled:
  • application.js βœ…
  • controllers/application.js βœ…
  • controllers/decorative_background_controller.js βœ…
  • controllers/hello_controller.js βœ…
  • controllers/index.js βœ…
  1. Asset Pipeline fully functional:
  • Sprockets serving all assets correctly
  • Proper cache headers and ETags
  • All asset links declared in manifest

🎯 Current Status:

Our Rails application now has:

  • βœ… Modern asset pipeline with Sprockets + Importmap
  • βœ… Tailwind CSS for styling (self-hosted)
  • βœ… ActiveAdmin for administration
  • βœ… Rails Icons instead of Font Awesome CDN
  • βœ… Stimulus controllers for JavaScript functionality
  • βœ… All assets properly precompiled and served

Check Github: Active admin changes

πŸ“‹ Clean Commit History Summary:

  1. βœ… Phase 1: feat: Add Rails Icons gem with Font Awesome and Heroicons support #94
  • Replaced Font Awesome CDN with self-hosted icons
  • Added Rails Icons with unified API for multiple icon libraries
  1. βœ… Phase 2: task: Migrate from Propshaft to Sprockets asset pipeline #96
  • Switched from Propshaft to Sprockets for ActiveAdmin compatibility
  • Fixed asset compilation and linking issues
  1. βœ… Phase 3: feat: Integrate ActiveAdmin for comprehensive admin interface #94
  • Complete ActiveAdmin setup with authentication
  • Full admin resources for all e-commerce models
  1. βœ… Phase 4: fix: Resolve ActiveAdmin PostgreSQL and Ransack security issues #94
  • Fixed PostgreSQL GROUP BY errors in dashboard
  • Added Ransack security configuration for all models

πŸš€ Our ActiveAdmin is now fully functional!

You should now be able to:

  • βœ… Access the admin dashboard at localhost:3000/admin
  • βœ… View analytics and statistics without GROUP BY errors
  • βœ… Search and filter all resources safely with Ransack
  • βœ… Manage Users, Products, Variants, Orders, and Order Items
  • βœ… Use nested attributes for product variants
  • βœ… Perform batch operations and advanced filtering

Test it out: Visit localhost:3000/admin and log in with your admin credentials to see the beautiful, fully-functional admin interface! 🎯

to be continued πŸš€…

Rails 8 App: Create an Academic software app using SQL without using ActiveRecord- Part 3

In this episode we move on from creating the tables with constraints, foreign keys, proper indexes, enums, reversing each migrations, seeded data etc. Now let’s check our seeded data with some ui tool that help us smell and modify our db data.

Setup a UI tool for analysing SQL and data

W’re using PostgreSQL. Here are the best SQL GUI tools for pure SQL data analysis and manipulation on macOS:

πŸ† Top Recommendations for SQL Analysis

1. TablePlus ⭐️ (Highly Recommended)

  • Best for: Fast SQL queries, data filtering, before/after comparisons
  • Strengths:
    Lightning-fast query execution
    Excellent data filtering UI with SQL query builder
    Beautiful native macOS interface
    Export to CSV/JSON/SQL
    Query history and favorites
    Cost: Free tier (2 tabs), Pro $89
    Perfect for: Your use case of checking seeded data

2. Postico (macOS Native)

  • Best for: PostgreSQL-specific features and analysis
  • Strengths:
    Built specifically for PostgreSQL
    Excellent for large dataset analysis
    Advanced filtering and sorting
    Beautiful data visualization
    Cost: $49 (one-time)
    PostgreSQL-optimized: Uses all PostgreSQL features

3. pgAdmin (Free, Official)

  • Best for: Advanced PostgreSQL administration and complex queries
  • Strengths:
    Official PostgreSQL tool
    Advanced query planner visualization
    Excellent for performance analysis
    Complete database management
    Cost: Free
    Learning curve: Steeper but very powerful

4. DBeaver (Free, Cross-platform)

  • Best for: Advanced SQL analysis and scripting
  • Strengths:
    Powerful SQL editor with autocomplete
    Data export in multiple formats
    Query execution plans
    Visual query builder
    Cost: Free (Community), Pro $10/month
    Great for: Complex data analysis workflows

Quick Setup Commands

For TablePlus (easiest to get started):

# Install via Homebrew
brew install --cask tableplus

For pgAdmin:

# Install via Homebrew
brew install --cask pgadmin4

For Postico:

# Install via Homebrew
brew install --cask postico

πŸ”§ Connection Details You’ll Need

Your PostgreSQL connection details:

  • Host: localhost (default)
  • Port: 5432 (default)
  • Database: academic_sql_software_development
  • Username: Your macOS username (default)
  • Password: None (default for local development)

πŸ’‘ Pro Tips for Data Analysis

Once connected, you can:

  1. Check seeded data:
   SELECT COUNT(*) FROM users;
   SELECT COUNT(*) FROM orders;
   SELECT COUNT(*) FROM products;
  1. Analyze relationships:
   SELECT 
     u.first_name, u.last_name, 
     COUNT(o.id) as order_count
   FROM users u 
   LEFT JOIN orders o ON u.id = o.user_id 
   GROUP BY u.id, u.first_name, u.last_name
   ORDER BY order_count DESC;
  1. Filter and export specific datasets for before/after comparisons

My Recommendation: Start with TablePlus – it’s the most intuitive for our workflow of checking and filtering seeded data, with excellent performance for the data volumes we’re working with (10k users, 5k orders, etc.).

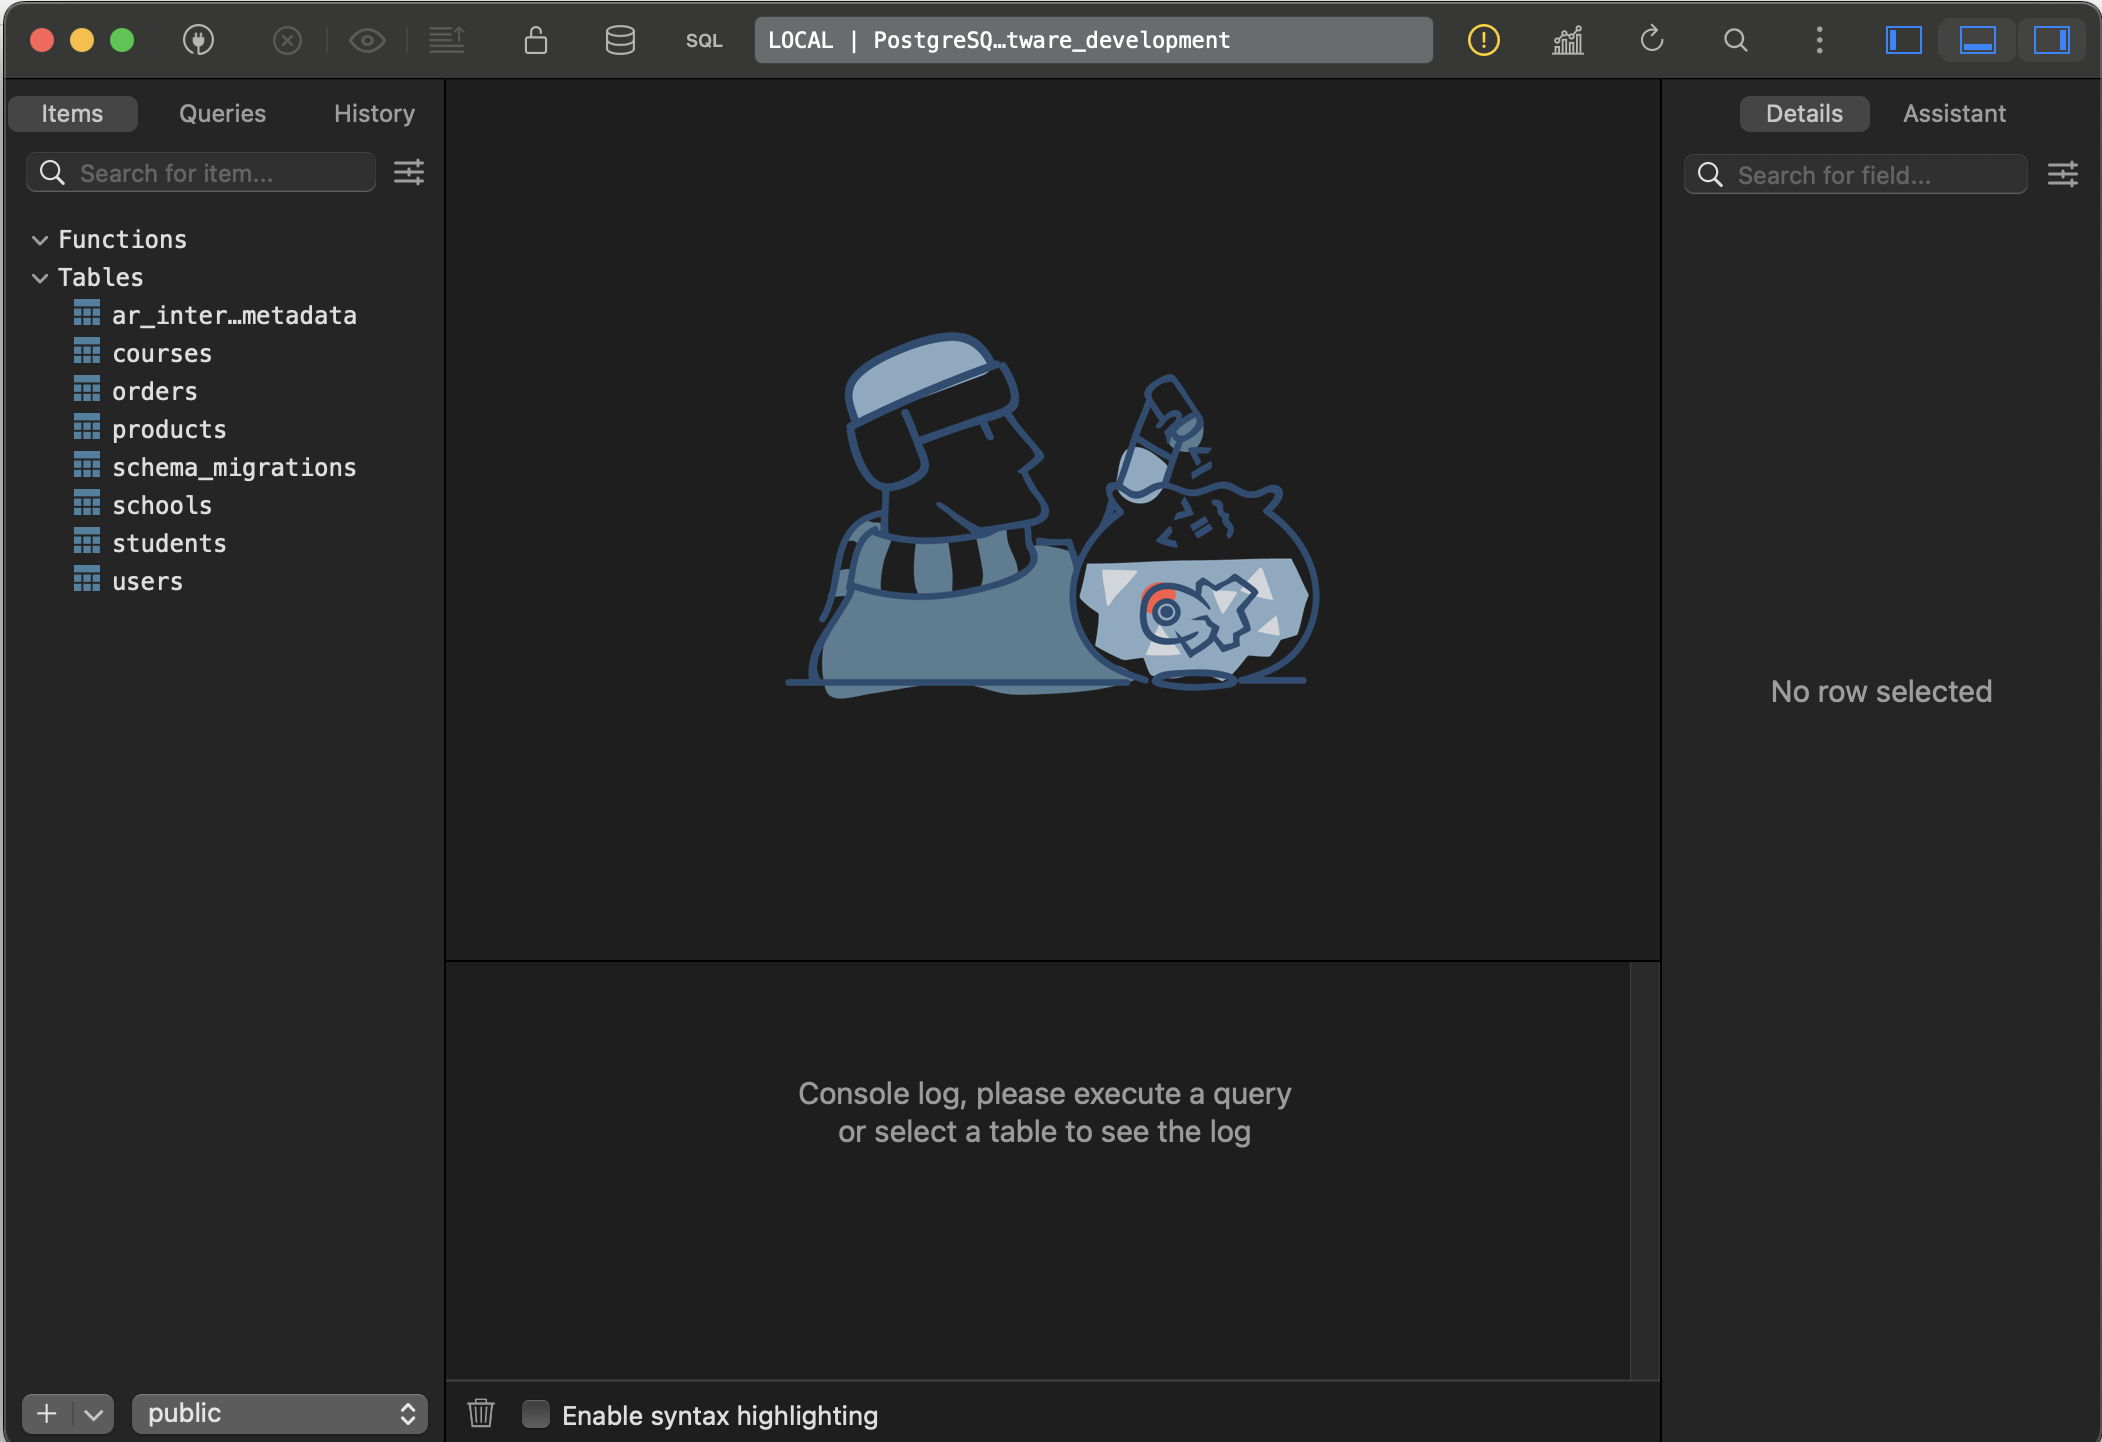
Let’s Go with TablePlus πŸ₯³

πŸš€ StepΒ 1: Install TablePlus

brew install --cask tableplus

πŸ“Š StepΒ 2: Check Our Database Schema

Β WeΒ have a greatΒ setup forΒ learning SQL with realisticΒ relationships. Let’s create aΒ progressive SQL learning path usingΒ our actualΒ data.

πŸ”— StepΒ 3: ConnectΒ to Your Database

TablePlus Connection Details:

  • Host:Β localhost
  • Port:Β 5432
  • Database:Β academic_sql_software_development
  • User:Β (yourΒ macOS username)
  • Password: (leaveΒ blank)

πŸ“š SQLΒ Learning Path: Basic to Advanced

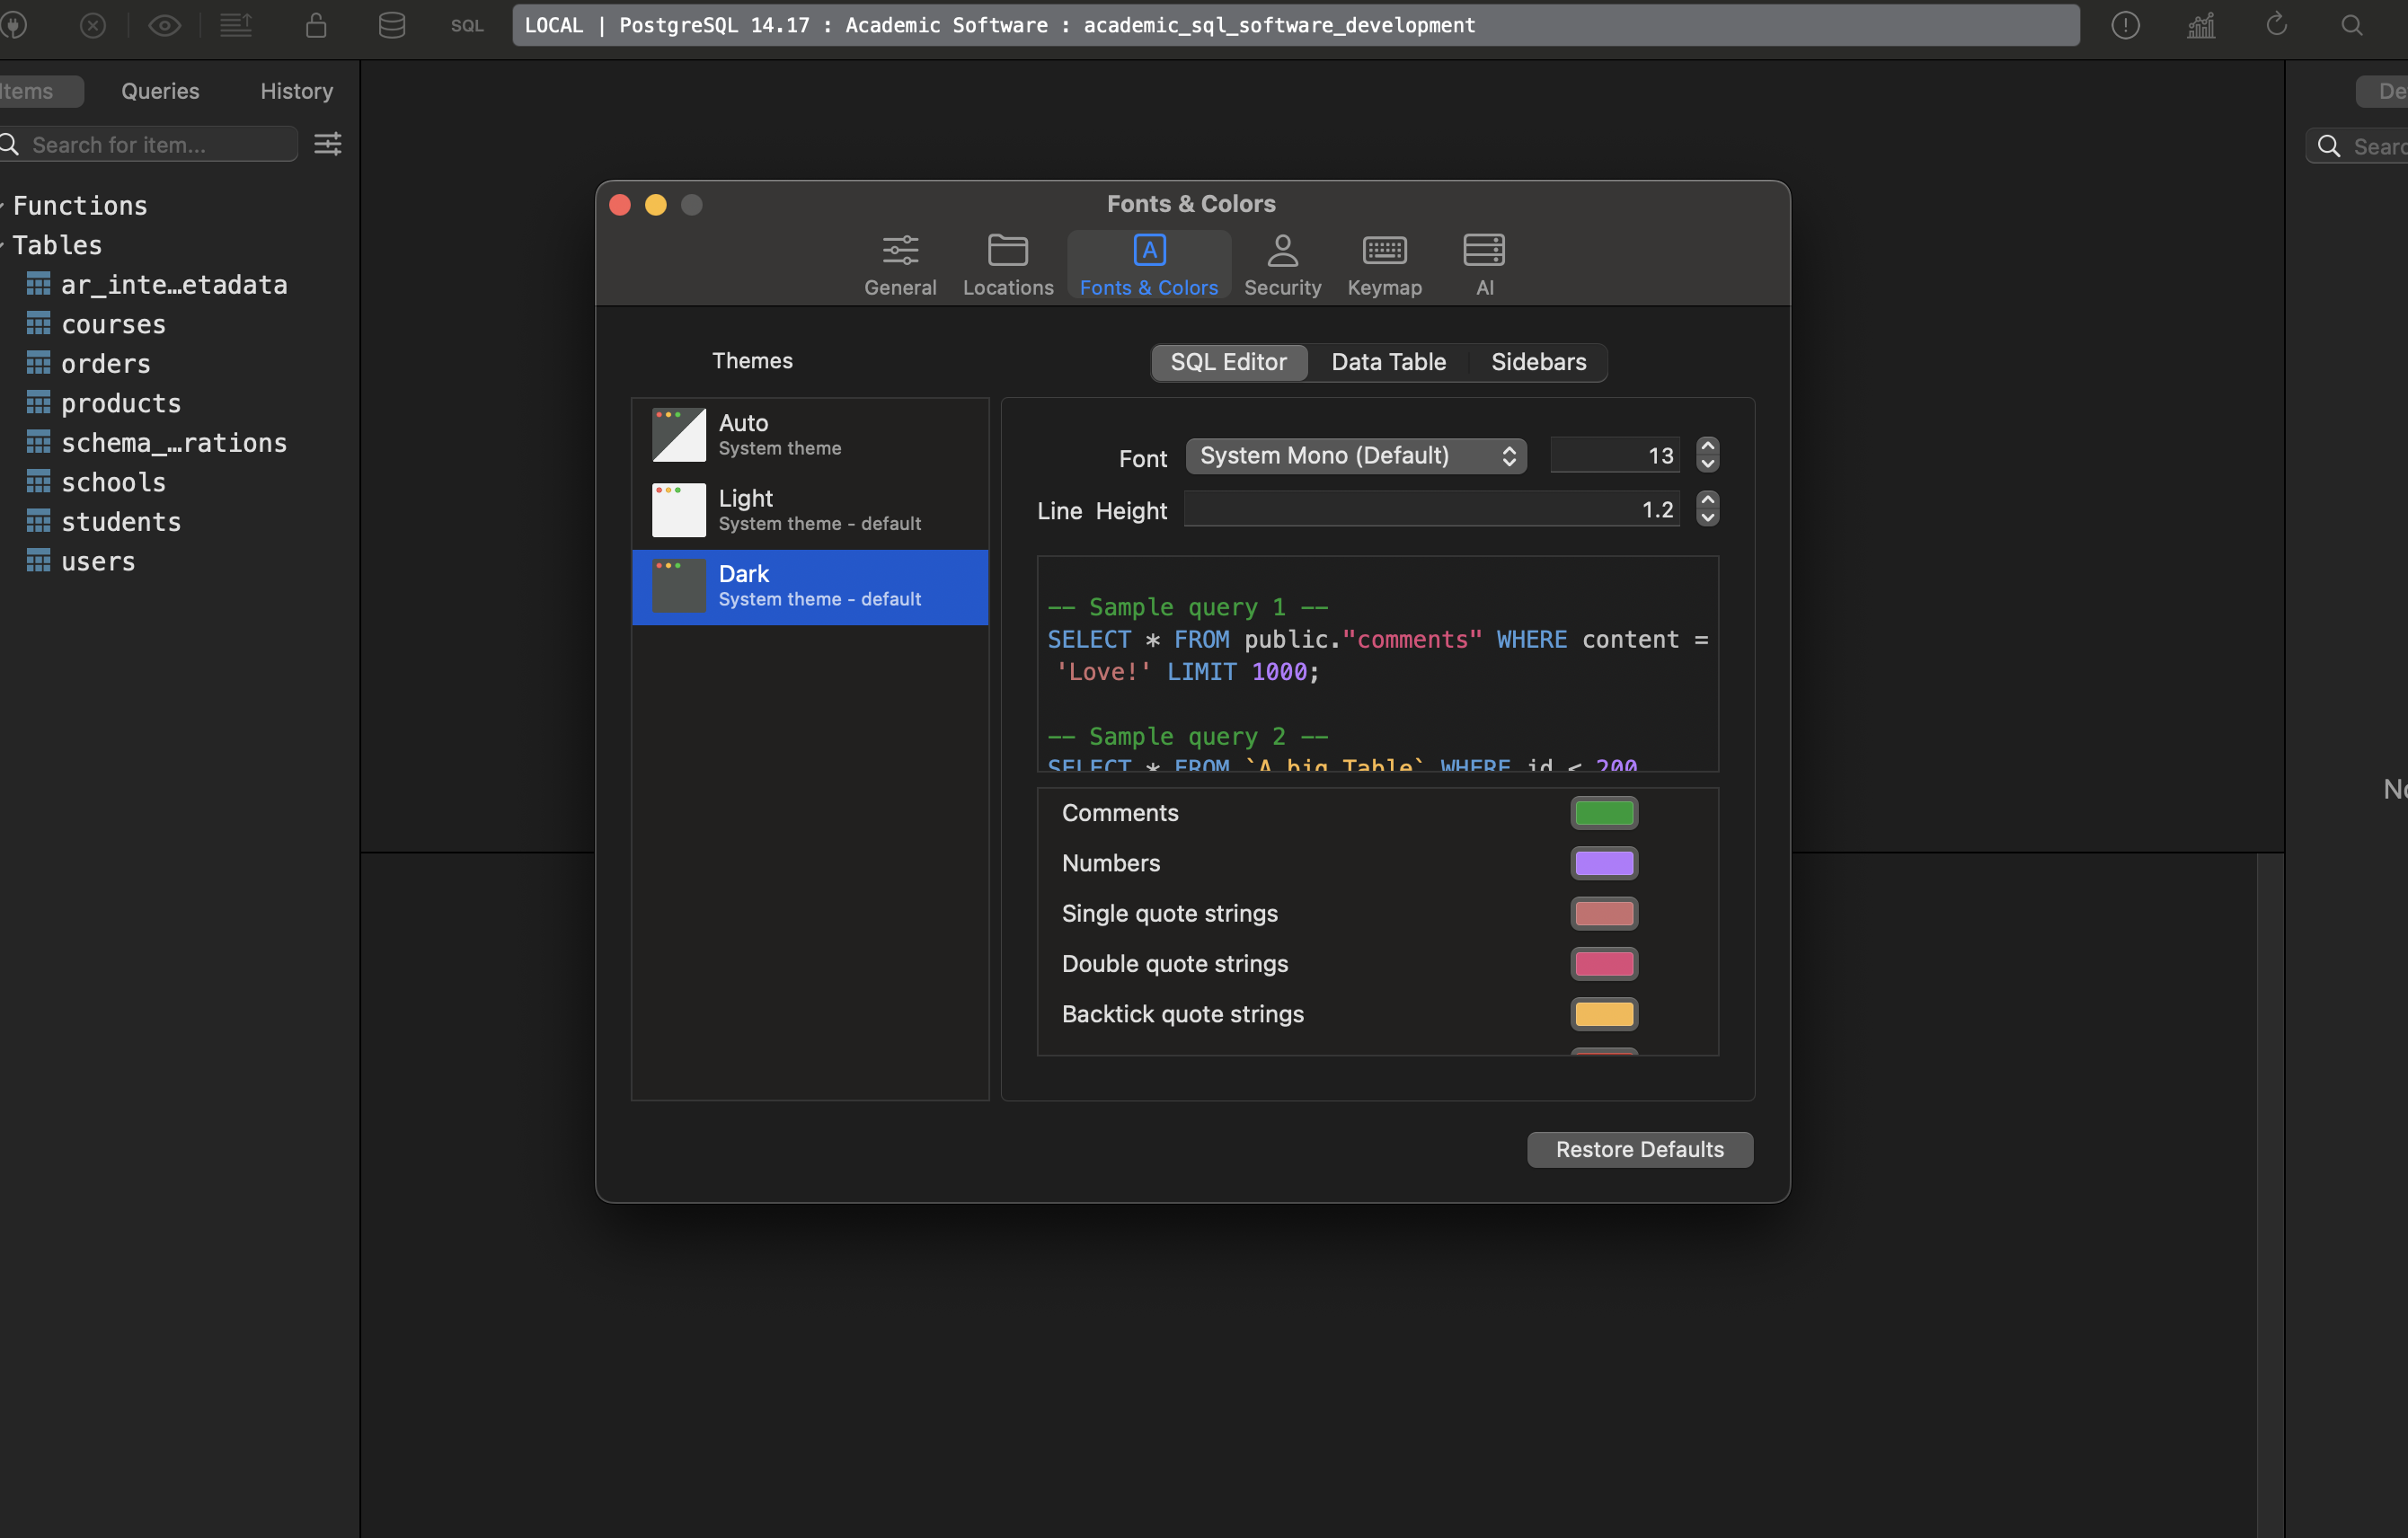
Change Font size, colour, theme etc:

Level 1: Basic SELECT Queries

-- 1. View all users
SELECT * FROM users LIMIT 10;

-- 2. Count total records
SELECT COUNT(*) FROM users;
SELECT COUNT(*) FROM orders;
SELECT COUNT(*) FROM products;

-- 3. Filter data
SELECT first_name, last_name, email 
FROM users 
WHERE gender = 'female' 
LIMIT 10;

-- 4. Sort data
SELECT first_name, last_name, date_of_birth 
FROM users 
ORDER BY date_of_birth DESC 
LIMIT 10;

-- 5. Filter with conditions
SELECT title, price, category 
FROM products 
WHERE price > 50 AND category = 'men' 
ORDER BY price DESC;

Level 2: Basic Aggregations

-- 1. Count by category
SELECT category, COUNT(*) as product_count 
FROM products 
GROUP BY category;

-- 2. Average prices by category
SELECT category, 
       AVG(price) as avg_price,
       MIN(price) as min_price,
       MAX(price) as max_price
FROM products 
GROUP BY category;

-- 3. Users by gender
SELECT gender, COUNT(*) as user_count 
FROM users 
WHERE gender IS NOT NULL
GROUP BY gender;

-- 4. Products with low stock
SELECT COUNT(*) as low_stock_products 
FROM products 
WHERE stock_quantity < 10;

Level 3: Inner Joins

-- 1. Users with their orders
SELECT u.first_name, u.last_name, u.email, o.id as order_id, o.created_at
FROM users u
INNER JOIN orders o ON u.id = o.user_id
ORDER BY o.created_at DESC
LIMIT 20;

-- 2. Orders with product details
SELECT o.id as order_id, 
       p.title as product_name, 
       p.price, 
       p.category,
       o.created_at
FROM orders o
INNER JOIN products p ON o.product_id = p.id
ORDER BY o.created_at DESC
LIMIT 20;

-- 3. Complete order information (3-table join)
SELECT u.first_name, u.last_name,
       p.title as product_name,
       p.price,
       p.category,
       o.created_at as order_date
FROM orders o
INNER JOIN users u ON o.user_id = u.id
INNER JOIN products p ON o.product_id = p.id
ORDER BY o.created_at DESC
LIMIT 20;

Level 4: Left Joins (Show Missing Data)

-- 1. All users and their order count (including users with no orders)
SELECT u.first_name, u.last_name, u.email,
       COUNT(o.id) as order_count
FROM users u
LEFT JOIN orders o ON u.id = o.user_id
GROUP BY u.id, u.first_name, u.last_name, u.email
ORDER BY order_count DESC;

-- 2. Users who haven't placed any orders
SELECT u.first_name, u.last_name, u.email, u.created_at
FROM users u
LEFT JOIN orders o ON u.id = o.user_id
WHERE o.id IS NULL
ORDER BY u.created_at DESC;

-- 3. Products that have never been ordered
SELECT p.title, p.price, p.category, p.stock_quantity
FROM products p
LEFT JOIN orders o ON p.id = o.product_id
WHERE o.id IS NULL
ORDER BY p.price DESC;

Level 5: Advanced Aggregations & Grouping

-- 1. Top customers by order count
SELECT u.first_name, u.last_name,
       COUNT(o.id) as total_orders,
       SUM(p.price) as total_spent
FROM users u
INNER JOIN orders o ON u.id = o.user_id
INNER JOIN products p ON o.product_id = p.id
GROUP BY u.id, u.first_name, u.last_name
HAVING COUNT(o.id) > 1
ORDER BY total_spent DESC
LIMIT 10;

-- 2. Most popular products
SELECT p.title, p.category, p.price,
       COUNT(o.id) as times_ordered,
       SUM(p.price) as total_revenue
FROM products p
INNER JOIN orders o ON p.id = o.product_id
GROUP BY p.id, p.title, p.category, p.price
ORDER BY times_ordered DESC
LIMIT 10;

-- 3. Monthly order analysis
SELECT DATE_TRUNC('month', o.created_at) as month,
       COUNT(o.id) as order_count,
       COUNT(DISTINCT o.user_id) as unique_customers,
       SUM(p.price) as total_revenue
FROM orders o
INNER JOIN products p ON o.product_id = p.id
GROUP BY DATE_TRUNC('month', o.created_at)
ORDER BY month;

Level 6: Student Enrollment Analysis (Complex Joins)

-- 1. Students with their course and school info
SELECT u.first_name, u.last_name,
       c.title as course_name,
       s.title as school_name,
       st.enrolment_date
FROM students st
INNER JOIN users u ON st.user_id = u.id
INNER JOIN courses c ON st.course_id = c.id
INNER JOIN schools s ON st.school_id = s.id
ORDER BY st.enrolment_date DESC
LIMIT 20;

-- 2. Course popularity by school
SELECT s.title as school_name,
       c.title as course_name,
       COUNT(st.id) as student_count
FROM students st
INNER JOIN courses c ON st.course_id = c.id
INNER JOIN schools s ON st.school_id = s.id
GROUP BY s.id, s.title, c.id, c.title
ORDER BY student_count DESC;

-- 3. Schools with enrollment stats
SELECT s.title as school_name,
       COUNT(st.id) as total_students,
       COUNT(DISTINCT st.course_id) as courses_offered,
       MIN(st.enrolment_date) as first_enrollment,
       MAX(st.enrolment_date) as latest_enrollment
FROM schools s
LEFT JOIN students st ON s.id = st.school_id
GROUP BY s.id, s.title
ORDER BY total_students DESC;

Level 7: Advanced Concepts

-- 1. Subqueries: Users who spent more than average
WITH user_spending AS (
  SELECT u.id, u.first_name, u.last_name,
         SUM(p.price) as total_spent
  FROM users u
  INNER JOIN orders o ON u.id = o.user_id
  INNER JOIN products p ON o.product_id = p.id
  GROUP BY u.id, u.first_name, u.last_name
)
SELECT first_name, last_name, total_spent
FROM user_spending
WHERE total_spent > (SELECT AVG(total_spent) FROM user_spending)
ORDER BY total_spent DESC;

-- 2. Window functions: Ranking customers
SELECT u.first_name, u.last_name,
       COUNT(o.id) as order_count,
       SUM(p.price) as total_spent,
       RANK() OVER (ORDER BY SUM(p.price) DESC) as spending_rank
FROM users u
INNER JOIN orders o ON u.id = o.user_id
INNER JOIN products p ON o.product_id = p.id
GROUP BY u.id, u.first_name, u.last_name
ORDER BY spending_rank
LIMIT 20;

-- 3. Case statements for categorization
SELECT u.first_name, u.last_name,
       COUNT(o.id) as order_count,
       CASE 
         WHEN COUNT(o.id) >= 5 THEN 'VIP Customer'
         WHEN COUNT(o.id) >= 2 THEN 'Regular Customer'
         ELSE 'New Customer'
       END as customer_type
FROM users u
LEFT JOIN orders o ON u.id = o.user_id
GROUP BY u.id, u.first_name, u.last_name
ORDER BY order_count DESC;

Level 8: Self-Joins & Advanced Analysis

-- 1. Find users enrolled in the same course (pseudo self-join)
SELECT DISTINCT 
       u1.first_name || ' ' || u1.last_name as student1,
       u2.first_name || ' ' || u2.last_name as student2,
       c.title as course_name
FROM students s1
INNER JOIN students s2 ON s1.course_id = s2.course_id AND s1.user_id < s2.user_id
INNER JOIN users u1 ON s1.user_id = u1.id
INNER JOIN users u2 ON s2.user_id = u2.id
INNER JOIN courses c ON s1.course_id = c.id
ORDER BY c.title, student1
LIMIT 20;

-- 2. Complex business question: Multi-role users
SELECT u.first_name, u.last_name, u.email,
       COUNT(DISTINCT o.id) as orders_placed,
       COUNT(DISTINCT st.id) as courses_enrolled,
       CASE 
         WHEN COUNT(DISTINCT o.id) > 0 AND COUNT(DISTINCT st.id) > 0 THEN 'Customer & Student'
         WHEN COUNT(DISTINCT o.id) > 0 THEN 'Customer Only'
         WHEN COUNT(DISTINCT st.id) > 0 THEN 'Student Only'
         ELSE 'No Activity'
       END as user_type
FROM users u
LEFT JOIN orders o ON u.id = o.user_id
LEFT JOIN students st ON u.id = st.user_id
GROUP BY u.id, u.first_name, u.last_name, u.email
ORDER BY orders_placed DESC, courses_enrolled DESC;

🎯 Our Learning Strategy:

  1. Start with Level 1-2Β in TablePlus toΒ get comfortable
  2. ProgressΒ through each levelΒ – try to understand eachΒ query before moving on
  3. Modify theΒ queriesΒ – change filters, add fields, etc.
  4. Create your own variationsΒ based on businessΒ questions

to be continued … πŸš€

Rails 8 App: Create an Academic software app using SQL without using ActiveRecord- Part 2 | students | courses | schools

Design: Our Students Table -> course -> school

We need a UNIQUE constraint on user_id because:

  • βœ… One student per user (user_id should be unique)
  • βœ… Multiple students per course (course_id can be repeated)

Check Migration Files:

Key Changes:

  1. βœ… Added UNIQUE constraint: CONSTRAINT uk_students_user_id UNIQUE (user_id)
  2. πŸ”§ Fixed typos:
  • TIMSTAMP β†’ TIMESTAMP
  • stidents β†’ students

πŸ“ˆ Optimized indexes: No need for user_id index since UNIQUE creates one automatically

Business Logic Validation:

  • user_id: One student per user βœ…
  • course_id: Multiple students per course βœ…
  • school_id: Multiple students per school βœ…

This ensures referential integrity and business rules are enforced at the database level!


πŸ“ Schema Storage Options:

Rails allows you to store the schema in SQL format instead of the default Ruby format. Let me explain the options and why you’d choose each:

1. Ruby Format (Default)

# db/schema.rb
ActiveRecord::Schema[8.0].define(version: 2025_07_09_074552) do
  enable_extension "pg_catalog.plpgsql"

  create_table "users", force: :cascade do |t|
    t.string "first_name", limit: 100, null: false
    t.string "email", limit: 150, null: false
    t.datetime "created_at", null: false
    t.index ["email"], name: "idx_users_email"
  end
end

2. SQL Format

-- db/structure.sql
CREATE EXTENSION IF NOT EXISTS pg_catalog.plpgsql;

CREATE TYPE gender_enum AS ENUM ('male', 'female', 'not-specified');

CREATE TABLE users (
    id bigserial PRIMARY KEY,
    first_name varchar(100) NOT NULL,
    email varchar(150) NOT NULL,
    created_at timestamp NOT NULL DEFAULT CURRENT_TIMESTAMP
);

CREATE UNIQUE INDEX idx_users_email ON users(email);

Check structure.sql File: Github: db/structure.sql

πŸ”§ How to Switch to SQL Format:

Add this to config/application.rb:

module AcademicSqlSoftware
  class Application < Rails::Application
    # ... existing config ...

    # Use SQL format for schema
    config.active_record.schema_format = :sql
  end
end

Then regenerate the schema:

# Generate SQL schema file
rails db:schema:dump

This will create db/structure.sql instead of db/schema.rb.

Comparison Table:

FeatureRuby Format (schema.rb)SQL Format (structure.sql)
Defaultβœ… Yes❌ No
Database Agnosticβœ… Yes❌ No (DB-specific)
Custom SQL Features❌ Limitedβœ… Full support
Views❌ Noβœ… Yes
Stored Procedures❌ Noβœ… Yes
Triggers❌ Noβœ… Yes
Custom Types/ENUMs❌ Limitedβœ… Full support
Partial Indexes❌ Limitedβœ… Yes
Check Constraints❌ Limitedβœ… Yes
Version Controlβœ… Easy to diff⚠️ Harder to diff
Readabilityβœ… Ruby-like⚠️ Raw SQL

When to Use Each:

Choose SQL Format When:

  • βœ… Using PostgreSQL-specific features (ENUMs, arrays, JSONB operators)
  • βœ… Need database views, triggers, or stored procedures
  • βœ… Using complex constraints (CHECK, partial indexes)
  • βœ… Working with custom data types
  • βœ… Team is SQL-proficient

Choose Ruby Format When:

  • βœ… Want database portability (switching between PostgreSQL/MySQL/SQLite)
  • βœ… Team prefers Ruby syntax
  • βœ… Using standard Rails features only
  • βœ… Need easier version control diffs

For Our Project:

I recommend SQL format because you’re using:

  • βœ… PostgreSQL ENUMs (gender_enum, category_enum) – Rails 8 supports this
  • βœ… Custom constraints (CHECK (price > 0)) – Rails 8 supports this
  • βœ… Complex foreign key relationships
  • βœ… Raw SQL migrations

Our config/application.rb should include:

config.active_record.schema_format = :sql

Then run:

rails db:schema:dump

This will give us full control over PostgreSQL features while maintaining schema consistency! 🎯

🌱 Seed Data

1. Let’s refactor the seed file into modular components. I’ll create separate seeder classes for each model type and organize them properly.

2. Let’s me create individual seeder classes for each model, the seeders for the dependent models (orders and students), refactor the main seeds.rb file to use the new modular structure, create a documentation file for the new modular structure.

3. I’ve successfully refactored our seed file into a modular, maintainable architecture. Here’s what we’ve created:

🎯 Modular Seed System Overview

πŸ“ File Structure:

db/
β”œβ”€β”€ seeds.rb                    # Main orchestrator (now 20 lines vs 246!)
└── seeds/
    β”œβ”€β”€ README.md              # Complete documentation
    β”œβ”€β”€ base_seeder.rb         # Shared functionality & config
    β”œβ”€β”€ users_seeder.rb        # User creation logic
    β”œβ”€β”€ products_seeder.rb     # Product creation logic  
    β”œβ”€β”€ courses_seeder.rb      # Course creation logic
    β”œβ”€β”€ schools_seeder.rb      # School creation logic
    β”œβ”€β”€ orders_seeder.rb       # Order creation (with dependencies)
    └── students_seeder.rb     # Student creation (with constraints)

Key Benefits:

βœ… Separation of Concerns:
  • Each model has its own dedicated seeder class
  • Clear responsibility boundaries
  • Easy to modify individual model generation
βœ… Maintainability:
  • Single file changes vs monolithic seed file
  • Inheritance from BaseSeeder for shared functionality
  • Comprehensive documentation
βœ… Flexibility:
  • Easy to add new models
  • Environment-specific configuration
  • Configurable record counts
βœ… Robustness:
  • Proper dependency handling
  • Constraint compliance (stock, unique keys)
  • Error handling and validation

πŸ“‹ Usage Examples:

# Basic seeding
rails db:seed

# Clear data first
CLEAR_DATA=true rails db:seed

# Scale up for testing
# Edit USERS_COUNT in base_seeder.rb then:
rails db:seed

Check my Github Seed File: Seed File – Academic SQL App

πŸ› οΈ Commit the Refactored System:

# Stage all the new modular files
git add db/seeds.rb \
        db/seeds/

# Commit with comprehensive message
git commit -m "Refactor seed system into modular architecture" -m "

Modular Structure:
- Split monolithic seeds.rb into focused seeder classes
- Create BaseSeeder with shared functionality and configuration
- Separate concerns: each model has dedicated seeder
- Add comprehensive documentation in seeds/README.md

Benefits:
- Maintainability: Easy to modify individual model generation
- Flexibility: Simple to add new models or adjust data
- Robustness: Proper dependency handling and constraint compliance
- Testability: Individual seeders can be tested in isolation

Features:
- Environment-specific behavior (auto-clear in development)
- Smart constraint handling (stock validation, unique keys)
- Progress indicators and comprehensive reporting
- Configurable record counts via constants

Files:
- db/seeds.rb: Main orchestrator (20 lines vs 246)
- db/seeds/base_seeder.rb: Shared functionality & config
- db/seeds/*_seeder.rb: Individual model seeders
- db/seeds/README.md: Complete documentation

The system is now ready for production use and easy to extend."

πŸŽ‰ What We Can Do Now:

Scale Easily:

# In base_seeder.rb - change these and run rails db:seed
USERS_COUNT = 10_000
PRODUCTS_COUNT = 1_000  
ORDERS_COUNT = 50_000

Add New Models: Create new_model_seeder.rb, inherit from BaseSeeder, add to orchestration.

Customize Data: Edit individual seeder constants and attribute methods.

Test Components:

users = UsersSeeder.create_users
products = ProductsSeeder.create_products

Our seed system is now enterprise-ready with clean architecture, comprehensive documentation, and infinite scalability! πŸš€

Possible Refactoring

Now Let’s move the helper methods to a dedicated helper folder for better organization. I’ll create a helpers directory and move the shared utility methods there.

Here’s how to refactor your seed helper methods into a new helpers folder under db/seeds:

  1. Create a directory:
    db/seeds/helpers/
  2. Move all shared/random data methods (like random_gender, random_category, etc.) into a module, e.g. db/seeds/helpers/data_generators.rb:
# db/seeds/helpers/data_generators.rb
module DataGenerators
  def random_gender
    ['male', 'female', 'not-specified'].sample
  end

  def random_category
    ['men', 'women', 'kids', 'infants'].sample
  end

  def random_date_of_birth
    Date.today - rand(18..80).years - rand(365).days
  end

  def random_phone
    "+1#{rand(100..999)}-#{rand(100..999)}-#{rand(1000..9999)}"
  end

  def random_price
    [9.99, 19.99, 29.99, 49.99, 99.99, 199.99, 299.99, 499.99].sample
  end

  def random_stock
    [0, 5, 10, 25, 50, 100, 500].sample
  end

  def random_past_date(days_ago_max = 365)
    Date.today - rand(1..days_ago_max).days
  end
end
  1. In your seeders and base seeder, require and include the helper:
# At the top of each seeder or in base_seeder.rb
require_relative 'helpers/data_generators'

class UsersSeeder < BaseSeeder
  extend DataGenerators
  # ... now you can call random_gender, random_category, etc.
end
  1. Remove the helper methods from BaseSeeder and use the module instead.

Summary:

  • Move all shared/random data methods to db/seeds/helpers/data_generators.rb as a module.
  • require_relative and extend or include the module in your seeders.
  • This keeps your seed logic clean and DRY!

Our BaseSeeder still contains all the random data and progress helper methods, which are now in db/seeds/helpers/data_generators.rb and db/seeds/helpers/ui_helpers.rb.

Here’s what we should do:

  • Remove all the methods at the bottom of BaseSeeder that are now in the helpers.
  • At the top of base_seeder.rb, require the helper modules.
  • If you want to use the helpers as class methods, use extend for each module.

Here’s the refactor plan:

  1. Remove:
  • random_gender
  • random_category
  • random_date_of_birth
  • random_phone
  • random_price
  • random_stock
  • random_past_date
  • progress_indicator
  1. Add at the top:
   require_relative 'helpers/data_generators'
   require_relative 'helpers/ui_helpers'
   extend DataGenerators
   extend UiHelpers

Changes Made:

  1. In UiHelpers:
    • Removed the hardcoded print_summary and print_verification methods.
    • Ensured print_summary_box and print_verification_stats are ready to accept data.
  2. In BaseSeeder:
    • Now dynamically creates a summary_data hash with the final record counts.
    • Creates a verification_stats hash with key metrics.
    • Calls UiHelpers.print_summary_box and UiHelpers.print_verification_stats, passing in the data.

Benefits of this Refactor:

  • More Flexible: You can now easily add or remove items from the summary and verification sections just by changing the hashes in BaseSeeder.
  • Decoupled: The UiHelpers module is now purely for presentation and has no knowledge of your specific models.
  • Cleaner Code: The logic is now clearly separatedβ€”BaseSeeder gathers the data, and UiHelpers displays it.

Now the BaseSeeder is clean and only contains orchestration logic and configuration. All random data and UI/progress helpers are now properly delegated to the new helper modules.

We can now use these helpers in any seeder by calling random_gender,  progress_indicator, etc., thanks to the extend statements. This makes our seed system much more modular, maintainable, and DRY!

That’s a great suggestion for further refactoring. It makes sense to keep all data-related logic, including aggregation for summaries, within the DataGenerators helper.

Let’s proceed. I’ll move the hash construction into new methods inside db/seeds/helpers/data_generators.rb and then update BaseSeeder to call them.
Now that the data generation has been moved, I’ll update the BaseSeeder to call the new methods.

Issues Fixed:

  1. UiHelpers method calls: All seeder files were calling progress_indicator directly, but since the methods in UiHelpers are defined as class methods, they needed to be prefixed with UiHelpers.. Fixed in:
  • UsersSeeder
  • ProductsSeeder
  • CoursesSeeder
  • SchoolsSeeder
  • OrdersSeeder
  • StudentsSeeder
  1. DataGenerators references: The BaseSeeder was trying to call DataGenerators.summary_data and DataGenerators.verification_stats, but that file was deleted. I updated it to use the local summary_data and verification_stats methods that were already defined in the BaseSeeder class.

Seeding Results:

  • βœ… 10,000 users created
  • βœ… 1,000 products created
  • βœ… 50 courses created
  • βœ… 25 schools created
  • βœ… 5,000 orders created
  • βœ… 5,000 students created

The verification stats show proper data relationships:

  • 4,004 users have orders
  • 647 products have been ordered
  • 756 products are active
  • 200 students per school (average)
  • 100 students per course (average)

βœ… Final Architecture:

  1. DataGenerators: Is now responsible for all data-related tasks, including generating random primitive data (random_phone) and creating aggregated summary data (summary_data, verification_stats).
  2. UiHelpers: Is responsible for all presentation logic, taking data as input and printing it to the console in a formatted way.
  3. Individual Seeders (UsersSeeder, etc.): Responsible for the business logic of creating a specific type of record, using helpers for data and UI.
  4. BaseSeeder: The main orchestrator. It knows the correct order to call the individual seeders and delegates all data and UI tasks to the appropriate helpers.
  5. seeds.rb: The single entry point that kicks off the entire process.

to be continued … πŸš€

String 𓍯 operations using Ruby πŸ’Žmethods

Let’s find out solutions to some ruby coding problems that can help us to manipulate over a String in Ruby.

Learn About the following topics to solve the below problems:

Ruby String scan: https://railsdrop.com/2012/07/07/ruby-string-method-scan/


πŸ§ͺ Q1: Ruby String Manipulation

❓ Prompt:

Write a method reverse_words that takes a string and returns a new string where the order of words is reversed, but the characters within each word stay in the same order.

Words are separated by spaces. Preserve exact spacing between words (multiple spaces too).

Examples:

reverse_words("hello world")             #=> "world hello"
reverse_words("  good   morning  ruby ") #=> " ruby  morning   good  "

✏️ Answer:

def reverse_words(str)
  str.scan(/\s+|\S+/).reverse.join
end

Explanation:

  • str.scan(/\s+|\S+/) splits the string into tokens that are either a word or a space block (preserves exact spacing).
  • .reverse reverses their order.
  • .join merges them back into a single string.

Sample Test Cases:

puts reverse_words("hello world")             # => "world hello"
puts reverse_words("  good   morning  ruby ") # => " ruby  morning   good  "
puts reverse_words("one")                     # => "one"
puts reverse_words("")                        # => ""


πŸ§ͺ Q2: Normalize Email Addresses

❓ Prompt:

Write a method normalize_email that normalizes email addresses using the following rules (similar to Gmail):

  1. Ignore dots (.) in the username part.
  2. Remove everything after a plus (+) in the username.
  3. Keep the domain part unchanged.

The method should return the normalized email string.

Examples:

normalize_email("john.doe+work@gmail.com")     # => "johndoe@gmail.com"
normalize_email("alice+spam@company.org")      # => "alice@company.org"
normalize_email("bob.smith@domain.co.in")      # => "bobsmith@domain.co.in"

✏️ Answer:

def normalize_email(email)
  local, domain = email.split("@")
  local = local.split("+").first.delete(".")
  "#{local}@#{domain}"
end

Explanation:

  • split("@") separates username from domain.
  • split("+").first keeps only the part before +.
  • .delete(".") removes all dots from the username.
  • Concatenate with the domain again.

Test Cases:

puts normalize_email("john.doe+work@gmail.com")     # => "johndoe@gmail.com"
puts normalize_email("alice+spam@company.org")      # => "alice@company.org"
puts normalize_email("bob.smith@domain.co.in")      # => "bobsmith@domain.co.in"
puts normalize_email("simple@domain.com")           # => "simple@domain.com"


to be continued.. πŸš€

Guide: Integrating React.js βš›οΈ into a RailsΒ 8 Application – PartΒ 2: Install React | Add esbuild, Jsx | Integrate React View

Throw back:

rails new design_studio_react --database=postgresql -j esbuild --skip-hotwire

Here’s what our Rails app looks like after skipping Hotwire with the --skip-hotwire flag:

βœ… Current JavaScript/Node.js Setup (Clean & Minimal)

πŸ“¦ Package Management:

  • package.json – Clean setup with only esbuild script
  • .node-version – Node.js version 24.1.0
  • No dependencies – Ready for React installation

πŸ“ JavaScript File Structure (Ultra-Clean):

app/javascript/
└── application.js          # Empty entry point (2 lines total!)

app/javascript/application.js content:

// Entry point for the build script in your package.json

🚫 What Got Successfully Removed:

  • ❌ No Turbo/Stimulus imports in application.js
  • ❌ No controllers/ directory at all
  • ❌ No Hotwire gems in Gemfile (only jsbundling-rails remains)
  • ❌ No @hotwired/turbo-rails or @hotwired/stimulus dependencies

βš™οΈ Configuration Files (Minimal – Only 4):

  1. package.json – esbuild build script only
  2. .node-version – Node.js version pinning
  3. Procfile.dev – Development processes (js: yarn build --watch)
  4. app/javascript/application.js – Empty entry point

πŸ”§ esbuild Configuration:

{
  "scripts": {
    "build": "esbuild app/javascript/*.* --bundle --sourcemap --format=esm --outdir=app/assets/builds --public-path=/assets"
  }
}

πŸ“‚ Build Output:

  • app/assets/builds/ – Contains only .keep file (empty, ready for bundles)

🎯 HTML Integration:

<!-- Still includes the JavaScript module correctly -->
<%= javascript_include_tag "application", "data-turbo-track": "reload", type: "module" %>

(Note: data-turbo-track is just an HTML attribute for cache busting, not the Turbo library)

# create db
βœ— rails db:migrate

# run react-rails-app in port 3001
βœ— rails s -p 3001

πŸš€ Next Steps: Install & Setup React

Step 1: Install react, react-dom

Your app is now perfectly clean for React! Just run:

brew install yarn
yarn add react react-dom # check node_modules/ folder for what is installed
yarn add --dev @types/react @types/react-dom  # Optional: for TypeScript support, check node_modules/@types folder

Status: βœ… Minimal JavaScript foundation – No Hotwire bloat, perfect React starting point!

Now that we have a clean Rails app with esbuild setup, here’s our step-by-step roadmap to get React working:

Step 2: Create Your First React Component

Create a simple React component to test the setup:

mkdir app/javascript/components

Then create app/javascript/components/App.jsx:

import React from 'react';

function App() {
  return (
    <div>
      <h1>React is Working!</h1>
      <p>Welcome to your Rails + React app</p>
    </div>
  );
}

export default App;

Step 3: Update JavaScript Entry Point

Modify app/javascript/application.js to render React:

// Entry point for the build script in your package.json
import React from 'react';
import { createRoot } from 'react-dom/client';
import App from './components/App';

document.addEventListener('DOMContentLoaded', () => {
  const container = document.getElementById('react-root');
  if (container) {
    const root = createRoot(container);
    root.render(<App />);
  }
});

Step 4: Create a Controller & Route

Generate a home controller:

rails generate controller Home index

Step 5: Add React Root to View

Update app/views/home/index.html.erb:

<div id="react-root"></div>

Step 6: Set Root Route

Update config/routes.rb:

Rails.application.routes.draw do
  root "home#index"
  # ... other routes
end

Step 7: Start Development

# update Procfile.dev assign port 3001
web: env RUBY_DEBUG_OPEN=true bin/rails server -p 3001
# run our rails-react app by

βœ— bin/dev
21:15:27 web.1  | started with pid 12619
21:15:27 js.1   | started with pid 12620
21:15:27 js.1   | yarn run v1.22.22
21:15:27 js.1   | $ esbuild app/javascript/*.* --bundle --sourcemap --format=esm --outdir=app/assets/builds --public-path=/assets --watch
21:15:27 js.1   | /bin/sh: esbuild: command not found
21:15:27 js.1   | error Command failed with exit code 127.
21:15:27 js.1   | info Visit https://yarnpkg.com/en/docs/cli/run for documentation about this command.
21:15:27 web.1  | => Booting Puma
..........

🎯 What This Gives Us:

  • βœ… React components in app/javascript/components/
  • βœ… esbuild automatically bundles JSX
  • βœ… Hot reloading with yarn build --watch
  • βœ… Rails serves your React app

🚨 Error Analysis:

  1. Rails serverΒ started fineΒ βœ… (port 3001)

πŸ”§ Solution: Install JavaScript Dependencies

You need to install esbuild and other JavaScript dependencies first:

yarn install

πŸ“‹ Files yarn install Checks:

1. Primary: package.json

{
  "name": "app",
  "private": true,
  "scripts": {
    "build": "esbuild app/javascript/*.* --bundle --sourcemap --format=esm --outdir=app/assets/builds --public-path=/assets"
  },
  "dependencies": {
    "react": "^19.1.0",           # βœ… Already added
    "react-dom": "^19.1.0"       # βœ… Already added  
  },
  "devDependencies": {
    "@types/react": "^19.1.8",      # βœ… Already added
    "@types/react-dom": "^19.1.6"   # βœ… Already added
  }
}

2. Lockfile: yarn.lock

  • Ensures exact versions for reproducible installs
  • Contains resolved URLs and integrity hashes

🚨 The Problem: Missing esbuild!

Our package.json calls esbuild in the build script, but esbuild is not listed as a dependency anywhere!

Rails should have added it, but didn’t. We need to add esbuild:

yarn add --dev esbuild

πŸ”§ What yarn install does:

  1. Reads package.json for dependency list
  2. Reads yarn.lock for exact versions (if exists)
  3. Downloads packages to node_modules/
  4. Updates yarn.lock with new resolutions

Current issue: Our build script expects esbuild command, but it’s not installed in node_modules/.bin/esbuild

Solution: Add esbuild as a dev dependency!

Solved~ and start servers: Error Again!

x bin/dev

* Listening on http://[::1]:3001
22:54:43 web.1  | Use Ctrl-C to stop
22:54:44 js.1   | ✘ [ERROR] The JSX syntax extension is not currently enabled
22:54:44 js.1   |
22:54:44 js.1   |     app/javascript/application.js:11:16:
22:54:44 js.1   |       11 β”‚     root.render(<App />);
22:54:44 js.1   |          β•΅                 ^
22:54:44 js.1   |
22:54:44 js.1   |   The esbuild loader for this file is currently set to "js" but it must be set to "jsx" to be able to parse JSX syntax. You can use "--loader:.js=jsx" to do that.
22:54:44 js.1   |
22:54:44 js.1   | 1 error
22:54:44 js.1   | [watch] build finished, watching for changes..

This error occurs because esbuild doesn’t know how to handle JSX syntax! The <App /> is JSX, but esbuild needs to be configured to transform it.

🚨 Problem: esbuild can’t process JSX syntax

Your application.js contains JSX (<App />), but esbuild isn’t configured to transform JSX!

JSX (JavaScript XML) is a syntax extension for JavaScript, commonly used with React, that allows you to write HTML-like code within JavaScript files.

πŸ”§ Solution: Configure esbuild for JSX

Update your package.json build script to handle JSX:

# add this to build
--jsx=automatic --loader:.js=jsx 

βœ… Fixed! Added JSX support:

What I added:

  • --jsx=automatic – Enables React’s automatic JSX runtime
  • --loader:.js=jsx – Treats .js files as JSX files

πŸ“ What this means:

  • βœ… esbuild can now process <App /> syntax
  • βœ… You don’t need to import React in every JSX file
  • βœ… Your .js files can contain JSX
bin/dev

Whola!!

Let’s see in Part 3. Happy React configuration! πŸš€

Software ArchitectΒ Guide: Layering An Application

𝐐) Why is Layering an Application Important in a Project?

Layering an application is a fundamental architectural principle where the codebase is divided into logical layers, each with a clear responsibility. This approach brings several benefits during the execution of a project:

1. Separation of Concerns (SoC)

  • Each layer handles a specific responsibility:
    • UI/Presentation Layer: Handles user interaction
    • Business Logic Layer: Implements application rules
    • Data Access Layer: Manages data storage and retrieval
      βœ… This makes the codebase easier to reason about and reduces interdependency.

2. Maintainability

  • You can update or refactor one layer (e.g., switch databases or UI frameworks) without deeply affecting the others.
    βœ… Makes the system easier to modify and debug over time.

3. Testability

  • Layers make unit testing and integration testing cleaner.
  • You can test business logic without hitting the database or UI.

4. Scalability

  • Different layers can scale independently.
    • Example: You might scale out your API layer separately from your database layer.
      βœ… Allows for horizontal scaling and performance tuning.

5. Reusability

  • Code in a layered architecture (like service or domain logic) can be reused across different contexts (e.g., web, mobile, CLI)
    βœ… Promotes DRY (Don’t Repeat Yourself) principles.

6. Security and Access Control

  • Sensitive operations can be isolated in backend or service layers, reducing risk of direct access from external sources.

7. Team Collaboration

  • Teams can work in parallel on different layers:
    • Frontend team builds the UI layer
    • Backend team develops business logic and APIs
      βœ… Leads to faster development cycles

Great! Here’s a diagram + real-world example of a layered architecture using a Ruby on Rails backend and a React frontend, typical for a full-stack application.


🎯 Example: Layered Architecture for an E-Commerce System

We’ll use a basic feature: placing an order.

🧱 Layered Architecture (Concept Diagram)


πŸ’‘ Layer Descriptions

LayerRoleTech/Tool
Client LayerUI & User InteractionReact, Redux
API LayerReceives requests, validates input, returns JSONRails Controllers
Service LayerCore business logic (e.g., payment, inventory, discount rules)Plain Ruby classes
Repository LayerData access, querying, persistenceActiveRecord, SQL
Database LayerStores persistent dataPostgreSQL, Redis, etc.

πŸ“¦ Rails Example (Placing an Order)

1. React (Client Layer)

// POST /api/v1/orders
axios.post('/api/v1/orders', {
  product_id: 101,
  quantity: 2
});

2. Rails Controller (API Layer)

# app/controllers/orders_controller.rb
def create
  result = OrderService.new(params).place_order
  if result.success?
    render json: result.order, status: :created
  else
    render json: { error: result.error }, status: :unprocessable_entity
  end
end

3. Service Layer (Business Logic)

# app/services/order_service.rb
class OrderService
  def initialize(params)
    @params = params
  end

  def place_order
    product = Product.find(@params[:product_id])
    return OpenStruct.new(success?: false, error: 'Out of stock') if product.stock < @params[:quantity]

    order = Order.create!(product_id: product.id, quantity: @params[:quantity])
    product.decrement!(:stock, @params[:quantity])
    OpenStruct.new(success?: true, order: order)
  end
end

4. Repository Layer (Handled via ActiveRecord)

# ActiveRecord abstracts DB operations
Product.find(id)
Order.create!(...)


βœ… Benefits in Action

  • πŸ” Separation: Business logic is not tied to the controller.
  • πŸ§ͺ Testable: You can test OrderService without hitting the API.
  • ♻️ Reusable: Service can be reused by background jobs or APIs.
  • πŸ”§ Flexible: You can switch from React to React Native without changing the backend.
  • Download pdf of this Architecture:

πŸ“Œ Conclusion

Layering is important not just for writing clean code but also for building scalable, testable, and maintainable software systems. It provides clear boundaries, enhances agility, and allows teams to deliver high-quality features with confidence.


Software ArchitectΒ Guide:πŸ’‘ Understanding Design Patterns & Anti-Patterns in Ruby

In the world of software development, design patterns and anti-patterns play a critical role in writing maintainable, clean, and scalable code. As a Ruby developer, mastering these concepts will help you design robust applications and avoid common pitfalls.


What are Design Patterns?

Design patterns are time-tested, reusable solutions to common problems in software design. They aren’t code snippets but conceptual templates you can adapt based on your needs. Think of them as architectural blueprints.

🧱 Common Ruby Design Patterns

1. Singleton Pattern

the_logger = Logger.new
class Logger
  @@instance = Logger.new

  def self.instance
    @@instance
  end

  private_class_method :new
end

Use when only one instance of a class should exist (e.g., logger, configuration manager).

🧠 What is the Singleton Pattern?

The Singleton Pattern ensures that only one instance of a class exists during the lifetime of an application. This is useful for managing shared resources like:

  • a logger (so logs are not duplicated or misdirected),
  • a configuration manager (so all parts of the app read/write the same config),
  • or a database connection pool.

πŸ” Why private_class_method :new?

This line prevents other parts of the code from calling Logger.new, like this:

Logger.new  # ❌ Will raise a NoMethodError

So, you’re restricting object creation from outside the class.

Q) Then how do you get an object of Logger?

By using a class method like Logger.instance that returns the only instance of the class.

βœ… Full Singleton Example in Ruby

class Logger
  # Create and store the single instance
  @@instance = Logger.new

  # Provide a public way to access that instance
  def self.instance
    @@instance
  end

  # Prevent external instantiation
  private_class_method :new

  # Example method
  def log(message)
    puts "[LOG] #{message}"
  end
end

# Usage
logger1 = Logger.instance
logger2 = Logger.instance

logger1.log("Singleton works!")

puts logger1.object_id == logger2.object_id  # true

🧾 Explanation:

  • @@instance = Logger.new: Creates the only instance when the class is loaded.
  • Logger.instance: The only way to access that object.
  • private_class_method :new: Prevents creation of new objects using Logger.new.
  • logger1 == logger2: βœ… True, because they point to the same object.

πŸ’¬ Think of a Real-World Example

Imagine a central control tower at an airport:

  • There should only be one control tower instance managing flights.
  • If each plane connected to a new tower, it would be chaos!

The Singleton pattern in Ruby ensures there’s just one control tower (object) shared globally.


2. Observer Pattern

class Order
  include Observable

  def place_order
    changed
    notify_observers(self)
  end
end

class EmailNotifier
  def update(order)
    puts "Email sent for order #{order.id}"
  end
end

order = Order.new
order.add_observer(EmailNotifier.new)
order.place_order

Use when one change in an object should trigger actions in other objects.

πŸ” Observer Pattern in Ruby – Explained in Detail

The Observer Pattern is a behavioral design pattern that lets one object (the subject) notify other objects (the observers) when its state changes.

Ruby has built-in support for this through the Observable module in the standard library (require 'observer').

How it Works

  1. The Subject (e.g., Order) includes the Observable module.
  2. The subject calls:
    • changed β†’ marks the object as changed.
    • notify_observers(data) β†’ notifies all subscribed observers.
  3. Observers (e.g., EmailNotifier) implement an update method.
  4. Observers are registered using add_observer(observer_object).

πŸ§ͺ Complete Working Example

require 'observer'

class Order
  include Observable
  attr_reader :id

  def initialize(id)
    @id = id
  end

  def place_order
    puts "Placing order #{@id}..."
    changed                      # Mark this object as changed
    notify_observers(self)       # Notify all observers
  end
end

class EmailNotifier
  def update(order)
    puts "πŸ“§ Email sent for Order ##{order.id}"
  end
end

class SMSNotifier
  def update(order)
    puts "πŸ“± SMS sent for Order ##{order.id}"
  end
end

# Create subject and observers
order = Order.new(101)
order.add_observer(EmailNotifier.new)
order.add_observer(SMSNotifier.new)

order.place_order

# Output:
# Placing order 101...
# πŸ“§ Email sent for Order #101
# πŸ“± SMS sent for Order #101

🧠 When to Use the Observer Pattern

  • You have one object whose changes should automatically update other dependent objects.
  • Examples:
    • UI updates in response to data changes
    • Logging, email, or analytics triggers after a user action
    • Notification systems in event-driven apps

Updated Observer Pattern

require 'observer'

class Order
  include Observable
  attr_reader :id

  def initialize(id)
    @id = id
  end

  def place_order
    changed
    notify_observers(self)
  end
end

class EmailNotifier
  def update(order)
    puts "πŸ“§ Email sent for Order ##{order.id}"
  end
end

order = Order.new(42)
order.add_observer(EmailNotifier.new)
order.place_order

What’s Happening?

  • Order includes the Observable module to gain observer capabilities.
  • add_observer registers an observer object.
  • When place_order is called:
    • changed marks the state as changed.
    • notify_observers(self) triggers the observer’s update method.
  • EmailNotifier reacts to the change β€” in this case, it simulates sending an email.

🧩 Use this pattern when one change should trigger multiple actions β€” like sending notifications, logging, or syncing data across objects.

Check: https://docs.ruby-lang.org/en/2.2.0/Observable.html

3. Decorator Pattern

class SimpleCoffee
  def cost
    2
  end
end

class MilkDecorator
  def initialize(coffee)
    @coffee = coffee
  end

  def cost
    @coffee.cost + 0.5
  end
end

coffee = MilkDecorator.new(SimpleCoffee.new)
puts coffee.cost  # => 2.5

Add responsibilities to objects dynamically without modifying their code.


πŸ”„ 4. Strategy Pattern

The Strategy Pattern allows choosing an algorithm’s behaviour at runtime. This pattern is useful when you have multiple interchangeable ways to perform a task.

βœ… Example: Text Formatter Strategies

Let’s say you have a system that outputs text in different formats β€” plain, HTML, or Markdown.

❌ Before Using Strategy Pattern β€” Hardcoded Conditional Formatting

class TextFormatter
  def initialize(format)
    @format = format
  end

  def format(text)
    case @format
    when :plain
      text
    when :html
      "<p>#{text}</p>"
    when :markdown
      "**#{text}**"
    else
      raise "Unknown format: #{@format}"
    end
  end
end

# Usage
formatter1 = TextFormatter.new(:html)
puts formatter1.format("Hello, World")       # => <p>Hello, World</p>

formatter2 = TextFormatter.new(:markdown)
puts formatter2.format("Hello, World")       # => **Hello, World**

⚠️ Problems With This Approach

  • All formatting logic is stuffed into one method.
  • Adding a new format (like XML) means modifying this method (violates Open/Closed Principle).
  • Not easy to test or extend individual formatting behaviors.
  • Harder to maintain and violates SRP (Single Responsibility Principle).

This sets the stage perfectly to apply the Strategy Pattern, where each format becomes its own class with a clear responsibility.

Instead of writing if/else logic everywhere, use strategy objects:

# Strategy Interface
class TextFormatter
  def self.for(format)
    case format
    when :plain
      PlainFormatter.new
    when :html
      HtmlFormatter.new
    when :markdown
      MarkdownFormatter.new
    else
      raise "Unknown format"
    end
  end
end

# Concrete Strategies
class PlainFormatter
  def format(text)
    text
  end
end

class HtmlFormatter
  def format(text)
    "<p>#{text}</p>"
  end
end

class MarkdownFormatter
  def format(text)
    "**#{text}**"
  end
end

# Usage
def render_text(text, format)
  formatter = TextFormatter.for(format)
  formatter.format(text)
end

puts render_text("Hello, world", :html)     # => <p>Hello, world</p>
puts render_text("Hello, world", :markdown) # => **Hello, world**

πŸ“Œ Why It’s Better

  • Adds new formats easily without changing existing code.
  • Keeps formatting logic isolated in dedicated classes.
  • Follows the Open/Closed Principle.

πŸ’³ Strategy Pattern in Rails: Payment Gateway Integration

Here’s a Rails-specific Strategy Pattern example. This example uses a service to handle different payment gateways (e.g., Stripe, PayPal, Razorpay), which are chosen dynamically based on configuration or user input.

Problem:

You want to process payments, but the actual logic differs depending on which gateway (Stripe, PayPal, Razorpay) is being used. Avoid if/else or case all over your controller or service.

βœ… Solution Using Strategy Pattern

# app/services/payment_processor.rb
class PaymentProcessor
  def self.for(gateway)
    case gateway.to_sym
    when :stripe
      StripeGateway.new
    when :paypal
      PaypalGateway.new
    when :razorpay
      RazorpayGateway.new
    else
      raise "Unsupported payment gateway"
    end
  end
end

# app/services/stripe_gateway.rb
class StripeGateway
  def charge(amount, user)
    # Stripe API integration here
    puts "Charging #{user.name} β‚Ή#{amount} via Stripe"
  end
end

# app/services/paypal_gateway.rb
class PaypalGateway
  def charge(amount, user)
    # PayPal API integration here
    puts "Charging #{user.name} β‚Ή#{amount} via PayPal"
  end
end

# app/services/razorpay_gateway.rb
class RazorpayGateway
  def charge(amount, user)
    # Razorpay API integration here
    puts "Charging #{user.name} β‚Ή#{amount} via Razorpay"
  end
end

# app/controllers/payments_controller.rb
class PaymentsController < ApplicationController
  def create
    user = User.find(params[:user_id])
    gateway = params[:gateway] # e.g., 'stripe', 'paypal', etc.
    amount = params[:amount].to_i

    processor = PaymentProcessor.for(gateway)
    processor.charge(amount, user)

    render json: { message: \"Payment processed via #{gateway.capitalize}\" }
  end
end

βœ… Benefits in Rails Context

  • Keeps your controller slim and readable.
  • Each gateway integration is encapsulated in its own class.
  • Easy to test, extend, and maintain (open/closed principle).
  • Avoids future code smell like “Shotgun Surgery”.

⚠️ What are Anti-Patterns?

Anti-patterns are poor programming practices or ineffective solutions that seem helpful at first but cause long-term issues like unmaintainable code or hidden bugs.

Common Ruby Anti-Patterns

🧨 1. God Object

A class that knows too much or does too much.

class UserManager
  def create_user
    # logic
  end

  def send_email
    # unrelated responsibility
  end

  def generate_report
    # another unrelated responsibility
  end
end

Fix: Follow the Single Responsibility Principle. Split into smaller, focused classes.


🧨 Shotgun Surgery

Tiny changes require touching many different places in code.

# Example of Shotgun Surgery - Business rule spread across many files

# In order.rb
class Order
  def eligible_for_discount?
    user.vip? && total > 1000
  end
end

# In invoice.rb
class Invoice
  def apply_discount(order)
    if order.user.vip? && order.total > 1000
      # apply discount logic
    end
  end
end

# In email_service.rb
class EmailService
  def send_discount_email(order)
    if order.user.vip? && order.total > 1000
      # send congratulatory email
    end
  end
end

Here, the logic user.vip? && total > 1000 is repeated in multiple places. If the discount eligibility rules change (e.g., change the threshold to 2000 or add a new condition), you’ll have to update every occurrence.

βœ… Fix: Centralize the Logic

class DiscountPolicy
  def self.eligible?(order)
    order.user.vip? && order.total > 1000
  end
end

Now all files can use DiscountPolicy.eligible?(order), ensuring consistency and easier maintenance.


3. Spaghetti Code

Unstructured and difficult-to-follow code.

def calculate_discount(user, items)
  if user.vip?
    # deeply nested logic
    total = items.sum { |i| i.price }
    total * 0.2
  else
    if user.new_customer?
      total = items.sum { |i| i.price }
      total * 0.1
    else
      total = items.sum { |i| i.price }
      total * 0.05
    end
  end
end

This code is hard to read, hard to extend, and violates SRP (Single Responsibility Principle).

Fix: Break into smaller methods, use polymorphism or strategy patterns.

βœ… Refactored with Strategy Pattern

# Strategy Interface
class DiscountStrategy
  def self.for(user)
    if user.vip?
      VipDiscount.new
    elsif user.new_customer?
      NewCustomerDiscount.new
    else
      RegularDiscount.new
    end
  end
end

# Concrete Strategies
class VipDiscount
  def apply(items)
    total = items.sum(&:price)
    total * 0.2
  end
end

class NewCustomerDiscount
  def apply(items)
    total = items.sum(&:price)
    total * 0.1
  end
end

class RegularDiscount
  def apply(items)
    total = items.sum(&:price)
    total * 0.05
  end
end

# Usage
def calculate_discount(user, items)
  strategy = DiscountStrategy.for(user)
  strategy.apply(items)
end

🎯 Benefits

  • No nested conditionals
  • Easy to add new discount types (open/closed principle)
  • Each class has one responsibility
  • Testable and readable

πŸ” How to Detect Anti-Patterns in Ruby Code

  1. Code Smells:
    • Long methods
    • Large classes
    • Repetition (DRY violations)
    • Deep nesting
  2. Code Review Checklist:
    • Is each class doing only one thing?
    • Can this method be broken down?
    • Are we repeating business logic?
    • Is the code testable?
  3. Use Static Analysis Tools:
    • Rubocop for style and complexity checks
    • Reek for code smells
    • Flog for measuring code complexity

πŸ›  How to Refactor Anti-Patterns

  • Use Service Objects: Extract complex logic into standalone classes.
  • Apply Design Patterns: Choose the right pattern that matches your need (Strategy, Adapter, etc).
  • Keep Methods Small: Limit to a single task; ideally under 10 lines.
  • Write Tests First: Test-driven development (TDD) helps spot untestable designs.

🎯 Conclusion

Understanding design patterns and identifying anti-patterns is crucial for writing better Ruby code. While patterns guide you toward elegant solutions, anti-patterns warn you about common mistakes. With good design principles, automated tools, and thoughtful reviews, your Ruby codebase can remain healthy, scalable and developer-friendly.


Happy Designing Ruby! ✨

Software ArchitectΒ Guide: Designing a RESTful API for a 🌐 Multi-Tenant Blogging Platform

Building a multi-tenant blogging platform requires thoughtful design of the API to ensure clarity, scalability, and security. In this post, we’ll explore a RESTful API design including versioning, nested resources, and authentication, using clear examples and best practices.


🧩 Understanding the Requirements

Before diving into endpoints, let’s break down what the platform supports:

  • Multiple tenants (e.g., organizations, teams)
  • Each tenant has users
  • Users can create blogs, and each blog has posts
  • Posts can have comments
  • Authentication is required

πŸ“ Versioning

We’ll use URI-based versioning:

/api/v1/

This helps manage breaking changes cleanly.


πŸ” Authentication

We’ll use token-based authentication (e.g., JWT or API keys). Each request must include:

Authorization: Bearer <token>

πŸ“Œ Base URL

https://api.blogcloud.com/api/v1

πŸ“š API Endpoint Design

πŸ”Έ Tenants

Tenants are top-level entities.

  • GET /tenants – List all tenants (admin only)
  • POST /tenants – Create a new tenant
  • GET /tenants/:id – Show tenant details
  • PATCH /tenants/:id – Update tenant
  • DELETE /tenants/:id – Delete tenant

πŸ”Έ Users (Scoped by tenant)

  • GET /tenants/:tenant_id/users – List users for tenant
  • POST /tenants/:tenant_id/users – Create user
  • GET /tenants/:tenant_id/users/:id – Show user
  • PATCH /tenants/:tenant_id/users/:id – Update user
  • DELETE /tenants/:tenant_id/users/:id – Delete user

πŸ”Έ Blogs (Belong to users)

  • GET /tenants/:tenant_id/users/:user_id/blogs – List blogs
  • POST /tenants/:tenant_id/users/:user_id/blogs – Create blog
  • GET /tenants/:tenant_id/users/:user_id/blogs/:id – Show blog
  • PATCH /tenants/:tenant_id/users/:user_id/blogs/:id – Update blog
  • DELETE /tenants/:tenant_id/users/:user_id/blogs/:id – Delete blog

πŸ”Έ Posts (Belong to blogs)

  • GET /blogs/:blog_id/posts – List posts
  • POST /blogs/:blog_id/posts – Create post
  • GET /blogs/:blog_id/posts/:id – Show post
  • PATCH /blogs/:blog_id/posts/:id – Update post
  • DELETE /blogs/:blog_id/posts/:id – Delete post

πŸ”Έ Comments (Belong to posts)

  • GET /posts/:post_id/comments – List comments
  • POST /posts/:post_id/comments – Add comment
  • DELETE /posts/:post_id/comments/:id – Delete comment

❓Question: what is the full url of comments?

No, the full URL for comments should not be:

https://api.blogcloud.com/api/v1/tenants/:tenant_id/users/:user_id/blogs/posts/:post_id/comments

That nesting is too deep and redundant, because:

  • By the time you’re at a post, you already implicitly know which blog/user/tenant it’s under (assuming proper authorization).
  • Posts have unique IDs across the system (or at least within blogs), so we don’t need the entire hierarchy in every request.

βœ… Correct RESTful URL for Comments

If your post_id is unique (or unique within a blog), the cleanest design is:

https://api.blogcloud.com/api/v1/posts/:post_id/comments

or, if you prefer to keep blog_id context:

https://api.blogcloud.com/api/v1/blogs/:blog_id/posts/:post_id/comments

Use that second version only if post_id is not globally unique, and you need the blog context.

πŸ” Recap of Comments Endpoints

ActionHTTP VerbEndpoint
List commentsGET/api/v1/posts/:post_id/comments
Create commentPOST/api/v1/posts/:post_id/comments
Delete commentDELETE/api/v1/posts/:post_id/comments/:id

🧠 Design Rule of Thumb

  • βœ… Keep URLs meaningful and shallow.
  • ❌ Don’t over-nest resources unless it’s needed to enforce scoping or clarify context.

πŸ“₯ Example: Create a Blog Post

Request:

POST /blogs/123/posts
Authorization: Bearer <token>
Content-Type: application/json

{
  "title": "Why REST APIs Still Matter",
  "body": "In this post, we explore the benefits of RESTful design..."
}

Response:

201 Created
{
  "id": 456,
  "title": "Why REST APIs Still Matter",
  "body": "In this post, we explore the benefits of RESTful design...",
  "created_at": "2025-07-03T10:00:00Z"
}


βœ… Best Practices Followed

  • Nesting: Resources are nested to show ownership (e.g., blogs under users).
  • Versioning: Prevents breaking old clients.
  • Consistency: Same verbs and JSON structure everywhere.
  • Authentication: Every sensitive request requires a token.

🧠 Final Thoughts

Designing a RESTful API for a multi-tenant app like a blogging platform requires balancing structure and simplicity. By properly scoping resources, using versioning, and enforcing auth, you build an API that’s powerful, secure, and easy to maintain.

Bonus Tip: Document your API using tools like Swagger/OpenAPI to make onboarding faster for new developers.

You are an awesome Architect πŸš€