Managing databases in Rails can seem overwhelming with all the available commands. This comprehensive guide will walk you through every essential Rails database command, from basic operations to complex real-world scenarios.
Basic Database Commands
Core Database Operations
# Create the database
rails db:create

# Drop (delete) the database
rails db:drop

# Run pending migrations
rails db:migrate

# Rollback the last migration
rails db:rollback

# Rollback multiple migrations
rails db:rollback STEP=3
Schema Management
# Load current schema into database
rails db:schema:load

# Dump current database structure to schema.rb
rails db:schema:dump

# Load structure from structure.sql (for complex databases)
rails db:structure:load

# Dump database structure to structure.sql
rails db:structure:dump
Seed Data
# Run the seed file (db/seeds.rb)
rails db:seed
Combined Commands: The Powerhouses
rails db:setup
What it does: Sets up database from scratch
rails db:setup
Equivalent to:
rails db:create
rails db:schema:load  # Loads from schema.rb
rails db:seed
When to use:
First time setting up project on new machine
Fresh development environment
CI/CD pipeline setup
rails db:reset
What it does: Nuclear option – completely rebuilds database
rails db:drop
rails db:create
rails db:migrate  # Runs all migrations from scratch
When to use:
Testing that migrations run cleanly
Debugging migration issues
Ensuring migration sequence works
Advanced Database Commands
Migration Management
# Rollback to specific migration
rails db:migrate:down VERSION=20240115123456

# Re-run specific migration
rails db:migrate:up VERSION=20240115123456

# Get current migration version
rails db:version

# Check migration status
rails db:migrate:status
Database Information
# Show database configuration
rails db:environment

# Validate database and pending migrations
rails db:abort_if_pending_migrations

# Check if database exists
rails db:check_protected_environments
Environment-Specific Commands
# Run commands on specific environment
rails db:create RAILS_ENV=production
rails db:migrate RAILS_ENV=staging
rails db:seed RAILS_ENV=test
Real-World Usage Scenarios
Scenario 1: New Developer Onboarding
# New developer joins the team
git clone project-repo
cd project
bundle install

# Set up database
rails db:setup

# Or if you prefer running migrations
rails db:create
rails db:migrate
rails db:seed
Scenario 2: Production Deployment
# Safe production deployment
rails db:migrate RAILS_ENV=production

# Never run these in production:
# rails db:reset        ❌ Will destroy data!
# rails db:schema:load  ❌ Will overwrite everything!
Scenario 3: Development Workflow
# Daily development cycle
git pull origin main
rails db:migrate          # Run any new migrations

# If you have conflicts or issues
rails db:rollback         # Undo last migration
# Fix migration file
rails db:migrate          # Re-run

# Major cleanup during development
rails db:reset           # Nuclear option
Scenario 4: Testing Environment
# Fast test database setup
rails db:schema:load RAILS_ENV=test

# Or use the test-specific command
rails db:test:prepare
Environment-Specific Best Practices
Development Environment
# Liberal use of reset commands
rails db:reset              # ✅ Safe to use
rails db:migrate:reset      # ✅ Safe to use
rails db:setup              # ✅ Safe for fresh start
Staging Environment
# Mirror production behavior
rails db:migrate RAILS_ENV=staging  # ✅ Recommended
rails db:seed RAILS_ENV=staging     # ✅ If needed

# Avoid
rails db:reset RAILS_ENV=staging    # ⚠️ Use with caution
Production Environment
# Only safe commands
rails db:migrate RAILS_ENV=production     # ✅ Safe
rails db:rollback RAILS_ENV=production    # ⚠️ With backup

# Never use in production
rails db:reset RAILS_ENV=production       # ❌ NEVER!
rails db:drop RAILS_ENV=production        # ❌ NEVER!
rails db:schema:load RAILS_ENV=production # ❌ NEVER!
Pro Tips and Gotchas
Migration vs Schema Loading
# For existing databases with data
rails db:migrate          # ✅ Incremental, safe

# For fresh databases
rails db:schema:load      # ✅ Faster, clean slate
Data vs Schema
Remember that some operations preserve data differently:
db:schema:load: Loads clean schema, no existing data
db:reset: Destroys everything, starts fresh
Common Workflow Commands
# The "fix everything" development combo
rails db:reset && rails db:migrate

# The "fresh start" combo
rails db:drop db:create db:migrate db:seed

# The "production-safe" combo
rails db:migrate db:seed
Quick Reference Cheat Sheet
Command
Use Case
Data Safety
Speed
db:migrate
Incremental updates
✅ Safe
Medium
db:setup
Initial setup
✅ Safe (new DB)
Fast
db:reset
Clean slate
❌ Destroys all
Fast
db:migrate:reset
Test migrations
❌ Destroys all
Slow
db:schema:load
Fresh schema
❌ No data migration
Fast
db:seed
Add sample data
✅ Additive
Fast
Conclusion
Understanding Rails database commands is crucial for efficient development and safe production deployments. Start with the basics (db:create, db:migrate, db:seed), get comfortable with the combined commands (db:setup, db:reset), and always remember the golden rule: be very careful with production databases!
The key is knowing when to use each command:
Development: Feel free to experiment with db:reset and friends
Production: Stick to db:migrate and always have backups
Team collaboration: Use migrations to keep everyone in sync
Remember: migrations tell the story of how your database evolved, while schema files show where you ended up. Both are important, and now you know how to use all the tools Rails gives you to manage them effectively.
In this episode we move on from creating the tables with constraints, foreign keys, proper indexes, enums, reversing each migrations, seeded data etc. Now let’s check our seeded data with some ui tool that help us smell and modify our db data.
Setup a UI tool for analysing SQL and data
W’re using PostgreSQL. Here are the best SQL GUI tools for pure SQL data analysis and manipulation on macOS:
🏆 Top Recommendations for SQL Analysis
1. TablePlus ⭐️ (Highly Recommended)
Best for: Fast SQL queries, data filtering, before/after comparisons
Strengths: Lightning-fast query execution Excellent data filtering UI with SQL query builder Beautiful native macOS interface Export to CSV/JSON/SQL Query history and favorites Cost: Free tier (2 tabs), Pro $89 Perfect for: Your use case of checking seeded data
2. Postico (macOS Native)
Best for: PostgreSQL-specific features and analysis
Strengths: Built specifically for PostgreSQL Excellent for large dataset analysis Advanced filtering and sorting Beautiful data visualization Cost: $49 (one-time) PostgreSQL-optimized: Uses all PostgreSQL features
3. pgAdmin (Free, Official)
Best for: Advanced PostgreSQL administration and complex queries
Strengths: Official PostgreSQL tool Advanced query planner visualization Excellent for performance analysis Complete database management Cost: Free Learning curve: Steeper but very powerful
4. DBeaver (Free, Cross-platform)
Best for: Advanced SQL analysis and scripting
Strengths: Powerful SQL editor with autocomplete Data export in multiple formats Query execution plans Visual query builder Cost: Free (Community), Pro $10/month Great for: Complex data analysis workflows
Quick Setup Commands
For TablePlus (easiest to get started):
# Install via Homebrew
brew install --cask tableplus
For pgAdmin:
# Install via Homebrew
brew install --cask pgadmin4
For Postico:
# Install via Homebrew
brew install --cask postico
🔧 Connection Details You’ll Need
Your PostgreSQL connection details:
Host: localhost (default)
Port: 5432 (default)
Database: academic_sql_software_development
Username: Your macOS username (default)
Password: None (default for local development)
💡 Pro Tips for Data Analysis
Once connected, you can:
Check seeded data:
   SELECT COUNT(*) FROM users;
   SELECT COUNT(*) FROM orders;
   SELECT COUNT(*) FROM products;
Analyze relationships:
   SELECT
     u.first_name, u.last_name,
     COUNT(o.id) as order_count
   FROM users u
   LEFT JOIN orders o ON u.id = o.user_id
   GROUP BY u.id, u.first_name, u.last_name
   ORDER BY order_count DESC;
Filter and export specific datasets for before/after comparisons
My Recommendation: Start with TablePlus – it’s the most intuitive for our workflow of checking and filtering seeded data, with excellent performance for the data volumes we’re working with (10k users, 5k orders, etc.).
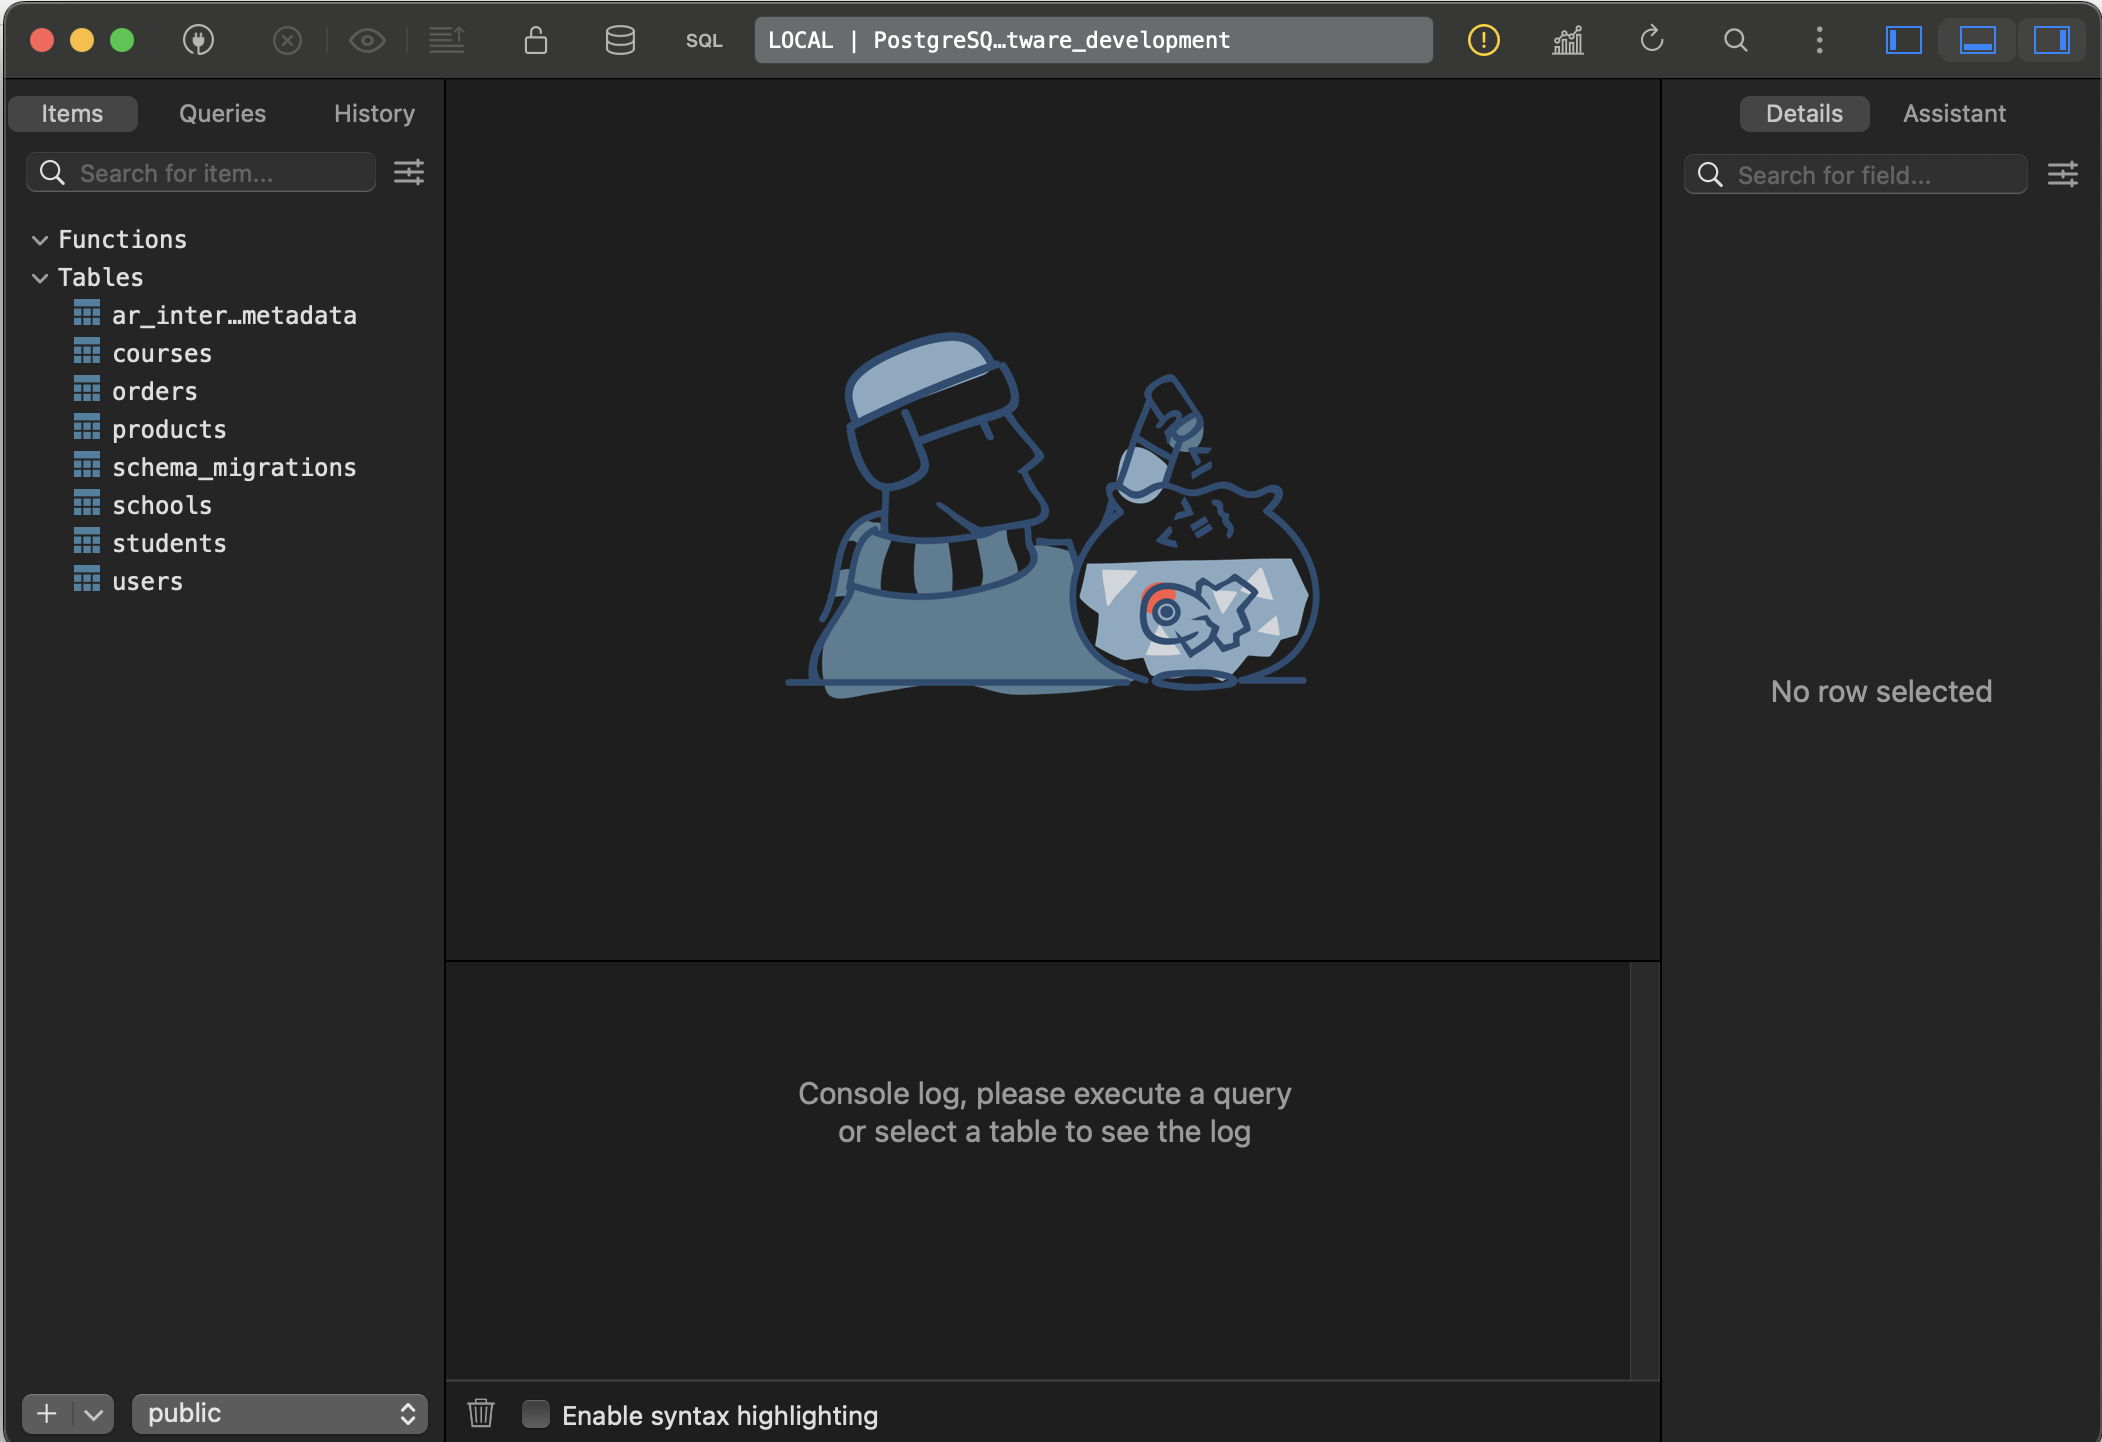
Let’s Go with TablePlus 🥳
🚀 Step 1: Install TablePlus
brew install --cask tableplus
📊 Step 2: Check Our Database Schema
We have a great setup for learning SQL with realistic relationships. Let’s create a progressive SQL learning path using our actual data.
🔗 Step 3: Connect to Your Database
TablePlus Connection Details:
Host: localhost
Port: 5432
Database: academic_sql_software_development
User: (your macOS username)
Password: (leave blank)
📚 SQL Learning Path: Basic to Advanced
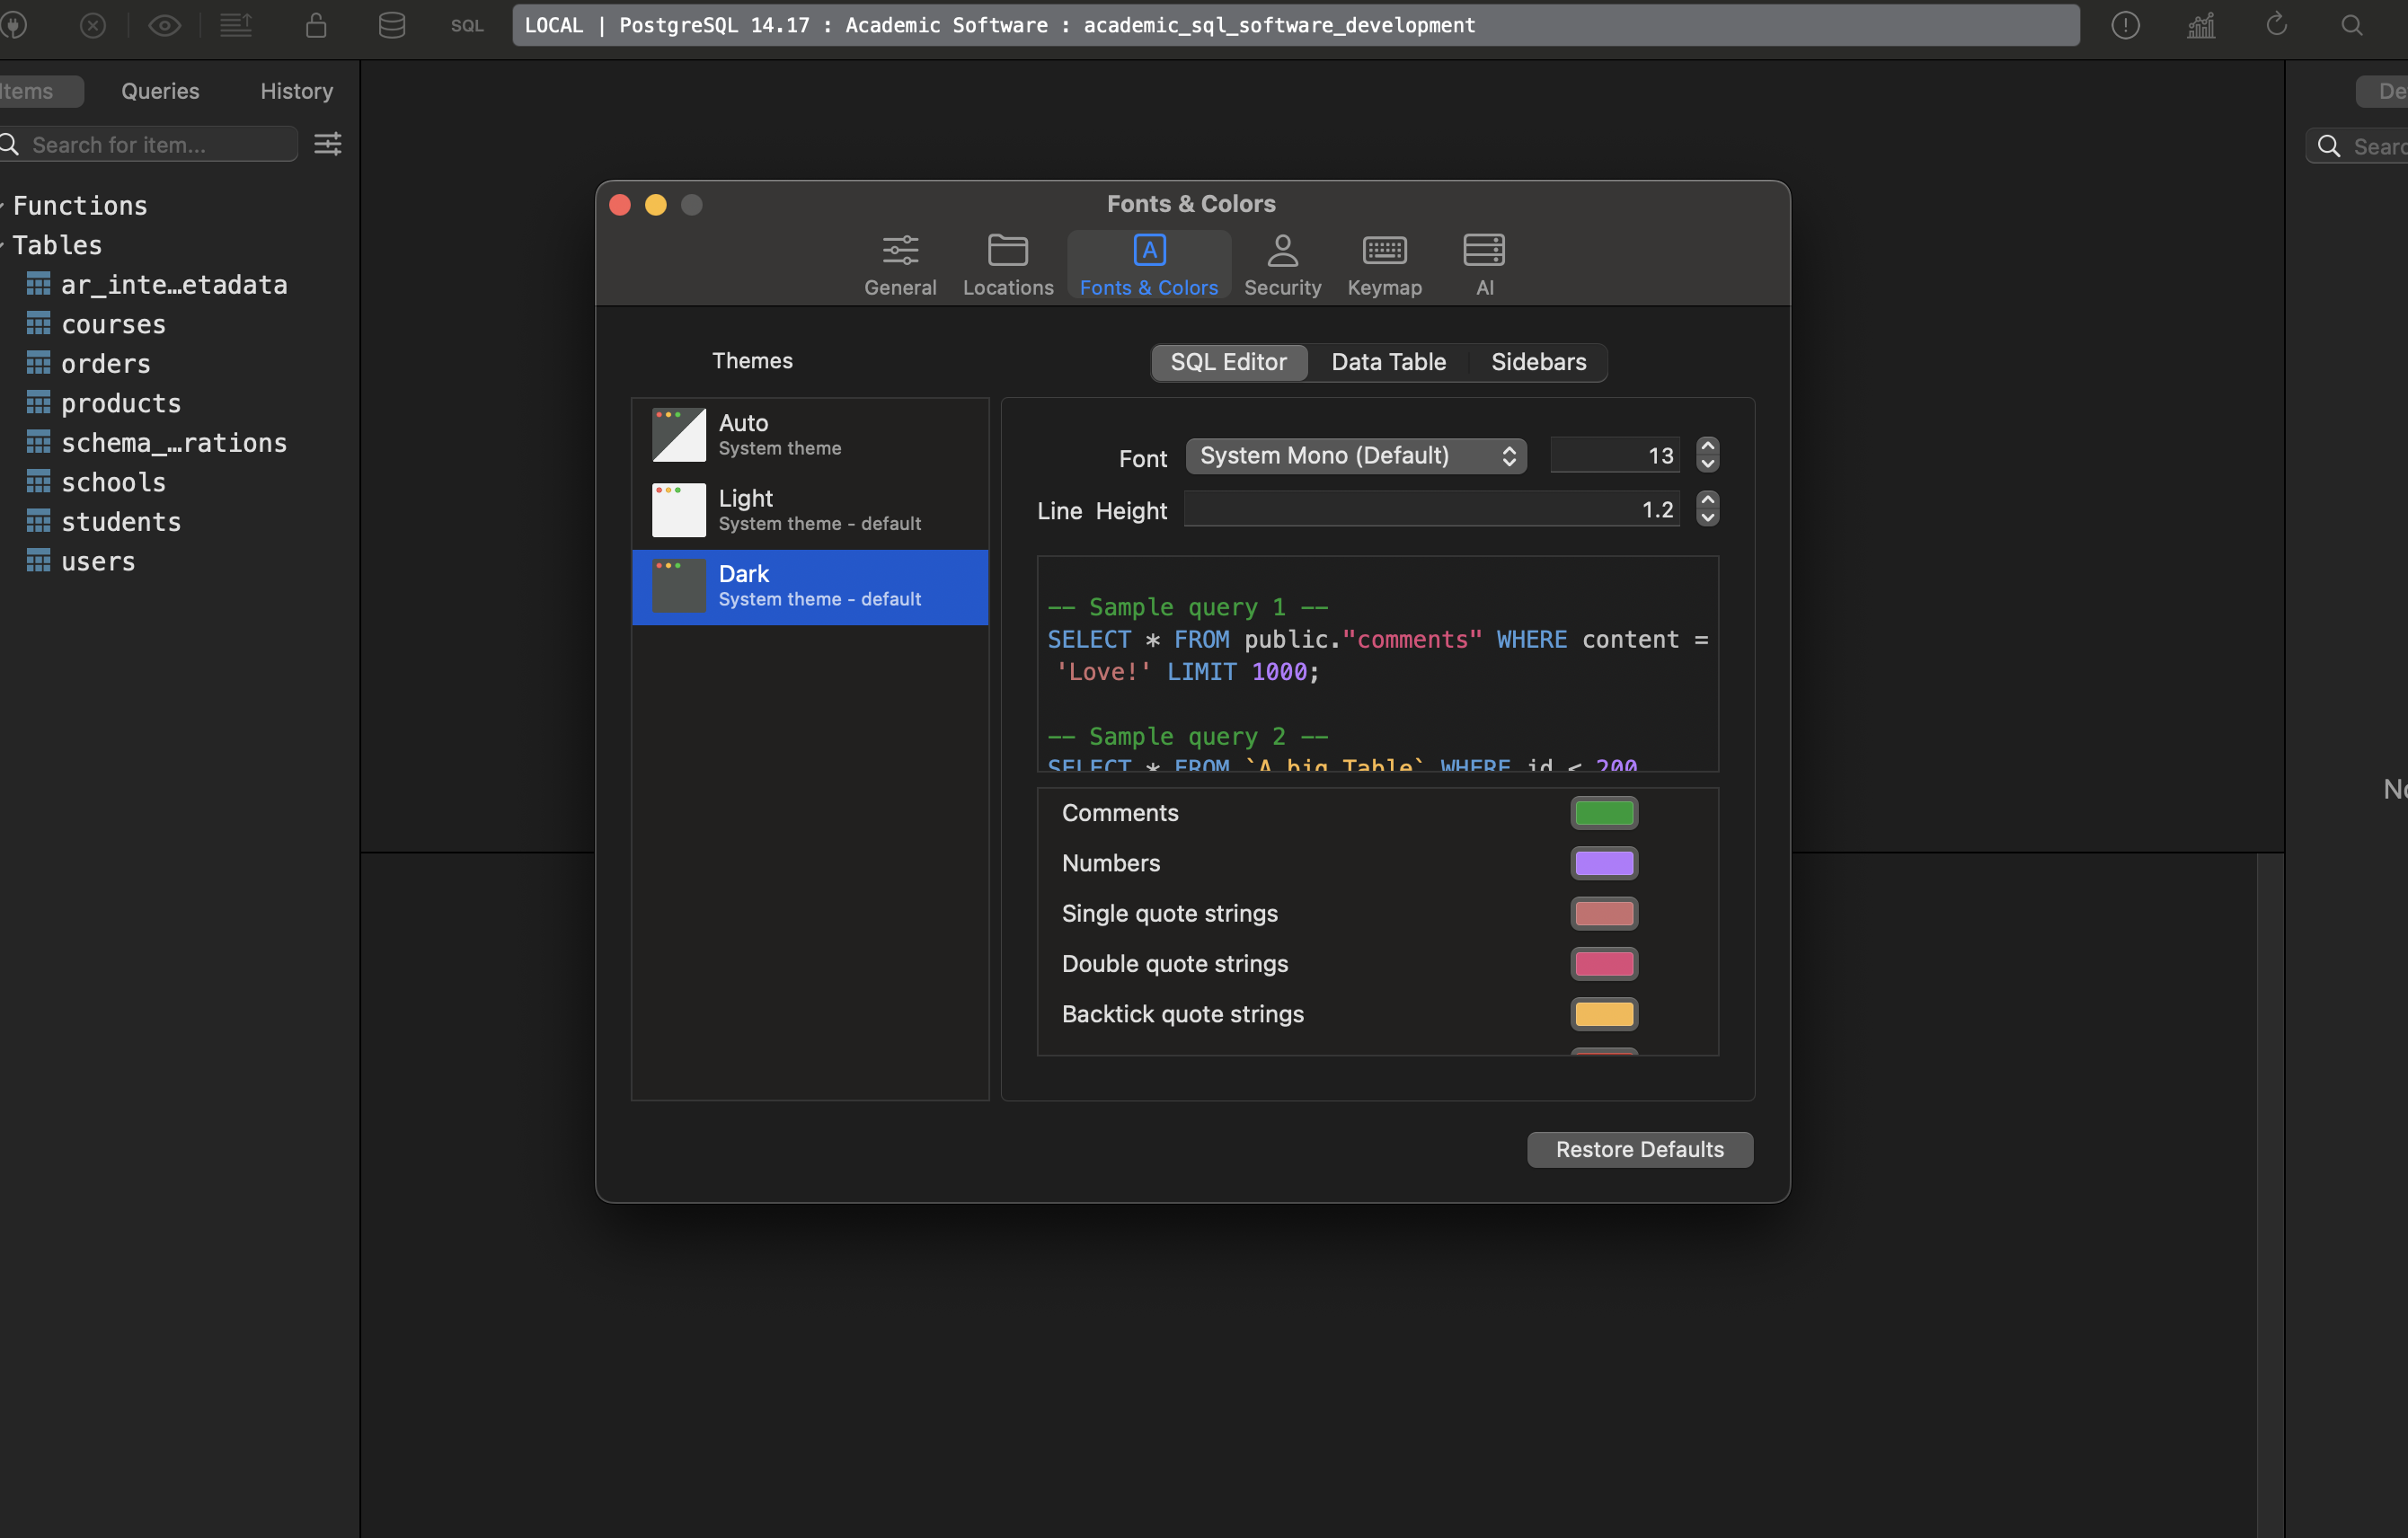
Change Font size, colour, theme etc:
Level 1: Basic SELECT Queries
-- 1. View all users
SELECT * FROM users LIMIT 10;

-- 2. Count total records
SELECT COUNT(*) FROM users;
SELECT COUNT(*) FROM orders;
SELECT COUNT(*) FROM products;

-- 3. Filter data
SELECT first_name, last_name, email
FROM users
WHERE gender = 'female'
LIMIT 10;

-- 4. Sort data
SELECT first_name, last_name, date_of_birth
FROM users
ORDER BY date_of_birth DESC
LIMIT 10;

-- 5. Filter with conditions
SELECT title, price, category
FROM products
WHERE price > 50 AND category = 'men'
ORDER BY price DESC;
Level 2: Basic Aggregations
-- 1. Count by category
SELECT category, COUNT(*) as product_count
FROM products
GROUP BY category;

-- 2. Average prices by category
SELECT category,
       AVG(price) as avg_price,
       MIN(price) as min_price,
       MAX(price) as max_price
FROM products
GROUP BY category;

-- 3. Users by gender
SELECT gender, COUNT(*) as user_count
FROM users
WHERE gender IS NOT NULL
GROUP BY gender;

-- 4. Products with low stock
SELECT COUNT(*) as low_stock_products
FROM products
WHERE stock_quantity < 10;
Level 3: Inner Joins
-- 1. Users with their orders
SELECT u.first_name, u.last_name, u.email, o.id as order_id, o.created_at
FROM users u
INNER JOIN orders o ON u.id = o.user_id
ORDER BY o.created_at DESC
LIMIT 20;

-- 2. Orders with product details
SELECT o.id as order_id,
       p.title as product_name,
       p.price,
       p.category,
       o.created_at
FROM orders o
INNER JOIN products p ON o.product_id = p.id
ORDER BY o.created_at DESC
LIMIT 20;

-- 3. Complete order information (3-table join)
SELECT u.first_name, u.last_name,
       p.title as product_name,
       p.price,
       p.category,
       o.created_at as order_date
FROM orders o
INNER JOIN users u ON o.user_id = u.id
INNER JOIN products p ON o.product_id = p.id
ORDER BY o.created_at DESC
LIMIT 20;
Level 4: Left Joins (Show Missing Data)
-- 1. All users and their order count (including users with no orders)
SELECT u.first_name, u.last_name, u.email,
       COUNT(o.id) as order_count
FROM users u
LEFT JOIN orders o ON u.id = o.user_id
GROUP BY u.id, u.first_name, u.last_name, u.email
ORDER BY order_count DESC;

-- 2. Users who haven't placed any orders
SELECT u.first_name, u.last_name, u.email, u.created_at
FROM users u
LEFT JOIN orders o ON u.id = o.user_id
WHERE o.id IS NULL
ORDER BY u.created_at DESC;

-- 3. Products that have never been ordered
SELECT p.title, p.price, p.category, p.stock_quantity
FROM products p
LEFT JOIN orders o ON p.id = o.product_id
WHERE o.id IS NULL
ORDER BY p.price DESC;
Level 5: Advanced Aggregations & Grouping
-- 1. Top customers by order count
SELECT u.first_name, u.last_name,
       COUNT(o.id) as total_orders,
       SUM(p.price) as total_spent
FROM users u
INNER JOIN orders o ON u.id = o.user_id
INNER JOIN products p ON o.product_id = p.id
GROUP BY u.id, u.first_name, u.last_name
HAVING COUNT(o.id) > 1
ORDER BY total_spent DESC
LIMIT 10;

-- 2. Most popular products
SELECT p.title, p.category, p.price,
       COUNT(o.id) as times_ordered,
       SUM(p.price) as total_revenue
FROM products p
INNER JOIN orders o ON p.id = o.product_id
GROUP BY p.id, p.title, p.category, p.price
ORDER BY times_ordered DESC
LIMIT 10;

-- 3. Monthly order analysis
SELECT DATE_TRUNC('month', o.created_at) as month,
       COUNT(o.id) as order_count,
       COUNT(DISTINCT o.user_id) as unique_customers,
       SUM(p.price) as total_revenue
FROM orders o
INNER JOIN products p ON o.product_id = p.id
GROUP BY DATE_TRUNC('month', o.created_at)
ORDER BY month;
-- 1. Students with their course and school info
SELECT u.first_name, u.last_name,
       c.title as course_name,
       s.title as school_name,
       st.enrolment_date
FROM students st
INNER JOIN users u ON st.user_id = u.id
INNER JOIN courses c ON st.course_id = c.id
INNER JOIN schools s ON st.school_id = s.id
ORDER BY st.enrolment_date DESC
LIMIT 20;

-- 2. Course popularity by school
SELECT s.title as school_name,
       c.title as course_name,
       COUNT(st.id) as student_count
FROM students st
INNER JOIN courses c ON st.course_id = c.id
INNER JOIN schools s ON st.school_id = s.id
GROUP BY s.id, s.title, c.id, c.title
ORDER BY student_count DESC;

-- 3. Schools with enrollment stats
SELECT s.title as school_name,
       COUNT(st.id) as total_students,
       COUNT(DISTINCT st.course_id) as courses_offered,
       MIN(st.enrolment_date) as first_enrollment,
       MAX(st.enrolment_date) as latest_enrollment
FROM schools s
LEFT JOIN students st ON s.id = st.school_id
GROUP BY s.id, s.title
ORDER BY total_students DESC;
Level 7: Advanced Concepts
-- 1. Subqueries: Users who spent more than average
WITH user_spending AS (
  SELECT u.id, u.first_name, u.last_name,
         SUM(p.price) as total_spent
  FROM users u
  INNER JOIN orders o ON u.id = o.user_id
  INNER JOIN products p ON o.product_id = p.id
  GROUP BY u.id, u.first_name, u.last_name
)
SELECT first_name, last_name, total_spent
FROM user_spending
WHERE total_spent > (SELECT AVG(total_spent) FROM user_spending)
ORDER BY total_spent DESC;

-- 2. Window functions: Ranking customers
SELECT u.first_name, u.last_name,
       COUNT(o.id) as order_count,
       SUM(p.price) as total_spent,
       RANK() OVER (ORDER BY SUM(p.price) DESC) as spending_rank
FROM users u
INNER JOIN orders o ON u.id = o.user_id
INNER JOIN products p ON o.product_id = p.id
GROUP BY u.id, u.first_name, u.last_name
ORDER BY spending_rank
LIMIT 20;

-- 3. Case statements for categorization
SELECT u.first_name, u.last_name,
       COUNT(o.id) as order_count,
       CASE
         WHEN COUNT(o.id) >= 5 THEN 'VIP Customer'
         WHEN COUNT(o.id) >= 2 THEN 'Regular Customer'
         ELSE 'New Customer'
       END as customer_type
FROM users u
LEFT JOIN orders o ON u.id = o.user_id
GROUP BY u.id, u.first_name, u.last_name
ORDER BY order_count DESC;
Level 8: Self-Joins & Advanced Analysis
-- 1. Find users enrolled in the same course (pseudo self-join)
SELECT DISTINCT
       u1.first_name || ' ' || u1.last_name as student1,
       u2.first_name || ' ' || u2.last_name as student2,
       c.title as course_name
FROM students s1
INNER JOIN students s2 ON s1.course_id = s2.course_id AND s1.user_id < s2.user_id
INNER JOIN users u1 ON s1.user_id = u1.id
INNER JOIN users u2 ON s2.user_id = u2.id
INNER JOIN courses c ON s1.course_id = c.id
ORDER BY c.title, student1
LIMIT 20;

-- 2. Complex business question: Multi-role users
SELECT u.first_name, u.last_name, u.email,
       COUNT(DISTINCT o.id) as orders_placed,
       COUNT(DISTINCT st.id) as courses_enrolled,
       CASE
         WHEN COUNT(DISTINCT o.id) > 0 AND COUNT(DISTINCT st.id) > 0 THEN 'Customer & Student'
         WHEN COUNT(DISTINCT o.id) > 0 THEN 'Customer Only'
         WHEN COUNT(DISTINCT st.id) > 0 THEN 'Student Only'
         ELSE 'No Activity'
       END as user_type
FROM users u
LEFT JOIN orders o ON u.id = o.user_id
LEFT JOIN students st ON u.id = st.user_id
GROUP BY u.id, u.first_name, u.last_name, u.email
ORDER BY orders_placed DESC, courses_enrolled DESC;
🎯 Our Learning Strategy:
Start with Level 1-2 in TablePlus to get comfortable
Progress through each level – try to understand each query before moving on
Modify the queries – change filters, add fields, etc.
Create your own variations based on business questions
📈 Optimized indexes: No need for user_id index since UNIQUE creates one automatically
Business Logic Validation:
user_id: One student per user ✅
course_id: Multiple students per course ✅
school_id: Multiple students per school ✅
This ensures referential integrity and business rules are enforced at the database level!
📁 Schema Storage Options:
Rails allows you to store the schema in SQL format instead of the default Ruby format. Let me explain the options and why you’d choose each:
1. Ruby Format (Default)
# db/schema.rb
ActiveRecord::Schema[8.0].define(version: 2025_07_09_074552) do
  enable_extension "pg_catalog.plpgsql"

  create_table "users", force: :cascade do |t|
    t.string "first_name", limit: 100, null: false
    t.string "email", limit: 150, null: false
    t.datetime "created_at", null: false
    t.index ["email"], name: "idx_users_email"
  end
end
2. SQL Format
-- db/structure.sql
CREATE EXTENSION IF NOT EXISTS pg_catalog.plpgsql;

CREATE TYPE gender_enum AS ENUM ('male', 'female', 'not-specified');

CREATE TABLE users (
    id bigserial PRIMARY KEY,
    first_name varchar(100) NOT NULL,
    email varchar(150) NOT NULL,
    created_at timestamp NOT NULL DEFAULT CURRENT_TIMESTAMP
);

CREATE UNIQUE INDEX idx_users_email ON users(email);
module AcademicSqlSoftware
  class Application < Rails::Application
    # ... existing config ...

    # Use SQL format for schema
    config.active_record.schema_format = :sql
  end
end
Then regenerate the schema:
# Generate SQL schema file
rails db:schema:dump
This will create db/structure.sql instead of db/schema.rb.
Comparison Table:
Feature
Ruby Format (schema.rb)
SQL Format (structure.sql)
Default
✅ Yes
❌ No
Database Agnostic
✅ Yes
❌ No (DB-specific)
Custom SQL Features
❌ Limited
✅ Full support
Views
❌ No
✅ Yes
Stored Procedures
❌ No
✅ Yes
Triggers
❌ No
✅ Yes
Custom Types/ENUMs
❌ Limited
✅ Full support
Partial Indexes
❌ Limited
✅ Yes
Check Constraints
❌ Limited
✅ Yes
Version Control
✅ Easy to diff
⚠️ Harder to diff
Readability
✅ Ruby-like
⚠️ Raw SQL
When to Use Each:
Choose SQL Format When:
✅ Using PostgreSQL-specific features (ENUMs, arrays, JSONB operators)
✅ Need database views, triggers, or stored procedures
✅ Using complex constraints (CHECK, partial indexes)
✅ Working with custom data types
✅ Team is SQL-proficient
Choose Ruby Format When:
✅ Want database portability (switching between PostgreSQL/MySQL/SQLite)
✅ Team prefers Ruby syntax
✅ Using standard Rails features only
✅ Need easier version control diffs
For Our Project:
I recommend SQL format because you’re using:
✅ PostgreSQL ENUMs (gender_enum, category_enum) – Rails 8 supports this
This will give us full control over PostgreSQL features while maintaining schema consistency! 🎯
🌱 Seed Data
1. Let’s refactor the seed file into modular components. I’ll create separate seeder classes for each model type and organize them properly.
2. Let’s me create individual seeder classes for each model, the seeders for the dependent models (orders and students), refactor the main seeds.rb file to use the new modular structure, create a documentation file for the new modular structure.
3. I’ve successfully refactored our seed file into a modular, maintainable architecture. Here’s what we’ve created:
Inheritance from BaseSeeder for shared functionality
Comprehensive documentation
✅ Flexibility:
Easy to add new models
Environment-specific configuration
Configurable record counts
✅ Robustness:
Proper dependency handling
Constraint compliance (stock, unique keys)
Error handling and validation
📋 Usage Examples:
# Basic seeding
rails db:seed

# Clear data first
CLEAR_DATA=true rails db:seed

# Scale up for testing
# Edit USERS_COUNT in base_seeder.rb then:
rails db:seed
# Stage all the new modular files
git add db/seeds.rb \
        db/seeds/

# Commit with comprehensive message
git commit -m "Refactor seed system into modular architecture" -m "

Modular Structure:
- Split monolithic seeds.rb into focused seeder classes
- Create BaseSeeder with shared functionality and configuration
- Separate concerns: each model has dedicated seeder
- Add comprehensive documentation in seeds/README.md

Benefits:
- Maintainability: Easy to modify individual model generation
- Flexibility: Simple to add new models or adjust data
- Robustness: Proper dependency handling and constraint compliance
- Testability: Individual seeders can be tested in isolation

Features:
- Environment-specific behavior (auto-clear in development)
- Smart constraint handling (stock validation, unique keys)
- Progress indicators and comprehensive reporting
- Configurable record counts via constants

Files:
- db/seeds.rb: Main orchestrator (20 lines vs 246)
- db/seeds/base_seeder.rb: Shared functionality & config
- db/seeds/*_seeder.rb: Individual model seeders
- db/seeds/README.md: Complete documentation

The system is now ready for production use and easy to extend."
🎉 What We Can Do Now:
Scale Easily:
# In base_seeder.rb - change these and run rails db:seed
USERS_COUNT = 10_000
PRODUCTS_COUNT = 1_000
ORDERS_COUNT = 50_000
Add New Models: Create new_model_seeder.rb, inherit from BaseSeeder, add to orchestration.
Customize Data: Edit individual seeder constants and attribute methods.
Our seed system is now enterprise-ready with clean architecture, comprehensive documentation, and infinite scalability! 🚀
Possible Refactoring
Now Let’s move the helper methods to a dedicated helper folder for better organization. I’ll create a helpers directory and move the shared utility methods there.
Here’s how to refactor your seed helper methods into a new helpers folder under db/seeds:
Create a directory: db/seeds/helpers/
Move all shared/random data methods (like random_gender, random_category, etc.) into a module, e.g. db/seeds/helpers/data_generators.rb:
# db/seeds/helpers/data_generators.rb
module DataGenerators
  def random_gender
    ['male', 'female', 'not-specified'].sample
  end

  def random_category
    ['men', 'women', 'kids', 'infants'].sample
  end

  def random_date_of_birth
    Date.today - rand(18..80).years - rand(365).days
  end

  def random_phone
    "+1#{rand(100..999)}-#{rand(100..999)}-#{rand(1000..9999)}"
  end

  def random_price
    [9.99, 19.99, 29.99, 49.99, 99.99, 199.99, 299.99, 499.99].sample
  end

  def random_stock
    [0, 5, 10, 25, 50, 100, 500].sample
  end

  def random_past_date(days_ago_max = 365)
    Date.today - rand(1..days_ago_max).days
  end
end
In your seeders and base seeder, require and include the helper:
# At the top of each seeder or in base_seeder.rb
require_relative 'helpers/data_generators'

class UsersSeeder < BaseSeeder
  extend DataGenerators
  # ... now you can call random_gender, random_category, etc.
end
Remove the helper methods from BaseSeeder and use the module instead.
Summary:
Move all shared/random data methods to db/seeds/helpers/data_generators.rb as a module.
require_relative and extend or include the module in your seeders.
This keeps your seed logic clean and DRY!
Our BaseSeeder still contains all the random data and progress helper methods, which are now in db/seeds/helpers/data_generators.rb and db/seeds/helpers/ui_helpers.rb.
Here’s what we should do:
Remove all the methods at the bottom of BaseSeeder that are now in the helpers.
At the top of base_seeder.rb, require the helper modules.
If you want to use the helpers as class methods, use extend for each module.
Removed the hardcoded print_summary and print_verification methods.
Ensured print_summary_box and print_verification_stats are ready to accept data.
In BaseSeeder:
Now dynamically creates a summary_data hash with the final record counts.
Creates a verification_stats hash with key metrics.
Calls UiHelpers.print_summary_box and UiHelpers.print_verification_stats, passing in the data.
Benefits of this Refactor:
More Flexible: You can now easily add or remove items from the summary and verification sections just by changing the hashes in BaseSeeder.
Decoupled: The UiHelpers module is now purely for presentation and has no knowledge of your specific models.
Cleaner Code: The logic is now clearly separated—BaseSeeder gathers the data, and UiHelpers displays it.
Now the BaseSeeder is clean and only contains orchestration logic and configuration. All random data and UI/progress helpers are now properly delegated to the new helper modules.
We can now use these helpers in any seeder by calling random_gender, progress_indicator, etc., thanks to the extend statements. This makes our seed system much more modular, maintainable, and DRY!
That’s a great suggestion for further refactoring. It makes sense to keep all data-related logic, including aggregation for summaries, within the DataGenerators helper.
Let’s proceed. I’ll move the hash construction into new methods inside db/seeds/helpers/data_generators.rb and then update BaseSeeder to call them. Now that the data generation has been moved, I’ll update the BaseSeeder to call the new methods.
Issues Fixed:
UiHelpers method calls: All seeder files were calling progress_indicator directly, but since the methods in UiHelpers are defined as class methods, they needed to be prefixed with UiHelpers.. Fixed in:
UsersSeeder
ProductsSeeder
CoursesSeeder
SchoolsSeeder
OrdersSeeder
StudentsSeeder
DataGenerators references: The BaseSeeder was trying to call DataGenerators.summary_data and DataGenerators.verification_stats, but that file was deleted. I updated it to use the local summary_data and verification_stats methods that were already defined in the BaseSeeder class.
Seeding Results:
✅ 10,000 users created
✅ 1,000 products created
✅ 50 courses created
✅ 25 schools created
✅ 5,000 orders created
✅ 5,000 students created
The verification stats show proper data relationships:
4,004 users have orders
647 products have been ordered
756 products are active
200 students per school (average)
100 students per course (average)
✅ Final Architecture:
DataGenerators: Is now responsible for all data-related tasks, including generating random primitive data (random_phone) and creating aggregated summary data (summary_data, verification_stats).
UiHelpers: Is responsible for all presentation logic, taking data as input and printing it to the console in a formatted way.
Individual Seeders (UsersSeeder, etc.): Responsible for the business logic of creating a specific type of record, using helpers for data and UI.
BaseSeeder: The main orchestrator. It knows the correct order to call the individual seeders and delegates all data and UI tasks to the appropriate helpers.
seeds.rb: The single entry point that kicks off the entire process.
Here’s a list of commonly used SQL comparison operators with brief explanations and examples:
📋 Basic Comparison Operators:
Operator
Meaning
Example
Result
=
Equal to
WHERE age = 25
Matches rows where age is 25
<>
Not equal to (standard)
WHERE status <> 'active'
Matches rows where status is not 'active'
!=
Not equal to (alternative)
WHERE id != 10
Same as <>, matches if id is not 10
>
Greater than
WHERE salary > 50000
Matches rows with salary above 50k
<
Less than
WHERE created_at < '2024-01-01'
Matches dates before Jan 1, 2024
>=
Greater than or equal
WHERE age >= 18
Matches age 18 and above
<=
Less than or equal
WHERE age <= 65
Matches age 65 and below
📋 Other Common Operators:
Operator
Meaning
Example
BETWEEN
Within a range
WHERE price BETWEEN 100 AND 200
IN
Match any value in a list
WHERE country IN ('US', 'CA', 'UK')
NOT IN
Not in a list
WHERE role NOT IN ('admin', 'staff')
IS NULL
Value is null
WHERE deleted_at IS NULL
IS NOT NULL
Value is not null
WHERE updated_at IS NOT NULL
LIKE
Pattern match (case-insensitive in some DBs)
WHERE name LIKE 'J%'
ILIKE
Case-insensitive LIKE (PostgreSQL only)
WHERE email ILIKE '%@gmail.com'
Now we’ve our products and product_variants schema, let’s re-explore all major SQL JOINs using these two related tables.
####### Products

   Column    |              Type              | Collation | Nullable |               Default
-------------+--------------------------------+-----------+----------+--------------------------------------
 id          | bigint                         |           | not null | nextval('products_id_seq'::regclass)
 description | text                           |           |          |
 category    | character varying              |           |          |
 created_at  | timestamp(6) without time zone |           | not null |
 updated_at  | timestamp(6) without time zone |           | not null |
 name        | character varying              |           | not null |
 rating      | numeric(2,1)                   |           |          | 0.0
 brand       | character varying              |           |          |

######## Product variants

      Column      |              Type              | Collation | Nullable |                   Default
------------------+--------------------------------+-----------+----------+----------------------------------------------
 id               | bigint                         |           | not null | nextval('product_variants_id_seq'::regclass)
 product_id       | bigint                         |           | not null |
 sku              | character varying              |           | not null |
 mrp              | numeric(10,2)                  |           | not null |
 price            | numeric(10,2)                  |           | not null |
 discount_percent | numeric(5,2)                   |           |          |
 size             | character varying              |           |          |
 color            | character varying              |           |          |
 stock_quantity   | integer                        |           |          | 0
 specs            | jsonb                          |           | not null | '{}'::jsonb
 created_at       | timestamp(6) without time zone |           | not null |
 updated_at       | timestamp(6) without time zone |           | not null |
💎 SQL JOINS with products and product_variants
These tables are related through:
product_variants.product_id → products.id
So we can use that for all join examples.
🔸 1. INNER JOIN – Show only products with variants
SELECT
  p.name,
  pv.sku,
  pv.price
FROM products p
INNER JOIN product_variants pv ON p.id = pv.product_id;
♦️ Only returns products that have at least one variant.
🔸 2. LEFT JOIN – Show all products, with variants if available
SELECT
  p.name,
  pv.sku,
  pv.price
FROM products p
LEFT JOIN product_variants pv ON p.id = pv.product_id;
♦️ Returns all products, even those with no variants (NULLs in variant columns).
🔸 3. RIGHT JOIN – Show all variants, with product info if available
(Less common, but useful if variants might exist without a product record)
SELECT
  pv.sku,
  pv.price,
  p.name
FROM products p
RIGHT JOIN product_variants pv ON p.id = pv.product_id;
🔸 4. FULL OUTER JOIN – All records from both tables
SELECT
  p.name AS product_name,
  pv.sku AS variant_sku
FROM products p
FULL OUTER JOIN product_variants pv ON p.id = pv.product_id;
♦️ Shows all products and all variants, even when there’s no match.
🔸 5. SELF JOIN Example (for product_variants comparing similar sizes or prices)
Let’s compare variants of the same product that are different sizes.
SELECT
  pv1.product_id,
  pv1.size AS size_1,
  pv2.size AS size_2,
  pv1.sku AS sku_1,
  pv2.sku AS sku_2
FROM product_variants pv1
JOIN product_variants pv2
  ON pv1.product_id = pv2.product_id
  AND pv1.size <> pv2.size
WHERE pv1.product_id = 101;  -- example product
♦️ Useful to analyze size comparisons or price differences within a product.
🧬 Complex Combined JOIN Example
Show each product with its variants, and include only discounted ones (price < MRP):
SELECT
  p.name AS product_name,
  pv.sku,
  pv.price,
  pv.mrp,
  (pv.mrp - pv.price) AS discount_value
FROM products p
INNER JOIN product_variants pv ON p.id = pv.product_id
WHERE pv.price < pv.mrp
ORDER BY discount_value DESC;
📑 JOIN Summary with These Tables
JOIN Type
Use Case
INNER JOIN
Only products with variants
LEFT JOIN
All products, even if they don’t have variants
RIGHT JOIN
All variants, even if product is missing
FULL OUTER JOIN
Everything — useful in data audits
SELF JOIN
Compare or relate rows within the same table
Let’s now look at JOIN queries with more realistic conditions using products and product_variants.
🦾 Advanced JOIN Queries with Conditions to practice
🔹 1. All products with variants in stock AND discounted
SELECT
  p.name AS product_name,
  pv.sku,
  pv.size,
  pv.color,
  pv.stock_quantity,
  pv.mrp,
  pv.price,
  (pv.mrp - pv.price) AS discount_amount
FROM products p
JOIN product_variants pv ON p.id = pv.product_id
WHERE pv.stock_quantity > 0
  AND pv.price < pv.mrp
ORDER BY discount_amount DESC;
♦️ Shows available discounted variants, ordered by discount.
🔹 2. Products with high rating (4.5+) and at least one low-stock variant (< 10 items)
SELECT
  p.name AS product_name,
  p.rating,
  pv.sku,
  pv.stock_quantity
FROM products p
JOIN product_variants pv ON p.id = pv.product_id
WHERE p.rating >= 4.5
  AND pv.stock_quantity < 10;
🔹 3. LEFT JOIN to find products with no variants or all variants out of stock
SELECT
  p.name AS product_name,
  pv.id AS variant_id,
  pv.stock_quantity
FROM products p
LEFT JOIN product_variants pv
  ON p.id = pv.product_id AND pv.stock_quantity > 0
WHERE pv.id IS NULL;
✅ This tells you:
Either the product has no variants
Or all variants are out of stock
🔹 4. Group and Count Variants per Product
SELECT
  p.name AS product_name,
  COUNT(pv.id) AS variant_count
FROM products p
LEFT JOIN product_variants pv ON p.id = pv.product_id
GROUP BY p.name
ORDER BY variant_count DESC;
🔹 5. Variants with price-percentage discount more than 30%
SELECT
  p.name AS product_name,
  pv.sku,
  pv.mrp,
  pv.price,
  ROUND(100.0 * (pv.mrp - pv.price) / pv.mrp, 2) AS discount_percent
FROM products p
JOIN product_variants pv ON p.id = pv.product_id
WHERE pv.price < pv.mrp
  AND (100.0 * (pv.mrp - pv.price) / pv.mrp) > 30;
🔹 6. Color-wise stock summary for a product category
SELECT
  p.category,
  pv.color,
  SUM(pv.stock_quantity) AS total_stock
FROM products p
JOIN product_variants pv ON p.id = pv.product_id
WHERE p.category = 'Shoes'
GROUP BY p.category, pv.color
ORDER BY total_stock DESC;
These queries simulate real-world dashboard views: inventory tracking, product health, stock alerts, etc.
Let’s try to add some sample data first to our database.
Step 1: Install pgxnclient
On macOS (with Homebrew):
brew install pgxnclient
On Ubuntu/Debian:
sudo apt install pgxnclient
Step 2: Install the faker extension via PGXN
pgxn install faker
I get issue with installing faker via pgxn:
~ pgxn install faker
INFO: best version: faker 0.5.3
ERROR: resource not found: 'https://api.pgxn.org/dist/PostgreSQL_Faker/0.5.3/META.json'
⚠️ Note: faker extension we’re trying to install via pgxn is not available or improperly published on the PGXN network. Unfortunately, the faker extension is somewhat unofficial and not actively maintained or reliably hosted.
🚨 You can SKIP STEP 3,4,5and opt Option 2
Step 3: Build and install the extension into PostgreSQL
cd /path/to/pg_faker  # PGXN will print this after install
make
sudo make install
Step 4: Enable it in your database
Inside psql :
CREATE EXTENSION faker;
Step 5: Insert 10,000 fake users
INSERT INTO users (user_id, username, email, phone_number)
SELECT
  gs AS user_id,
  faker_username(),
  faker_email(),
  faker_phone_number()
FROM generate_series(1, 10000) AS gs;
Option 2: Use Ruby + Faker gem (if you’re using Rails or Ruby)
If you’re building your app in Rails, use the faker gem directly:
In Ruby:
require 'faker'
require 'pg'

conn = PG.connect(dbname: 'test_db')

(1..10_000).each do |i|
  conn.exec_params(
    "INSERT INTO users (user_id, username, email, phone_number) VALUES ($1, $2, $3, $4)",
    [i, Faker::Internet.username, Faker::Internet.email, Faker::PhoneNumber.phone_number]
  )
end
In Rails (for test_db), Create the Rake Task:
Create a file at:
lib/tasks/seed_fake_users.rake
# lib/tasks/seed_fake_users.rake

namespace :db do
  desc "Seed 10,000 fake users into the users table"
  task seed_fake_users: :environment do
    require "faker"
    require "pg"

    conn = PG.connect(dbname: "test_db")

    # If user_id is a serial and you want to reset the sequence after deletion, run:
    # conn.exec_params("TRUNCATE TABLE users RESTART IDENTITY")
    # delete existing users to load fake users
    conn.exec_params("DELETE FROM users")


    puts "Seeding 10,000 fake users ...."
    (1..10_000).each do |i|
      conn.exec_params(
        "INSERT INTO users (user_id, username, email, phone_number) VALUES ($1, $2, $3, $4)",
        [ i, Faker::Internet.username, Faker::Internet.email, Faker::PhoneNumber.phone_number ]
      )
    end
    puts "Seeded 10,000 fake users into the users table"
    conn.close
  end
end
# run the task
bin/rails db:seed_fake_users
For Normal Rails Rake Task:
# lib/tasks/seed_fake_users.rake

namespace :db do
  desc "Seed 10,000 fake users into the users table"
  task seed_fake_users: :environment do
    require 'faker'

    puts "🌱 Seeding 10,000 fake users..."

    users = []

    # delete existing users
    User.destroy_all

    10_000.times do |i|
      users << {
        user_id: i + 1,
        username: Faker::Internet.unique.username,
        email: Faker::Internet.unique.email,
        phone_number: Faker::PhoneNumber.phone_number
      }
    end

    # Use insert_all for performance
    User.insert_all(users)

    puts "✅ Done. Inserted 10,000 users."
  end
end
# run the task
bin/rails db:seed_fake_users
Now we will discuss about PostgreSQL Extensions and it’s usage.
PostgreSQL extensions are add-ons or plug-ins that extend the core functionality of PostgreSQL. They provide additional capabilities such as new data types, functions, operators, index types, or full features like full-text search, spatial data handling, or fake data generation.
🔧 What Extensions Can Do
Extensions can:
Add functions (e.g. gen_random_bytes() from pgcrypto)
Enabling an extension makes its functionality available to the current database only.
🤔 Why Use Extensions?
Productivity: Quickly add capabilities without writing custom code.
Performance: Access to advanced indexing, statistics, and optimization tools.
Development: Generate test data (faker), test encryption (pgcrypto), etc.
Modularity: PostgreSQL stays lightweight while letting you add only what you need.
Here’s a categorized list (with a simple visual-style layout) of PostgreSQL extensions that are safe and useful for Rails apps in both development and production environments.
🔌 PostgreSQL Extensions for Rails Apps
# connect psql
psql -U username -d database_name

# list all available extensions
SELECT * FROM pg_available_extensions;

# eg. to install the hstore extension run
CREATE EXTENSION hstore;

# verify the installation
SELECT * FROM pg_extension;
SELECT * FROM pg_extension WHERE extname = 'hstore';
🔐 Security & UUIDs
Extension
Use Case
Safe for Prod
pgcrypto
Secure random bytes, hashes, UUIDs
✅
uuid-ossp
UUID generation (v1, v4, etc.)
✅
💡 Tip: Use uuid-ossp or pgcrypto to generate UUID primary keys (id: :uuid) in Rails.
📘 PostgreSQL Procedures and Triggers — Explained with Importance and Examples
PostgreSQL is a powerful, open-source relational database that supports advanced features like stored procedures and triggers, which are essential for encapsulating business logic inside the database.
🔹 What are Stored Procedures in PostgreSQL?
A stored procedure is a pre-compiled set of SQL and control-flow statements stored in the database and executed by calling it explicitly.
Purpose: Encapsulate business logic, reuse complex operations, improve performance, and reduce network overhead.
✅ Benefits of Stored Procedures:
Faster execution (compiled and stored in DB)
Centralized logic
Reduced client-server round trips
Language support: SQL, PL/pgSQL, Python, etc.
🧪 Example: Create a Procedure to Add a New User
CREATE OR REPLACE PROCEDURE add_user(name TEXT, email TEXT)
LANGUAGE plpgsql
AS $$
BEGIN
    INSERT INTO users (name, email) VALUES (name, email);
END;
$$;
▶️ Call the procedure:
CALL add_user('John Doe', 'john@example.com');
🔹 What are Triggers in PostgreSQL?
A trigger is a special function that is automatically executed in response to certain events on a table (like INSERT, UPDATE, DELETE).
CREATE TABLE user_audit (
    id SERIAL PRIMARY KEY,
    user_id INTEGER,
    name TEXT,
    email TEXT,
    created_at TIMESTAMP DEFAULT CURRENT_TIMESTAMP
);
2. Create the trigger function:
CREATE OR REPLACE FUNCTION log_user_insert()
RETURNS TRIGGER AS $$
BEGIN
    INSERT INTO user_audit (user_id, name, email)
    VALUES (NEW.id, NEW.name, NEW.email);
    RETURN NEW;
END;
$$ LANGUAGE plpgsql;
3. Create the trigger on users table:
CREATE TRIGGER after_user_insert
AFTER INSERT ON users
FOR EACH ROW
EXECUTE FUNCTION log_user_insert();
Now, every time a user is inserted, the trigger logs it in the user_audit table automatically.
📌 Difference: Procedures vs. Triggers
Feature
Stored Procedures
Triggers
When executed
Called explicitly with CALL
Automatically executed on events
Purpose
Batch processing, encapsulate logic
React to data changes automatically
Control
Full control by developer
Fire based on database event (Insert, Update, Delete)
Returns
No return or OUT parameters
Must return NEW or OLD row in most cases
🎯 Why Are Procedures and Triggers Important?
✅ Use Cases for Stored Procedures:
Bulk processing (e.g. daily billing)
Data import/export
Account setup workflows
Multi-step business logic
✅ Use Cases for Triggers:
Auto update updated_at column
Enforce soft-deletes
Maintain counters or summaries (e.g., post comment count)
Audit logs / change history
Cascading updates or cleanups
🚀 Real-World Example: Soft Delete Trigger
Instead of deleting records, mark them as deleted = true.
CREATE OR REPLACE FUNCTION soft_delete_user()
RETURNS TRIGGER AS $$
BEGIN
  UPDATE users SET deleted = TRUE WHERE id = OLD.id;
  RETURN NULL; -- cancel the delete
END;
$$ LANGUAGE plpgsql;

CREATE TRIGGER before_user_delete
BEFORE DELETE ON users
FOR EACH ROW
EXECUTE FUNCTION soft_delete_user();
Now any DELETE FROM users WHERE id = 1; will just update the deleted column.
🛠️ Tools to Manage Procedures & Triggers
pgAdmin (GUI)
psql (CLI)
Code-based migrations (via tools like ActiveRecord or pg gem)
🧠 Summary
Feature
Stored Procedure
Trigger
Manual/Auto
Manual (CALL)
Auto (event-based)
Flexibility
Complex logic, loops, variables
Quick logic, row-based or statement-based
Languages
PL/pgSQL, SQL, Python, etc.
PL/pgSQL, SQL
Best for
Multi-step workflows
Audit, logging, validation
Use Postgres RANDOM()
By using RANDOM() in PostgreSQL. If the application uses PostgreSQL’s built-in RANDOM() function to efficiently retrieve a random user from the database. Here’s why this is important:
Efficiency: PostgreSQL’s RANDOM() is more efficient than loading all records into memory and selecting one randomly in Ruby. This is especially important when dealing with large datasets (like if we have 10000 users).
Database-level Operation: The randomization happens at the database level rather than the application level, which:
Reduces memory usage (we don’t need to load unnecessary records)
Reduces network traffic (only one record is transferred)
Takes advantage of PostgreSQL’s optimized random number generation
Single Query: Using RANDOM() allows us to fetch a random record in a single SQL query, typically something like:sqlApply to
SELECT * FROM users ORDER BY RANDOM() LIMIT 1
This is in contrast to less efficient methods like:
Loading all users and using Ruby’s sample method (User.all.sample)
Getting a random ID and then querying for it (which would require two queries)
Using offset with count (which can be slow on large tables)
🔍 Full Text Search & Similarity
Extension
Use Case
Safe for Prod
pg_trgm
Trigram-based fuzzy search (great with ILIKE & similarity)
✅
unaccent
Remove accents for better search results
✅
fuzzystrmatch
Soundex, Levenshtein distance
✅ (heavy use = test!)
💡 Combine pg_trgm + unaccent for powerful search in Rails models using ILIKE.
📊 Performance Monitoring & Dev Insights
Extension
Use Case
Safe for Prod
pg_stat_statements
Monitor slow queries, frequency
✅
auto_explain
Log plans for slow queries
✅
hypopg
Simulate hypothetical indexes
✅ (dev only)
🧪 Dev Tools & Data Generation
Extension
Use Case
Safe for Prod
faker
Fake data generation for testing
❌ Dev only
pgfaker
Community alternative to faker
❌ Dev only
📦 Storage & Structure
Extension
Use Case
Safe for Prod
hstore
Key-value storage in a column
✅
citext
Case-insensitive text
✅
💡 citext is very handy for case-insensitive email columns in Rails.
# 1. open the Command Palette (Cmd + Shift + P)
# 2. Type 'PostgreSQL: Add Connection'
# 3. Enter the hostname of the database authentication details
# 4. Open Command Palette, type: 'PostgreSQL: New Query'
Now we’ll go full-on query performance pro mode using EXPLAIN ANALYZE and real plans. We’ll learn how PostgreSQL makes decisions, how to catch slow queries, and how your indexes make them 10x faster.
💎 Part 1: What is EXPLAIN ANALYZE?
EXPLAIN shows how PostgreSQL plans to execute your query.
ANALYZE runs the query and adds actual time, rows, loops, etc.
Syntax:
EXPLAIN ANALYZE
SELECT * FROM users WHERE username = 'bob';
✏️ Example 1: Without Index
SELECT * FROM users WHERE username = 'bob';
If username has no index, plan shows:
Seq Scan on users
  Filter: (username = 'bob')
  Rows Removed by Filter: 9999
❌ PostgreSQL scans all rows = Sequential Scan = slow!
➕ Add Index:
CREATE INDEX idx_users_username ON users (username);
Now rerun:
EXPLAIN ANALYZE SELECT * FROM users WHERE username = 'bob';
You’ll see:
Index Scan using idx_users_username on users
  Index Cond: (username = 'bob')
✅ PostgreSQL uses B-tree index 🚀 Massive speed-up!
🔥 Want even faster?
SELECT username FROM users WHERE username = 'bob';
If PostgreSQL shows:
Index Only Scan using idx_users_username on users
  Index Cond: (username = 'bob')
🎉 Index Only Scan! = covering index success! No heap fetch = lightning-fast.
⚠️ Note: Index-only scan only works if:
Index covers all selected columns
Table is vacuumed (PostgreSQL uses visibility map)
If you still get Seq scan output like:
test_db=# EXPLAIN ANALYSE SELECT * FROM users where username = 'aman_chetri';
                                           QUERY PLAN
-------------------------------------------------------------------------------------------------
 Seq Scan on users  (cost=0.00..1.11 rows=1 width=838) (actual time=0.031..0.034 rows=1 loops=1)
   Filter: ((username)::text = 'aman_chetri'::text)
   Rows Removed by Filter: 2
 Planning Time: 0.242 ms
 Execution Time: 0.077 ms
(5 rows)
even after adding an index, because PostgreSQL is saying:
🤔 “The table is so small (cost = 1.11), scanning the whole thing is cheaper than using the index.”
Also: Your query uses only SELECT username, which could be eligible for Index Only Scan, but heap fetch might still be needed due to visibility map.
🔧 Step-by-step Fix:
✅ 1. Add Data for Bigger Table
If the table is small (few rows), PostgreSQL will prefer Seq Scan no matter what.
Try adding ~10,000 rows:
INSERT INTO users (username, email, phone_number)
SELECT 'user_' || i, 'user_' || i || '@mail.com', '1234567890'
FROM generate_series(1, 10000) i;
Then VACUUM ANALYZE users; again and retry EXPLAIN.
✅ 2. Confirm Index Exists
First, check your index exists and is recognized:
\d users
You should see something like:
Indexes:
    "idx_users_username" btree (username)
If not, add:
CREATE INDEX idx_users_username ON users(username);
✅ 3. Run ANALYZE (Update Stats)
ANALYZE users;
This updates statistics — PostgreSQL might not be using the index if it thinks only one row matches or the table is tiny.
✅ 4. Vacuum for Index-Only Scan
Index-only scans require the visibility map to be set.
Run:
VACUUM ANALYZE users;
This marks pages in the table as “all-visible,” enabling PostgreSQL to avoid reading the heap.
✅ 5. Force PostgreSQL to Consider Index
You can turn off sequential scan temporarily (for testing):
SET enable_seqscan = OFF;

EXPLAIN SELECT username FROM users WHERE username = 'bob';
You should now see:
Index Scan using idx_users_username on users ...
⚠️ Use this only for testing/debugging — not in production.
💡 Extra Tip (optional): Use EXPLAIN (ANALYZE, BUFFERS)
EXPLAIN (ANALYZE, BUFFERS)
SELECT username FROM users WHERE username = 'bob';
This will show:
Whether heap was accessed
Buffer hits
Actual rows
📋 Summary
Step
Command
Check Index
\d users
Analyze table
ANALYZE users;
Vacuum for visibility
VACUUM ANALYZE users;
Disable seq scan for test
SET enable_seqscan = OFF;
Add more rows (optional)
INSERT INTO ...
🚨 How to catch bad index usage?
Always look for:
“Seq Scan” instead of “Index Scan” ➔ missing index
“Heap Fetch” ➔ not a covering index
“Rows Removed by Filter” ➔ inefficient filtering
“Loops: 1000+” ➔ possible N+1 issue
Common Pattern Optimizations
Pattern
Fix
WHERE column = ?
B-tree index on column
WHERE column LIKE 'prefix%'
B-tree works (with text_ops)
SELECT col1 WHERE col2 = ?
Covering index: (col2, col1) or (col2) INCLUDE (col1)
WHERE col BETWEEN ?
Composite index with range second: (status, created_at)
WHERE col IN (?, ?, ?)
Index still helps
ORDER BY col LIMIT 10
Index on col helps sort fast
⚡ Tip: Use pg_stat_statements to Find Slow Queries
Enable it in postgresql.conf:
shared_preload_libraries = 'pg_stat_statements'
Then run:
SELECT query, total_exec_time, calls
FROM pg_stat_statements
ORDER BY total_exec_time DESC
LIMIT 5;
🎯 Find your worst queries & optimize them with new indexes!
🧪 Try It Yourself
Want a little lab setup to practice?
CREATE TABLE users (
  user_id serial PRIMARY KEY,
  username VARCHAR(220),
  email VARCHAR(150),
  phone_number VARCHAR(20)
);

-- Insert 100K fake rows
INSERT INTO users (username, email, phone_number)
SELECT
  'user_' || i,
  'user_' || i || '@example.com',
  '999-000-' || i
FROM generate_series(1, 100000) i;
Then test:
EXPLAIN ANALYZE SELECT * FROM users WHERE username = 'user_5000';
Add INDEX ON username
Re-run, compare speed!
🎯 Extra Pro Tools for Query Performance
EXPLAIN ANALYZE → Always first tool
pg_stat_statements → Find slow queries in real apps
auto_explain → Log slow plans automatically
pgBadger or pgHero → Visual query monitoring
💥 Now We Know:
✅ How to read query plans ✅ When you’re doing full scans vs index scans ✅ How to achieve index-only scans ✅ How to catch bad performance early ✅ How to test and fix in real world
Let’s look into some of the features of sql data indexing. This will be super helpful while developing our Rails 8 Application.
💎 Part 1: What is a Covering Index?
Normally when you query:
SELECT * FROM users WHERE username = 'bob';
Database searches username index (secondary).
Finds a pointer (TID or PK).
Then fetches full row from table (heap or clustered B-tree).
Problem:
Heap fetch = extra disk read.
Clustered B-tree fetch = extra traversal.
📜 Covering Index idea:
✅ If the index already contains all the columns you need, ✅ Then the database does not need to fetch the full row!
It can answer the query purely by scanning the index! ⚡
Boom — one disk read, no extra hop!
✏️ Example in PostgreSQL:
Suppose your query is:
SELECT username FROM users WHERE username = 'bob';
You only need username.
But by default, PostgreSQL indexes only store the index column (here, username) + TID.
✅ So in this case — already covering!
No heap fetch needed!
✏️ Example in MySQL InnoDB:
Suppose your query is:
SELECT username FROM users WHERE username = 'bob';
Secondary index (username) contains:
username (indexed column)
user_id (because secondary indexes in InnoDB always store PK)
♦️ So again, already covering! No need to jump to the clustered index!
🎯 Key point:
If your query only asks for columns already inside the index, then only the index is touched ➔ no second lookup ➔ super fast!
💎 Part 2: Real SQL Examples
✨ PostgreSQL
Create a covering index for common query:
CREATE INDEX idx_users_username_email ON users (username, email);
Now if you run:
SELECT email FROM users WHERE username = 'bob';
Postgres can:
Search index on username
Already have email in index
✅ No heap fetch!
(And Postgres is smart: it checks index-only scan automatically.)
✨ MySQL InnoDB
Create a covering index:
CREATE INDEX idx_users_username_email ON users (username, email);
✅ Now query:
SELECT email FROM users WHERE username = 'bob';
Same behavior:
Only secondary index read.
No need to touch primary clustered B-tree.
💎 Part 3: Tips to design smart Covering Indexes
✅ If your query uses WHERE on col1 and SELECTcol2, ✅ Best to create index: (col1, col2).
✅ Keep indexes small — don’t add 10 columns unless needed. ✅ Avoid huge TEXT or BLOB columns in covering indexes — they make indexes heavy.
✅ Composite indexes are powerful:
CREATE INDEX idx_users_username_email ON users (username, email);
→ Can be used for:
WHERE username = ?
WHERE username = ? AND email = ?
etc.
✅ Monitor index usage:
PostgreSQL: EXPLAIN ANALYZE
MySQL: EXPLAIN
✅ Always check if Index Only Scan or Using Index appears in EXPLAIN plan!
📚 Quick Summary Table
Database
Normal Query
With Covering Index
PostgreSQL
B-tree ➔ Heap fetch (unless TID optimization)
B-tree scan only
MySQL InnoDB
Secondary B-tree ➔ Primary B-tree
Secondary B-tree only
Result
2 steps
1 step
Speed
Slower
Faster
🏆 Great! — Now We Know:
🧊 How heap fetch works! 🧊 How block lookup is O(1)! 🧊 How covering indexes skip heap fetch! 🧊 How to create super fast indexes for PostgreSQL and MySQL!
🦾 Advanced Indexing Tricks (Real Production Tips)
Now it’s time to look into super heavy functionalities that Postgres supports for making our sql data search/fetch super fast and efficient.
1. 🎯 Partial Indexes (PostgreSQL ONLY)
✅ Instead of indexing the whole table, ✅ You can index only the rows you care about!
Example:
Suppose 95% of users have status = 'inactive', but you only search active users:
SELECT * FROM users WHERE status = 'active' AND email = 'bob@example.com';
👉 Instead of indexing the whole table:
CREATE INDEX idx_active_users_email ON users (email) WHERE status = 'active';
♦️ PostgreSQL will only store rows with status = 'active' in this index!
Advantages:
Smaller index = Faster scans
Less space on disk
Faster index maintenance (less updates/inserts)
Important:
MySQL (InnoDB) does NOT support partial indexes 😔 — only PostgreSQL has this superpower.
2. 🎯 INCLUDE Indexes (PostgreSQL 11+)
✅ Normally, a composite index uses all columns for sorting/searching. ✅ With INCLUDE, extra columns are just stored in index, not used for ordering.
Example:
CREATE INDEX idx_username_include_email ON users (username) INCLUDE (email);
Meaning:
username is indexed and ordered.
email is only stored alongside.
Now query:
SELECT email FROM users WHERE username = 'bob';
➔ Index-only scan — no heap fetch.
Advantages:
Smaller & faster than normal composite indexes.
Helps to create very efficient covering indexes.
Important:
MySQL 8.0 added something similar with INVISIBLE columns but it’s still different.
3. 🎯 Composite Index Optimization
✅ Always order columns inside index smartly based on query pattern.
Golden Rules:
⚜️ Equality columns first (WHERE col = ?) ⚜️ Range columns second (WHERE col BETWEEN ?) ⚜️ SELECT columns last (for covering)
Example:
If query is:
SELECT email FROM users WHERE status = 'active' AND created_at > '2024-01-01';
Best index:
CREATE INDEX idx_users_status_created_at ON users (status, created_at) INCLUDE (email);
♦️ status first (equality match) ♦️ created_at second (range) ♦️ email included (covering)
Bad Index: (wrong order)
CREATE INDEX idx_created_at_status ON users (created_at, status);
→ Will not be efficient!
4. 🎯 BRIN Indexes (PostgreSQL ONLY, super special!)
✅ When your table is very huge (millions/billions of rows), ✅ And rows are naturally ordered (like timestamp, id increasing), ✅ You can create a BRIN (Block Range Index).
Example:
CREATE INDEX idx_users_created_at_brin ON users USING BRIN (created_at);
♦️ BRIN stores summaries of large ranges of pages (e.g., min/max timestamp per 128 pages).
♦️ Ultra small index size.
♦️ Very fast for large range queries like:
SELECT * FROM users WHERE created_at BETWEEN '2024-01-01' AND '2024-04-01';
Important:
BRIN ≠ B-tree
BRIN is approximate, B-tree is precise.
Only useful if data is naturally correlated with physical storage order.
MySQL?
MySQL does not have BRIN natively. PostgreSQL has a big advantage here.
5. 🎯 Hash Indexes (special case)
✅ If your query is always exact equality (not range), ✅ You can use hash indexes.
Example:
CREATE INDEX idx_users_username_hash ON users USING HASH (username);
Useful for:
Simple WHERE username = 'bob'
Never ranges (BETWEEN, LIKE, etc.)
⚠️ Warning:
Hash indexes used to be “lossy” before Postgres 10.
Now they are safe, but usually B-tree is still better unless you have very heavy point lookups.
😎 PRO-TIP: Which Index Type to Use?
Use case
Index type
Search small ranges or equality
B-tree
Search on huge tables with natural order (timestamps, IDs)
BRIN
Only exact match, super heavy lookup
Hash
Search only small part of table (active users, special conditions)
Partial index
Need to skip heap fetch
INCLUDE / Covering Index
🗺️ Quick Visual Mindmap:
Your Query
│
├── Need Equality + Range? ➔ B-tree
│
├── Need Huge Time Range Query? ➔ BRIN
│
├── Exact equality only? ➔ Hash
│
├── Want Smaller Index (filtered)? ➔ Partial Index
│
├── Want to avoid Heap Fetch? ➔ INCLUDE columns (Postgres) or Covering Index
🏆 Now we Know:
🧊 Partial Indexes 🧊 INCLUDE Indexes 🧊 Composite Index order tricks 🧊 BRIN Indexes 🧊 Hash Indexes 🧊 How to choose best Index
MySQL InnoDB: Directly find the row inside the PK B-tree (no extra lookup).
✅ MySQL is a little faster here because it needs only 1 step!
2. SELECT username FROM users WHERE user_id = 102; (Only 1 Column)
PostgreSQL: Might do an Index Only Scan if all needed data is in the index (very fast).
MySQL: Clustered index contains all columns already, no special optimization needed.
✅ Both can be very fast, but PostgreSQL shines if the index is “covering” (i.e., contains all needed columns). Because index table has less size than clustered index of mysql.
3. SELECT * FROM users WHERE username = 'Bob'; (Secondary Index Search)
PostgreSQL: Secondary index on username ➔ row pointer ➔ fetch table row.
MySQL: Secondary index on username ➔ get primary key ➔ clustered index lookup ➔ fetch data.
✅ Both are 2 steps, but MySQL needs 2 different B-trees: secondary ➔ primary clustered.
Consider the below situation:
SELECT username FROM users WHERE user_id = 102;
user_id is the Primary Key.
You only want username, not full row.
Now:
🔵 PostgreSQL Behavior
👉 In PostgreSQL, by default:
It uses the primary key btree to find the row pointer.
Then fetches the full row from the table (heap fetch).
👉 But PostgreSQL has an optimization called Index-Only Scan.
If all requested columns are already present in the index,
And if the table visibility map says the row is still valid (no deleted/updated row needing visibility check),
Then Postgres does not fetch the heap.
👉 So in this case:
If the primary key index also stores username internally (or if an extra index is created covering username), Postgres can satisfy the query just from the index.
✅ Result: No table lookup needed ➔ Very fast (almost as fast as InnoDB clustered lookup).
📢 Postgres primary key indexes usually don’t store extra columns, unless you specifically create an index that includes them (INCLUDE (username) syntax in modern Postgres 11+).
🟠 MySQL InnoDB Behavior
In InnoDB: Since the primary key B-tree already holds all columns (user_id, username, email), It directly finds the row from the clustered index.
So when you query by PK, even if you only need one column, it has everything inside the same page/block.
✅ One fast lookup.
🔥 Why sometimes Postgres can still be faster?
If PostgreSQL uses Index-Only Scan, and the page is already cached, and no extra visibility check is needed, Then Postgres may avoid touching the table at all and only scan the tiny index pages.
In this case, for very narrow queries (e.g., only 1 small field), Postgres can outperform even MySQL clustered fetch.
💡 Because fetching from a small index page (~8KB) is faster than reading bigger table pages.
🎯 Conclusion:
✅ MySQL clustered index is always fast for PK lookups. ✅ PostgreSQL can be even faster for small/narrow queries if Index-Only Scan is triggered.
👉 Quick Tip:
In PostgreSQL, you can force an index to include extra columns by using: CREATE INDEX idx_user_id_username ON users(user_id) INCLUDE (username); Then index-only scans become more common and predictable! 🚀
Isn’t PostgreSQL also doing 2 B-tree scans? One for secondary index and one for table (row_id)?
When you query with a secondary index, like:
SELECT * FROM users WHERE username = 'Bob';
In MySQL InnoDB, I said:
Find in secondary index (username ➔ user_id)
Then go to primary clustered index (user_id ➔ full row)
Let’s look at PostgreSQL first:
♦️ Step 1: Search Secondary Index B-tree on username.
It finds the matching TID (tuple ID) or row pointer.
TID is a pair (block_number, row_offset).
Not a B-tree! Just a physical pointer.
♦️ Step 2: Use the TID to directly jump into the heap (the table).
The heap (table) is not a B-tree — it’s just a collection of unordered pages (blocks of rows).
PostgreSQL goes directly to the block and offset — like jumping straight into a file.
🔔 Important:
Secondary index ➔ TID ➔ heap fetch.
No second B-tree traversal for the table!
🟠 Meanwhile in MySQL InnoDB:
♦️ Step 1: Search Secondary Index B-tree on username.
It finds the Primary Key value (user_id).
♦️ Step 2: Now, search the Primary Key Clustered B-tree to find the full row.
Need another B-tree traversal based on user_id.
🔔 Important:
Secondary index ➔ Primary Key B-tree ➔ data fetch.
Two full B-tree traversals!
Real-world Summary:
♦️ PostgreSQL
Secondary index gives a direct shortcut to the heap.
One B-tree scan (secondary) ➔ Direct heap fetch.
♦️ MySQL
Secondary index gives PK.
Then another B-tree scan (primary clustered) to find full row.
✅ PostgreSQL does not scan a second B-tree when fetching from the table — just a direct page lookup using TID.
✅ MySQL does scan a second B-tree (primary clustered index) when fetching full row after secondary lookup.
Is heap fetch a searching technique? Why is it faster than B-tree?
📚 Let’s start from the basics:
When PostgreSQL finds a match in a secondary index, what it gets is a TID.
♦️ A TID (Tuple ID) is a physical address made of:
Block Number (page number)
Offset Number (row slot inside the page)
Example:
TID = (block_number = 1583, offset = 7)
🔵 How PostgreSQL uses TID?
It directly calculates the location of the block (disk page) using block_number.
It reads that block (if not already in memory).
Inside that block, it finds the row at offset 7.
♦️ No search, no btree, no extra traversal — just:
Find the page (via simple number addressing)
Find the row slot
📈 Visual Example
Secondary index (username ➔ TID):
username
TID
Alice
(1583, 7)
Bob
(1592, 3)
Carol
(1601, 12)
♦️ When you search for “Bob”:
Find (1592, 3) from secondary index B-tree.
Jump directly to Block 1592, Offset 3.
Done ✅!
Answer:
Heap fetch is NOT a search.
It’s a direct address lookup (fixed number).
Heap = unordered collection of pages.
Pages = fixed-size blocks (usually 8 KB each).
TID gives an exact GPS location inside heap — no searching required.
That’s why heap fetch is faster than another B-tree search:
No binary search, no B-tree traversal needed.
Only a simple disk/memory read + row offset jump.
🌿 B-tree vs 📁 Heap Fetch
Action
B-tree
Heap Fetch
What it does
Binary search inside sorted tree nodes
Direct jump to block and slot
Steps needed
Traverse nodes (root ➔ internal ➔ leaf)
Directly read page and slot
Time complexity
O(log n)
O(1)
Speed
Slower (needs comparisons)
Very fast (direct)
🎯 Final and short answer:
♦️ In PostgreSQL, after finding the TID in the secondary index, the heap fetch is a direct, constant-time (O(1)) access — no B-tree needed! ♦️ This is faster than scanning another B-tree like in MySQL InnoDB.
🧩 Our exact question:
When we say:
Jump directly to Block 1592, Offset 3.
We are thinking:
There are thousands of blocks.
How can we directly jump to block 1592?
Shouldn’t that be O(n) (linear time)?
Shouldn’t there be some traversal?
🔵 Here’s the real truth:
No traversal needed.
No O(n) work.
Accessing Block 1592 is O(1) — constant time.
📚 Why?
Because of how files, pages, and memory work inside a database.
When PostgreSQL stores a table (the “heap”), it saves it in a file on disk. The file is just a long array of fixed-size pages.
Each page = 8KB (default in Postgres).
Each block = 1 page = fixed 8KB chunk.
Block 0 is the first 8KB.
Block 1 is next 8KB.
Block 2 is next 8KB.
…
Block 1592 = (1592 × 8 KB) offset from the beginning.
✅ So block 1592 is simply located at 1592 × 8192 bytes offset from the start of the file.
✅ Operating systems (and PostgreSQL’s Buffer Manager) know exactly how to seek to that byte position without reading everything before it.
Let’s walk through a real-world example using a schema we are already working on: a shopping app that sells clothing for women, men, kids, and infants.
We’ll look at how candidate keys apply to real tables like Users, Products, Orders, etc.
Here, a combination of order_id and product_id uniquely identifies a row — i.e., what product was ordered in which order — making it a composite candidate key, and we’ve selected it as the primary key.
👀 Summary of Candidate Keys by Table
Table
Candidate Keys
Primary Key Used
Users
user_id, email, username
user_id
Products
product_id, sku
product_id
Orders
order_id, order_number
order_id
OrderItems
(order_id, product_id)
(order_id, product_id)
Let’s explore how to implement candidate keys in both SQL and Rails (Active Record). Since we are working on a shopping app in Rails 8, I’ll show how to enforce uniqueness and data integrity in both layers:
🔹 1. Candidate Keys in SQL (PostgreSQL Example)
Let’s take the Users table with multiple candidate keys (email, username, and user_id).
CREATE TABLE users (
  user_id SERIAL PRIMARY KEY,
  email VARCHAR(255) NOT NULL UNIQUE,
  username VARCHAR(100) NOT NULL UNIQUE,
  phone_number VARCHAR(20)
);
user_id: chosen as the primary key
email and username: candidate keys, enforced via UNIQUE constraints
If you’ve already built a Rails 8 app using the default SQLite setup and now want to switch to PostgreSQL, here’s a clean step-by-step guide to make the transition smooth:
1.🔧 Setup PostgreSQL in macOS
🔷 Step 1: Install PostgreSQL via Homebrew
Run the following:
brew install postgresql
This created a default database cluster for me, check the output. So you can skip the Step 3.
==> Summary
🍺  /opt/homebrew/Cellar/postgresql@14/14.17_1: 3,330 files, 45.9MB

==> Running `brew cleanup postgresql@14`...
==> postgresql@14
This formula has created a default database cluster with:
  initdb --locale=C -E UTF-8 /opt/homebrew/var/postgresql@14

To start postgresql@14 now and restart at login:
  brew services start postgresql@14

Or, if you don't want/need a background service you can just run:
  /opt/homebrew/opt/postgresql@14/bin/postgres -D /opt/homebrew/var/postgresql@14
Sometimes Homebrew does this automatically. If not:
initdb /opt/homebrew/var/postgresql@<version>
Or a more general version:
initdb /usr/local/var/postgres
Key functions of initdb: Creates a new database cluster, Initializes the database cluster’s default locale and character set encoding, Runs a vacuum command.
In essence, initdb prepares the environment for a PostgreSQL database to be used and provides a foundation for creating and managing databases within that cluster
🔷 Step 4: Create a User and Database
PostgreSQL uses a role-based access control. Create a user with superuser privileges:
# createuser creates a new Postgres user
createuser -s postgres
createuser is a shell script wrapper around the SQL command CREATE USER via the Postgres interactive terminal psql. Thus, there is nothing special about creating users via this or other methods
Then switch to psql:
psql postgres
You can also create a database:
createdb <db_name>
🔷 Step 5: Connect and Use psql
psql -d <db_name>
Inside the psql shell, try:
\l    -- list databases
\dt   -- list tables
\q    -- quit
Then go to http://localhost:3000 and confirm everything works.
7. Check psql manually (Optional)
psql -d your_app_name_development
Then run:
\dt     -- view tables
\q      -- quit
8. Update .gitignore
Note: If not already added /storage/*
Make sure SQLite DBs are not accidentally committed:
/storage/*.sqlite3
/storage/*.sqlite3-journal
After moving into PostgreSQL
I was getting an issue with postgres column, where I have the following data in the migration:
# migration
t.decimal :rating, precision: 1, scale: 1

# log
ActiveRecord::RangeError (PG::NumericValueOutOfRange: ERROR:  numeric field overflow
12:44:36 web.1  | DETAIL:  A field with precision 1, scale 1 must round to an absolute value less than 1.
12:44:36 web.1  | )
Value passed is: 4.3. I was not getting this issue in SqLite DB.
What does precision: 1, scale: 1 mean?
precision: Total number of digits (both left and right of the decimal).
scale: Number of digits after the decimal point
If you want to store ratings like 4.3, 4.5, etc., a good setup is:
t.decimal :rating, precision: 2, scale: 1
# revert and migrate for products table

✗ rails db:migrate:down VERSION=2025031XXXXX -t
✗ rails db:migrate:up VERSION=2025031XXXXXX -t
Then go to http://localhost:3000 and confirm everything works.