
Let’s create an application for managing Tasks that are created by different users. Let’s use React UI for quick data response. The app consists of CRUD operations of Tasks, User Authentication using JWT-Tokens, User Authorization for their particular tasks.
Technology stack
Here’s the list of technology stack we use in our application.
| Layer | Technology | Purpose |
|---|---|---|
| Backend | Ruby on Rails 8.1+ | REST API |
| Database | PostgreSQL | Persistent storage |
| Frontend | React | UI |
| Language | TypeScript | Static typing |
| Build tool | Vite | Frontend development/build |
| UI library | Fluent UI React v9 | Components and styling |
| HTTP | Fetch API initially | API communication |
| Server cache | TanStack Query | API data caching |
| Global state | Redux Toolkit | Shared client-side state |
| Testing backend | RSpec | API and model tests |
| Testing frontend | Vitest + React Testing Library | Component tests |
| Containers | Docker + Docker Compose | Containerization |
| CI/CD | GitHub Actions | Automation and deployment |
Check our ruby current version.
$ ruby -v

ruby 3.4.1 (2024-12-25 revision 48d4efcb85)
Check the security patches and updates of our version.
https://www.ruby-lang.org/en/downloads/releases
Then update the latest compatible version.
$ mise use -g ruby@3.4.12

(2026-10-23 revision 366f5fdc00)
To uninstall Ruby using mise, run mise uninstall ruby@ to delete a specific installed version.
$ mise uninstall ruby@3.4.1
Install latest ruby version that you need.
Switch between versions globally:
$ mise use -g ruby@3.4.12

$ mise use -g ruby@4.0.9
Check all needed versions exists:
ruby -v
gem -v
rails -v
node -v
npm -v
psql --version
Check Postgres versions available here: https://www.postgresql.org/download/macosx/
Download the one of the latest one if you have currently installed the old version.
$ brew install postgresql@18

Installing postgresql@18
==> Pouring postgresql@18--18.7.arm64_tahoe.bottle.tar.gz
Warning: postgresql@18 was installed but not linked because postgresql@14 is already linked.
To link this version, run:
brew link postgresql@18

$ brew link postgresql@18
Unlinking /opt/homebrew/Cellar/postgresql@14/14.17_1... 2165 symlinks removed.
Linking /opt/homebrew/Cellar/postgresql@18/18.7... 812 symlinks created.
$ psql --version
psql (PostgreSQL) 18.7 (Homebrew)
Update node js:
$ node -v
v24.14.0
install the latest Long-Term Support release
$ nvm install --lts
Installing latest LTS version.
Downloading and installing node v26.13.1...
Downloading https://nodejs.org/dist/v26.13.1/node-v26.13.1-darwin-arm64.tar.xz...
Computing checksum with sha256sum
Checksums matched!
Now using node v26.13.1 (npm v11.20.0)
Create app folder:
$ mkdir rails-react-task-manager
$ cd rails-react-task-manager
$ git init -b main
We want to manage the backend, frontend, Docker configuration and CI/CD workflows in one repository.
Update ruby gems:
A new release of RubyGems is available: 4.0.20 → 4.0.24!
See https://github.com/ruby/rubygems/blob/v4.0.24/CHANGELOG.md for the changes since 4.0.20.
Run `gem update --system 4.0.24` to update your installation
Install Rails:
check rails newest versions: https://rubygems.org/gems/rails/versions
$ gem install rails -v '~> 8.1.0'
Note: Pessimistic version constraint. Using -v “~> 8.1.0” installs the latest patch release within the 8.1 series (such as 8.1.4.1) while avoiding unintended jumps to future minor or major versions
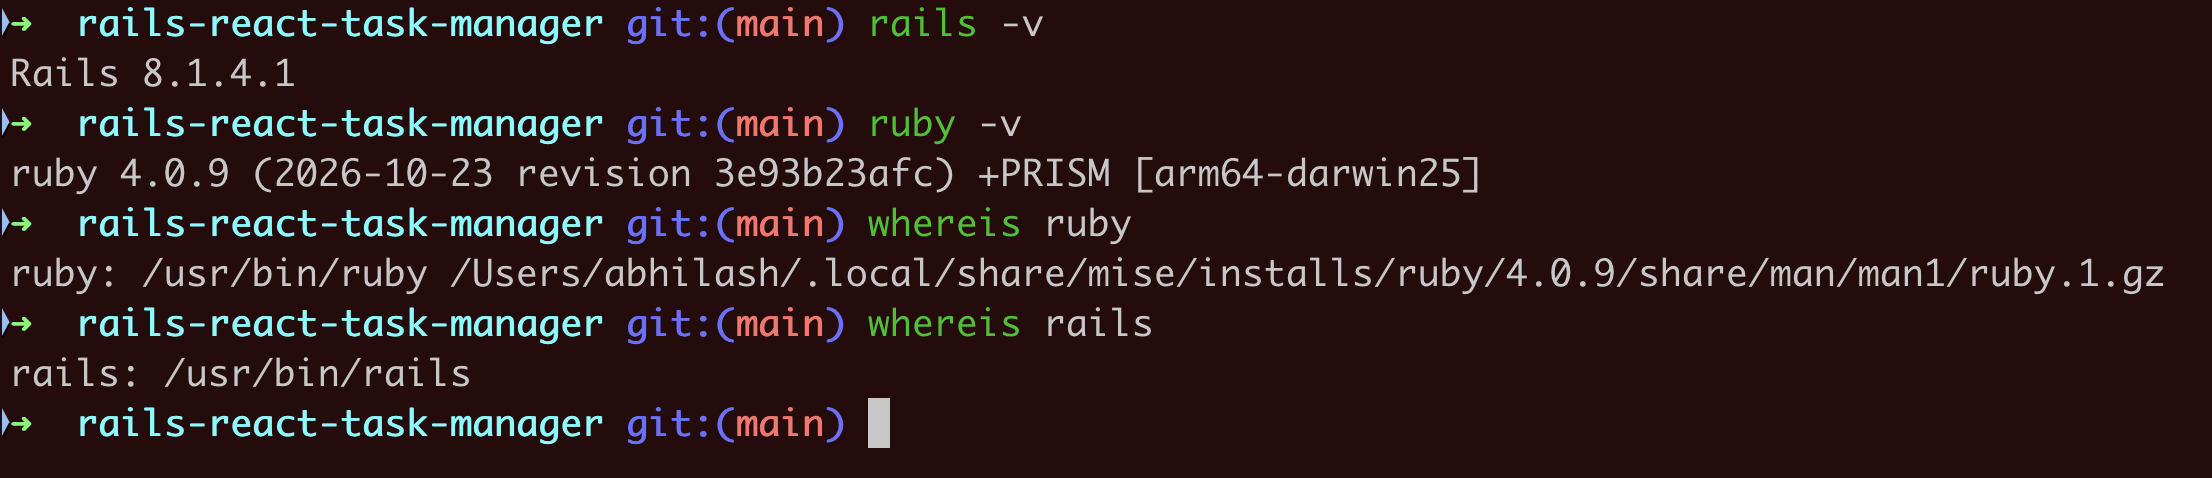
Reopen the shell and check:
Create a github repository
name it: rails-react-task-manager
$ git remote add origin git@github.com:<username>/rails-react-task-manager.git
Problem 1:
The first problem I faced was the command rails new already has the folders: .git, .github, .gitattributes, .gitignore etc inside rails app.
So when I try to push the rails app:
git add backend/
error: 'backend/' does not have a commit checked out
error: unable to index file 'backend/'
fatal: adding files failed
This happens because Rails automatically initializes a Git repository when you run rails new.
Solution: Keep only one Git repository
Since we’re building a monorepo, we want Git initialized only at the project root.
Remove only the nested Git metadata:
rm -rf backend/.git
| Type | When to Use It | Example |
|---|---|---|
chore | Upgrading packages, libraries, or runtime versions | chore: update Node.js version or chore(deps): bump lodash |
feat | Adding a new feature or capability for the user. | feat: add user login via OAuth |
fix | Patching a bug in the application code. | fix: resolve crash on checkout page |
refactor | Restructuring production code without changing its behavior. | refactor: simplify auth helper logic |
docs | Updating READMEs, comments, or API guides. | docs: add setup instructions |
style | Fixing formatting, whitespace, or missing semicolons. | style: format files with Prettier |
test | Adding or updating unit and integration tests. | test: add unit tests for cart total |
build / ci | Making dedicated changes to build systems or CI pipelines (used by teams that prefer stricter categories over chore). | ci: cache node_modules in pipeline |
Problem 2:
Accessing the Rails url at: http://localhost:3000/
Started GET "/" for ::1 at 2026-11-15

ActiveRecord::StatementInvalid (PG::InvalidParameterValue: ERROR:  invalid value for parameter "TimeZone": "UTC"
)
Caused by: PG::InvalidParameterValue (ERROR:  invalid value for parameter "TimeZone": "UTC"
)

Information for: ActiveRecord::StatementInvalid (PG::InvalidParameterValue: ERROR:  invalid value for parameter "TimeZone": "UTC"
):
Solution: check which PostgreSQL server is actually running
psql --version
brew services list
brew services stop postgresql@14
brew services restart postgresql@18
# then do
rails db:prepare -t # recommended
Restart the rails server. Also check:
curl -i http://localhost:3000/up
Install RSpec
Add RSpec to Gemfile
group :development, :test do
  gem "rspec-rails", "~> 8.1"
end
Install the gem
cd backend
bundle install
bundle exec rspec --version
Generate RSpec configuration
 rails g rspec:install
      create  .rspec
      create  spec
      create  spec/spec_helper.rb
      create  spec/rails_helper.rb
| File | Responsibility |
|---|---|
.rspec | Default command-line options for RSpec |
spec_helper.rb | General RSpec configuration |
rails_helper.rb | Rails-specific test configuration |
Important distinction:
spec_helper.rb can be used for tests that don’t require Rails.
rails_helper.rb loads the Rails application and integrates Rails testing functionality.
Verify:
bundle exec rspec
No examples found.

Finished in 0.00022 seconds (files took 0.05449 seconds to load)
0 examples, 0 failures
Minitest is still present: Your Rails application probably already has: backend/test/. That’s because Rails generated its default Minitest structure. We’ll configure Rails generators to use RSpec automatically, so that when we generate a model, Rails creates: spec/models/task_spec.rb instead of: test/models/task_test.rb. We’ll also decide how to handle the existing Minitest files cleanly.
Configure Rails generators to use RSpec
Currently, Rails uses Minitest as its default testing framework. For example, when you generate a model: bin/rails generate model Task title:string, Rails normally generates: app/models/task.rb
test/models/task_test.rb
But we want: app/models/task.rb
spec/models/task_spec.rb
RSpec Rails integrates with Rails generators to do exactly this.
Open: backend/config/application.rb and add:
config.generators do |g|
  g.test_framework :rspec
end
Important: This does not remove Minitest or disable its test runner. It changes the default generator behaviour.
We don’t want to generate our actual Task model just to test the configuration.
Instead, use Rails --pretend option:
rails g model Task title:string --pretend
      invoke  active_record
      create    db/migrate/20261115171837_create_tasks.rb
      create    app/models/task.rb
      invoke    rspec
      create      spec/models/task_spec.rb
Rspec Structure:
spec/
├── models/
│   └── task_spec.rb
│
├── requests/
│   └── api/
│       └── v1/
│           └── tasks_spec.rb
│
├── services/
│   └── authentication/
│
├── jobs/
├── factories/
│
├── spec_helper.rb
└── rails_helper.rb
For our Rails API, we’ll primarily use request specs instead of controller specs. A request spec tests the application from the HTTP client’s perspective. This lets us test the complete API behaviour rather than testing controller methods in isolation. RSpec Rails recommends request specs as the higher-level alternative to controller specs.
For example:
HTTP Request
    ↓
Router
    ↓
Controller
    ↓
Authentication
    ↓
Authorization
    ↓
Model / Database
    ↓
HTTP Response
Understand the structure of an RSpec test
An RSpec test typically consists of four important building blocks:
| RSpec syntax | Purpose |
|---|---|
RSpec.describe | Defines the top-level example group |
describe | Groups related examples |
context | Describes a particular condition or scenario |
it | Defines an individual test example |
expect | Defines an expectation |
to | Specifies the expected matcher |
Let’s look at a simple example.
RSpec.describe "RSpec basics" do
  describe "equality matcher" do
    it "compares two values" do
      result = 2 + 3

      expect(result).to eq(5)
    end
  end
end
Understand each line
RSpec.describe "RSpec basics" – Creates an example group. This is the outermost container for our tests.
describe "equality matcher" – Groups tests related to equality. You can nest multiple describe blocks to organize tests logically.
it "compares two values" – Defines an individual test example. The string describes the expected behaviour. RSpec uses it when displaying test results.
expect(result).to eq(5) – This is the actual expectation.
expect(result)– the actual value.to– tells RSpec we’re checking a positive expectation.eq(5)– matcher checking whether the actual value equals 5 using Ruby’s==operator.
If the expectation fails, RSpec reports a failure with the actual and expected values.
Understand RSpec matchers
Matchers are one of the most important parts of RSpec.
They determine how RSpec compares actual and expected values.
Here are some commonly used matchers:
| Matcher | Purpose | Example |
|---|---|---|
eq | Value equality (==) | eq(10) |
be | Object identity (equal?) | be(true) |
include | Collection contains value | include("Rails") |
be_nil | Checks nil | be_nil |
be_empty | Checks empty collection | be_empty |
be_truthy | Checks truthiness | be_truthy |
be_falsey | Checks falsiness | be_falsey |
match | Regular expression matching | match(/rails/i) |
raise_error | Checks raised exception | raise_error(ArgumentError) |
A particularly important distinction: expect("Rails").to eq("Rails")
This checks value equality. Whereas: expect(object).to be(other_object)
This checks whether both references point to the same object. Don’t confuse eq and be. You can also write negative expectations: expect(result).not_to eq(10) This verifies that the result isn’t equal to 10.
One principle to remember: Good tests should make the behaviour obvious, minimize duplicated setup and remain independent of one another. That’s the mindset I want you to develop while learning RSpec.
Understand describe vs context
They look similar, but they serve slightly different organizational purposes. Consider a future Task model.
RSpec.describe Task do
  describe "validations" do
    context "when title is present" do
      # Examples go here
    end

    context "when title is missing" do
      # Examples go here
    end
  end
end
Preferred convention:
describe: What behaviour are we testing?context: Under what circumstances are we testing it?it: What should happen?
Technically, describe and context create the same kind of RSpec example group. The difference is semantic and improves readability.
hands-on exercise
Let’s create a temporary learning spec. We aren’t creating the Task model or touching the database yet. From your backend directory:
mkdir spec/learningtouch spec/learning/rspec_basics_spec.rb
Start with the previous equality example. Now add your own examples to cover these requirements:
Exercise 1 – Equality
Write an example that checks whether 10 + 20 equals 30.
Exercise 2 – Collection
Given: languages = ["Ruby", "JavaScript", "Python"]
Write an expectation that verifies the array includes "Ruby".
Exercise 3 – Nil
Given a variable whose value is nil, verify that it is nil.
Exercise 4 – Boolean
Given a variable whose value is false, verify that it is exactly false.
Exercise 5 – Negative expectation
Verify that the languages array does not include "Java".
Execute your tests: bundle exec rspec spec/learning/rspec_basics_spec.rb
For more readable output: bundle exec rspec spec/learning/rspec_basics_spec.rb --format documentation , The documentation formatter displays the example descriptions and their results.
Refer:
https://rspec.info/features/3-13/rspec-expectations/built-in-matchers/equality
https://rspec.info/features/3-13/rspec-expectations/built-in-matchers/include
https://rspec.info/features/3-12/rspec-core/helper-methods/let
RSpec.describe "Rspec Basics learning" do
  describe "Equality" do
    let(:languages) { ["Ruby", "JavaScript", "Python"] }

    it "check addition" do
      expect(10 + 20).to eq(30)
    end

    it "include in the list" do
      expect(languages).to include "Ruby"
    end

    it "checks nil value" do
      nil_value = nil
      expect(nil_value).to be_nil
    end

    it "checks false value" do
      false_value = false
      true_value = true
      expect(false_value).to be false
      expect(false_value).to be_falsey
      expect(true_value).to be_truthy
      expect(true_value).to be true
    end

    it "checks negative expectation" do
      expect(languages).not_to include "Scala"
    end
  end
end

# run
$ rspec spec/
Note: be false vs be_falsey These are different expectations.
expect(false).to be false
expect(false).to be_falsey
expect(nil).to be_falsey
expect(true).to be_truthy
be_truthy accepts anything other than false or nil. be false checks that the value is exactly false. be_falsey accepts either false or nil. let is lazily evaluated and memoized within an individual example.
We’ll apply these concepts to our first actual Rails model spec. No need to rush into FactoryBot yet. We should understand native RSpec first.
RSpec hooks: before, after, let and let!
This is one of the most frequently used parts of RSpec in real Rails projects. When writing model and request specs, we often need to prepare test data before executing an example.
For example:
- Create a user before testing authentication.
- Create a task before testing task updates.
- Prepare some data before testing associations.
- Clean up resources after an example.
RSpec provides hooks and helper methods for this.
before hook
RSpec.describe "Task" do
  before do
    puts "Running before hook"
  end

  it "checks something" do
    puts "Running example"
  end

  it "checks something else" do
    puts "Running another example"
  end
end

# output
Running before hook
Running example

Running before hook
Running another example
before executes before every example by default. These are equivalent:
before do
  # Setup
end

# and

before(:each) do
  # Setup
end
When do we use it?
When every example needs some common setup. For example, imagine we need a variable initialized before each test.
Imagine we have 10 test examples and every example requires the same initial setup.
# Without hooks, you might repeat:

it "example 1" do
  languages = ["Ruby", "JavaScript"]
  # Test logic
end

it "example 2" do
  languages = ["Ruby", "JavaScript"]
  # Test logic
end

# This creates unnecessary duplication. RSpec provides hooks to solve this problem.
Understand let vs before
This distinction is particularly important.
before | let |
|---|---|
| Setup hook | Defines a helper method |
| Executes automatically | Executes only when referenced |
| Runs before every example by default | Evaluates once per example |
| Useful for setup actions | Useful for reusable test data |
after hook: after executes after each example.
after(:each) do
  puts "Cleaning up"
end
Typical use cases:
- Cleaning up temporary resources.
- Restoring modified environment variables.
- Closing external resources.
- Removing temporary files.
RSpec Rails and transactional tests will handle much of our database cleanup automatically, so we shouldn’t manually delete every test record in after
let – lazy evaluation
Let’s understand its behaviour: let(:languages) { ["Ruby", "JavaScript", "Python"] } . And if you call it multiple times within the same example, RSpec reuses its cached value. This is called lazy evaluation and memoization.
Hands-on exercise
Let’s create another learning spec: touch spec/learning/rspec_setup_hooks_spec.rb
RSpec.describe "RSpec setup hooks" do
  let(:execution_log) { [] }

  let(:languages) do
    execution_log << :languages_created
    ["Ruby", "JavaScript", "Python"]
  end

  before(:each) do
    execution_log << :before_hook
  end

  # Write your examples here
  it "Test lazy evaluation" do
    puts "execution_log: #{execution_log}"
  end

  it "Access let variable and check lazy evaluation when referenced" do
    expect(languages).to include("Ruby")
    puts "execution_log: #{execution_log}"
  end

  it "Access let variables twice within this example and verify lazy loading" do
    expect(languages).to include("Python")
    expect(languages).not_to include("Rust")
    puts "execution_log: #{execution_log}"
  end
end
We’ll now cover three important RSpec concepts that you’ll use extensively when writing Rails model specs and request specs:
let!– eager evaluation.subject– defining the primary object under test.before(:all)vsbefore(:each)– setup lifecycle and execution order.
RSpec execution lifecycle
1. let vs let!
We already understand let. let!(:user) { "Abhilash" } The ! changes the behaviour.
# let - Lazy

Start example
    |
    v
Before hook
    |
    v
Execute example
    |
    v
Access user?
   /    \
  Yes     No
  |       |
Evaluate  Never
# let! - Eager

Start example
    |
    v
Execute let! setup
    |
    v
Before hooks (according to declaration order)
    |
    v
Execute example
Technically, let! is implemented by defining a let helper and registering a before hook that invokes it.
When should we use let!?
Consider a Rails model spec. Suppose we want to test whether a user has three tasks. We need those three tasks to exist before the example executes. This is a good use case for let!. let!(:task) { create(:task) }
We’ll eventually use FactoryBot’s create method here.
My recommendation: Prefer let by default. Use let! when the setup must happen before the example, regardless of whether the helper is explicitly accessed.
2. subject – the primary object under test
This is another important RSpec concept. Suppose we’re testing a method that normalizes a task title. Instead of repeatedly creating or referencing the main result, we can define it using subject.
subject(:normalized_title) do
  title.strip.downcase
end
Now we can use: expect(normalized_title).to eq("learn rails")
Why use subject?
Imagine testing a Task model with many examples. The primary object being tested is usually a Task instance. We can define:
subject(:task) do
  Task.new(title: "Learn Rails")
end
Then use: expect(task).to be_valid
Notice the difference:
let | subject |
|---|---|
| Defines reusable test data | Defines the primary object under test |
| Can define multiple helpers | Usually one primary subject per example group |
| Access using its name | Access using its name or subject |
| Lazy and memoized | Lazy and memoized |
A named subject such as subject(:task) also creates a helper called task.
What is the implicit subject?
RSpec also provides a default subject. For example:
RSpec.describe Array do
  it "starts empty" do
    expect(subject).to be_empty
  end
end
When the described class is an Array, RSpec’s implicit subject is a new instance of that class. You can also explicitly use: subject { described_class.new }
described_class refers to the class being tested.
Best practice: Prefer named subjects when they improve readability, especially in model specs.
3. before(:each) vs before(:all)
This is particularly important when working with database records.
| Hook | Execution | State |
|---|---|---|
before(:each) | Before every example | Isolated per example |
before(:all) | Once before the example group | Shared across examples |
before without arguments is equivalent to before(:each).
Example: before each
before(:each) do
  puts "Before each example"
end
Suppose there are three examples. Output:
Before each example
Example 1

Before each example
Example 2

Before each example
Example 3
Example: before all
before(:all) do
  puts "Before all examples"
end
Output:
Before all examples

Example 1
Example 2
Example 3
Important: Be careful with before(:all) and ActiveRecord
This is something I want you to remember for Rails development. RSpec Rails normally manages database transactions around individual examples. before(:all) runs outside that normal per-example transaction lifecycle. Consequently, database records created in before(:all) can leak between examples or require manual cleanup.
It can also result in shared mutable objects, making tests order-dependent.
My recommendation: For our Rails model and request specs, prefer let, let! and before(:each).
Use before(:all) only when you have a specific reason and understand its lifecycle implications.


