
Great. Now we can make the first real LLM request.
We’ll keep this step deliberately small. Our goal is not to build the complete AI assistant yet.
The goal is simply:
Rails ↓Ai::Client ↓OpenAI API ↓LLM ↓Response
Once this works, we’ll build the Rails service layer around it.
Step 5.11 – Add the OpenAI Ruby SDK
Rather than manually constructing HTTP requests, we’ll start with the official Ruby SDK.
1. Add the gem
Open our Gemfile and add:
gem "openai"
Then run:
bundle install
Verify:
bundle info ruby-openai
You should see where Bundler installed the gem.
Why use an SDK?
We could use Ruby’s Net::HTTP ourselves:
Ruby ↓Net::HTTP ↓HTTP request ↓OpenAI
But then we’d have to manually handle:
- authentication headers
- JSON encoding
- HTTP errors
- response parsing
- request formatting
The SDK gives us:
Ruby ↓OpenAI Ruby SDK ↓HTTP ↓OpenAI
Important point: An SDK doesn’t eliminate the HTTP API. It is an abstraction over it.
Step 5.12 – Verify the gem
Run:
bin/rails console
Then:
require "openai"
It should return:
=> true
or possibly:
=> "openai"
depending on the gem’s load behavior.
Then:
OpenAI
should resolve without a NameError.
Exit:
exit
Step 5.13 – Let’s inspect the SDK before using it
This is something I want you to develop as a senior Ruby developer habit.
Instead of blindly copying code from a blog, let’s see what API the installed gem exposes.
Run:
bundle info ruby-openai
Then:
bin/rails console
Inside console:
require "openai"
Then:
OpenAI::Client.instance_method(:initialize).parameters
This tells us what the client’s constructor expects.
Also try:
OpenAI::Client.instance_methods(false)
We’re learning to inspect a Ruby library rather than treating it as magic.
Step 5.14 – Create the OpenAI client
Now let’s modify:
app/services/ai/client.rb
We’ll start with:
class Ai::Client
  def initialize
    @api_key = Rails.application.credentials.dig(:openai, :api_key)

    raise "OpenAI API key is missing" if @api_key.blank?

    @client = OpenAI::Client.new(api_key: @api_key)
  end
end
Now we have:
Ai::Client
   │
   ├── reads Rails credentials
   │
   └── creates OpenAI SDK client
Step 5.15 – Test initialization
Run:
bin/rails console
Then:
client = Ai::Client.new
It should return something similar to:
#<Ai::Client:0x...>
No request has happened yet.
That’s important.
We’ve only done:
Rails credentials ↓API key ↓OpenAI::Client
Stop here
Don’t call the LLM yet.
I want you to complete these steps first:
1. Gemfile
gem "openai"
2. Install
bundle install
3. Verify
bundle info ruby-openai
4. Update
app/services/ai/client.rb
with the code above.
5. Test
bin/rails c
client = Ai::Client.new
One note
The Ruby OpenAI SDK’s API can change between versions, so don’t blindly copy the exact request syntax from older tutorials. That’s why we’re checking the version we’ve actually installed before writing the API call.
Now we’ve:
“OpenAI client initialized.”
We’ll make our first actual LLM request and inspect the complete response, including:
responsemodeloutputusageinput tokensoutput tokens
That will lead directly into why we added those fields to our Message model.
@client = OpenAI::Client.new(api_key: @api_key)
We’ll use our installed SDK’s API, not older ruby-openai examples. The current official openai Ruby SDK documents OpenAI::Client.new(api_key: ...) and the Responses API as the current interface. (GitHub)
Step 5.16 – Make the First Real LLM Request
For this step, we’ll do one simple request and inspect the response.
We are not integrating it with Conversation or Message yet.
Our goal is:
Rails console ↓Ai::Client ↓OpenAI Responses API ↓LLM ↓Response
1. Add a chat method
Open:
app/services/ai/client.rb
Change it to:
class Ai::Client
  def initialize
    @api_key = Rails.application.credentials.dig(:openai, :api_key)

    raise "OpenAI API key is missing" if @api_key.blank?

    @client = OpenAI::Client.new(api_key: @api_key)
  end

  def chat(message)
    @client.responses.create(
      model: "gpt-5.2",
      input: message
    )
  end
end
The SDK’s current Responses API accepts model and input for creating a response. (GitHub)
Why input: message?
We’re deliberately starting with the simplest possible request:
input: "Explain Ruby blocks in simple terms"
Later we’ll send structured conversation history:
input: [ { role: :system, content: "..." }, { role: :user, content: "..." }]
The Responses API supports both simple input and structured message input. (GitHub)
2. Start Rails console
bin/rails c
Create the client:
client = Ai::Client.new
Now make the request:
response = client.chat( message: "Explain Ruby blocks in simple terms.")
This is the moment our application makes an actual network request.
3. Inspect the response
First:
response.class
Then:
response
Don’t worry if the output is large.
The current official Ruby SDK returns typed response objects and the response contains the generated output plus metadata such as usage. (GitHub)
But if you get the following output, we can change the model which has free API calls:
ai-assistant(dev):013> client = Ai::Client.new
ai-assistant(dev):003> res = ai.chat('I want to be a expert in Ruby language')
app/services/ai/client.rb:11:in 'Ai::Client#chat': {url: "https://api.openai.com/v1/responses", status: 429, body: {error: {message: "You have no credits remaining. Add credits to continue using the API at https://platform.openai.com/settings/organization/billing/.", type: "insufficient_quota", param: nil, code: "credit_balance_exhausted"}}} (OpenAI::Errors::RateLimitError)
        from (ai-assistant):3:in '<compiled>'
Yes – the error makes sense and there is an important distinction here:
Our ChatGPT subscription and OpenAI API billing are separate.
So even if you can use ChatGPT normally, that does not give your Ruby application free API calls. OpenAI explicitly says ChatGPT and API billing are managed separately. (OpenAI Help Center)
Why you’re seeing You have no credits remaining
Your Rails code is calling the OpenAI API, not ChatGPT:
Rails app ↓OpenAI API ↓API billing / credits
The API account associated with your key currently has no usable credits. OpenAI’s current prepaid-billing documentation says API requests stop once the available credit balance is exhausted. (OpenAI Help Center)

“But aren’t basic models free?”
Not generally for the API.
There may be specific free/trial allocations or products with included usage, but you should not assume that a model being available in ChatGPT means the API is free.
For our Rails application, we’re using:
OpenAI::Client
which consumes API usage and is metered separately.
What I recommend for our course
I don’t think we should spend money just to continue learning unless you’re comfortable doing so.
We have three practical paths:
Option 1 – Add a small API balance
Open your OpenAI API billing overview and check your balance. New API users currently use prepaid billing and the documented minimum purchase is $5, with $10 as the default purchase amount. (OpenAI Help Center)
For this course a small balance should be plenty for experimentation because our prompts will be tiny.
Option 2 – Use another provider with a free tier
We could temporarily use a provider that offers some free API usage, while keeping the same architecture:
Ai::Client ↓Provider ↓LLM
This is actually useful because later we’ll make our architecture provider-agnostic.
Option 3 – Run a local model
We can install something like Ollama and run an LLM locally:
Rails ↓Ai::Client ↓localhost ↓Local LLM
Advantages:
- no API credits
- no network dependency
- no per-token cost
- great for development
The downside is that the model quality may differ from hosted models, and local inference requires reasonable hardware.
One important thing for our architecture
Don’t change this:
Ai::Client
The fact that OpenAI isn’t currently usable doesn’t mean we should redesign the application.
We specifically created:
Rails ↓Ai::Client ↓Provider
so that later we can switch:
Ai::Client ↓OpenAI
to:
Ai::Client ↓Anthropic
or:
Ai::Client ↓Ollama
without rewriting our Rails application.
That’s actually an important senior-level design lesson.
What we can do now?
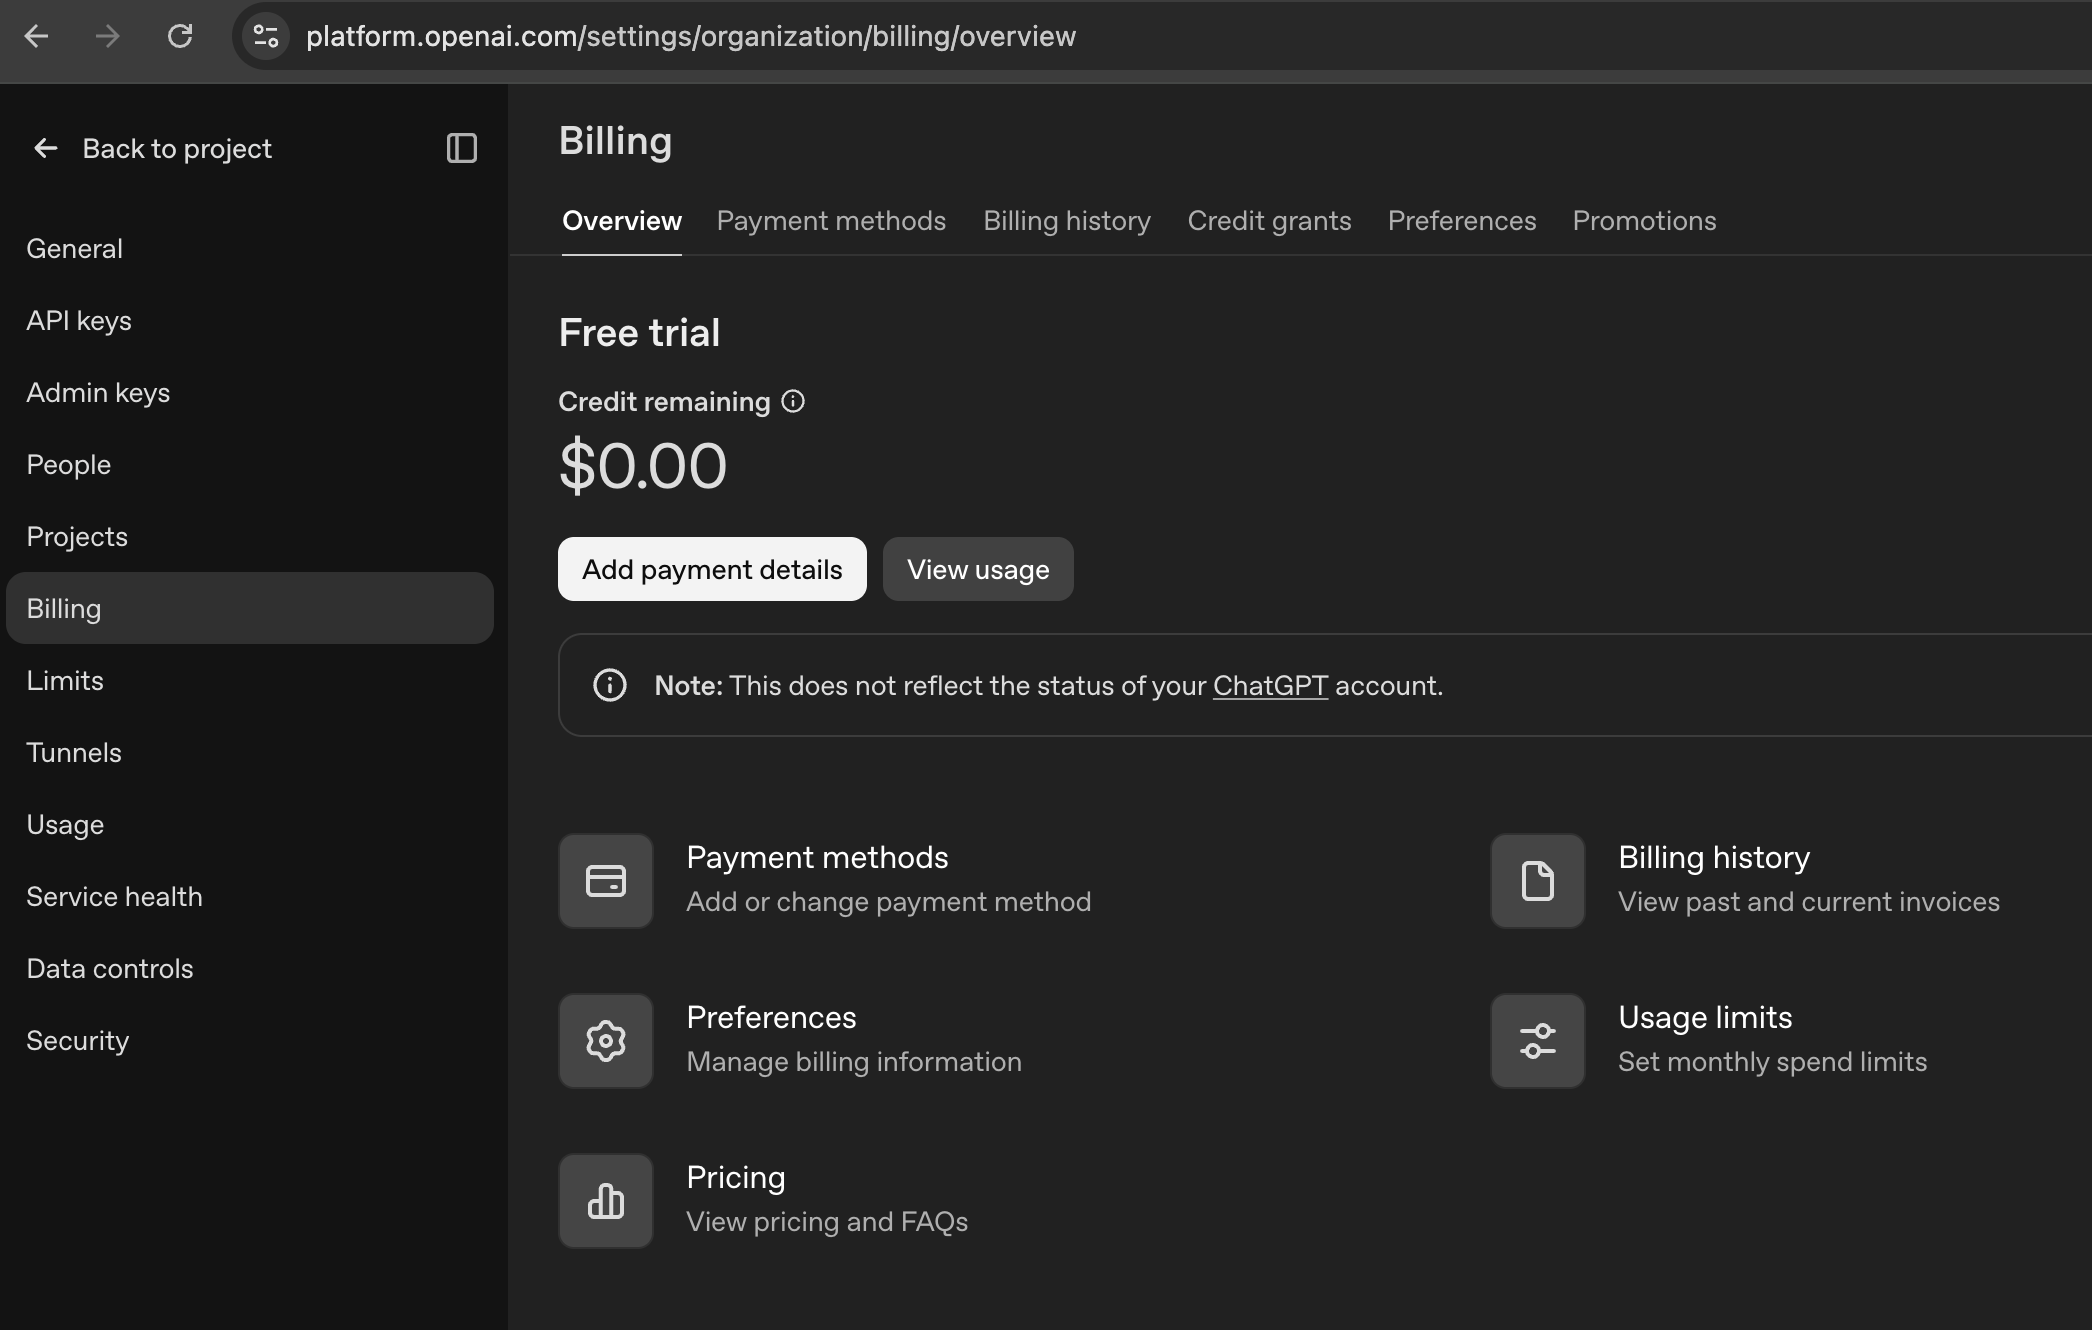
Since our objective is learning AI engineering, not spending money on API calls, first check your API billing page.
If it shows:
Free trial credit remaining: $0.00
then the error is fully explained. OpenAI’s billing documentation uses exactly this sort of balance indicator. (OpenAI Help Center)
We can then decide between a small API credit or a local/free-tier provider.
For this course, I slightly prefer keeping OpenAI as the first provider so you learn the real production API flow, then later we’ll add a second provider/local model to demonstrate the abstraction properly.
4. Get the generated text
Try:
response.output_text
You should get a normal answer such as:
A Ruby block is a chunk of code that can be passed to a method...
This is the first important distinction:
response ↓entire API responseresponse.output_text ↓just the model's text
Don’t immediately throw away the full response. We need the metadata later.
5. Inspect the model
Try:
response.model
This tells you which model actually generated the response.
That’s relevant to our messages.model column.
6. Inspect usage
Now:
response.usage
You should see token-related information.
Inspect it:
response.usage.input_tokens
and:
response.usage.output_tokens
These are directly related to the fields we added earlier:
messages-------------------input_tokensoutput_tokens
So our database design is now connected to a real API response.
LLM response │ ├── model ├── output text └── usage ├── input_tokens └── output_tokens
The SDK’s response models expose usage information as part of the response. (GitHub)
7. One very important experiment
Ask a second question:
response2 = client.chat( message: "What is my name?")
You’ll probably notice the model doesn’t know your name from the previous request.
That’s intentional.
We made two independent requests:
Request 1"Explain Ruby blocks"Request 2"What is my name?"
The LLM does not automatically receive our previous request.
This is going to become extremely important when we implement:
Conversation ↓Messages ↓Prompt Builder ↓LLM
Our Rails application will be responsible for providing the appropriate conversation context.
8. One thing to notice
We’ve built:
app/services/ai/client.rb
and now:
Ai::Client.new.chat(...)
works.
That’s already a valuable architectural boundary:
Rails application │ ▼ Ai::Client │ ▼OpenAI SDK │ ▼OpenAI API
Our controllers won’t need to know:
- how authentication works,
- how the SDK works,
- which API endpoint is used,
- how OpenAI responses are represented.
That’s why we created the abstraction.
Check our code in this repo: https://github.com/abhilashak/ai_assistant
Stop Here
Run these commands one by one:
bin/rails c
client = Ai::Client.new
response = client.chat( message: "Explain Ruby blocks in simple terms.")
Then inspect:
response.output_text
response.model
response.usage
response.usage.input_tokens
response.usage.output_tokens
Don’t paste our API key or any sensitive output anywhere.
Now: “Our First LLM request works.”
Then we’ll do the next important step: inspect the raw response structure and improve Ai::Client so it returns a clean Ruby object to the rest of our Rails application.


