Setup 🛠 Rails 8 App – Part 2: Command line, VS Code, RuboCop, Server, Action text, Image processing

In the first part of this guide, we covered setting up a Rails 8 app with essential configurations. In this follow-up, we’ll go over optimizing command-line usage, setting up VS Code for development, running migrations, styling the app, and enabling Action Text.


1. Optimizing Command-Line Usage with Aliases

One of the best ways to speed up development is to create shortcuts for frequently used commands. You can do this by adding aliases to your shell configuration.

Steps to Add an Alias:

  1. Open your shell configuration file:
    vim ~/.zshrc
  2. Search for the alias section:
    <esc> / alias <enter>
  3. Add your alias:
    alias gs="git status"
  4. Save and exit:
    <esc> :wq
  5. Reload your configuration:
    source ~/.zshrc
  6. Use your new alias:
    gs

This method saves time by allowing you to run frequently used commands more quickly.


2. Using Terminal Efficiently in VS Code

By default, VS Code uses `Ctrl + “ to toggle the terminal, which may not be intuitive. You can change this shortcut:

  1. Open VS Code.
  2. Go to Settings → Keyboard Shortcuts.
  3. Search for Toggle Terminal.
  4. Click Edit and change it to Ctrl + Opt + T for easier access.

3. Setting Up RuboCop in VS Code

RuboCop ensures your Ruby code follows best practices. Here’s how to set it up:

Checking RuboCop from the Terminal:

rubocop .

VS Code Setup:

  1. Open Command Palette (Cmd + Shift + P) and search for “Lint by RuboCop”.
  2. Go to Extensions Tab and install “VS Code RuboCop”.
  3. In VS Code Settings, search for “Rubocop” and check Ruby -> Rubocop -> Execute Path.
  4. Find the RuboCop installation path: whereis rubocop Example output: ~/.local/share/mise/installs/ruby/3.4.1/bin/rubocop/
  5. Update the Execute Path in VS Code to: ~/.local/share/mise/installs/ruby/3.4.1/bin/
  6. If RuboCop still returns an empty output, check .rubocop.yml in your project: ~/rails/design_studio/.rubocop.yml
  7. If the issue persists, ensure the gem is installed: gem install rubocop
  8. Restart VS Code from the Rails project root: code .

For more details, check the official documentation: RuboCop Usage


4. Running Migrations and Starting the Server

Running Migrations:

rails db:migrate -t

You can check the file: db/schema.rb You can see the active storage tables for attachments and other info.

Starting the Rails Server:

bin/dev

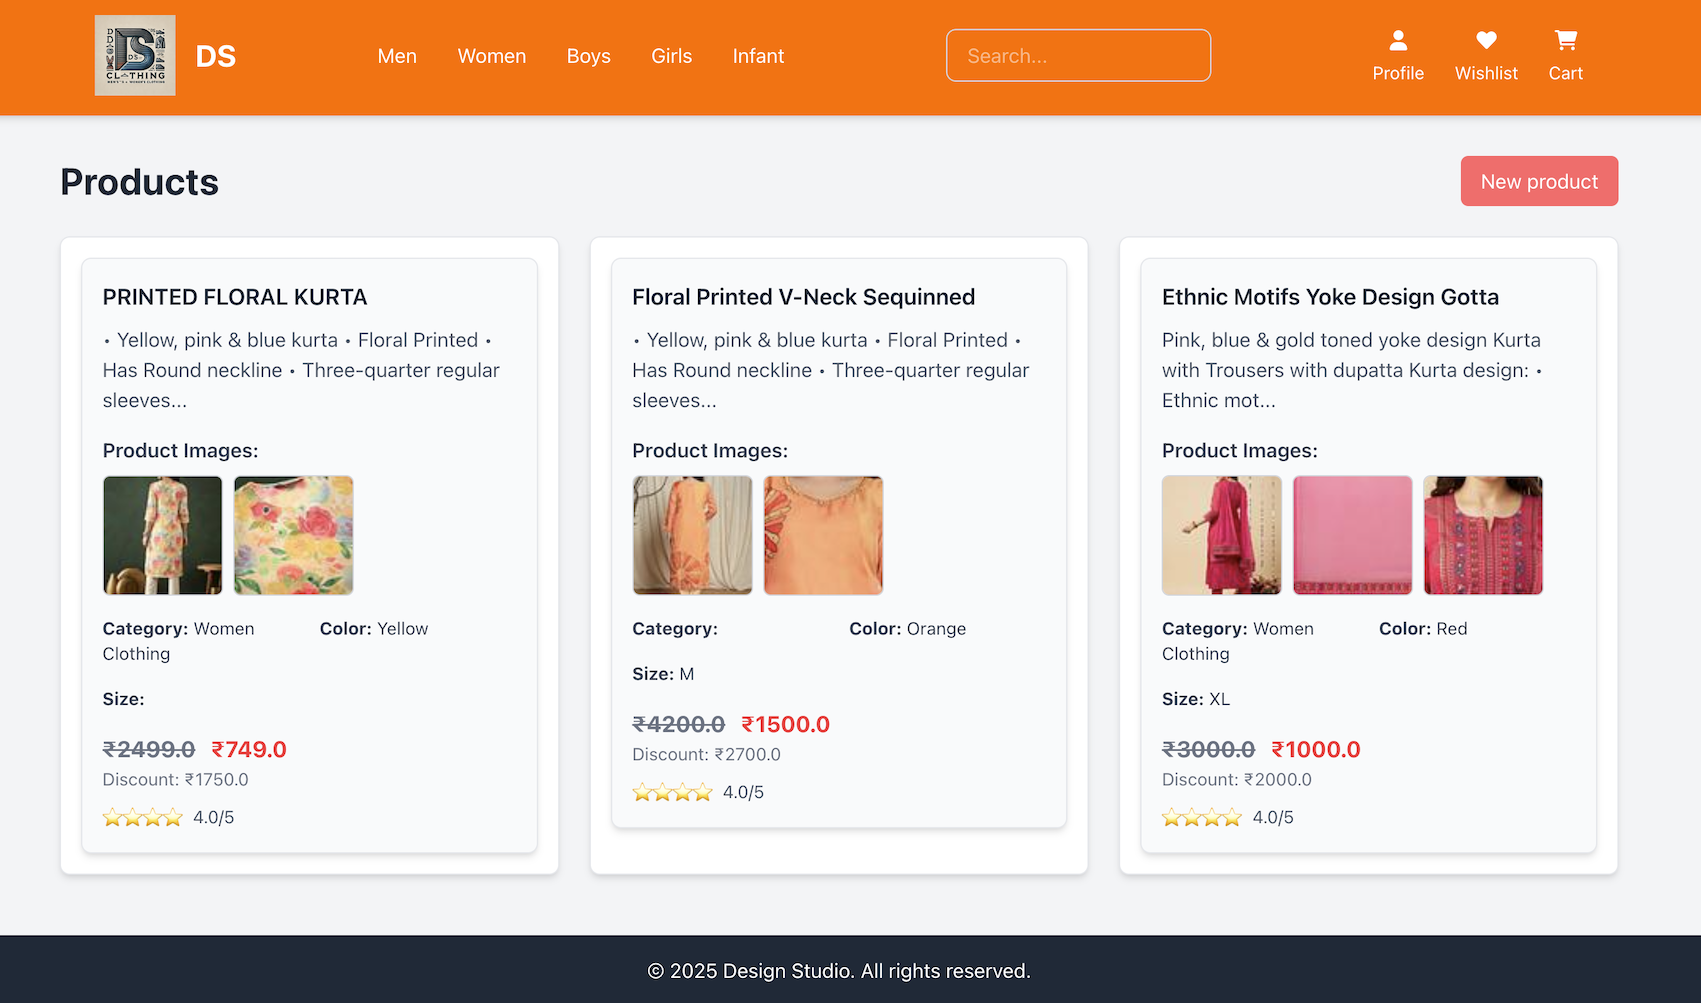
Access your application at: http://localhost:3000/

Check the product routes:


5. Adding Basic Styles

To quickly improve the appearance of your site, add this to application.html.erb:

<%= stylesheet_link_tag "https://cdn.simplecss.org/simple.css" %>

Alternatively, use Tailwind CSS for a more modern approach.

An example of convention over configurations in view file in Rails:

<div id="products">
  <%= render brand.products %>
</div>

Rails will look into the views/products/ folder and fetch right partial file that match.


6. Debugging with Rails Console

If an error occurs, you can inspect variables and data in the Rails console:

rails console


7. Installing Action Text for Rich Text Editing

Action Text is not installed by default but can be added easily:

rails action_text:install

This command:

  • Installs JavaScript dependencies
  • Creates necessary stylesheets
  • Generates database migrations for rich text

Running Migrations:

rails db:migrate -t

If you encounter an error about missing gems:

Could not find gem 'image_processing (~> 1.2)'

Run:

bundle install
rails db:migrate -t

Updating the Product Model:

Add this to app/models/product.rb:

has_rich_text :description

Updating the Form View:

In app/views/products/_form.html.erb, replace the description input with:

<%= form.rich_text_area :description %>

Now, visiting the new product page should display a rich text editor.


8. Solving Image Processing Errors

If you see an error like:

LoadError: Could not open library 'vips.42'

Install libvips to resolve it:

brew install vips


Conclusion

In this second part, we covered:

  • Optimizing terminal usage with aliases.
  • Configuring VS Code for efficient development.
  • Running migrations and starting the Rails server.
  • Enhancing the UI with styles.
  • Debugging using Rails console.
  • Installing and configuring Action Text for rich text support.

Stay tuned for more Rails 8 improvements!

Part 3: https://railsdrop.com/2025/03/25/setup-rails-8-app-git-setup-gitignore-part-3/

To be continued… 🚀

Setup 🛠 Rails 8 App – Part 1: Setup All Necessary Configurations | Ruby | Rails setup | Kamal | Rails Generations

Ruby on Rails 8 introduces several improvements that make development easier, more secure, and more maintainable. In this guide, we’ll walk through setting up a new Rails 8 application while noting the significant configurations and features that come out of the box.

1. Check Your Ruby and Rails Versions

If not installed Ruby 3.4 and Rails 8.0 please check: https://railsdrop.com/2025/02/11/installing-and-setup-ruby-3-rails-8-vscode-ide-on-macos-in-2025/

Before starting, ensure that you have the correct versions of Ruby and Rails installed:

$ ruby -v
ruby 3.4.1

$ rails -v
Rails 8.0.1

If you don’t have these versions installed, update them using your package manager or version manager (like rbenv or RVM).

2. Create a New Rails 8 Application

Run the following command to create a new Rails app:

$ rails new design_studio

Noteworthy Files and Directories Created

Here are some interesting files and directories that are generated with a new Rails 8 app:

 create  .ruby-version
 create  bin/brakeman
 create  bin/rubocop
 create  bin/docker-entrypoint
 create  .rubocop.yml
 create  .github/workflows
 create  .github/workflows/ci.yml
 create  config/cable.yml
 create  config/storage.yml
 create  config/initializers/content_security_policy.rb
 create  config/initializers/filter_parameter_logging.rb
 create  config/initializers/new_framework_defaults_8_0.rb

Key Takeaways:

  • Security & Code Quality Tools: Brakeman (security scanner) and RuboCop (code style linter) are included by default.
  • Docker Support: The presence of bin/docker-entrypoint suggests better built-in support for containerized deployment.
  • GitHub Actions Workflow: The .github/workflows/ci.yml file provides default CI configurations.
  • Enhanced Security: The content_security_policy.rb initializer helps enforce a strict security policy.
  • New Rails Defaults: The new_framework_defaults_8_0.rb initializer helps manage breaking changes in Rails 8.

Rails automatically creates the following during the creation of the rails new app.

a. Configuring Import Maps and Installing Turbo & Stimulus

Rails 8 still defaults to Import Maps for JavaScript package management, avoiding the need for Node.js and Webpack:

$ rails turbo:install stimulus:install

This creates the following files:

create    config/importmap.rb
create    app/javascript/controllers
create    app/javascript/controllers/index.js
create    app/javascript/controllers/hello_controller.js
append    config/importmap.rb

Key Takeaways:

  • Import Maps: Defined in config/importmap.rb, allowing dependency management without npm.
  • Hotwired Support: Turbo and Stimulus are automatically configured for modern front-end development.
  • Generated Controllers: Stimulus controllers are pre-configured inside app/javascript/controllers/.

b. Deploying with Kamal

Kamal simplifies deployment with Docker and Kubernetes. Rails 8 includes built-in support:

$ bundle binstubs kamal
$ bundle exec kamal init

This results in:

Created .kamal/secrets file
Created sample hooks in .kamal/hooks

Key Takeaways:

  • Automated Deployment Setup: Kamal provides easy-to-use deployment scripts.
  • Secret Management: The .kamal/secrets file ensures secure handling of credentials.
  • Deployment Hooks: Custom hooks allow pre- and post-deployment scripts for automation.

c. Setting Up Caching and Queues with Solid Cache, Queue, and Cable

NOTE: Rails automatically creates this for you while creating the rails app.

Rails 8 includes Solid Cache, Solid Queue, and Solid Cable for enhanced performance and scalability:

$ rails solid_cache:install solid_queue:install solid_cable:install

This creates:

create  config/cache.yml
create  db/cache_schema.rb
create  config/queue.yml

Key Takeaways:

  • Caching Support: config/cache.yml manages application-wide caching.
  • Database-Powered Queue System: Solid Queue simplifies background job management without requiring external dependencies like Sidekiq.
  • Real-Time WebSockets: Solid Cable offers Action Cable improvements for real-time features.

3. Rails 8 Migration Enhancements

Rails 8 provides new shortcuts and syntax improvements for database migrations:

NOT NULL Constraints with ! Shortcut

You can impose NOT NULL constraints directly from the command line using !:

# Example for not null constraints: 
➜ rails generate model User name:string!

Type Modifiers in Migrations

Rails 8 allows passing commonly used type modifiers directly via the command line. These modifiers are enclosed in curly braces {} after the field type.

# Example for model generation: 
➜ rails generate model Product name:string description:text
# Example for passing modifiers: 
➜ rails generate migration AddDetailsToProducts 'price:decimal{5,2}' supplier:references{polymorphic}

Generating a Scaffold for the Product Model

Let’s generate a complete scaffold for our Product model:

✗ rails generate scaffold product title:string! description:text category:string color:string 'size:string{10}' 'mrp:decimal{7,2}' 'discount:decimal{7,2}' 'rating:decimal{1,1}'
➜  design_studio git:(main) ✗ rails -v
Rails 8.0.1
➜  design_studio git:(main) ✗ ruby -v
ruby 3.4.1 (2024-12-25 revision 48d4efcb85) +PRISM [arm64-darwin24]
➜  design_studio git:(main) ✗ rails generate scaffold product title:string! description:text category:string color:string 'size:string{10}' 'mrp:decimal{7,2}' 'discount:decimal{7,2}' 'rating:decimal{1,1}'

Using the Rails Resource Generator

The rails g resource command is a powerful way to generate models, controllers, migrations, and routes all in one go. This is particularly useful when setting up RESTful resources in a Rails application.

Basic Syntax

➜ rails g resource product

This command creates the necessary files for a new resource, including:

  • A model (app/models/product.rb)
  • A migration file (db/migrate/)
  • A controller (app/controllers/product_controller.rb)
  • Routes in config/routes.rb
  • A test file (test/controllers/product_controller_test.rb or spec/)

Example Usage

To generate a Post resource with attributes:

➜ rails g resource Product title:string! description:text brand:references

This will:

  1. Create a Product model with title and description attributes.
  2. Add a brand_id foreign key as a reference.
  3. Apply a NOT NULL constraint on title (! shortcut).
  4. Generate a corresponding migration file.
  5. Set up routes automatically (resources :products).

Running the Migration

After generating a resource, apply the migration to update the database:

➜ rails db:migrate


Difference Between resource and scaffold

Rails provides both rails g resource and rails g scaffold, but they serve different purposes:

Featurerails g resourcerails g scaffold
Generates a Model
Generates a Migration
Generates a Controller✅ (empty actions)✅ (full CRUD actions)
Generates Views (HTML/ERB)✅ (index, show, new, edit, etc.)
Generates Routes
Generates Helper Files
Generates Tests
  • rails g resource is minimal—it generates only essential files without view templates. It’s useful when you want more control over how your views and controller actions are built.
  • rails g scaffold is more opinionated and generates full CRUD functionality with prebuilt forms and views, making it ideal for rapid prototyping.

If you need full CRUD functionality quickly, use scaffold. If you prefer a leaner setup with manual control over implementation, use resource.

Conclusion

Rails 8 significantly enhances the development experience with built-in security tools, CI/CD workflows, streamlined deployment via Kamal, and modern front-end support with Turbo & Stimulus. It also improves caching, background jobs, and real-time features with Solid tools.

These improvements make Rails 8 a robust framework for modern web applications, reducing the need for additional dependencies while keeping development efficient and secure.

Enjoy Rails! 🚀

Writing Perfect Active Record 🗒️ Queries in Ruby on Rails 8

Active Record (AR) is the heart of Ruby on Rails when it comes to database interactions. Writing efficient and readable queries is crucial for application performance and maintainability. This guide will help you master Active Record queries with real-world examples and best practices.


Setting Up a Sample Database

To demonstrate complex Active Record queries, let’s create a Rails app with a sample database structure containing multiple tables.

Generate Models & Migrations

rails new MyApp --database=postgresql
cd MyApp
rails g model User name:string email:string
rails g model Post title:string body:text user:references
rails g model Comment body:text user:references post:references
rails g model Category name:string
rails g model PostCategory post:references category:references
rails g model Like user:references comment:references
rails db:migrate

Database Schema Overview

  • users: Stores user information.
  • posts: Stores blog posts written by users.
  • comments: Stores comments on posts, linked to users and posts.
  • categories: Stores post categories.
  • post_categories: Join table for posts and categories.
  • likes: Stores likes on comments by users.

Basic Active Record Queries

1. Fetching All Records

User.all  # Returns all users (Avoid using it directly on large datasets as it loads everything into memory)

⚠️ User.all can lead to performance issues if the table contains a large number of records. Instead, prefer pagination (User.limit(100).offset(0)) or batch processing (User.find_each).

2. Finding a Specific Record

User.find(1)  # Finds a user by ID
User.find_by(email: 'john@example.com')  # Finds by attribute

3. Filtering with where vs having

Post.where(user_id: 2)  # Fetch all posts by user with ID 2

Difference between where and having:

  • where is used for filtering records before grouping.
  • having is used for filtering after group operations.

Example:

Post.group(:user_id).having('COUNT(id) > ?', 5)  # Users with more than 5 posts

4. Ordering Results

User.order(:name)  # Order users alphabetically
Post.order(created_at: :desc)  # Order posts by newest first

5. Limiting Results

Post.limit(5)  # Get the first 5 posts

6. Selecting Specific Columns

User.select(:id, :name)  # Only fetch ID and name

7. Fetching Users with a Specific Email Domain

User.where("email LIKE ?", "%@gmail.com")

8. Fetching the Most Recent Posts

Post.order(created_at: :desc).limit(5)

9. Using pluck for Efficient Data Retrieval

User.pluck(:email)  # Fetch only emails as an array

10. Checking if a Record Exists Efficiently

User.exists?(email: 'john@example.com')

11. Including Associations (eager loading to avoid N+1 queries)

Post.includes(:comments).where(comments: { body: 'Great post!' })


Advanced Queries with Joins

1. Joining Tables (INNER JOIN)

Post.joins(:user).where(users: { name: 'John' })

2. Self Join Example

A self-join is useful when dealing with hierarchical relationships, such as an employee-manager structure.

Model Setup

class Employee < ApplicationRecord
  belongs_to :manager, class_name: 'Employee', optional: true
  has_many :subordinates, class_name: 'Employee', foreign_key: 'manager_id'
end

Sample Data

idnamemanager_id
1AliceNULL
2Bob1
3Carol1
4Dave2

Query: Find Employees Who Report to Alice

Employee.joins(:manager).where(managers_employees: { name: 'Alice' })

Result:

idnamemanager_id
2Bob1
3Carol1

This query fetches employees who report to Alice (i.e., those where manager_id = 1).

3. Fetching Users with No Posts (LEFT JOIN with NULL check)

User.left_outer_joins(:posts).where(posts: { id: nil })

4. Counting Posts Per User

User.joins(:posts).group('users.id').count

Complex Queries in Active Record

1. Fetching Posts with the Most Comments

Post.joins(:comments)
    .group('posts.id')
    .order('COUNT(comments.id) DESC')
    .limit(1)

2. Fetching Posts with More than 5 Comments

Post.joins(:comments)
    .group(:id)
    .having('COUNT(comments.id) > ?', 5)

3. Finding Users Who Liked the Most Comments

User.joins(comments: :likes)
    .group('users.id')
    .select('users.id, users.name, COUNT(likes.id) AS likes_count')
    .order('likes_count DESC')
    .limit(1)

4. Fetching Posts Belonging to Multiple Categories

Post.joins(:categories).group('posts.id').having('COUNT(categories.id) > ?', 1)

5. Fetching the Last Comment of Each Post

Comment.select('DISTINCT ON (post_id) *').order('post_id, created_at DESC')

6. Fetching Users Who Haven’t Commented on a Specific Post

User.where.not(id: Comment.where(post_id: 10).select(:user_id))

7. Fetching Users Who Have Commented on Every Post

User.joins(:comments).group(:id).having('COUNT(DISTINCT comments.post_id) = ?', Post.count)

8. Finding Posts With No Comments

Post.left_outer_joins(:comments).where(comments: { id: nil })

9. Fetching the User Who Created the Most Posts

User.joins(:posts)
    .group('users.id')
    .select('users.id, users.name, COUNT(posts.id) AS post_count')
    .order('post_count DESC')
    .limit(1)

10. Fetching the Most Liked Comment

Comment.joins(:likes)
    .group('comments.id')
    .order('COUNT(likes.id) DESC')
    .limit(1)

11. Fetching Comments with More than 3 Likes and Their Associated Posts

Comment.joins(:likes, :post)
    .group('comments.id', 'posts.id')
    .having('COUNT(likes.id) > ?', 3)

12. Finding Users Who Haven’t Liked Any Comments

User.left_outer_joins(:likes).where(likes: { id: nil })

13. Fetching Users, Their Posts, and the Count of Comments on Each Post

User.joins(posts: :comments)
    .group('users.id', 'posts.id')
    .select('users.id, users.name, posts.id AS post_id, COUNT(comments.id) AS comment_count')
    .order('comment_count DESC')

Importance of inverse_of in Model Associations

What is inverse_of?

The inverse_of option in Active Record associations helps Rails correctly link objects in memory, avoiding unnecessary database queries and ensuring bidirectional association consistency.

Example Usage

class User < ApplicationRecord
  has_many :posts, inverse_of: :user
end

class Post < ApplicationRecord
  belongs_to :user, inverse_of: :posts
end

Why Use inverse_of?

  • Performance Optimization: Prevents extra queries by using already loaded objects.
  • Ensures Data Consistency: Updates associations without additional database fetches.
  • Enables Nested Attributes: Helps when using accepts_nested_attributes_for.

Example:

user = User.new(name: 'Alice')
post = user.posts.build(title: 'First Post')
post.user == user  # True without needing an additional query

Best Practices to use in Rails Projects

1. Using Scopes for Readability

class Post < ApplicationRecord
  scope :recent, -> { order(created_at: :desc) }
end

Post.recent.limit(10)  # Fetch recent posts

2. Using find_each for Large Datasets

User.find_each(batch_size: 100) do |user|
  puts user.email
end

3. Avoiding SELECT * for Performance

User.select(:id, :name).load

4. Avoiding N+1 Queries with includes

Post.includes(:comments).each do |post|
  puts post.comments.count
end


Conclusion

Mastering Active Record queries is essential for writing performant and maintainable Rails applications. By using joins, scopes, batch processing, and eager loading, you can write clean and efficient queries that scale well.

Do you have any favorite Active Record query tricks? Share them in the comments!

Exploring Rails 8: Powerful 💪 Features, Deployment & Real-Time Updates

Introduction

Rails 8.x has arrived, bringing exciting new features and enhancements to improve productivity, performance, and ease of development. From built-in authentication to real-time WebSocket updates, this latest version of Rails continues its commitment to being a powerful and developer-friendly framework.

Let’s dive into some of the most significant features and improvements introduced in Rails 8.


Rails 8 Features & Enhancements

1. Modern JavaScript with Importmaps & Hotwire

Rails 8 eliminates the need for Webpack and Node.js, allowing developers to manage JavaScript dependencies more efficiently. Importmaps simplify dependency management by fetching JavaScript packages directly and caching them locally, removing runtime dependencies.

Key Benefits:

  • Faster page loads and reduced complexity
  • No need for Node.js or Webpack
  • Dependencies are cached locally and loaded efficiently

Example: Pinning a Package

bin/importmap pin local-time

This command fetches the package from npm and stores it locally for future use.

Hotwire Integration

Hotwire enables dynamic page updates without requiring heavy JavaScript frameworks. Rails 8 fully integrates Turbo and Stimulus, making frontend interactivity more seamless.

Importing Dependencies in application.js:
import "trix";

With this setup, developers can create reactive UI elements with minimal JavaScript.


2. Real-Time WebSockets with Action Cable & Turbo Streams

Rails 8 enhances real-time functionality with Action Cable and Turbo Streams, allowing WebSocket-based updates across multiple pages without additional JavaScript libraries.

Setting Up Turbo Streams in Views:

<%= turbo_stream_from @object %>

This creates a WebSocket channel tied to the object.

Broadcasting Updates from Models:

broadcast_to :object, render(partial: "objects/object", locals: { object: self })

Any changes to the object will be instantly reflected across all connected clients.

Why This Matters:

  • No need for third-party WebSocket npm packages
  • Real-time updates are built into Rails
  • Simplifies building interactive applications

3. Rich Text with ActionText

Rails 8 continues to support ActionText, making it easy to handle rich text content within models and views.

Model Level Implementation:

has_rich_text :body

This enables rich text storage and formatting for the body attribute of a model.

View Implementation:

<%= form.rich_text_area :body %>

This adds a full-featured WYSIWYG text editor to the form, allowing users to create and edit rich text content seamlessly.

Displaying Updated Timestamps:

<%= time_tag post.updated_at %>

This helper formats timestamps cleanly, improving date and time representation in views.


4. Deployment with Kamal – Simpler & Faster

Rails 8 introduces Kamal, a modern deployment tool that simplifies remote deployment by leveraging Docker containers.

Deployment Steps:

  1. Setup Remote Serverkamal setup
    • Installs Docker (if missing) and configures the server.
  2. Deploy the Applicationkamal deploy
    • Builds and ships a Docker container using Rails’ default Dockerfile.

File Uploads with Active Storage

By default, Kamal stores uploaded files in Docker volumes, but this can be customized based on specific deployment needs.


5. Built-in Authentication – No Devise Needed

Rails 8 introduces native authentication, reducing reliance on third-party gems like Devise. This built-in system manages password encryption, user sessions, and password resets while keeping signup flows flexible.

Generating Authentication:

rails g authentication
rails db:migrate

Creating a User for Testing:

User.create(email: "user@example.com", password: "securepass")

Managing Authentication:

  • Uses bcrypt for password encryption
  • Provides a pre-built sessions_controller for handling authentication
  • Allows remote database changes via: kamal console

6. Turning a Rails App into a PWA

Rails 8 makes it incredibly simple to transform any app into a Progressive Web App (PWA), enabling offline support and installability.

Steps to Enable PWA:

  1. Modify application.html.erb: <%= tag.link pwa_manifest_path %>
  2. Ensure manifest and service-worker routes are enabled.
  3. Verify PWA files: pwa/manifest.json.erb and pwa/service-worker.js.
  4. Deploy and restart the application to see the Install button in the browser.

Final Thoughts

Rails 8 is packed with developer-friendly features that improve security, real-time updates, and deployment workflows. With Hotwire, Kamal, and native authentication, it’s clear that Rails is evolving to reduce dependencies while enhancing performance.

Are you excited about Rails 8? Let me know your thoughts and experiences in the comments below!