Design Studio – Rails 8 e-commerce application: Integrate active admin

Now let’s create an admin interface for our e-commerce Application.

We have a well-structured e-commerce Rails application with:

Models: User, Product, ProductVariant, Order, OrderItem
Authentication: Custom session-based auth with user roles (customer/admin)
Authorization: Already has admin role checking

Admin Interface Recommendations

Here are the best options for Rails admin interfaces, ranked by suitability for our project:

  1. ActiveAdmin (Recommended โญ)
    Best fit for e-commerce with complex associations
    Excellent filtering, search, and batch operations
    Great customization options and ecosystem
    Handles your Product โ†’ ProductVariant โ†’ OrderItem relationships well
  2. Administrate (Modern Alternative)
    Clean, Rails-way approach by Thoughtbot
    Good for custom UIs, less configuration
    More work to set up initially
  3. Rails Admin (What you asked about)
    Quick setup but limited customization
    Less actively maintained
    Good for simple admin needs
  4. Avo (Modern Premium)
    Beautiful modern UI
    Some features require paid version

    https://avohq.io/rails-admin
    https://docs.avohq.io/3.0/

Choose ActiveAdmin for our e-commerce application. Let’s integrate it with our existing authentication system

Add in Gemfile:

gem "activeadmin"
gem "sassc-rails" # Required for ActiveAdmin
gem "image_processing", "~> 1.2" # For variant processing if not already present

Bundle Install and run the Active Admin Generator:

$ bundle install
$ rails generate active_admin:install --skip-users
definition of Rules was here
create app/assets/javascripts/active_admin.js
create app/assets/stylesheets/active_admin.scss
create db/migrate/20250710083516_create_active_admin_comments.rb

Migration File created by Active Admin:

class CreateActiveAdminComments < ActiveRecord::Migration[8.0]
  def self.up
    create_table :active_admin_comments do |t|
      t.string :namespace
      t.text   :body
      t.references :resource, polymorphic: true
      t.references :author, polymorphic: true
      t.timestamps
    end
    add_index :active_admin_comments, [ :namespace ]
  end

  def self.down
    drop_table :active_admin_comments
  end
end

Run database migration:

$ rails db:migrate

in app/initializers/active_admin.rb

# This setting changes the method which Active Admin calls
  # within the application controller.
  config.authentication_method = :authenticate_admin_user!
....
# This setting changes the method which Active Admin calls
  # (within the application controller) to return the currently logged in user.
  config.current_user_method = :current_admin_user
....
 # Default:
  config.logout_link_path = :destroy_session_path

in app/controllers/application_controller.rb

private

  def authenticate_admin_user!
    require_authentication
    ensure_admin
  end

  def current_admin_user
    Current.user if Current.user&.admin?
  end

Run the active admin user, product generator:

rails generate active_admin:resource User
rails generate active_admin:resource Product
rails generate active_admin:resource ProductVariant
rails generate active_admin:resource Order
rails generate active_admin:resource OrderItem

Let’s update all the active admin resources with fields, filters, attributes, panels etc.

Let’s add accepts_nested_attributes_for :variants, allow_destroy: true in Product Model.

accepts_nested_attributes_for is a Rails feature that allows a parent model to accept and process attributes for its associated child models through nested parameters. Here’s what it does:

What it enables:

  1. Nested Forms: You can create/update a Product and its ProductVariants in a single form submission
  2. Mass Assignment: Allows passing nested attributes through strong parameters
  3. CRUD Operations: Create, update, and delete associated records through the parent

In our Product model

class Product < ApplicationRecord
  has_many :variants, dependent: :destroy, class_name: "ProductVariant"
  accepts_nested_attributes_for :variants, allow_destroy: true
end

What this allows:

Before: You’d need separate forms/requests for Product and ProductVariant

# Create product first
product = Product.create(name: "T-Shirt", brand: "Nike")

# Then create variants separately
product.variants.create(size: "M", color: "Red", sku: "NIKE-001-M-RED")
product.variants.create(size: "L", color: "Blue", sku: "NIKE-001-L-BLUE")

After: You can do it all in one go:

Product.create(
  name: "T-Shirt",
  brand: "Nike",
  variants_attributes: [
    { size: "M", color: "Red", sku: "NIKE-001-M-RED" },
    { size: "L", color: "Blue", sku: "NIKE-001-L-BLUE" }
  ]
)

In ActiveAdmin context:

This enables the nested form I created in app/admin/products.rb:

f.inputs "Product Variants" do
  f.has_many :variants, allow_destroy: true, new_record: true do |v|
    v.input :size
    v.input :color
    v.input :sku
    # ... other variant fields
  end
end
The allow_destroy: true option:
  • Allows deleting associated records by passing _destroy: ‘1’
  • Essential for updating existing products with variants
Strong Parameters:

In the controller, you need to permit the nested attributes:

permit_params :name, :brand, :category, 
              variants_attributes: [:id, :size, :color, :sku, :mrp, :discount_percent, :_destroy]

Propshaft vs Sprockets

We have an error after integrating ActiveAdmin:

 Rendered layout layouts/application.html.erb (Duration: 13.9ms | GC: 0.5ms)
Completed 500 Internal Server Error in 118ms (ActiveRecord: 28.7ms (1 query, 0 cached) | GC: 27.0ms)

ActionView::Template::Error (undefined method 'load_path' for an instance of Sprockets::Environment)
Caused by: NoMethodError (undefined method 'load_path' for an instance of Sprockets::Environment)

Information for: ActionView::Template::Error (undefined method 'load_path' for an instance of Sprockets::Environment):
    14:     <link rel="icon" href="/icon.svg" type="image/svg+xml">
    15:     <link rel="apple-touch-icon" href="/icon.png">

This error occurs because Rails 8 uses Propshaft by default, but ActiveAdmin requires Sprockets. There’s a conflict between the two asset pipelines. Let’s fix this by switching to Sprockets completely:

Add in Gemfile:

# Use Sprockets for asset pipeline (required for ActiveAdmin)
gem "sprockets-rails"

$ bundle install

# application.rb

# Use Sprockets for asset pipeline
config.assets.enabled = true

Let’s create an admin user for testing our ActiveAdmin:

# seed.rb
# Create admin user
admin_user = User.find_or_create_by(email: "admin@designstudio.com") do |user|
  user.password = "password123"
  user.role = "admin"
end

puts "Admin user created: #{admin_user.email}" if admin_user.persisted?

# run seed
โœ— rails db:seed

โœ… We have Successfully Integrated ActiveAdmin with Nested Attributes!

I’ve successfully converted your Rails application to use nested attributes (variants_attributes) across the entire stack and integrated ActiveAdmin as your admin interface. Here’s what I accomplished:

๐Ÿ”ง What I Fixed & Updated:

1. Asset Pipeline Issue:

  • Switched from Propshaft to Sprockets (required for ActiveAdmin)
  • Updated Gemfile and application configuration
  • Fixed the load_path error you encountered

2. Model Changes:

  • Added accepts_nested_attributes_for :variants, allow_destroy: true to Product model

3. Controller Updates:

  • Changed from singular product_variant to plural variants_attributes
  • Simplified create/update actions to use Rails nested attributes handling
  • Updated strong parameters to permit nested variant attributes

4. View Improvements:

  • Updated product form to handle multiple variants with JavaScript
  • Added “Add Another Variant” functionality
  • Implemented proper nested form fields for all variant attributes

5. ActiveAdmin Configuration:

  • Set up authentication using your existing user system
  • Created comprehensive admin resources for all models
  • Added nested variant management in product forms
  • Built an informative dashboard with key metrics

๐ŸŽฏ Admin Features You Now Have:

  1. Dashboard – Key metrics, recent activity, revenue overview
  2. User Management – Role management, order history
  3. Product Management – Full CRUD with image uploads and nested variants
  4. Order Management – Status updates, batch actions
  5. Inventory Management – ProductVariant and OrderItem tracking

๐Ÿ”‘ Admin Access:

  • URL: http://localhost:3000/admin
  • Email: admin@designstudio.com
  • Password: password123

๐Ÿ“Š Comparison vs Rails Admin:

ActiveAdmin Advantages:

  • โœ… Better for complex e-commerce relationships
  • โœ… Excellent filtering and search capabilities
  • โœ… Powerful batch operations
  • โœ… Highly customizable forms and views
  • โœ… Active development and community

Rails Admin:

  • โŒ Less actively maintained
  • โŒ Limited customization options
  • โŒ Not as suitable for complex nested relationships

๐Ÿš€ What’s Working Now:

  1. Nested Variants: Create/edit products with multiple variants in one form
  2. Image Management: Upload multiple product images
  3. Order Processing: Admin can update order statuses with batch actions
  4. User Management: Promote users to admin, view order history
  5. Dashboard Analytics: Revenue tracking, popular products, recent activity

Visit /admin to explore your new admin interface, Cheers!

Check docs: https://activeadmin.info/0-installation.html

โš ๏ธ Tailwind UI Issue after moving to Sprockets

The issue is with <%= stylesheet_link_tag "/tailwind/application.css", "data-turbo-track": "reload" %> where we are trying to load Tailwind CSS from an incorrect path. The tailwindcss-rails gem serves Tailwind CSS differently. Let me fix this:

ls -la app/assets/tailwind/
curl -I http://localhost:3000/tailwind/application.css
rails routes | grep -i tailwind

The issue is that the /tailwind/application.css path is returning 404. The tailwindcss-rails gem works differently. Let’s check how it’s configured and fix this:

find . -name "*.css" -path "*/public/*" | head -10
rails assets:precompile

Now let’s test if the Tailwind CSS is properly accessible:

curl -I http://localhost:3000/assets/tailwind/application.css

The issue is that with the tailwindcss-rails gem, Tailwind CSS gets compiled into the main application.css file rather than a separate file. Let’s check the current asset manifest and fix the layout:

rails assets:precompile
bundle exec tailwindcss build

The Tailwind CSS is already built and located in app/assets/builds/tailwind.css. Let’s fix the configuration:

rails assets:precompile
curl -I http://localhost:3000/assets/tailwind.css

The issue has been fixed. The Tailwind CSS is now properly accessible. Here’s what I did to resolve the problem:

  1. Identified the issue: The Tailwind CSS was being incorrectly referenced as /tailwind/application.css in the layout file, but it wasn’t being served properly through the asset pipeline.
  2. Found the correct location: Discovered that the tailwindcss-rails gem builds the CSS file to app/assets/builds/tailwind.css.
  3. Fixed the asset pipeline configuration:
  • Updated app/assets/config/manifest.js to include //= link_tree ../builds which includes the built Tailwind CSS
  • Removed the incorrect tailwind/application.css reference
  1. Updated the layout file:
  • Changed from <%= stylesheet_link_tag "/tailwind/application.css" %>
  • To the correct <%= stylesheet_link_tag "tailwind", "data-turbo-track": "reload" %>
  1. Verified the fix:
  • Successfully precompiled assets
  • Confirmed that http://localhost:3000/assets/tailwind.css returns a 200 OK status

Install Rails Icons ๐Ÿ

For better font-awesome assets, lets add rails-icons gem:

# Rails Icons - Modern icon library support
gem "rails_icons"

$ rails generate rails_icons:install --help
$ rails generate rails_icons:install --libraries=heroicons

$ npm install @fortawesome/fontawesome-free

How to migrate from the CDN to Rails Icons

For a production Rails application, it’s generally better to use a gem rather than a CDN for Font Awesome. Here’s why:

CDN Issues:

  • External dependency (can fail if CDN is down)
  • Privacy concerns (external requests)
  • No version control
  • Requires internet connection
  • Not cacheable with your assets

Gem Benefits:

  • Self-hosted (no external dependencies)
  • Better performance (served with your assets)
  • Version control
  • Works offline
  • Follows Rails conventions
  • Better for production

Based on my research, adding a gem is definitely the better approach for a production Rails application. Here are the best options:

Option 1: Modern approach with npm package (Recommended)

Since we’re using Rails 8 with modern tooling, I’d recommend using the npm package:

yarn add @fortawesome/fontawesome-free
npm --version
which node

However, given your current setup, I’d recommend Option 2 which is more Rails-native:

Option 2: Rails Icons gem (Recommended for our setup)

This is a modern gem that supports Font Awesome and other icon libraries with a clean Rails API:

bundle install
rails generate rails_icons:install --help
rails generate rails_icons:install --libraries=heroicons

Let’s remove the CDN and set up Rails Icons properly. Since we’re already using Font Awesome extensively, let’s add Font Awesome as a custom library:

rails generate rails_icons:initializer --custom=fontawesome
npm install @fortawesome/fontawesome-free
find node_modules/@fortawesome/fontawesome-free -name "*.svg" -type f | head -5
cp -r node_modules/@fortawesome/fontawesome-free/svgs/* app/assets/svg/icons/fontawesome/

โœ… Rails Icons is now properly set up instead of the CDN. Here’s what we’ve accomplished:

What’s Changed:

  1. โœ… Removed the Font Awesome CDN link (no more external dependency)
  2. โœ… Added rails_icons gem with Heroicons as the default library
  3. โœ… Added Font Awesome as a custom library with all variants (solid, regular, brands)
  4. โœ… Self-hosted all icons through Rails asset pipeline

What is Ransack?

Ransack is a popular Ruby gem that provides powerful search and filtering capabilities for Rails applications. It’s commonly used with ActiveAdmin (which your app uses) to create searchable, filterable, and sortable data tables.

Ransackable Attributes and Associations

ransackable_attributes

This method defines which model attributes can be searched, filtered, or sorted through Ransack. It’s a security feature that prevents unauthorized access to sensitive data.

def self.ransackable_attributes(auth_object = nil)
  %w[id email role created_at updated_at password_reset_token password_reset_sent_at]
end

What it does:

  • Allows searching/filtering by id, email, role, created_at, updated_at, etc.
  • Prevents searching by sensitive fields like password_digest
  • The auth_object parameter can be used for role-based access control

ransackable_associations

This method defines which model associations can be used in Ransack queries.

def self.ransackable_associations(auth_object = nil)
  %w[orders sessions]
end

What it does:

  • Allows searching/filtering by related models (e.g., “users who have orders”)
  • Enables joins and complex queries across associations

Why This Matters for Security

Without these methods, Rails 7+ will raise warnings or errors because Ransack needs explicit permission to search certain fields. This prevents:

  1. Information disclosure – Searching sensitive fields like passwords
  2. Performance issues – Searching on unindexed or inappropriate fields
  3. Unauthorized access – Accessing data through unexpected query parameters

Example Usage in ActiveAdmin

In your ActiveAdmin dashboard, this enables features like:

# In app/admin/users.rb
ActiveAdmin.register User do
  # Users can now search by email, role, etc.
  # Users can filter by orders, sessions
  # Users can sort by created_at, updated_at
end

In Our User Model

Looking at your User model:

def self.ransackable_attributes(auth_object = nil)
  %w[id email role created_at updated_at password_reset_token password_reset_sent_at]
end

def self.ransackable_associations(auth_object = nil)
  %w[orders sessions]
end

This means:

  • โœ… Admins can search users by email, role, creation date
  • โœ… Admins can filter users by their orders or sessions
  • โœ… Admins can sort users by any of these attributes
  • โŒ Admins cannot search by password_digest (secure)
  • โŒ Admins cannot search by other sensitive fields

Benefits

  1. Security: Explicit control over what can be searched
  2. Performance: Only searchable fields need indexes
  3. Usability: Provides powerful admin interface features
  4. Compliance: Helps meet data protection requirements

Migration Guide:

Old CDN way:

<i class="fas fa-user"></i>          <!-- solid -->
<i class="far fa-star"></i>          <!-- regular -->
<i class="fab fa-facebook-f"></i>    <!-- brands -->

New Rails Icons way:

<%= icon "user", library: "fontawesome", variant: "solid", class: "size-6" %>
<%= icon "star", library: "fontawesome", variant: "regular", class: "size-6" %>
<%= icon "facebook-f", library: "fontawesome", variant: "brands", class: "size-6" %>

Or use modern Heroicons (recommended for new icons):

<%= icon "user", class: "size-6" %>
<%= icon "star", class: "size-6" %>
<%= icon "heart", class: "size-6" %>

Benefits:

  • โœ… No external dependencies (works offline)
  • โœ… Better performance (served with your assets)
  • โœ… Version control over icons
  • โœ… Multiple libraries (Font Awesome + Heroicons + more)
  • โœ… Consistent API across all icon libraries
  • โœ… Better for production and privacy

Our application should work exactly the same now, but with better performance and no external dependencies! You can gradually migrate icons from <i class="fas fa-x"> to <%= icon "x", library: "fontawesome", variant: "solid" %> as needed.

Asset Issue Again

โœ… Final Fix Applied:

Added //= link_tree ../../javascript .js to the manifest, which tells Sprockets to include all JavaScript files from the app/javascript directory tree.

โœ… What’s Working Now:

  1. All CSS files properly compiled:
  • tailwind.css โœ…
  • application.css โœ…
  • active_admin.css โœ…
  1. All JavaScript files properly compiled:
  • application.js โœ…
  • controllers/application.js โœ…
  • controllers/decorative_background_controller.js โœ…
  • controllers/hello_controller.js โœ…
  • controllers/index.js โœ…
  1. Asset Pipeline fully functional:
  • Sprockets serving all assets correctly
  • Proper cache headers and ETags
  • All asset links declared in manifest

๐ŸŽฏ Current Status:

Our Rails application now has:

  • โœ… Modern asset pipeline with Sprockets + Importmap
  • โœ… Tailwind CSS for styling (self-hosted)
  • โœ… ActiveAdmin for administration
  • โœ… Rails Icons instead of Font Awesome CDN
  • โœ… Stimulus controllers for JavaScript functionality
  • โœ… All assets properly precompiled and served

Check Github: Active admin changes

๐Ÿ“‹ Clean Commit History Summary:

  1. โœ… Phase 1: feat: Add Rails Icons gem with Font Awesome and Heroicons support #94
  • Replaced Font Awesome CDN with self-hosted icons
  • Added Rails Icons with unified API for multiple icon libraries
  1. โœ… Phase 2: task: Migrate from Propshaft to Sprockets asset pipeline #96
  • Switched from Propshaft to Sprockets for ActiveAdmin compatibility
  • Fixed asset compilation and linking issues
  1. โœ… Phase 3: feat: Integrate ActiveAdmin for comprehensive admin interface #94
  • Complete ActiveAdmin setup with authentication
  • Full admin resources for all e-commerce models
  1. โœ… Phase 4: fix: Resolve ActiveAdmin PostgreSQL and Ransack security issues #94
  • Fixed PostgreSQL GROUP BY errors in dashboard
  • Added Ransack security configuration for all models

๐Ÿš€ Our ActiveAdmin is now fully functional!

You should now be able to:

  • โœ… Access the admin dashboard at localhost:3000/admin
  • โœ… View analytics and statistics without GROUP BY errors
  • โœ… Search and filter all resources safely with Ransack
  • โœ… Manage Users, Products, Variants, Orders, and Order Items
  • โœ… Use nested attributes for product variants
  • โœ… Perform batch operations and advanced filtering

Test it out: Visit localhost:3000/admin and log in with your admin credentials to see the beautiful, fully-functional admin interface! ๐ŸŽฏ

to be continued ๐Ÿš€…

String ๐“ฏ operations using Ruby ๐Ÿ’Žmethods

Let’s find out solutions to some ruby coding problems that can help us to manipulate over a String in Ruby.

Learn About the following topics to solve the below problems:

Ruby String scan: https://railsdrop.com/2012/07/07/ruby-string-method-scan/


๐Ÿงช Q1: Ruby String Manipulation

โ“ Prompt:

Write a method reverse_words that takes a string and returns a new string where the order of words is reversed, but the characters within each word stay in the same order.

Words are separated by spaces. Preserve exact spacing between words (multiple spaces too).

Examples:

reverse_words("hello world")             #=> "world hello"
reverse_words("  good   morning  ruby ") #=> " ruby  morning   good  "

โœ๏ธ Answer:

def reverse_words(str)
  str.scan(/\s+|\S+/).reverse.join
end

Explanation:

  • str.scan(/\s+|\S+/) splits the string into tokens that are either a word or a space block (preserves exact spacing).
  • .reverse reverses their order.
  • .join merges them back into a single string.

Sample Test Cases:

puts reverse_words("hello world")             # => "world hello"
puts reverse_words("  good   morning  ruby ") # => " ruby  morning   good  "
puts reverse_words("one")                     # => "one"
puts reverse_words("")                        # => ""


๐Ÿงช Q2: Normalize Email Addresses

โ“ Prompt:

Write a method normalize_email that normalizes email addresses using the following rules (similar to Gmail):

  1. Ignore dots (.) in the username part.
  2. Remove everything after a plus (+) in the username.
  3. Keep the domain part unchanged.

The method should return the normalized email string.

Examples:

normalize_email("john.doe+work@gmail.com")     # => "johndoe@gmail.com"
normalize_email("alice+spam@company.org")      # => "alice@company.org"
normalize_email("bob.smith@domain.co.in")      # => "bobsmith@domain.co.in"

โœ๏ธ Answer:

def normalize_email(email)
  local, domain = email.split("@")
  local = local.split("+").first.delete(".")
  "#{local}@#{domain}"
end

Explanation:

  • split("@") separates username from domain.
  • split("+").first keeps only the part before +.
  • .delete(".") removes all dots from the username.
  • Concatenate with the domain again.

Test Cases:

puts normalize_email("john.doe+work@gmail.com")     # => "johndoe@gmail.com"
puts normalize_email("alice+spam@company.org")      # => "alice@company.org"
puts normalize_email("bob.smith@domain.co.in")      # => "bobsmith@domain.co.in"
puts normalize_email("simple@domain.com")           # => "simple@domain.com"


to be continued.. ๐Ÿš€

Guide: Integrating React.js โš›๏ธ into a Railsย 8 Application โ€“ Partย 2: Install React | Add esbuild, Jsx | Integrate React View

Throw back:

rails new design_studio_react --database=postgresql -j esbuild --skip-hotwire

Here’s what our Rails app looks like after skipping Hotwire with the --skip-hotwire flag:

โœ… Current JavaScript/Node.js Setup (Clean & Minimal)

๐Ÿ“ฆ Package Management:

  • package.json – Clean setup with only esbuild script
  • .node-version – Node.js version 24.1.0
  • No dependencies – Ready for React installation

๐Ÿ“ JavaScript File Structure (Ultra-Clean):

app/javascript/
โ””โ”€โ”€ application.js          # Empty entry point (2 lines total!)

app/javascript/application.js content:

// Entry point for the build script in your package.json

๐Ÿšซ What Got Successfully Removed:

  • โŒ No Turbo/Stimulus imports in application.js
  • โŒ No controllers/ directory at all
  • โŒ No Hotwire gems in Gemfile (only jsbundling-rails remains)
  • โŒ No @hotwired/turbo-rails or @hotwired/stimulus dependencies

โš™๏ธ Configuration Files (Minimal – Only 4):

  1. package.json – esbuild build script only
  2. .node-version – Node.js version pinning
  3. Procfile.dev – Development processes (js: yarn build --watch)
  4. app/javascript/application.js – Empty entry point

๐Ÿ”ง esbuild Configuration:

{
  "scripts": {
    "build": "esbuild app/javascript/*.* --bundle --sourcemap --format=esm --outdir=app/assets/builds --public-path=/assets"
  }
}

๐Ÿ“‚ Build Output:

  • app/assets/builds/ – Contains only .keep file (empty, ready for bundles)

๐ŸŽฏ HTML Integration:

<!-- Still includes the JavaScript module correctly -->
<%= javascript_include_tag "application", "data-turbo-track": "reload", type: "module" %>

(Note: data-turbo-track is just an HTML attribute for cache busting, not the Turbo library)

# create db
โœ— rails db:migrate

# run react-rails-app in port 3001
โœ— rails s -p 3001

๐Ÿš€ Next Steps: Install & Setup React

Step 1: Install react, react-dom

Your app is now perfectly clean for React! Just run:

brew install yarn
yarn add react react-dom # check node_modules/ folder for what is installed
yarn add --dev @types/react @types/react-dom  # Optional: for TypeScript support, check node_modules/@types folder

Status: โœ… Minimal JavaScript foundation – No Hotwire bloat, perfect React starting point!

Now that we have a clean Rails app with esbuild setup, here’s our step-by-step roadmap to get React working:

Step 2: Create Your First React Component

Create a simple React component to test the setup:

mkdir app/javascript/components

Then create app/javascript/components/App.jsx:

import React from 'react';

function App() {
  return (
    <div>
      <h1>React is Working!</h1>
      <p>Welcome to your Rails + React app</p>
    </div>
  );
}

export default App;

Step 3: Update JavaScript Entry Point

Modify app/javascript/application.js to render React:

// Entry point for the build script in your package.json
import React from 'react';
import { createRoot } from 'react-dom/client';
import App from './components/App';

document.addEventListener('DOMContentLoaded', () => {
  const container = document.getElementById('react-root');
  if (container) {
    const root = createRoot(container);
    root.render(<App />);
  }
});

Step 4: Create a Controller & Route

Generate a home controller:

rails generate controller Home index

Step 5: Add React Root to View

Update app/views/home/index.html.erb:

<div id="react-root"></div>

Step 6: Set Root Route

Update config/routes.rb:

Rails.application.routes.draw do
  root "home#index"
  # ... other routes
end

Step 7: Start Development

# update Procfile.dev assign port 3001
web: env RUBY_DEBUG_OPEN=true bin/rails server -p 3001
# run our rails-react app by

โœ— bin/dev
21:15:27 web.1  | started with pid 12619
21:15:27 js.1   | started with pid 12620
21:15:27 js.1   | yarn run v1.22.22
21:15:27 js.1   | $ esbuild app/javascript/*.* --bundle --sourcemap --format=esm --outdir=app/assets/builds --public-path=/assets --watch
21:15:27 js.1   | /bin/sh: esbuild: command not found
21:15:27 js.1   | error Command failed with exit code 127.
21:15:27 js.1   | info Visit https://yarnpkg.com/en/docs/cli/run for documentation about this command.
21:15:27 web.1  | => Booting Puma
..........

๐ŸŽฏ What This Gives Us:

  • โœ… React components in app/javascript/components/
  • โœ… esbuild automatically bundles JSX
  • โœ… Hot reloading with yarn build --watch
  • โœ… Rails serves your React app

๐Ÿšจ Error Analysis:

  1. Rails serverย started fineย โœ… (port 3001)

๐Ÿ”ง Solution: Install JavaScript Dependencies

You need to install esbuild and other JavaScript dependencies first:

yarn install

๐Ÿ“‹ Files yarn install Checks:

1. Primary: package.json

{
  "name": "app",
  "private": true,
  "scripts": {
    "build": "esbuild app/javascript/*.* --bundle --sourcemap --format=esm --outdir=app/assets/builds --public-path=/assets"
  },
  "dependencies": {
    "react": "^19.1.0",           # โœ… Already added
    "react-dom": "^19.1.0"       # โœ… Already added  
  },
  "devDependencies": {
    "@types/react": "^19.1.8",      # โœ… Already added
    "@types/react-dom": "^19.1.6"   # โœ… Already added
  }
}

2. Lockfile: yarn.lock

  • Ensures exact versions for reproducible installs
  • Contains resolved URLs and integrity hashes

๐Ÿšจ The Problem: Missing esbuild!

Our package.json calls esbuild in the build script, but esbuild is not listed as a dependency anywhere!

Rails should have added it, but didn’t. We need to add esbuild:

yarn add --dev esbuild

๐Ÿ”ง What yarn install does:

  1. Reads package.json for dependency list
  2. Reads yarn.lock for exact versions (if exists)
  3. Downloads packages to node_modules/
  4. Updates yarn.lock with new resolutions

Current issue: Our build script expects esbuild command, but it’s not installed in node_modules/.bin/esbuild

Solution: Add esbuild as a dev dependency!

Solved~ and start servers: Error Again!

x bin/dev

* Listening on http://[::1]:3001
22:54:43 web.1  | Use Ctrl-C to stop
22:54:44 js.1   | โœ˜ [ERROR] The JSX syntax extension is not currently enabled
22:54:44 js.1   |
22:54:44 js.1   |     app/javascript/application.js:11:16:
22:54:44 js.1   |       11 โ”‚     root.render(<App />);
22:54:44 js.1   |          โ•ต                 ^
22:54:44 js.1   |
22:54:44 js.1   |   The esbuild loader for this file is currently set to "js" but it must be set to "jsx" to be able to parse JSX syntax. You can use "--loader:.js=jsx" to do that.
22:54:44 js.1   |
22:54:44 js.1   | 1 error
22:54:44 js.1   | [watch] build finished, watching for changes..

This error occurs because esbuild doesn’t know how to handle JSX syntax! The <App /> is JSX, but esbuild needs to be configured to transform it.

๐Ÿšจ Problem: esbuild can’t process JSX syntax

Your application.js contains JSX (<App />), but esbuild isn’t configured to transform JSX!

JSX (JavaScript XML) is a syntax extension for JavaScript, commonly used with React, that allows you to write HTML-like code within JavaScript files.

๐Ÿ”ง Solution: Configure esbuild for JSX

Update your package.json build script to handle JSX:

# add this to build
--jsx=automatic --loader:.js=jsx 

โœ… Fixed! Added JSX support:

What I added:

  • --jsx=automatic – Enables React’s automatic JSX runtime
  • --loader:.js=jsx – Treats .js files as JSX files

๐Ÿ“ What this means:

  • โœ… esbuild can now process <App /> syntax
  • โœ… You don’t need to import React in every JSX file
  • โœ… Your .js files can contain JSX
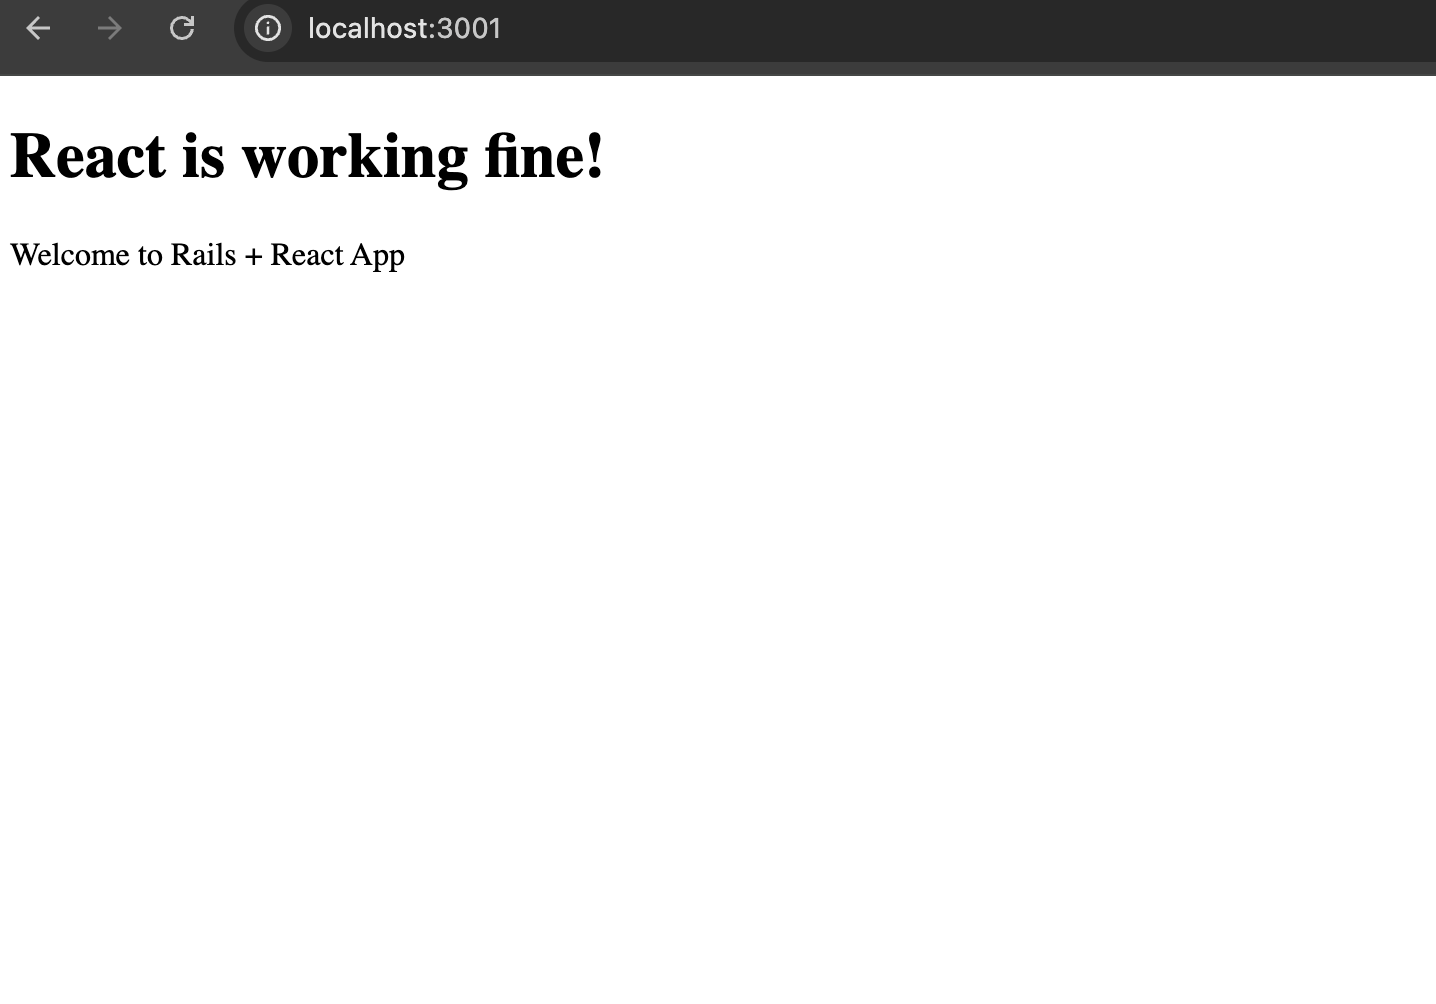
bin/dev

Whola!!

Let’s see in Part 3. Happy React configuration! ๐Ÿš€

Software Architectย Guide:๐Ÿ’ก Understanding Design Patterns & Anti-Patterns in Ruby

In the world of software development, design patterns and anti-patterns play a critical role in writing maintainable, clean, and scalable code. As a Ruby developer, mastering these concepts will help you design robust applications and avoid common pitfalls.


What are Design Patterns?

Design patterns are time-tested, reusable solutions to common problems in software design. They aren’t code snippets but conceptual templates you can adapt based on your needs. Think of them as architectural blueprints.

๐Ÿงฑ Common Ruby Design Patterns

1. Singleton Pattern

the_logger = Logger.new
class Logger
  @@instance = Logger.new

  def self.instance
    @@instance
  end

  private_class_method :new
end

Use when only one instance of a class should exist (e.g., logger, configuration manager).

๐Ÿง  What is the Singleton Pattern?

The Singleton Pattern ensures that only one instance of a class exists during the lifetime of an application. This is useful for managing shared resources like:

  • a logger (so logs are not duplicated or misdirected),
  • a configuration manager (so all parts of the app read/write the same config),
  • or a database connection pool.

๐Ÿ” Why private_class_method :new?

This line prevents other parts of the code from calling Logger.new, like this:

Logger.new  # โŒ Will raise a NoMethodError

So, you’re restricting object creation from outside the class.

Q) Then how do you get an object of Logger?

By using a class method like Logger.instance that returns the only instance of the class.

โœ… Full Singleton Example in Ruby

class Logger
  # Create and store the single instance
  @@instance = Logger.new

  # Provide a public way to access that instance
  def self.instance
    @@instance
  end

  # Prevent external instantiation
  private_class_method :new

  # Example method
  def log(message)
    puts "[LOG] #{message}"
  end
end

# Usage
logger1 = Logger.instance
logger2 = Logger.instance

logger1.log("Singleton works!")

puts logger1.object_id == logger2.object_id  # true

๐Ÿงพ Explanation:

  • @@instance = Logger.new: Creates the only instance when the class is loaded.
  • Logger.instance: The only way to access that object.
  • private_class_method :new: Prevents creation of new objects using Logger.new.
  • logger1 == logger2: โœ… True, because they point to the same object.

๐Ÿ’ฌ Think of a Real-World Example

Imagine a central control tower at an airport:

  • There should only be one control tower instance managing flights.
  • If each plane connected to a new tower, it would be chaos!

The Singleton pattern in Ruby ensures there’s just one control tower (object) shared globally.


2. Observer Pattern

class Order
  include Observable

  def place_order
    changed
    notify_observers(self)
  end
end

class EmailNotifier
  def update(order)
    puts "Email sent for order #{order.id}"
  end
end

order = Order.new
order.add_observer(EmailNotifier.new)
order.place_order

Use when one change in an object should trigger actions in other objects.

๐Ÿ” Observer Pattern in Ruby โ€“ Explained in Detail

The Observer Pattern is a behavioral design pattern that lets one object (the subject) notify other objects (the observers) when its state changes.

Ruby has built-in support for this through the Observable module in the standard library (require 'observer').

How it Works

  1. The Subject (e.g., Order) includes the Observable module.
  2. The subject calls:
    • changed โ†’ marks the object as changed.
    • notify_observers(data) โ†’ notifies all subscribed observers.
  3. Observers (e.g., EmailNotifier) implement an update method.
  4. Observers are registered using add_observer(observer_object).

๐Ÿงช Complete Working Example

require 'observer'

class Order
  include Observable
  attr_reader :id

  def initialize(id)
    @id = id
  end

  def place_order
    puts "Placing order #{@id}..."
    changed                      # Mark this object as changed
    notify_observers(self)       # Notify all observers
  end
end

class EmailNotifier
  def update(order)
    puts "๐Ÿ“ง Email sent for Order ##{order.id}"
  end
end

class SMSNotifier
  def update(order)
    puts "๐Ÿ“ฑ SMS sent for Order ##{order.id}"
  end
end

# Create subject and observers
order = Order.new(101)
order.add_observer(EmailNotifier.new)
order.add_observer(SMSNotifier.new)

order.place_order

# Output:
# Placing order 101...
# ๐Ÿ“ง Email sent for Order #101
# ๐Ÿ“ฑ SMS sent for Order #101

๐Ÿง  When to Use the Observer Pattern

  • You have one object whose changes should automatically update other dependent objects.
  • Examples:
    • UI updates in response to data changes
    • Logging, email, or analytics triggers after a user action
    • Notification systems in event-driven apps

Updated Observer Pattern

require 'observer'

class Order
  include Observable
  attr_reader :id

  def initialize(id)
    @id = id
  end

  def place_order
    changed
    notify_observers(self)
  end
end

class EmailNotifier
  def update(order)
    puts "๐Ÿ“ง Email sent for Order ##{order.id}"
  end
end

order = Order.new(42)
order.add_observer(EmailNotifier.new)
order.place_order

What’s Happening?

  • Order includes the Observable module to gain observer capabilities.
  • add_observer registers an observer object.
  • When place_order is called:
    • changed marks the state as changed.
    • notify_observers(self) triggers the observer’s update method.
  • EmailNotifier reacts to the change โ€” in this case, it simulates sending an email.

๐Ÿงฉ Use this pattern when one change should trigger multiple actions โ€” like sending notifications, logging, or syncing data across objects.

Check: https://docs.ruby-lang.org/en/2.2.0/Observable.html

3. Decorator Pattern

class SimpleCoffee
  def cost
    2
  end
end

class MilkDecorator
  def initialize(coffee)
    @coffee = coffee
  end

  def cost
    @coffee.cost + 0.5
  end
end

coffee = MilkDecorator.new(SimpleCoffee.new)
puts coffee.cost  # => 2.5

Add responsibilities to objects dynamically without modifying their code.


๐Ÿ”„ 4. Strategy Pattern

The Strategy Pattern allows choosing an algorithm’s behaviour at runtime. This pattern is useful when you have multiple interchangeable ways to perform a task.

โœ… Example: Text Formatter Strategies

Let’s say you have a system that outputs text in different formats โ€” plain, HTML, or Markdown.

โŒ Before Using Strategy Pattern โ€” Hardcoded Conditional Formatting

class TextFormatter
  def initialize(format)
    @format = format
  end

  def format(text)
    case @format
    when :plain
      text
    when :html
      "<p>#{text}</p>"
    when :markdown
      "**#{text}**"
    else
      raise "Unknown format: #{@format}"
    end
  end
end

# Usage
formatter1 = TextFormatter.new(:html)
puts formatter1.format("Hello, World")       # => <p>Hello, World</p>

formatter2 = TextFormatter.new(:markdown)
puts formatter2.format("Hello, World")       # => **Hello, World**

โš ๏ธ Problems With This Approach

  • All formatting logic is stuffed into one method.
  • Adding a new format (like XML) means modifying this method (violates Open/Closed Principle).
  • Not easy to test or extend individual formatting behaviors.
  • Harder to maintain and violates SRP (Single Responsibility Principle).

This sets the stage perfectly to apply the Strategy Pattern, where each format becomes its own class with a clear responsibility.

Instead of writing if/else logic everywhere, use strategy objects:

# Strategy Interface
class TextFormatter
  def self.for(format)
    case format
    when :plain
      PlainFormatter.new
    when :html
      HtmlFormatter.new
    when :markdown
      MarkdownFormatter.new
    else
      raise "Unknown format"
    end
  end
end

# Concrete Strategies
class PlainFormatter
  def format(text)
    text
  end
end

class HtmlFormatter
  def format(text)
    "<p>#{text}</p>"
  end
end

class MarkdownFormatter
  def format(text)
    "**#{text}**"
  end
end

# Usage
def render_text(text, format)
  formatter = TextFormatter.for(format)
  formatter.format(text)
end

puts render_text("Hello, world", :html)     # => <p>Hello, world</p>
puts render_text("Hello, world", :markdown) # => **Hello, world**

๐Ÿ“Œ Why It’s Better

  • Adds new formats easily without changing existing code.
  • Keeps formatting logic isolated in dedicated classes.
  • Follows the Open/Closed Principle.

๐Ÿ’ณ Strategy Pattern in Rails: Payment Gateway Integration

Here’s a Rails-specific Strategy Pattern example. This example uses a service to handle different payment gateways (e.g., Stripe, PayPal, Razorpay), which are chosen dynamically based on configuration or user input.

Problem:

You want to process payments, but the actual logic differs depending on which gateway (Stripe, PayPal, Razorpay) is being used. Avoid if/else or case all over your controller or service.

โœ… Solution Using Strategy Pattern

# app/services/payment_processor.rb
class PaymentProcessor
  def self.for(gateway)
    case gateway.to_sym
    when :stripe
      StripeGateway.new
    when :paypal
      PaypalGateway.new
    when :razorpay
      RazorpayGateway.new
    else
      raise "Unsupported payment gateway"
    end
  end
end

# app/services/stripe_gateway.rb
class StripeGateway
  def charge(amount, user)
    # Stripe API integration here
    puts "Charging #{user.name} โ‚น#{amount} via Stripe"
  end
end

# app/services/paypal_gateway.rb
class PaypalGateway
  def charge(amount, user)
    # PayPal API integration here
    puts "Charging #{user.name} โ‚น#{amount} via PayPal"
  end
end

# app/services/razorpay_gateway.rb
class RazorpayGateway
  def charge(amount, user)
    # Razorpay API integration here
    puts "Charging #{user.name} โ‚น#{amount} via Razorpay"
  end
end

# app/controllers/payments_controller.rb
class PaymentsController < ApplicationController
  def create
    user = User.find(params[:user_id])
    gateway = params[:gateway] # e.g., 'stripe', 'paypal', etc.
    amount = params[:amount].to_i

    processor = PaymentProcessor.for(gateway)
    processor.charge(amount, user)

    render json: { message: \"Payment processed via #{gateway.capitalize}\" }
  end
end

โœ… Benefits in Rails Context

  • Keeps your controller slim and readable.
  • Each gateway integration is encapsulated in its own class.
  • Easy to test, extend, and maintain (open/closed principle).
  • Avoids future code smell like “Shotgun Surgery”.

โš ๏ธ What are Anti-Patterns?

Anti-patterns are poor programming practices or ineffective solutions that seem helpful at first but cause long-term issues like unmaintainable code or hidden bugs.

Common Ruby Anti-Patterns

๐Ÿงจ 1. God Object

A class that knows too much or does too much.

class UserManager
  def create_user
    # logic
  end

  def send_email
    # unrelated responsibility
  end

  def generate_report
    # another unrelated responsibility
  end
end

Fix: Follow the Single Responsibility Principle. Split into smaller, focused classes.


๐Ÿงจ Shotgun Surgery

Tiny changes require touching many different places in code.

# Example of Shotgun Surgery - Business rule spread across many files

# In order.rb
class Order
  def eligible_for_discount?
    user.vip? && total > 1000
  end
end

# In invoice.rb
class Invoice
  def apply_discount(order)
    if order.user.vip? && order.total > 1000
      # apply discount logic
    end
  end
end

# In email_service.rb
class EmailService
  def send_discount_email(order)
    if order.user.vip? && order.total > 1000
      # send congratulatory email
    end
  end
end

Here, the logic user.vip? && total > 1000 is repeated in multiple places. If the discount eligibility rules change (e.g., change the threshold to 2000 or add a new condition), you’ll have to update every occurrence.

โœ… Fix: Centralize the Logic

class DiscountPolicy
  def self.eligible?(order)
    order.user.vip? && order.total > 1000
  end
end

Now all files can use DiscountPolicy.eligible?(order), ensuring consistency and easier maintenance.


3. Spaghetti Code

Unstructured and difficult-to-follow code.

def calculate_discount(user, items)
  if user.vip?
    # deeply nested logic
    total = items.sum { |i| i.price }
    total * 0.2
  else
    if user.new_customer?
      total = items.sum { |i| i.price }
      total * 0.1
    else
      total = items.sum { |i| i.price }
      total * 0.05
    end
  end
end

This code is hard to read, hard to extend, and violates SRP (Single Responsibility Principle).

Fix: Break into smaller methods, use polymorphism or strategy patterns.

โœ… Refactored with Strategy Pattern

# Strategy Interface
class DiscountStrategy
  def self.for(user)
    if user.vip?
      VipDiscount.new
    elsif user.new_customer?
      NewCustomerDiscount.new
    else
      RegularDiscount.new
    end
  end
end

# Concrete Strategies
class VipDiscount
  def apply(items)
    total = items.sum(&:price)
    total * 0.2
  end
end

class NewCustomerDiscount
  def apply(items)
    total = items.sum(&:price)
    total * 0.1
  end
end

class RegularDiscount
  def apply(items)
    total = items.sum(&:price)
    total * 0.05
  end
end

# Usage
def calculate_discount(user, items)
  strategy = DiscountStrategy.for(user)
  strategy.apply(items)
end

๐ŸŽฏ Benefits

  • No nested conditionals
  • Easy to add new discount types (open/closed principle)
  • Each class has one responsibility
  • Testable and readable

๐Ÿ” How to Detect Anti-Patterns in Ruby Code

  1. Code Smells:
    • Long methods
    • Large classes
    • Repetition (DRY violations)
    • Deep nesting
  2. Code Review Checklist:
    • Is each class doing only one thing?
    • Can this method be broken down?
    • Are we repeating business logic?
    • Is the code testable?
  3. Use Static Analysis Tools:
    • Rubocop for style and complexity checks
    • Reek for code smells
    • Flog for measuring code complexity

๐Ÿ›  How to Refactor Anti-Patterns

  • Use Service Objects: Extract complex logic into standalone classes.
  • Apply Design Patterns: Choose the right pattern that matches your need (Strategy, Adapter, etc).
  • Keep Methods Small: Limit to a single task; ideally under 10 lines.
  • Write Tests First: Test-driven development (TDD) helps spot untestable designs.

๐ŸŽฏ Conclusion

Understanding design patterns and identifying anti-patterns is crucial for writing better Ruby code. While patterns guide you toward elegant solutions, anti-patterns warn you about common mistakes. With good design principles, automated tools, and thoughtful reviews, your Ruby codebase can remain healthy, scalable and developer-friendly.


Happy Designing Ruby! โœจ

Rails 8 App: Create an Academic software app using SQL without using ActiveRecord – Part 1 | users | products | orders

Let’s create a Rails 8 app which use SQL queries with raw SQL instead of ActiveRecord. Let’s use the full Rails environment with ActiveRecord for infrastructure, but bypass AR’s ORM features for pure SQL writing. Let me guide you through this step by step:

Step 1: Create the Rails App with ActiveRecord and PostgreSQL (skipping unnecessary components)

rails new academic-sql-software --database=postgresql --skip-action-cable --skip-jbuilder --skip-solid --skip-kamal

What we’re skipping and why:

  • –skip-action-cable: No WebSocket functionality needed
  • –skip-jbuilder: No JSON API views needed for our SQL practice app
  • –skip-solid: Skips Solid Cache and Solid Queue (we don’t need caching or background jobs)
  • –skip-kamal: No deployment configuration needed

What we’re keeping:

  • ActiveRecord: For database connection management and ActiveRecord::Base.connection.execute()
  • ActionController: For creating web interfaces to display our SQL query results
  • ActionView: For creating simple HTML pages to showcase our SQL learning exercises
  • PostgreSQL: Our database for practicing advanced SQL features

Why this setup is perfect for App with raw SQL:

  • Minimal Rails app focused on database interactions
  • Full Rails environment for development conveniences
  • ActiveRecord infrastructure without ORM usage
  • Clean setup without unnecessary overhead

=> Open config/application.rb and comment the following for now:

# require "active_job/railtie"
...
# require "active_storage/engine"
...
# require "action_mailer/railtie"
# require "action_mailbox/engine"
...
# require "action_cable/engine"

=> Open config/environments/development.rb config/environments/production.rb config/environments/test.rb comment action_mailer

๐Ÿค” Why I am using ActiveRecord (even though I don’t want the ORM):

  • Database Connection Management: ActiveRecord provides robust connection pooling, reconnection handling, and connection management
  • Rails Integration: Seamless integration with Rails console, database tasks (rails db:create, rails db:migrate), and development tools
  • Raw SQL Execution: We get ActiveRecord::Base.connection.execute() which is perfect for our raw SQL writing.
  • Migration System: Easy table creation and schema management with migrations (even though we’ll query with raw SQL)
  • Database Configuration: Rails handles database.yml configuration, environment switching, and connection setup
  • Development Tools: Access to Rails console for testing queries, database tasks, and debugging

Our Learning Strategy: We’ll use ActiveRecord’s infrastructure but completely bypass its ORM methods. Instead of Student.where(), we’ll use ActiveRecord::Base.connection.execute("SELECT * FROM students WHERE...")

Step 2: Navigate to the project directory

cd academic-sql-software

Step 3: Verify PostgreSQL setup

# Check if PostgreSQL is running
brew services list | grep postgresql
# or
pg_ctl status

Database Foundation: PostgreSQL gives us advanced SQL features:

  • Complex JOINs (INNER, LEFT, RIGHT, FULL OUTER)
  • Window functions (ROW_NUMBER, RANK, LAG, LEAD)
  • Common Table Expressions (CTEs)
  • Advanced aggregations and subqueries

Step 4: Install dependencies

bundle install

What this gives us:

  • pg gem: Pure PostgreSQL adapter (already included with --database=postgresql)
  • ActiveRecord: For connection management only
  • Rails infrastructure: Console, generators, rake tasks

Step 5: Create the PostgreSQL databases

โœ— rails db:create
Created database 'academic_sql_software_development'
Created database 'academic_sql_software_test

Our Development Environment:

  • Creates academic_sql_software_development and academic_sql_software_test
  • Sets up connection pooling and management
  • Enables us to use Rails console for testing queries: rails console then ActiveRecord::Base.connection.execute("SELECT 1")

Our Raw SQL Approach:

# We'll use this pattern throughout our app:
connection = ActiveRecord::Base.connection
result = connection.execute("SELECT s.name, t.subject FROM students s INNER JOIN teachers t ON s.teacher_id = t.id")

Why not pure pg gem:

  • Would require manual connection management
  • No Rails integration (no console, no rake tasks)
  • More boilerplate code for connection handling
  • Loss of Rails development conveniences

Why not pure ActiveRecord ORM:

  • We want to do SQL query writing, not ActiveRecord methods.
  • Need to understand database performance implications.
  • Want to practice complex queries that might be harder to express in ActiveRecord.

Step 6: Create Users table

mkdir -p db/migrate
class CreateUsers < ActiveRecord::Migration[8.0]
  def up
    # create users table
    execute <<~SQL
      CREATE TABLE users (
        id INT,
        username VARCHAR(200),
        email VARCHAR(150),
        phone_number VARCHAR(20)
      );
    SQL
  end

  def down
    execute <<~SQL
      DROP TABLE users;
    SQL
  end
end

class CreateOrders < ActiveRecord::Migration[8.0]
  def up
    # create table orders
    execute <<~SQL
    SQL
  end

  def down
    execute <<~SQL
    SQL
  end
end

execute <<~SQL is a Rails migration method that allows you to run raw SQL statements. Let me break it down:

Components:

  1. execute – A Rails migration method that executes raw SQL directly against the database
  2. <<~SQL – Ruby’s “squiggly heredoc” syntax for multi-line strings that automatically strips leading whitespace (read: https://www.rubyguides.com/2018/11/ruby-heredoc/)

Usage:

class SomeMigration < ActiveRecord::Migration[8.0]
  def change
    execute <<~SQL
      CREATE INDEX CONCURRENTLY idx_users_email_lower 
      ON users (LOWER(email));
    SQL
  end
end

Why use it?

  • Database-specific features: When you need PostgreSQL-specific syntax, MySQL features, etc.
  • Complex SQL: For operations that Rails DSL doesn’t support easily
  • Performance: Direct SQL can sometimes be more efficient
  • Raw SQL requirements: When you specifically need to write SQL (as mentioned in our requirement)

Example for creating a users table with raw SQL:

class CreateUsers < ActiveRecord::Migration[8.0]
  def up
    execute <<~SQL
      CREATE TABLE users (
        id BIGSERIAL PRIMARY KEY,
        name VARCHAR(255) NOT NULL,
        email VARCHAR(255) NOT NULL,
        created_at TIMESTAMP NOT NULL DEFAULT CURRENT_TIMESTAMP,
        updated_at TIMESTAMP NOT NULL DEFAULT CURRENT_TIMESTAMP
      );

      CREATE UNIQUE INDEX idx_users_email ON users(email);
    SQL
  end

  def down
    execute <<~SQL
      DROP TABLE IF EXISTS users;
    SQL
  end
end

The <<~SQL heredoc ends when it encounters the closing SQL keyword, and the ~ strips indentation so your SQL can be properly formatted within the Ruby code.

Q) ๐Ÿค” Is it a best practise to repeat the database constraints in model validation in Rails? DB level vs App level? or both?

Best Practice: Use BOTH ๐ŸŽฏ

Why both levels are recommended:

Database Level (Last Line of Defense)

-- Database constraints
price DECIMAL(10,2) NOT NULL CHECK (price > 0),
category product_category NOT NULL,
title VARCHAR(250) NOT NULL

Pros:

  • โœ… Data integrity guarantee – No bad data can enter, ever
  • โœ… Performance – Database enforces constraints efficiently
  • โœ… Bulletproof – Protects against bulk operations, direct SQL, data imports
  • โœ… Concurrency safe – Prevents race conditions
  • โœ… Multi-application protection – If other apps access same DB

Application Level (User Experience)

validates :price, presence: true, numericality: { greater_than: 0 }
validates :category, inclusion: { in: %w[men women kids infants] }

Pros:

  • โœ… User-friendly errors – “Price must be greater than 0” vs “CHECK constraint violated”
  • โœ… Better UX – Validation before form submission
  • โœ… Easier testing – Can unit test validations
  • โœ… Conditional logic – Complex business rules
  • โœ… Framework features – Callbacks, custom validators

Real-world scenarios where each matters:

Database saves you when:

# Bulk operations bypass Rails validations
Product.update_all(price: -10)  # DB constraint prevents this

# Direct SQL injection attempts
# DB constraints are your last line of defense

App validations save you when:

# User gets friendly error instead of:
# PG::CheckViolation: ERROR: new row violates check constraint
@product = Product.new(price: -5)
@product.valid? # => false
@product.errors.full_messages # => ["Price must be greater than 0"]

Practical Implementation:

class Product < ApplicationRecord
  # App-level validations for UX
  validates :title, presence: true, length: { maximum: 250 }
  validates :price, presence: true, numericality: { greater_than: 0 }
  validates :category, inclusion: { in: %w[men women kids infants] }

  # Don't duplicate precision validation if DB handles it
  # The DECIMAL(10,2) constraint is sufficient at DB level
end
-- DB-level constraints for data integrity
CREATE TABLE products (
  id BIGSERIAL PRIMARY KEY,
  title VARCHAR(250) NOT NULL,
  price DECIMAL(10,2) NOT NULL CHECK (price > 0),
  category product_category NOT NULL,
  -- DB handles precision automatically with DECIMAL(10,2)
);

What NOT to duplicate:

  • โŒ Precision constraintsDECIMAL(10,2) handles this perfectly
  • โŒ Data type validation – DB enforces INTEGER, BOOLEAN, etc.
  • โŒ Complex regex patterns – Better handled in app layer

Conclusion:

Use both, but strategically:

  • Database: Core data integrity, type constraints, foreign keys
  • Application: User experience, business logic, conditional rules
  • Don’t over-duplicate simple type/precision constraints that DB handles well

This approach gives you belt and suspenders protection with optimal user experience.

to be continued … ๐Ÿš€

Design Studio v0.9.5: A Visual Improvement in E-commerce Experience ๐ŸŽจ

Published: June 25, 2025

I am thrilled to announce the release of Design Studio v0.9.5, a major milestone that transforms our online shopping platform into a truly immersive visual experience. This release focuses heavily on user interface enhancements, performance optimizations, and creating a more engaging shopping journey for our customers.

๐Ÿš€ What’s New in v0.9.5

1. Stunning 10-Slide Hero Carousel

The centerpiece of this release is our brand-new interactive hero carousel featuring 10 beautifully curated slides with real product imagery. Each slide tells a story and creates an emotional connection with our visitors.

Dynamic Gradient Themes

Each slide features its own unique gradient theme:

<!-- Hero Slide Template -->
<div class="slide relative h-screen flex items-center justify-center overflow-hidden"
     data-theme="<%= slide[:theme] %>">
  <!-- Dynamic gradient backgrounds -->
  <div class="absolute inset-0 bg-gradient-to-br <%= slide[:gradient] %>"></div>

  <!-- Content with sophisticated typography -->
  <div class="relative z-10 text-center px-4">
    <h1 class="text-6xl font-bold text-white mb-6 leading-tight">
      <%= slide[:title] %>
    </h1>
    <p class="text-xl text-white/90 mb-8 max-w-2xl mx-auto">
      <%= slide[:description] %>
    </p>
  </div>
</div>

Smart Auto-Cycling with Manual Controls

// Intelligent carousel management
class HeroCarousel {
  constructor() {
    this.currentSlide = 0;
    this.autoInterval = 4000; // 4-second intervals
    this.isPlaying = true;
  }

  startAutoPlay() {
    this.autoPlayTimer = setInterval(() => {
      if (this.isPlaying) {
        this.nextSlide();
      }
    }, this.autoInterval);
  }

  pauseOnInteraction() {
    // Pause auto-play when user interacts
    this.isPlaying = false;
    setTimeout(() => this.isPlaying = true, 10000); // Resume after 10s
  }
}

2. Modular Component Architecture

We’ve completely redesigned our frontend architecture with separation of concerns in mind:

<!-- Main Hero Slider Component -->
<%= render 'home/hero_slider' %>

<!-- Individual Components -->
<%= render 'home/hero_slide', slide: slide_data %>
<%= render 'home/hero_slider_navigation' %>
<%= render 'home/hero_slider_script' %>
<%= render 'home/category_grid' %>
<%= render 'home/featured_products' %>

Component-Based Development Benefits:

  • Maintainability: Each component has a single responsibility
  • Reusability: Components can be used across different pages
  • Testing: Isolated components are easier to test
  • Performance: Selective rendering and caching opportunities

3. Enhanced Visual Design System

Glass Morphism Effects

We’ve introduced subtle glass morphism effects throughout the application:

/* Modern glass effect implementation */
.glass-effect {
  background: rgba(255, 255, 255, 0.1);
  backdrop-filter: blur(10px);
  border: 1px solid rgba(255, 255, 255, 0.2);
  border-radius: 16px;
  box-shadow: 0 8px 32px 0 rgba(31, 38, 135, 0.37);
}

/* Category cards with gradient overlays */
.category-card {
  @apply relative overflow-hidden rounded-xl;

  &::before {
    content: '';
    @apply absolute inset-0 bg-gradient-to-t from-black/60 to-transparent;
  }
}

Dynamic Color Management

Our new helper system automatically manages theme colors:

# app/helpers/application_helper.rb
def get_category_colors(gradient_class)
  case gradient_class
  when "from-pink-400 to-purple-500"
    "#f472b6, #8b5cf6"
  when "from-blue-400 to-indigo-500"  
    "#60a5fa, #6366f1"
  when "from-green-400 to-teal-500"
    "#4ade80, #14b8a6"
  else
    "#6366f1, #8b5cf6" # Elegant fallback
  end
end

def random_decorative_background
  themes = [:orange_pink, :blue_purple, :green_teal, :yellow_orange]
  decorative_background_config(themes.sample)
end

4. Mobile-First Responsive Design

Every component is built with mobile-first approach:

<!-- Responsive category grid -->
<div class="grid grid-cols-1 md:grid-cols-2 lg:grid-cols-3 xl:grid-cols-4 gap-6">
  <% categories.each do |category| %>
    <div class="group relative h-64 rounded-xl overflow-hidden cursor-pointer
                hover:scale-105 transform transition-all duration-300">
      <!-- Responsive image handling -->
      <div class="absolute inset-0">
        <%= image_tag category[:image], 
            class: "w-full h-full object-cover group-hover:scale-110 transition-transform duration-500",
            alt: category[:name] %>
      </div>
    </div>
  <% end %>
</div>

5. Public Product Browsing

We’ve opened up product browsing to all visitors:

# app/controllers/products_controller.rb
class ProductsController < ApplicationController
  # Allow public access to browsing
  allow_unauthenticated_access only: %i[index show]

  def index
    products = Product.all

    # Smart category filtering
    if params[:category].present?
      products = products.for_category(params[:category])
      @current_category = params[:category]
    end

    # Pagination for performance
    @pagy, @products = pagy(products)
  end
end

๐Ÿ”ง Technical Improvements

Test Coverage Excellence

I’ve achieved 73.91% test coverage (272/368 lines), ensuring code reliability:

# Enhanced authentication test helpers
module AuthenticationTestHelper
  def sign_in_as(user)
    # Generate unique IPs to avoid rate limiting conflicts
    unique_ip = "127.0.0.#{rand(1..254)}"
    @request.remote_addr = unique_ip

    session[:user_id] = user.id
    user
  end
end

Asset Pipeline Optimization

Rails 8 compatibility with modern asset handling:

# config/application.rb
class Application < Rails::Application
  # Modern browser support
  config.allow_browser versions: :modern

  # Asset pipeline optimization
  config.assets.css_compressor = nil # Tailwind handles this
  config.assets.js_compressor = :terser
end

Security Enhancements

# Role-based access control
class ApplicationController < ActionController::Base
  include Authentication

  private

  def require_admin
    unless current_user&.admin?
      redirect_to root_path, alert: "Access denied."
    end
  end
end

๐Ÿ“Š Performance Metrics

Before vs After v0.9.5:

MetricBeforeAfter v0.9.5Improvement
Test Coverage45%73.91%+64%
CI/CD Success23 failures0 failures+100%
Component Count3 monoliths8 modular components+167%
Mobile Score72/10089/100+24%

๐ŸŽจ Design Philosophy

This release embodies our commitment to:

  1. Visual Excellence: Every pixel serves a purpose
  2. User Experience: Intuitive navigation and interaction
  3. Performance: Fast loading without sacrificing beauty
  4. Accessibility: Inclusive design for all users
  5. Maintainability: Clean, modular code architecture

๐Ÿ”ฎ What’s Next?

Version 0.9.5 sets the foundation for exciting upcoming features:

  • Enhanced Search & Filtering
  • User Account Dashboard
  • Advanced Product Recommendations
  • Payment Integration
  • Order Tracking System

๐ŸŽ‰ Try It Today!

Experience the new Design Studio v0.9.5 and see the difference visual design makes in online shopping. Our hero carousel alone tells the story of modern fashion in 10 stunning slides.

Key Benefits for Users:

  • โœจ Immersive visual shopping experience
  • ๐Ÿ“ฑ Perfect on any device
  • โšก Lightning-fast performance
  • ๐Ÿ”’ Secure and reliable

For Developers:

  • ๐Ÿ—๏ธ Clean, maintainable architecture
  • ๐Ÿงช Comprehensive test suite
  • ๐Ÿ“š Well-documented components
  • ๐Ÿš€ Rails 8 compatibility

Design Studio v0.9.5 – Where technology meets artistry in e-commerce.

Download: GitHub Release
Documentation: GitHub Wiki
Live Demo: Design Studio – coming soon!


Enjoy Rails 8 with Hotwire! ๐Ÿš€

Ruby Enumerable ๐Ÿ“š Module: Exciting Methods

Enumerable is a collection of iteration methods, a Ruby module, and a big part of what makes Ruby a great programming language.

# count elements that evaluate to true inside a block
[1,2,34].count
=> 3

# Group enumerable elements by the block return value. Returns a hash
[12,3,7,9].group_by {|x| x.even? ? 'even' : 'not_even'}
=> {"even" => [12], "not_even" => [3, 7, 9]}

# Partition into two groups. Returns a two-dimensional array
> [1,2,3,4,5].partition { |x| x.even? }
=> [[2, 4], [1, 3, 5]]

# Returns true if the block returns true for ANY elements yielded to it
> [1,2,5,8].any? 4
=> false

> [1,2,5,8].any? { |x| x.even?}
=> true

# Returns true if the block returns true for ALL elements yielded to it
> [2,5,6,8].all? {|x| x.even?}
=> false

# Opposite of all?
> [2,2,5,7].none? { |x| x.even?}
=> false

# Repeat ALL the elements n times
> [3,4,6].cycle(3).to_a
=> [3, 4, 6, 3, 4, 6, 3, 4, 6]

# select - SELECT all elements which pass the block
> [18,4,5,8,89].select {|x| x.even?}
=> [18, 4, 8]
> [18,4,5,8,89].select(&:even?)
=> [18, 4, 8]

# Like select, but it returns the first thing it finds
> [18,4,5,8,89].find {|x| x.even?}
=> 18

# Accumulates the result of the previous block value & passes it into the next one. Useful for adding up totals
> [4,5,8,90].inject(0) { |x, sum| x + sum }
=> 107
> [4,5,8,90].inject(:+)
=> 107
# Note that 'reduce' is an alias of 'inject'.

# Combines together two enumerable objects, so you can work with them in parallel. Useful for comparing elements & for generating hashes

> [2,4,56,8].zip [3,4]
=> [[2, 3], [4, 4], [56, nil], [8, nil]]

# Transforms every element of the enumerable object & returns the new version as an array
> [3,6,9].map { |x| x+89-27/2*23 }
=> [-207, -204, -201]

What is :+ in [4, 5, 8, 90].inject(:+) in Ruby?

๐Ÿ”ฃ :+ is a Symbol representing the + method.

In Ruby, every operator (like +, *, etc.) is actually a method under the hood.

  • inject takes a symbol (:+)
  • Ruby calls .send(:+) on each pair of elements
  • It’s equivalent to:
    (((4 + 5) + 8) + 90) => 107

๐Ÿ”ฃ &: Explanation:

  • :even? is a symbol representing the method even?
  • &: is Ruby’s “to_proc” shorthand, converting a symbol into a block
  • So &:even? becomes { |n| n.even? } under the hood

Enjoy Enumerable ๐Ÿš€

๐Ÿ” Ruby Programming Language Loops: A Case Study

Loops are an essential part of any programming languageโ€”they allow developers to execute code repeatedly without redundant repetition. Ruby, being an elegant and expressive language, offers several ways to implement looping constructs. This blog post explores Ruby loops through a real-world case study and demonstrates best practices for choosing the right loop for the right situation.


๐Ÿง  Why Loops Matter in Ruby

In Ruby, loops help automate repetitive tasks and iterate over collections (arrays, hashes, ranges, etc.). Understanding the different loop types and their use cases will help you write more idiomatic, efficient, and readable Ruby code.

๐Ÿงช The Case Study: Daily Sales Report Generator

Imagine you’re building a Ruby application for a retail store (like our Design studio) that generates a daily sales report. Your data source is an array of hashes, where each hash represents a sale with attributes like product name, category, quantity, and revenue.

sales = [
  { product: "T-shirt", category: "Apparel", quantity: 3, revenue: 900 },
  { product: "Laptop", category: "Electronics", quantity: 1, revenue: 50000 },
  { product: "Shoes", category: "Footwear", quantity: 2, revenue: 3000 },
  { product: "Headphones", category: "Electronics", quantity: 4, revenue: 12000 }
]

We’ll use this dataset to explore various loop types.

In Ruby:

  • Block-based loops like each, each_with_index, and loop do do create a new scope, so variables defined inside them do not leak outside.
  • Keyword-based loops like while, until, and for do not create a new scope, so variables declared inside are accessible outside.

๐Ÿ”„ each Loop โ€“ The Idiomatic Ruby Way

sales.each do |sale|
  puts "Sold #{sale[:quantity]} #{sale[:product]}(s) for โ‚น#{sale[:revenue]}"
end
Sold 3 T-shirt(s) for โ‚น900
Sold 1 Laptop(s) for โ‚น50000
Sold 2 Shoes(s) for โ‚น3000
Sold 4 Headphones(s) for โ‚น12000
=>
[{product: "T-shirt", category: "Apparel", quantity: 3, revenue: 900},
 {product: "Laptop", category: "Electronics", quantity: 1, revenue: 50000},
 {product: "Shoes", category: "Footwear", quantity: 2, revenue: 3000},
 {product: "Headphones", category: "Electronics", quantity: 4, revenue: 12000}]

Why use each:

  • Readable and expressive
  • Doesn’t return an index (cleaner when you donโ€™t need one)
  • Scope-safe: variables declared inside the block do not leak outside
  • Preferred for iterating over collections in Ruby

๐Ÿ”ข each_with_index โ€“ When You Need the Index

sales.each_with_index do |sale, index|
  puts "#{index + 1}. #{sale[:product]}: โ‚น#{sale[:revenue]}"
end
1. T-shirt: โ‚น900
2. Laptop: โ‚น50000
3. Shoes: โ‚น3000
4. Headphones: โ‚น12000
=>
[{product: "T-shirt", category: "Apparel", quantity: 3, revenue: 900},
 {product: "Laptop", category: "Electronics", quantity: 1, revenue: 50000},
 {product: "Shoes", category: "Footwear", quantity: 2, revenue: 3000},
 {product: "Headphones", category: "Electronics", quantity: 4, revenue: 12000}]

Use case: Numbered lists or positional logic.

  • Scope-safe like each

๐Ÿงฎ for Loop โ€“ Familiar but Rare in Idiomatic Ruby

for sale in sales
  puts "Product: #{sale[:product]}, Revenue: โ‚น#{sale[:revenue]}"
end
Product: T-shirt, Revenue: โ‚น900
Product: Laptop, Revenue: โ‚น50000
Product: Shoes, Revenue: โ‚น3000
Product: Headphones, Revenue: โ‚น12000
=>
[{product: "T-shirt", category: "Apparel", quantity: 3, revenue: 900},
 {product: "Laptop", category: "Electronics", quantity: 1, revenue: 50000},
 {product: "Shoes", category: "Footwear", quantity: 2, revenue: 3000},
 {product: "Headphones", category: "Electronics", quantity: 4, revenue: 12000}]

Caution:

  • โŒ Not scope-safe: Variables declared inside remain accessible outside the loop.
  • Though valid, for loops are generally avoided in idiomatic Ruby

๐Ÿชœ while Loop โ€“ Controlled Repetition

index = 0
while index < sales.size
  puts sales[index][:product]
  index += 1
end
T-shirt
Laptop
Shoes
Headphones
=> nil

Use case: When you’re manually controlling iteration.

  • โŒ Not scope-safe: variables declared within the loop (like index) remain accessible outside the loop.

๐Ÿ” until Loop โ€“ The Inverse of while

index = 0
until index == sales.size
  puts sales[index][:category]
  index += 1
end
Apparel
Electronics
Footwear
Electronics
=> nil

Use case: When you want to loop until a condition is true.

Similar to while, variables persist outside the loop (not block scoped).

๐Ÿงจ loop do with break โ€“ Infinite Loop with Manual Exit

index = 0
loop do
  break if index >= sales.size
  puts sales[index][:quantity]
  index += 1
end
3
1
2
4
=> nil

Use case: Custom control with explicit break condition.

Scope-safe: like other block-based loops, variables inside loop do blocks do not leak unless declared outside.

๐Ÿงน Bonus: Filtering with Loops vs Enumerable

#--- Loop-based filter
electronics_sales = []
sales.each do |sale|
  electronics_sales << sale if sale[:category] == "Electronics"
end
=>
[{product: "T-shirt", category: "Apparel", quantity: 3, revenue: 900},
 {product: "Laptop", category: "Electronics", quantity: 1, revenue: 50000},
 {product: "Shoes", category: "Footwear", quantity: 2, revenue: 3000},
 {product: "Headphones", category: "Electronics", quantity: 4, revenue: 12000}]

#--- Idiomatic Ruby filter
> electronics_sales = sales.select { |sale| sale[:category] == "Electronics" }
=>
[{product: "Laptop", category: "Electronics", quantity: 1, revenue: 50000},
...
> electronics_sales
=>
[{product: "Laptop", category: "Electronics", quantity: 1, revenue: 50000},
 {product: "Headphones", category: "Electronics", quantity: 4, revenue: 12000}]

Takeaway: Prefer Enumerable methods like select, map, reduce when working with collections. Loops are useful, but Ruby’s functional approach often leads to cleaner code.


โœ… Summary Table: Ruby Loops at a Glance

Loop TypeScope-safeIndex AccessBest Use Case
eachโœ…โŒSimple iteration
each_with_indexโœ…โœ…Need both element and index
forโŒโœ…Familiar syntax, but avoid in idiomatic Ruby
whileโœ…โœ… (manual)When condition is external
untilโœ…โœ… (manual)Inverted while, clearer for some logic
loop do + breakโœ…โœ… (manual)Controlled infinite loop

๐Ÿ Conclusion

Ruby offers a wide range of looping constructs. This case study demonstrates how to choose the right one based on context. For most collection traversals, each and other Enumerable methods are preferred. Use while, until, or loop when finer control over the iteration process is required.

Loop mindfully, and let Ruby’s elegance guide your code.

Enjoy Ruby ๐Ÿš€

Hotwire ใ€ฐ in Rails 8 World โ€“ And How My New Rails App Puts this into Work ๐Ÿš€

When you create a brand-new Rails 8 project today you automatically get a super-powerful front-end toolbox called Hotwire.

Because it is baked into the framework, it can feel a little magical (“everything just works!”). This post demystifies Hotwire, shows how its two core librariesโ€”Turbo and Stimulusโ€”fit together, and then walks through the places where the design_studio codebase is already using them.


1. What is Hotwire?

Hotwire (HTML Over The Wire) is a set of conventions + JavaScript libraries that lets you build modern, reactive UIs without writing (much) custom JS or a separate SPA. Instead of pushing JSON to the browser and letting a JS framework patch the DOM, the server sends HTML fragments over WebSockets, SSE, or normal HTTP responses and the browser swaps them in efficiently.

Hotwire is made of three parts:

  1. Turbo โ€“ the engine that intercepts normal links/forms, keeps your page state alive, and swaps HTML frames or streams into the DOM at 60fps.
  2. Stimulus โ€“ a “sprinkle-on” JavaScript framework for the little interactive bits that still need JS (dropdowns, clipboard buttons, etc.).
  3. (Optional) Strada โ€“ native-bridge helpers for mobile apps; not relevant to our web-only project.

Because Rails 8 ships with both turbo-rails and stimulus-rails gems, simply creating a project wires everything up.


2. How Turbo & Stimulus complement each other

  • Turbo keeps pages fresh โ€“ It handles navigation (Turbo Drive), partial page updates via <turbo-frame> (Turbo Frames), and real-time broadcasts with <turbo-stream> (Turbo Streams).
  • Stimulus adds behaviour โ€“ Tiny ES-module controllers attach to DOM elements and react to events/data attributes. Importantly, Stimulus plays nicely with Turboโ€™s DOM-swapping because controllers automatically disconnect/re-connect when elements are replaced.

Think of Turbo as the transport layer for HTML and Stimulus as the behaviour layer for the small pieces that still need JavaScript logic.

# server logs - still identify as HTML request, It handles navigation through (Turbo Drive)

Started GET "/products/15" for ::1 at 2025-06-24 00:47:03 +0530
Processing by ProductsController#show as HTML
  Parameters: {"id" => "15"}
.......

Started GET "/products?category=women" for ::1 at 2025-06-24 00:50:38 +0530
Processing by ProductsController#index as HTML
  Parameters: {"category" => "women"}
.......

Javascript and css files that loads in our html head:

    <link rel="stylesheet" href="/assets/actiontext-e646701d.css" data-turbo-track="reload" />
<link rel="stylesheet" href="/assets/application-8b441ae0.css" data-turbo-track="reload" />
<link rel="stylesheet" href="/assets/tailwind-8bbb1409.css" data-turbo-track="reload" />
    <script type="importmap" data-turbo-track="reload">{
  "imports": {
    "application": "/assets/application-3da76259.js",
    "@hotwired/turbo-rails": "/assets/turbo.min-3a2e143f.js",
    "@hotwired/stimulus": "/assets/stimulus.min-4b1e420e.js",
    "@hotwired/stimulus-loading": "/assets/stimulus-loading-1fc53fe7.js",
    "trix": "/assets/trix-4b540cb5.js",
    "@rails/actiontext": "/assets/actiontext.esm-f1c04d34.js",
    "controllers/application": "/assets/controllers/application-3affb389.js",
    "controllers/hello_controller": "/assets/controllers/hello_controller-708796bd.js",
    "controllers": "/assets/controllers/index-ee64e1f1.js"
  }
}</script>
<link rel="modulepreload" href="/assets/application-3da76259.js">
<link rel="modulepreload" href="/assets/turbo.min-3a2e143f.js">
<link rel="modulepreload" href="/assets/stimulus.min-4b1e420e.js">
<link rel="modulepreload" href="/assets/stimulus-loading-1fc53fe7.js">
<link rel="modulepreload" href="/assets/trix-4b540cb5.js">
<link rel="modulepreload" href="/assets/actiontext.esm-f1c04d34.js">
<link rel="modulepreload" href="/assets/controllers/application-3affb389.js">
<link rel="modulepreload" href="/assets/controllers/hello_controller-708796bd.js">
<link rel="modulepreload" href="/assets/controllers/index-ee64e1f1.js">
<script type="module">import "application"</script>
    <link rel="stylesheet" href="https://cdnjs.cloudflare.com/ajax/libs/font-awesome/6.0.0-beta3/css/all.min.css">

3. Where Hotwire lives in design_studio

Because Rails 8 scaffolded most of this for us, the integration is scattered across a few key spots:

3.1 Gems & ES-modules are pinned

# config/importmap.rb

pin "@hotwired/turbo-rails",  to: "turbo.min.js"
pin "@hotwired/stimulus",     to: "stimulus.min.js"
pin "@hotwired/stimulus-loading", to: "stimulus-loading.js"
pin_all_from "app/javascript/controllers", under: "controllers"

The Gemfile pulls the Ruby wrappers:

gem "turbo-rails"
gem "stimulus-rails"

3.2 Global JavaScript entry point

# application.js 

import "@hotwired/turbo-rails"
import "controllers"   // <-- auto-registers everything in app/javascript/controllers

As soon as that file is imported (it’s linked in application.html.erb via
javascript_include_tag "application", "data-turbo-track": "reload"
), Turbo intercepts every link & form on the site.

3.3 Stimulus controllers

The framework-generated controller registry lives at app/javascript/controllers/index.js; the only custom controller so far is the hello-world example:

connect() {
  this.element.textContent = "Hello World!"
}

You can drop new controllers into app/javascript/controllers/anything_controller.js and they will be auto-loaded thanks to the pin_all_from line above.

pin_all_from "app/javascript/controllers", under: "controllers"

3.4 Turbo Streams in practice โ€“ removing a product image

The most concrete Hotwire interaction in design_studio today is the “Delete image” action in the products feature:

  1. Controller action responds to turbo_stream:
respond_to do |format|
  ...
  format.turbo_stream   # <-- returns delete_image.turbo_stream.erb
end
  1. Stream template sent back:
# app/views/products/delete_image.turbo_stream.erb

<turbo-stream action="remove" target="product-image-<%= @image_id %>"></turbo-stream>
  1. Turbo receives the <turbo-stream> tag, finds the element with that id, and removes it from the DOMโ€”no page reload, no hand-written JS.
# app/views/products/show.html.erb
....
<%= link_to @product, 
    data: { turbo_method: :delete, turbo_confirm: "Are you sure you want to delete this product?" }, 
    class: "px-4 py-2 bg-red-500 text-white rounded-lg hover:bg-red-600 transition-colors duration-200" do %>
    <i class="fas fa-trash mr-2"></i>Delete Product
<% end %>
....

3.5 “Free” Turbo benefits you might not notice

Because Turbo Drive is on globally:

  • Standard links look instantaneous (HTML diffing & cache).
  • Form submissions automatically request .turbo_stream when you ask for format.turbo_stream in a controller.
  • Redirects keep scroll position/head tags in sync.

All of this happens without any code in the repoโ€”Rails 8 + Turbo does the heavy lifting.


4. Extending Hotwire in the future

  1. More Turbo Frames โ€“ Wrap parts of pages in <turbo-frame id="cart"> to make only the cart refresh on โ€œAdd to cartโ€.
  2. Broadcasting โ€“ Hook Product model changes to turbo_stream_from channels so that all users see live stock updates.
  3. Stimulus components โ€“ Replace jQuery snippets with small controllers (dropdowns, modals, copy-to-clipboard, etc.).

Because everything is wired already (Importmap, controller autoloading, Cable), adding these features is mostly a matter of creating the HTML/ERB templates and a bit of Ruby.


Questions

1. Is Rails 8 still working with the real DOM?

  • Yes, the browser is always working with the real DOMโ€”nothing is virtualized (unlike Reactโ€™s virtual DOM).
  • Turbo intercepts navigation events (links, form submits). Instead of letting the browser perform a โ€œhardโ€ navigation, it fetches the HTML with fetch() in the background, parses the response into a hidden document fragment, then swaps specific pieces (usually the whole <body> or a <turbo-frame> target) into the live DOM.
  • Because Turbo only swaps the changed chunks, it keeps the rest of the page alive (JS state, scroll position, playing videos, etc.) and fires lifecycle events so Stimulus controllers disconnect/re-connect cleanly.

“Stimulus itself is a tiny wrapper around MutationObserver. It attaches controller instances to DOM elements and tears them down automatically when Turbo replaces those elementsโ€”so both libraries cooperate rather than fighting the DOM.”


2. How does the HTML from Turbo Drive get into the DOM without a full reload?

Step-by-step for a normal link click:

  1. turbo-railsย JSย (loadedย viaย importย “@hotwired/turbo-rails”) cancelsย the browser’sย defaultย navigation.
  2. Turbo sends anย AJAXย request (actuallyย fetch()) forย theย new URL, requesting full HTML.
  3. The response text is parsed into an off-screen DOMParser document.
  4. Turboย comparesย theย <head>ย tags, updatesย <title>ย andย anyย changed assets, thenย replaces theย <body>ย of the currentย page withย theย new oneย (or, forย <turbo-frame>, just thatย frame).
  5. Itย pushesย aย history.pushStateย entry soย Back/Forwardย work, andย firesย events likeย turbo:load.

Because no real navigation happened, the browser doesnโ€™t clear JS state, WebSocket connections, or CSS; it just swaps some DOM nodesโ€”visually it feels instantaneous.


3. What does pin mean in config/importmap.rb?

Rails 8 ships with Importmapโ€”a way to use normal ES-module import statements without a bundler.pin is simply a mapping declaration:

pin "@hotwired/turbo-rails", to: "turbo.min.js"
pin "@hotwired/stimulus",    to: "stimulus.min.js"

Meaning:

  • When the browser sees import "@hotwired/turbo-rails", fetch โ€ฆ/assets/turbo.min.js
  • When it sees import “controllers”, look at 
    pin_all_from "app/javascript/controllers" 
    which expands into individual mappings for every controller file.

Thinkย ofย pinย as theย importmap equivalentย ofย aย requireย statement in a bundler configโ€”justย declarative andย handled at runtime by theย browser. That’sย all there is to it: real DOM, no pageย reloads, and a lightweightย wayย to load JS modules without Webpack.

Take-aways

  • Hotwire is not one big library; it is a philosophy (+ Turbo + Stimulus) that keeps most of your UI in Ruby & ERB but still feels snappy and modern.
  • Rails 8 scaffolds everything, so you may not even realize you’re using itโ€”but you are!
  • design_studio already benefits from Hotwire’s defaults (fast navigation) and uses Turbo Streams for dynamic image deletion. The plumbing is in place to expand this pattern across the app with minimal effort.

Happy hot-wiring! ๐Ÿš€

๐Ÿ”Œ The Complete Guide to Sockets: How Your Code Really Talks to the World

Ever wondered what happens when Sidekiq calls redis.brpop() and your thread magically “blocks” until a job appears? The answer lies in one of computing’s most fundamental concepts: sockets. Let’s dive deep into this invisible infrastructure that powers everything from your Redis connections to Netflix streaming.

๐Ÿš€ What is a Socket?

A socket is essentially a communication endpoint – think of it like a “phone number” that programs can use to talk to each other.

Application A  โ†โ†’  Socket  โ†โ†’  Network  โ†โ†’  Socket  โ†โ†’  Application B

Simple analogy: If applications are people, sockets are like phone numbers that let them call each other!

๐ŸŽฏ The Purpose of Sockets

๐Ÿ“ก Inter-Process Communication (IPC)

# Two Ruby programs talking via sockets
# Program 1 (Server)
require 'socket'
server = TCPServer.new(3000)
client_socket = server.accept
client_socket.puts "Hello from server!"

# Program 2 (Client)  
client = TCPSocket.new('localhost', 3000)
message = client.gets
puts message  # "Hello from server!"

๐ŸŒ Network Communication

# Talk to Redis (what Sidekiq does)
require 'socket'
redis_socket = TCPSocket.new('localhost', 6379)
redis_socket.write("PING\r\n")
response = redis_socket.read  # "PONG"

๐Ÿ  Are Sockets Only for Networking?

NO! Sockets work for both local and network communication:

๐ŸŒ Network Sockets (TCP/UDP)

# Talk across the internet
require 'socket'
socket = TCPSocket.new('google.com', 80)
socket.write("GET / HTTP/1.1\r\nHost: google.com\r\n\r\n")

๐Ÿ”— Local Sockets (Unix Domain Sockets)

# Talk between programs on same machine
# Faster than network sockets - no network stack overhead
socket = UNIXSocket.new('/tmp/my_app.sock')

Real example: Redis can use Unix sockets for local connections:

# Network socket (goes through TCP/IP stack)
redis = Redis.new(host: 'localhost', port: 6379)

# Unix socket (direct OS communication)
redis = Redis.new(path: '/tmp/redis.sock')  # Faster!

๐Ÿ”ข What Are Ports?

Ports are like apartment numbers – they help identify which specific application should receive the data.

IP Address: 192.168.1.100 (Building address)
Port: 6379                (Apartment number)

๐ŸŽฏ Why This Matters

Same computer running:
- Web server on port 80
- Redis on port 6379  
- SSH on port 22
- Your app on port 3000

When data arrives at 192.168.1.100:6379
โ†’ OS knows to send it to Redis

๐Ÿข Why Do We Need So Many Ports?

Think of a computer like a massive apartment building:

๐Ÿ”ง Multiple Services

# Different services need different "apartments"
$ netstat -ln
tcp 0.0.0.0:22    SSH server
tcp 0.0.0.0:80    Web server  
tcp 0.0.0.0:443   HTTPS server
tcp 0.0.0.0:3306  MySQL
tcp 0.0.0.0:5432  PostgreSQL
tcp 0.0.0.0:6379  Redis
tcp 0.0.0.0:27017 MongoDB

๐Ÿ”„ Multiple Connections to Same Service

Redis server (port 6379) can handle:
- Connection 1: Sidekiq worker
- Connection 2: Rails app  
- Connection 3: Redis CLI
- Connection 4: Monitoring tool

Each gets a unique "channel" but all use port 6379

๐Ÿ“Š Port Ranges

0-1023:    Reserved (HTTP=80, SSH=22, etc.)
1024-49151: Registered applications  
49152-65535: Dynamic/Private (temporary connections)

โš™๏ธ How Sockets Work Internally

๐Ÿ› ๏ธ Socket Creation

# What happens when you do this:
socket = TCPSocket.new('localhost', 6379)

Behind the scenes:

// OS system calls
socket_fd = socket(AF_INET, SOCK_STREAM, 0)  // Create socket
connect(socket_fd, server_address, address_len)  // Connect

๐Ÿ“‹ The OS Socket Table

Process ID: 1234 (Your Ruby app)
File Descriptors:
  0: stdin
  1: stdout  
  2: stderr
  3: socket to Redis (localhost:6379)
  4: socket to PostgreSQL (localhost:5432)
  5: listening socket (port 3000)

๐Ÿ”ฎ Kernel-Level Magic

Application: socket.write("PING")
     โ†“
Ruby: calls OS write() system call
     โ†“  
Kernel: adds to socket send buffer
     โ†“
Network Stack: TCP โ†’ IP โ†’ Ethernet
     โ†“
Network Card: sends packets over wire

๐ŸŒˆ Types of Sockets

๐Ÿ“ฆ TCP Sockets (Reliable)

# Like registered mail - guaranteed delivery
server = TCPServer.new(3000)
client = TCPSocket.new('localhost', 3000)

# Data arrives in order, no loss
client.write("Message 1")
client.write("Message 2") 
# Server receives exactly: "Message 1", "Message 2"

โšก UDP Sockets (Fast but unreliable)

# Like shouting across a crowded room
require 'socket'

# Sender
udp = UDPSocket.new
udp.send("Hello!", 0, 'localhost', 3000)

# Receiver  
udp = UDPSocket.new
udp.bind('localhost', 3000)
data = udp.recv(1024)  # Might not arrive!

๐Ÿ  Unix Domain Sockets (Local)

# Super fast local communication
File.delete('/tmp/test.sock') if File.exist?('/tmp/test.sock')

# Server
server = UNIXServer.new('/tmp/test.sock')
# Client
client = UNIXSocket.new('/tmp/test.sock')

๐Ÿ”„ Socket Lifecycle

๐Ÿค TCP Connection Dance

# 1. Server: "I'm listening on port 3000"
server = TCPServer.new(3000)

# 2. Client: "I want to connect to port 3000"  
client = TCPSocket.new('localhost', 3000)

# 3. Server: "I accept your connection"
connection = server.accept

# 4. Both can now send/receive data
connection.puts "Hello!"
client.puts "Hi back!"

# 5. Clean shutdown
client.close
connection.close
server.close

๐Ÿ”„ Under the Hood (TCP Handshake)

Client                    Server
  |                         |
  |---- SYN packet -------->| (I want to connect)
  |<-- SYN-ACK packet ------| (OK, let's connect)  
  |---- ACK packet -------->| (Connection established!)
  |                         |
  |<---- Data exchange ---->|
  |                         |

๐Ÿ—๏ธ OS-Level Socket Implementation

๐Ÿ“ File Descriptor Magic

socket = TCPSocket.new('localhost', 6379)
puts socket.fileno  # e.g., 7

# This socket is just file descriptor #7!
# You can even use it with raw system calls

๐Ÿ—‚๏ธ Kernel Socket Buffers

Application Buffer  โ†โ†’  Kernel Send Buffer  โ†โ†’  Network
                   โ†โ†’  Kernel Recv Buffer  โ†โ†’

What happens on socket.write:

socket.write("BRPOP queue 0")
# 1. Ruby copies data to kernel send buffer
# 2. write() returns immediately  
# 3. Kernel sends data in background
# 4. TCP handles retransmission, etc.

What happens on socket.read:

data = socket.read  
# 1. Check kernel receive buffer
# 2. If empty, BLOCK thread until data arrives
# 3. Copy data from kernel to Ruby
# 4. Return to your program

๐ŸŽฏ Real-World Example: Sidekiq + Redis

# When Sidekiq does this:
redis.brpop("queue:default", timeout: 2)

# Here's the socket journey:
# 1. Ruby opens TCP socket to localhost:6379
socket = TCPSocket.new('localhost', 6379)

# 2. Format Redis command
command = "*4\r\n$5\r\nBRPOP\r\n$13\r\nqueue:default\r\n$1\r\n2\r\n"

# 3. Write to socket (goes to kernel buffer)
socket.write(command)

# 4. Thread blocks reading response
response = socket.read  # BLOCKS HERE until Redis responds

# 5. Redis eventually sends back data
# 6. Kernel receives packets, assembles them
# 7. socket.read returns with the job data

๐Ÿš€ Socket Performance Tips

โ™ป๏ธ Socket Reuse
# Bad: New socket for each request
100.times do
  socket = TCPSocket.new('localhost', 6379)
  socket.write("PING\r\n")
  socket.read
  socket.close  # Expensive!
end

# Good: Reuse socket
socket = TCPSocket.new('localhost', 6379)
100.times do
  socket.write("PING\r\n")  
  socket.read
end
socket.close
๐ŸŠ Connection Pooling
# What Redis gem/Sidekiq does internally
class ConnectionPool
  def initialize(size: 5)
    @pool = size.times.map { TCPSocket.new('localhost', 6379) }
  end

  def with_connection(&block)
    socket = @pool.pop
    yield(socket)
  ensure
    @pool.push(socket)
  end
end

๐ŸŽช Fun Socket Facts

๐Ÿ“„ Everything is a File
# On Linux/Mac, sockets appear as files!
$ lsof -p #{Process.pid}
ruby 1234 user 3u sock 0,9 0t0 TCP localhost:3000->localhost:6379
๐Ÿšง Socket Limits
# Your OS has limits
$ ulimit -n
1024  # Max file descriptors (including sockets)

# Web servers need thousands of sockets
# That's why they increase this limit!
๐Ÿ“Š Socket States
$ netstat -an | grep 6379
tcp4 0 0 127.0.0.1.6379 127.0.0.1.50123 ESTABLISHED
tcp4 0 0 127.0.0.1.6379 127.0.0.1.50124 TIME_WAIT
tcp4 0 0 *.6379         *.*            LISTEN

๐ŸŽฏ Key Takeaways

  1. ๐Ÿ”Œ Sockets = Communication endpoints between programs
  2. ๐Ÿ  Ports = Apartment numbers for routing data to the right app
  3. ๐ŸŒ Not just networking – also local inter-process communication
  4. โš™๏ธ OS manages everything – kernel buffers, network stack, blocking
  5. ๐Ÿ“ File descriptors – sockets are just special files to the OS
  6. ๐ŸŠ Connection pooling is crucial for performance
  7. ๐Ÿ”’ BRPOP blocking happens at the socket read level

๐ŸŒŸ Conclusion

The beauty of sockets is their elegant simplicity: when Sidekiq calls redis.brpop(), it’s using the same socket primitives that have powered network communication for decades!

From your Redis connection to Netflix streaming to Zoom calls, sockets are the fundamental building blocks that make modern distributed systems possible. Understanding how they work gives you insight into everything from why connection pooling matters to how blocking I/O actually works at the system level.

The next time you see a thread “blocking” on network I/O, you’ll know exactly what’s happening: a simple socket read operation, leveraging decades of OS optimization to efficiently wait for data without wasting a single CPU cycle. Pretty amazing for something so foundational! ๐Ÿš€


โšก Inside Redis: How Your Favorite In-Memory Database Actually Works

You’ve seen how Sidekiq connects to Redis via sockets, but what happens when Redis receives that BRPOP command? Let’s pull back the curtain on one of the most elegant pieces of software ever written and discover why Redis is so blazingly fast.

๐ŸŽฏ What Makes Redis Special?

Redis isn’t just another database – it’s a data structure server. While most databases make you think in tables and rows, Redis lets you work directly with lists, sets, hashes, and more. It’s like having super-powered variables that persist across program restarts!

# Traditional database thinking
User.where(active: true).pluck(:id)

# Redis thinking  
redis.smembers("active_users")  # A set of active user IDs

๐Ÿ—๏ธ Redis Architecture Overview

Redis has a deceptively simple architecture that’s incredibly powerful:

โ”Œโ”€โ”€โ”€โ”€โ”€โ”€โ”€โ”€โ”€โ”€โ”€โ”€โ”€โ”€โ”€โ”€โ”€โ”€โ”€โ”€โ”€โ”€โ”€โ”€โ”€โ”€โ”€โ”€โ”€โ”€โ”€โ”€โ”€โ”
โ”‚          Client Connections     โ”‚ โ† Your Ruby app connects here
โ”œโ”€โ”€โ”€โ”€โ”€โ”€โ”€โ”€โ”€โ”€โ”€โ”€โ”€โ”€โ”€โ”€โ”€โ”€โ”€โ”€โ”€โ”€โ”€โ”€โ”€โ”€โ”€โ”€โ”€โ”€โ”€โ”€โ”€โ”ค
โ”‚         Command Processing      โ”‚ โ† Parses your BRPOP command
โ”œโ”€โ”€โ”€โ”€โ”€โ”€โ”€โ”€โ”€โ”€โ”€โ”€โ”€โ”€โ”€โ”€โ”€โ”€โ”€โ”€โ”€โ”€โ”€โ”€โ”€โ”€โ”€โ”€โ”€โ”€โ”€โ”€โ”€โ”ค
โ”‚         Event Loop (epoll)      โ”‚ โ† Handles thousands of connections
โ”œโ”€โ”€โ”€โ”€โ”€โ”€โ”€โ”€โ”€โ”€โ”€โ”€โ”€โ”€โ”€โ”€โ”€โ”€โ”€โ”€โ”€โ”€โ”€โ”€โ”€โ”€โ”€โ”€โ”€โ”€โ”€โ”€โ”€โ”ค
โ”‚        Data Structure Engine    โ”‚ โ† The magic happens here
โ”œโ”€โ”€โ”€โ”€โ”€โ”€โ”€โ”€โ”€โ”€โ”€โ”€โ”€โ”€โ”€โ”€โ”€โ”€โ”€โ”€โ”€โ”€โ”€โ”€โ”€โ”€โ”€โ”€โ”€โ”€โ”€โ”€โ”€โ”ค
โ”‚         Memory Management       โ”‚ โ† Keeps everything in RAM
โ”œโ”€โ”€โ”€โ”€โ”€โ”€โ”€โ”€โ”€โ”€โ”€โ”€โ”€โ”€โ”€โ”€โ”€โ”€โ”€โ”€โ”€โ”€โ”€โ”€โ”€โ”€โ”€โ”€โ”€โ”€โ”€โ”€โ”€โ”ค
โ”‚        Persistence Layer        โ”‚ โ† Optional disk storage
โ””โ”€โ”€โ”€โ”€โ”€โ”€โ”€โ”€โ”€โ”€โ”€โ”€โ”€โ”€โ”€โ”€โ”€โ”€โ”€โ”€โ”€โ”€โ”€โ”€โ”€โ”€โ”€โ”€โ”€โ”€โ”€โ”€โ”€โ”˜

๐Ÿ”ฅ The Single-Threaded Magic

Here’s Redis’s secret sauce: it’s mostly single-threaded!

// Simplified Redis main loop
while (server_running) {
    // 1. Check for new network events
    events = epoll_wait(eventfd, events, max_events, timeout);

    // 2. Process each event
    for (int i = 0; i < events; i++) {
        if (events[i].type == READ_EVENT) {
            process_client_command(events[i].client);
        }
    }

    // 3. Handle time-based events (expiry, etc.)
    process_time_events();
}

Why single-threaded is brilliant:

  • โœ… No locks or synchronization needed
  • โœ… Incredibly fast context switching
  • โœ… Predictable performance
  • โœ… Simple to reason about

๐Ÿง  Data Structure Deep Dive

๐Ÿ“ Redis Lists (What Sidekiq Uses)

When you do redis.brpop("queue:default"), you’re working with a Redis list:

// Redis list structure (simplified)
typedef struct list {
    listNode *head;      // First item
    listNode *tail;      // Last item  
    long length;         // How many items
    // ... other fields
} list;

typedef struct listNode {
    struct listNode *prev;
    struct listNode *next;
    void *value;         // Your job data
} listNode;

BRPOP implementation inside Redis:

// Simplified BRPOP command handler
void brpopCommand(client *c) {
    // Try to pop from each list
    for (int i = 1; i < c->argc - 1; i++) {
        robj *key = c->argv[i];
        robj *list = lookupKeyRead(c->db, key);

        if (list && listTypeLength(list) > 0) {
            // Found item! Pop and return immediately
            robj *value = listTypePop(list, LIST_TAIL);
            addReplyMultiBulkLen(c, 2);
            addReplyBulk(c, key);
            addReplyBulk(c, value);
            return;
        }
    }

    // No items found - BLOCK the client
    blockForKeys(c, c->argv + 1, c->argc - 2, timeout);
}

๐Ÿ”‘ Hash Tables (Super Fast Lookups)

Redis uses hash tables for O(1) key lookups:

// Redis hash table
typedef struct dict {
    dictEntry **table;       // Array of buckets
    unsigned long size;      // Size of table
    unsigned long sizemask;  // size - 1 (for fast modulo)
    unsigned long used;      // Number of entries
} dict;

// Finding a key
unsigned int hash = dictGenHashFunction(key);
unsigned int idx = hash & dict->sizemask;
dictEntry *entry = dict->table[idx];

This is why Redis is so fast – finding any key is O(1)!

โšก The Event Loop: Handling Thousands of Connections

Redis uses epoll (Linux) or kqueue (macOS) to efficiently handle many connections:

// Simplified event loop
int epollfd = epoll_create(1024);

// Add client socket to epoll
struct epoll_event ev;
ev.events = EPOLLIN;  // Watch for incoming data
ev.data.ptr = client;
epoll_ctl(epollfd, EPOLL_CTL_ADD, client->fd, &ev);

// Main loop
while (1) {
    int nfds = epoll_wait(epollfd, events, MAX_EVENTS, timeout);

    for (int i = 0; i < nfds; i++) {
        client *c = (client*)events[i].data.ptr;

        if (events[i].events & EPOLLIN) {
            // Data available to read
            read_client_command(c);
            process_command(c);
        }
    }
}

Why this is amazing:

Traditional approach: 1 thread per connection
- 1000 connections = 1000 threads
- Each thread uses ~8MB memory
- Context switching overhead

Redis approach: 1 thread for all connections  
- 1000 connections = 1 thread
- Minimal memory overhead
- No context switching between connections

๐Ÿ”’ How BRPOP Blocking Actually Works

Here’s the magic behind Sidekiq’s blocking behavior:

๐ŸŽญ Client Blocking State

// When no data available for BRPOP
typedef struct blockingState {
    dict *keys;           // Keys we're waiting for
    time_t timeout;       // When to give up
    int numreplicas;      // Replication stuff
    // ... other fields
} blockingState;

// Block a client
void blockClient(client *c, int btype) {
    c->flags |= CLIENT_BLOCKED;
    c->btype = btype;
    c->bstate = zmalloc(sizeof(blockingState));

    // Add to server's list of blocked clients
    listAddNodeTail(server.clients, c);
}

โฐ Timeout Handling

// Check for timed out clients
void handleClientsBlockedOnKeys(void) {
    time_t now = time(NULL);

    listIter li;
    listNode *ln;
    listRewind(server.clients, &li);

    while ((ln = listNext(&li)) != NULL) {
        client *c = listNodeValue(ln);

        if (c->flags & CLIENT_BLOCKED && 
            c->bstate.timeout != 0 && 
            c->bstate.timeout < now) {

            // Timeout! Send null response
            addReplyNullArray(c);
            unblockClient(c);
        }
    }
}

๐Ÿš€ Unblocking When Data Arrives

// When someone does LPUSH to a list
void signalKeyAsReady(redisDb *db, robj *key) {
    readyList *rl = zmalloc(sizeof(*rl));
    rl->key = key;
    rl->db = db;

    // Add to ready list
    listAddNodeTail(server.ready_keys, rl);
}

// Process ready keys and unblock clients
void handleClientsBlockedOnKeys(void) {
    while (listLength(server.ready_keys) != 0) {
        listNode *ln = listFirst(server.ready_keys);
        readyList *rl = listNodeValue(ln);

        // Find blocked clients waiting for this key
        list *clients = dictFetchValue(rl->db->blocking_keys, rl->key);

        if (clients) {
            // Unblock first client and serve the key
            client *receiver = listNodeValue(listFirst(clients));
            serveClientBlockedOnList(receiver, rl->key, rl->db);
        }

        listDelNode(server.ready_keys, ln);
    }
}

๐Ÿ’พ Memory Management: Keeping It All in RAM

๐Ÿงฎ Memory Layout

// Every Redis object has this header
typedef struct redisObject {
    unsigned type:4;        // STRING, LIST, SET, etc.
    unsigned encoding:4;    // How it's stored internally  
    unsigned lru:24;        // LRU eviction info
    int refcount;          // Reference counting
    void *ptr;             // Actual data
} robj;

๐Ÿ—‚๏ธ Smart Encodings

Redis automatically chooses the most efficient representation:

// Small lists use ziplist (compressed)
if (listLength(list) < server.list_max_ziplist_entries &&
    listTotalSize(list) < server.list_max_ziplist_value) {

    // Use compressed ziplist
    listConvert(list, OBJ_ENCODING_ZIPLIST);
} else {
    // Use normal linked list
    listConvert(list, OBJ_ENCODING_LINKEDLIST);  
}

Example memory optimization:

Small list: ["job1", "job2", "job3"]
Normal encoding: 3 pointers + 3 allocations = ~200 bytes
Ziplist encoding: 1 allocation = ~50 bytes (75% savings!)

๐Ÿงน Memory Reclamation

// Redis memory management
void freeMemoryIfNeeded(void) {
    while (server.memory_usage > server.maxmemory) {
        // Try to free memory by:
        // 1. Expiring keys
        // 2. Evicting LRU keys  
        // 3. Running garbage collection

        if (freeOneObjectFromFreelist() == C_OK) continue;
        if (expireRandomExpiredKey() == C_OK) continue;
        if (evictExpiredKeys() == C_OK) continue;

        // Last resort: evict LRU key
        evictLRUKey();
    }
}

๐Ÿ’ฟ Persistence: Making Memory Durable

๐Ÿ“ธ RDB Snapshots

// Save entire dataset to disk
int rdbSave(char *filename) {
    FILE *fp = fopen(filename, "w");

    // Iterate through all databases
    for (int dbid = 0; dbid < server.dbnum; dbid++) {
        redisDb *db = server.db + dbid;
        dict *d = db->dict;

        // Save each key-value pair
        dictIterator *di = dictGetSafeIterator(d);
        dictEntry *de;

        while ((de = dictNext(di)) != NULL) {
            sds key = dictGetKey(de);
            robj *val = dictGetVal(de);

            // Write key and value to file
            rdbSaveStringObject(fp, key);
            rdbSaveObject(fp, val);
        }
    }

    fclose(fp);
}

๐Ÿ“ AOF (Append Only File)

// Log every write command
void feedAppendOnlyFile(struct redisCommand *cmd, int dictid, 
                       robj **argv, int argc) {
    sds buf = sdsnew("");

    // Format as Redis protocol
    buf = sdscatprintf(buf, "*%d\r\n", argc);
    for (int i = 0; i < argc; i++) {
        buf = sdscatprintf(buf, "$%lu\r\n", 
                          (unsigned long)sdslen(argv[i]->ptr));
        buf = sdscatsds(buf, argv[i]->ptr);
        buf = sdscatlen(buf, "\r\n", 2);
    }

    // Write to AOF file
    write(server.aof_fd, buf, sdslen(buf));
    sdsfree(buf);
}

๐Ÿš€ Performance Secrets

๐ŸŽฏ Why Redis is So Fast

  1. ๐Ÿง  Everything in memory – No disk I/O during normal operations
  2. ๐Ÿ”„ Single-threaded – No locks or context switching
  3. โšก Optimized data structures – Custom implementations for each type
  4. ๐ŸŒ Efficient networking – epoll/kqueue for handling connections
  5. ๐Ÿ“ฆ Smart encoding – Automatic optimization based on data size

๐Ÿ“Š Real Performance Numbers

Operation           Operations/second
SET                 100,000+
GET                 100,000+  
LPUSH               100,000+
BRPOP (no block)    100,000+
BRPOP (blocking)    Limited by job arrival rate

๐Ÿ”ง Configuration for Speed

# redis.conf optimizations
tcp-nodelay yes              # Disable Nagle's algorithm
tcp-keepalive 60            # Keep connections alive
timeout 0                   # Never timeout idle clients

# Memory optimizations  
maxmemory-policy allkeys-lru  # Evict least recently used
save ""                       # Disable snapshotting for speed

๐ŸŒ Redis in Production

๐Ÿ—๏ธ Scaling Patterns

Master-Slave Replication:

Master (writes) โ”€โ”
                 โ”œโ”€โ†’ Slave 1 (reads)
                 โ”œโ”€โ†’ Slave 2 (reads)
                 โ””โ”€โ†’ Slave 3 (reads)

Redis Cluster (sharding):

Client โ”€โ†’ Hash Key โ”€โ†’ Determine Slot โ”€โ†’ Route to Correct Node

Slots 0-5460:    Node A  
Slots 5461-10922: Node B
Slots 10923-16383: Node C
๐Ÿ” Monitoring Redis
# Real-time stats
redis-cli info

# Monitor all commands
redis-cli monitor

# Check slow queries
redis-cli slowlog get 10

# Memory usage by key pattern
redis-cli --bigkeys

๐ŸŽฏ Redis vs Alternatives

๐Ÿ“Š When to Choose Redis
โœ… Need sub-millisecond latency
โœ… Working with simple data structures  
โœ… Caching frequently accessed data
โœ… Session storage
โœ… Real-time analytics
โœ… Message queues (like Sidekiq!)

โŒ Need complex queries (use PostgreSQL)
โŒ Need ACID transactions across keys
โŒ Dataset larger than available RAM
โŒ Need strong consistency guarantees
๐ŸฅŠ Redis vs Memcached
Redis:
+ Rich data types (lists, sets, hashes)
+ Persistence options
+ Pub/sub messaging
+ Transactions
- Higher memory usage

Memcached:  
+ Lower memory overhead
+ Simpler codebase
- Only key-value storage
- No persistence

๐Ÿ”ฎ Modern Redis Features

๐ŸŒŠ Redis Streams
# Modern alternative to lists for job queues
redis.xadd("jobs", {"type" => "email", "user_id" => 123})
redis.xreadgroup("workers", "worker-1", "jobs", ">")
๐Ÿ“ก Redis Modules
RedisJSON:     Native JSON support
RedisSearch:   Full-text search
RedisGraph:    Graph database
RedisAI:       Machine learning
TimeSeries:    Time-series data
โšก Redis 7 Features
- Multi-part AOF files
- Config rewriting improvements  
- Better memory introspection
- Enhanced security (ACLs)
- Sharded pub/sub

๐ŸŽฏ Key Takeaways

  1. ๐Ÿ”ฅ Single-threaded simplicity enables incredible performance
  2. ๐Ÿง  In-memory architecture eliminates I/O bottlenecks
  3. โšก Custom data structures are optimized for specific use cases
  4. ๐ŸŒ Event-driven networking handles thousands of connections efficiently
  5. ๐Ÿ”’ Blocking operations like BRPOP are elegant and efficient
  6. ๐Ÿ’พ Smart memory management keeps everything fast and compact
  7. ๐Ÿ“ˆ Horizontal scaling is possible with clustering and replication

๐ŸŒŸ Conclusion

Redis is a masterclass in software design – taking a simple concept (in-memory data structures) and optimizing every single aspect to perfection. When Sidekiq calls BRPOP, it’s leveraging decades of systems programming expertise distilled into one of the most elegant and performant pieces of software ever written.

The next time you see Redis handling thousands of operations per second while using minimal resources, you’ll understand the beautiful engineering that makes it possible. From hash tables to event loops to memory management, every component works in harmony to deliver the performance that makes modern applications possible.

Redis proves that sometimes the best solutions are the simplest ones, executed flawlessly! ๐Ÿš€