Ruby on Rails is known for its developer-friendly conventions, but it’s also built with security in mind. While the framework provides many features to guard against common threats, it’s up to developers to understand and apply them correctly.
In this post, we’ll walk through essential Rails security measures, tackle real-world threats, and share best practices – with examples for both API-only and full-stack Rails applications.
🚨 Common Web Threats Rails Helps Mitigate
- SQL Injection
- Cross-Site Scripting (XSS)
- Cross-Site Request Forgery (CSRF)
- Mass Assignment
- Session Hijacking
- Insecure Deserialization
- Insecure File Uploads
- Authentication & Authorization flaws
Let’s explore how Rails addresses these and what you can do to reinforce your app.
1. 🧱 SQL Injection
🛡️ Rails Protection:
Threat: Attackers inject malicious SQL through user inputs to read, modify, or delete database records
Rails uses Active Record with prepared statements to prevent SQL injection by default.
Arel: Build complex queries without string interpolation.
# Safe - uses bound parameters
User.where(email: params[:email])

# ❌ Dangerous - interpolates input directly
User.where("email = '#{params[:email]}'")

# Safe: Parameterized query
User.where("role = ? AND created_at > ?", params[:role], 7.days.ago)

# Using Arel for dynamic conditions
users = User.arel_table
def recent_admins
  User.where(users[:role].eq('admin').and(users[:created_at].gt(7.days.ago)))
end
Tip: Never use string interpolation to build SQL queries. Use .where, .find_by, or Arel methods.
Additional Measures
- Whitelist Columns: Pass only known column names to dynamic ordering or filtering.
- Gem:
activerecord-securityto raise errors on unsafe query methods.
2. 🧼 Cross-Site Scripting (XSS)
Threat: Injection of malicious JavaScript via user inputs, compromising other users’ sessions.
🛡️ Rails Protection
Content Security Policy (CSP): Limit sources of executable scripts.
# config/initializers/content_security_policy.rb
Rails.application.config.content_security_policy do |policy|
  policy.default_src :self
  policy.script_src  :self, :https
  policy.style_src   :self, :https
end
Auto-Escaping: <%= %> escapes HTML; <%== %> and raw do not.
Rails auto-escapes output in views.
<!-- Safe: Escaped -->
<%= user.bio %>

<!-- Unsafe: Unescaped (only use if trusted) -->
<%= raw user.bio %>
In API-only apps: Always sanitize any input returned in JSON if used in web contexts later.
Use gems:
sanitizegem to strip malicious HTMLloofahfor more control (Loofah for robust HTML5 handling and scrubbers.)
# In models or controllers
clean_bio = Loofah.fragment(params[:bio]).scrub!(:prune).to_s
3. 🔐 Cross-Site Request Forgery (CSRF)
🔍 How CSRF Works (Example)
1.Victim logs in to bank.example.com, receiving a session cookie.
2. Attacker crafts a hidden form on attacker.com:
<form action="https://bank.example.com/transfer" method="POST">
  <input type="hidden" name="amount" value="1000">
  <input type="hidden" name="to_account" value="attacker_account">
</form>
<script>document.forms[0].submit();</script>
3. Victim visits attacker.com while still logged into the bank.
4. Browser auto-sends the bank session cookie with the forged POST—and the transfer goes through, because the bank sees a “legitimate” logged-in request.
🛡️ Rails’ CSRF Protection
Rails ships with built-in defenses against CSRF by embedding an unguessable token in forms and verifying it on each non-GET request.
1.protect_from_forgery
In ApplicationController, Rails by default includes:
class ApplicationController < ActionController::Base
  protect_from_forgery with: :exception
end
This causes Rails to raise an exception if the token is missing or invalid.
Refer: https://api.rubyonrails.org/classes/ActionController/RequestForgeryProtection/ClassMethods.html
2. Authenticity Token in Forms
All Rails form-builders (form_with, form_for, form_tag) automatically insert:
<input type="hidden" name="authenticity_token" value="…secure random…">
3.Meta Tag for AJAX
Rails also inserts in <head>:
<%= csrf_meta_tags %>
Which renders:
<meta name="csrf-param" content="authenticity_token" />
<meta name="csrf-token" content="…secure random…" />
Rails UJS or Turbo JS will read these and include the token on XHR/fetch requests.
4.Server-Side Verification
On each POST/PUT/PATCH/DELETE, Rails:
- Extracts the token (from form param, header
X-CSRF-Token, or query string). - Compares it to the session-stored token.
- Rejects the request if they don’t match.
API-only apps:
CSRF is less relevant for stateless APIs using tokens, but if you use session-based authentication, enable CSRF protection:
# application_controller.rb
protect_from_forgery with: :exception
Thought for a couple of seconds
Cross-Site Request Forgery (CSRF) is an attack that tricks a user’s browser into submitting a request (e.g. form submission, link click) to your application without the user’s intention, leveraging the fact that the browser automatically includes credentials (cookies, basic auth headers, etc.) with each request.
🔧 Disabling or Customizing CSRF
♦️ Disable for APIs (stateless JSON endpoints):
class Api::BaseController < ActionController::API skip_before_action :verify_authenticity_token end
♦️ Use Null Session (allowing some API use without exception):
protect_from_forgery with: :null_session
✅ Key Takeaways
- CSRF exploits the browser’s automatic credential sending.
- Rails guards by inserting and validating an unguessable token.
- Always keep
protect_from_forgery with: :exceptionin your base controller for full-stack Rails apps.
4. 🛑 Mass Assignment Vulnerability
Threat: Attackers pass unexpected parameters to update sensitive attributes (e.g., admin=true).
Before Rails 4, mass assignment was a common issue. Now, strong parameters protect against it.
✅ Use Strong Parameters:
# ✅ Safe
def user_params
  params.require(:user).permit(:name, :email)
end

User.create(user_params)

# ❌ Unsafe
User.create(params[:user])
Pro tip: Don’t over-permit, especially with admin or role-based attributes.
Real-World Gotcha
- Before permitting arrays or nested attributes, validate length and content.
params.require(:order).permit(:total, items: [:product_id, :quantity])
5. 🔒 Secure Authentication
Built-In: has_secure_password
Provides authenticate method.
Uses BCrypt with configurable cost.
# user.rb
class User < ApplicationRecord
  has_secure_password
  # optional: validates length, complexity
  validates :password, length: { minimum: 12 }, format: { with: /(?=.*\d)(?=.*[A-Z])/ }
end
Make sure you have a password_digest column. This uses bcrypt under the hood.
Using Devise
JWT: integrate with devise-jwt for stateless APIs.
Modules: Database Authenticatable, Confirmable, Lockable, Timeoutable, Trackable.
Devise gives you:
- Password encryption
- Lockable accounts
- Timeoutable sessions
- Token-based authentication for APIs (with
devise-jwt)
# config/initializers/devise.rb
Devise.setup do |config|
  config.jwt do |jwt|
    jwt.secret = Rails.application.credentials.devise_jwt_secret
    jwt.dispatch_requests = [['POST', %r{^/login$}]]
    jwt.revocation_requests = [['DELETE', %r{^/logout$}]]
  end
end
6. 🧾 Authorization
Threat: Users access or modify resources beyond their permissions.
Never trust the frontend. Always check permissions server-side.
# ❌ Dangerous
redirect_to dashboard_path if current_user.admin?

# ✅ Use Pundit or CanCanCan
authorize @order
Gems:
Pundit Example
# app/policies/article_policy.rb
class ArticlePolicy
  attr_reader :user, :article

  def initialize(user, article)
    @user = user
    @article = article
  end

  def update?
    user.admin? || article.author_id == user.id
  end
end

# In controller
def update
  @article = Article.find(params[:id])
  authorize @article
  @article.update!(article_params)
end
Use Existing Auditing Libraries
To track user actions including access, use:
For Rails 8 check the post for Rails own Authentication: https://railsdrop.com/2025/05/07/rails-8-implement-users-authentication-orders-order-items/
7. 🗃️ Secure File Uploads
Threat: Attackers upload malicious files (e.g., scripts, executables).
Use Active Storage securely:
<%= image_tag url_for(user.avatar) %>
Active Storage Best Practices
Validation:
class Photo < ApplicationRecord
  has_one_attached :image
  validate :image_type, :image_size

  private
  def image_type
    return unless image.attached?
    acceptable = ['image/jpeg', 'image/png']
    errors.add(:image, 'must be JPEG or PNG') unless acceptable.include?(image.content_type)
  end

  def image_size
    return unless image.attached?
    errors.add(:image, 'is too big') if image.byte_size > 5.megabytes
  end
end
- Validate content type:
validates :avatar, content_type: ['image/png', 'image/jpg', 'image/jpeg']
- Restrict file size.
- Store uploads in private S3 buckets for sensitive data.
- Private URLs for sensitive documents (e.g., contracts).
- Virus Scanning: hook into
after_uploadto scan with ClamAV (or VirusTotal API).
8. 🧾 HTTP Headers & SSL
Rails helps with secure headers via secure_headers gem (https://github.com/github/secure_headers).
# config/initializers/secure_headers.rb
SecureHeaders::Configuration.default do |config|
  config.hsts = "max-age=31536000; includeSubDomains"
  config.x_frame_options = "DENY"
  config.x_content_type_options = "nosniff"
  config.x_xss_protection = "1; mode=block"
end
SSL/TLS Force HTTPS:
# config/environments/production.rb
config.force_ssl = true
Ensure HSTS is enabled:
# config/initializers/secure_headers.rb
Rails.application.config.middleware.insert_before 0, SecureHeaders::Middleware
SecureHeaders::Configuration.default do |config|
  config.hsts = "max-age=63072000; includeSubDomains; preload"
end
Key Headers
X-Frame-Options: DENYto prevent clickjacking.X-Content-Type-Options: nosniff.Referrer-Policy: strict-origin-when-cross-origin.
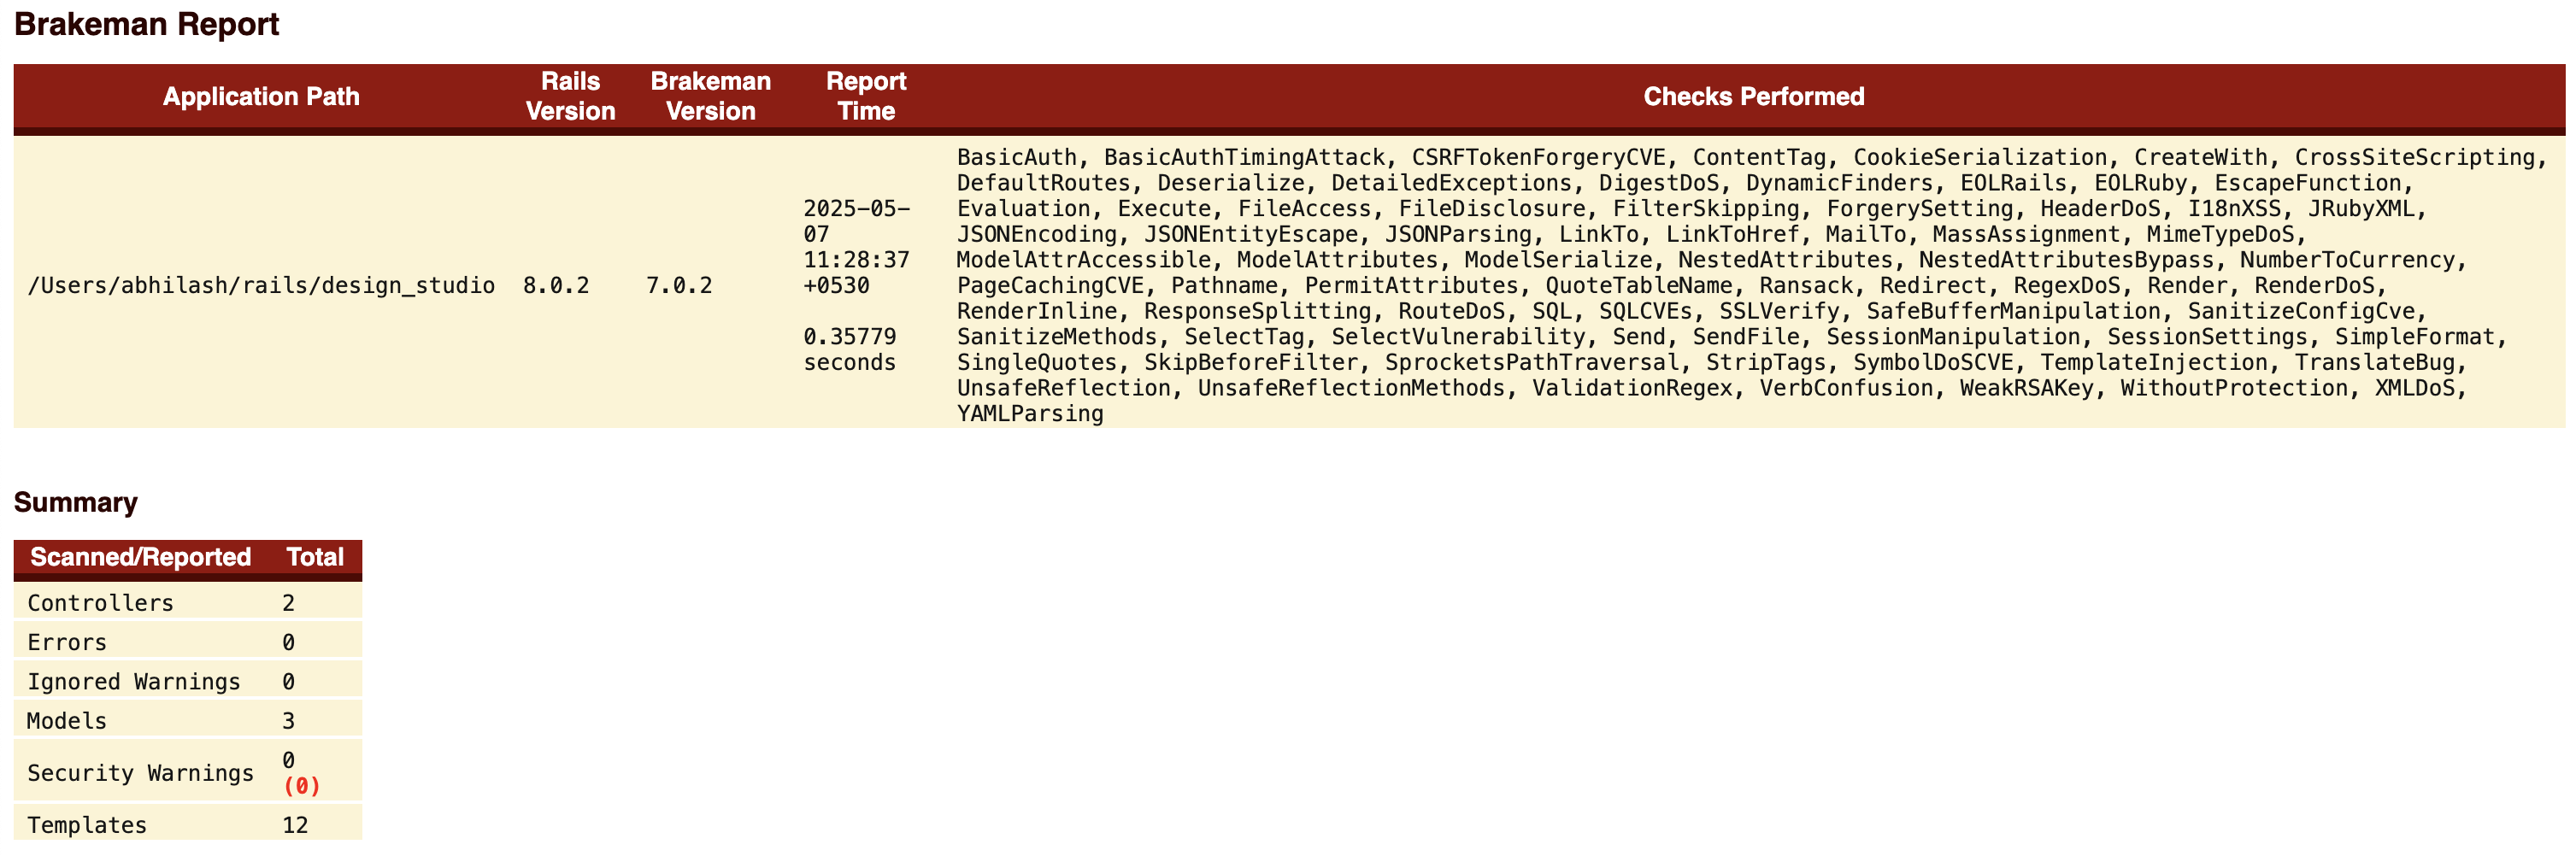
9. 🧪 Security Testing
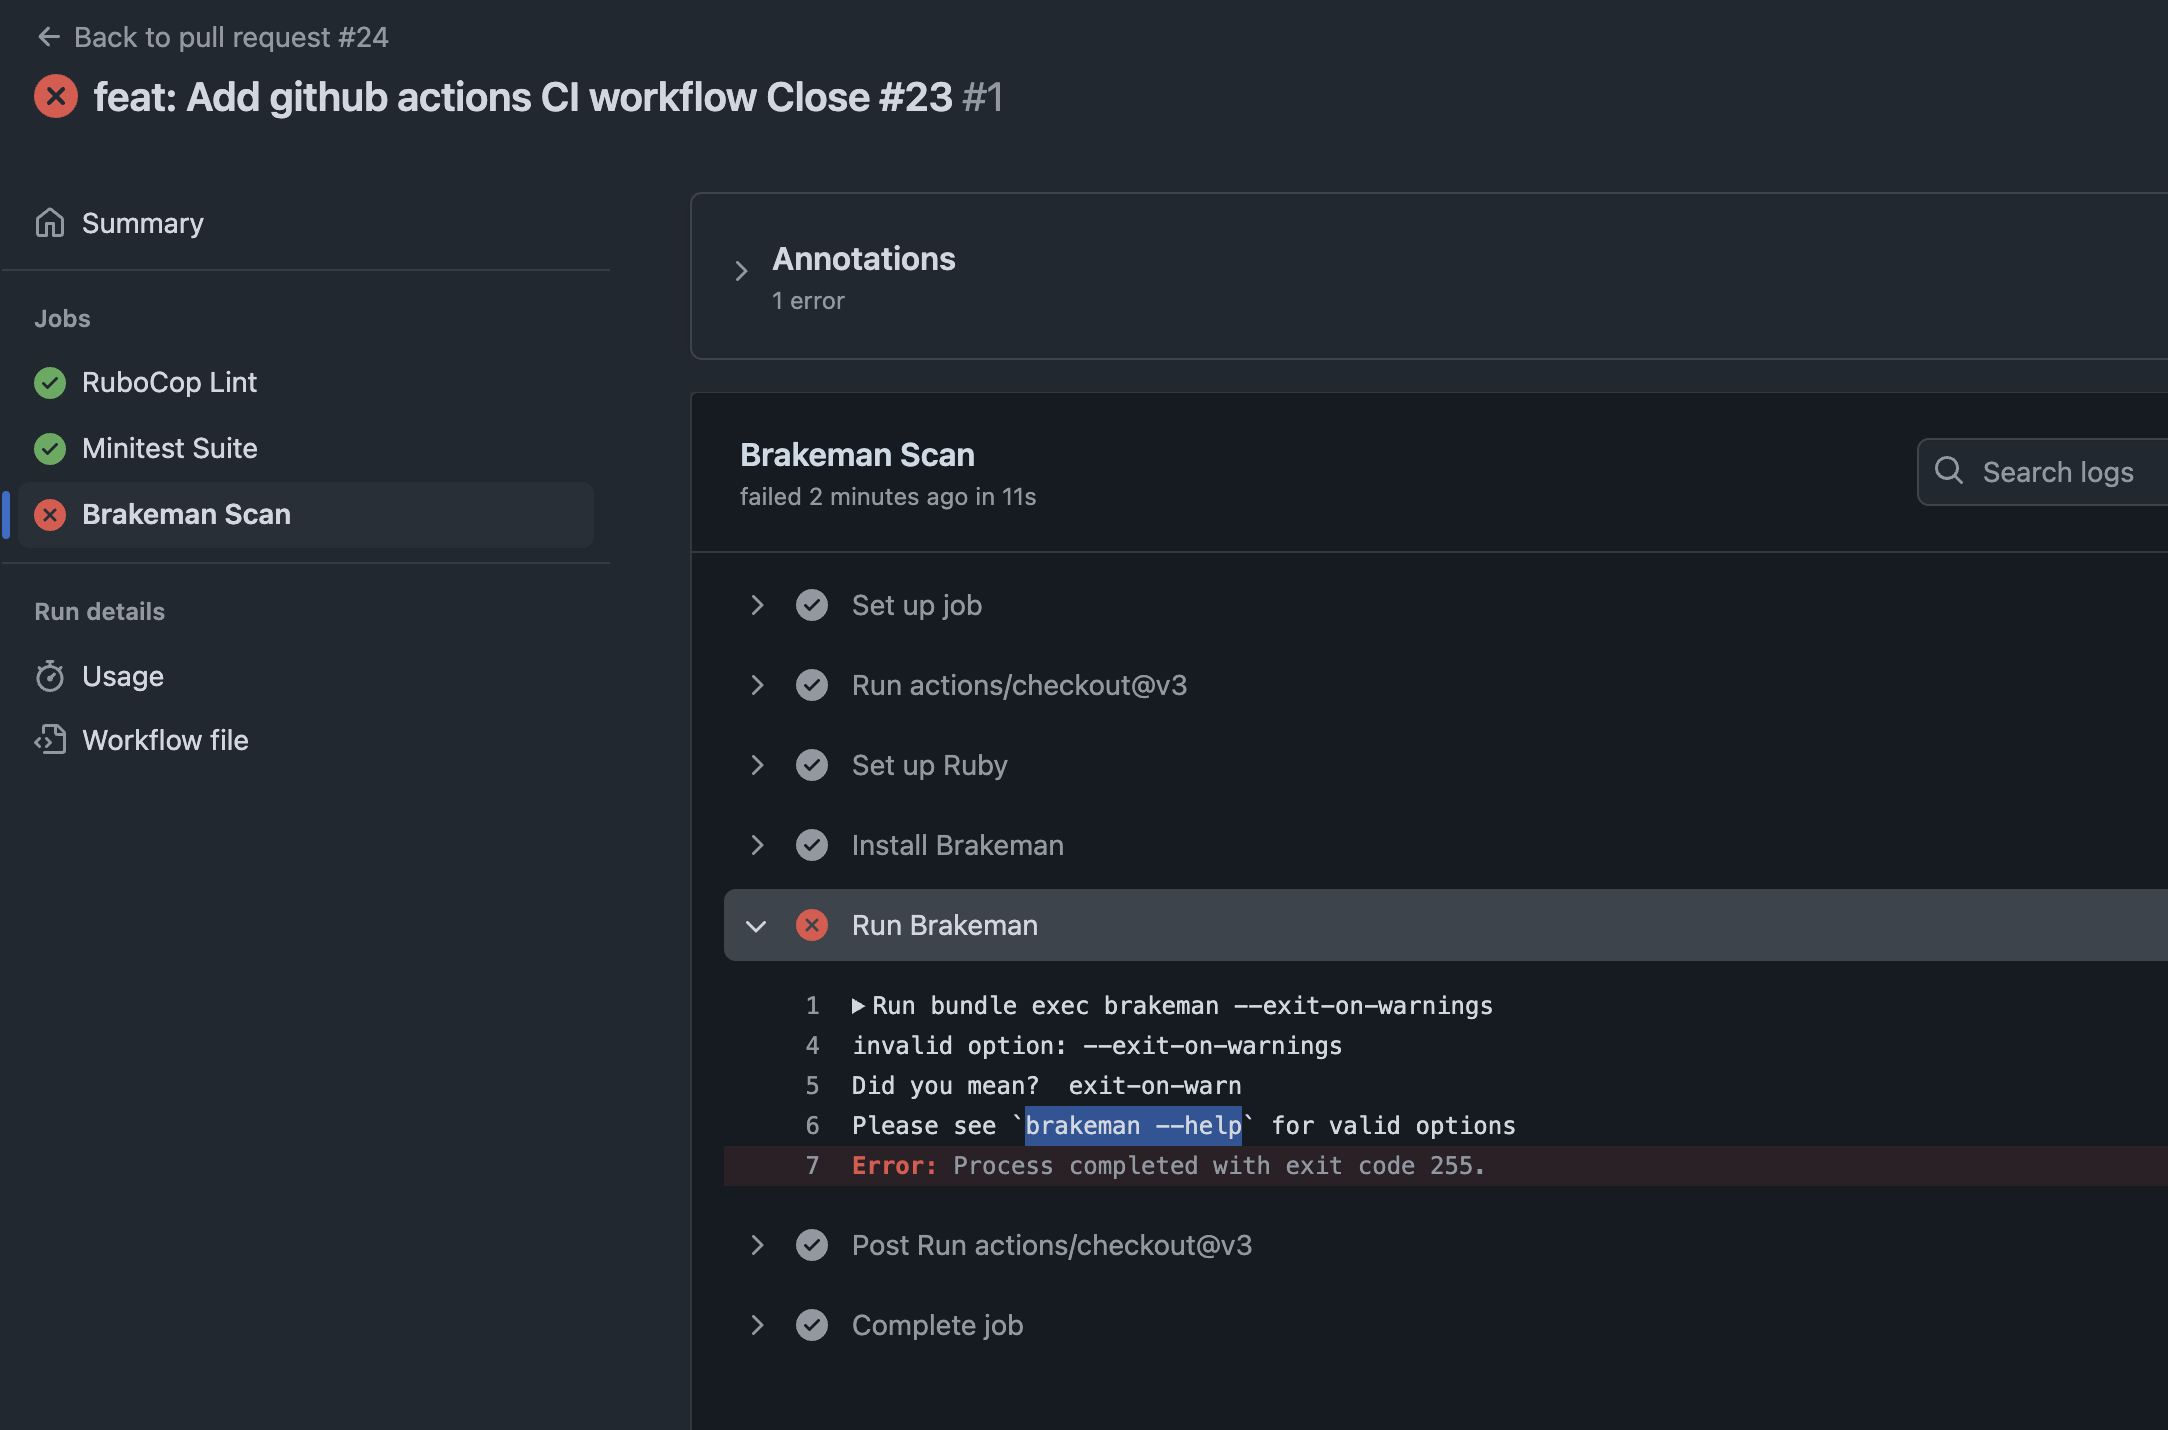
- Use
brakemanto detect common vulnerabilities.
bundle exec brakeman
- Add
bundler-auditto scan for insecure gems.
bundle exec bundler-audit check --update
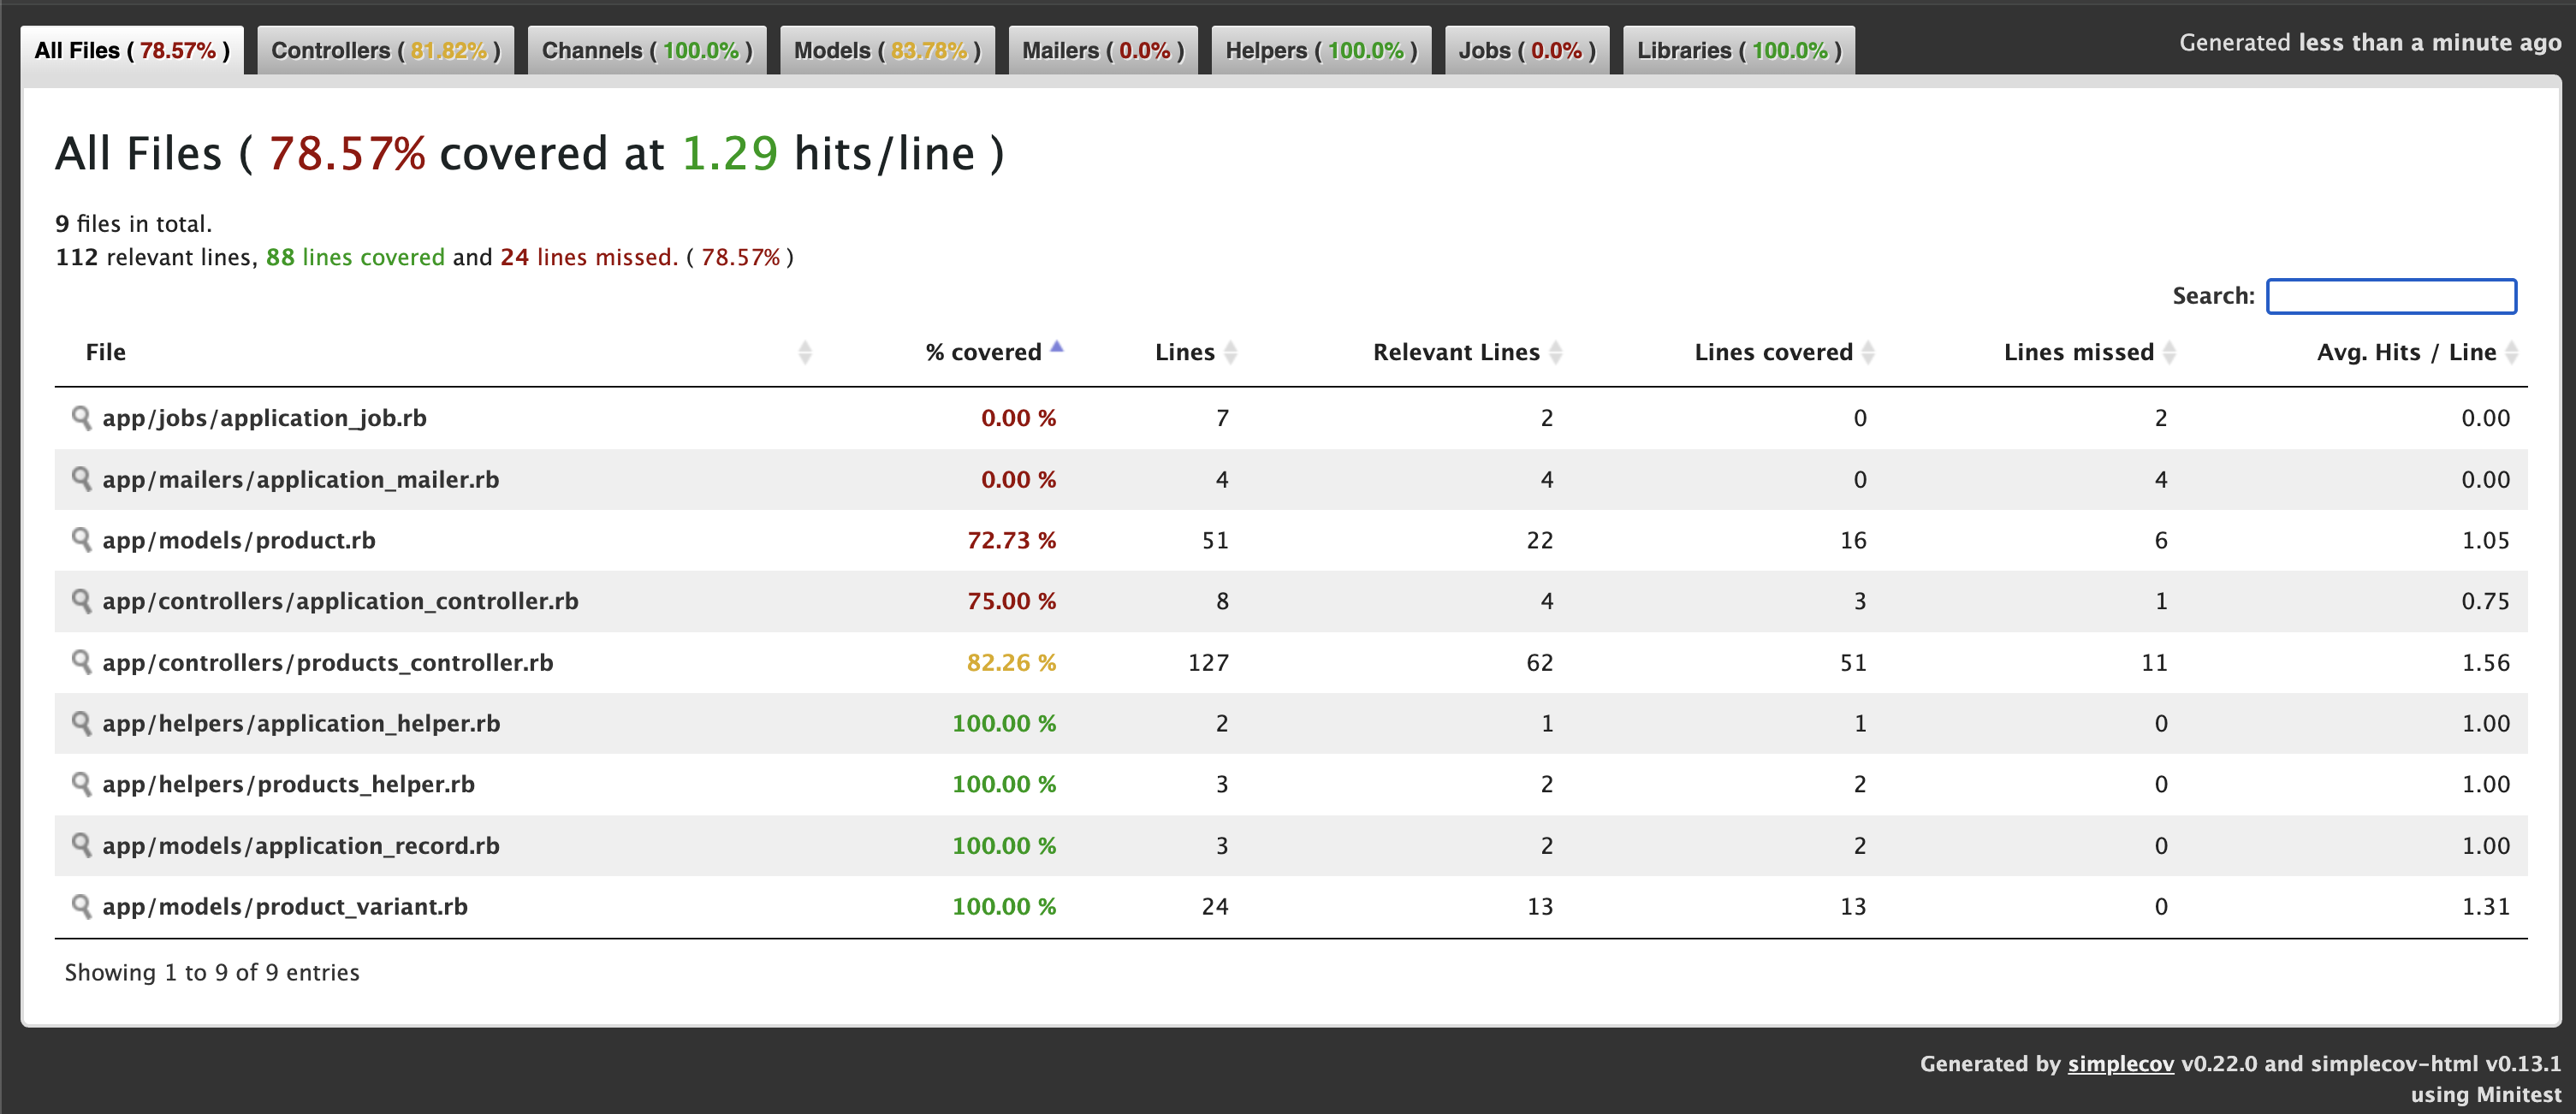
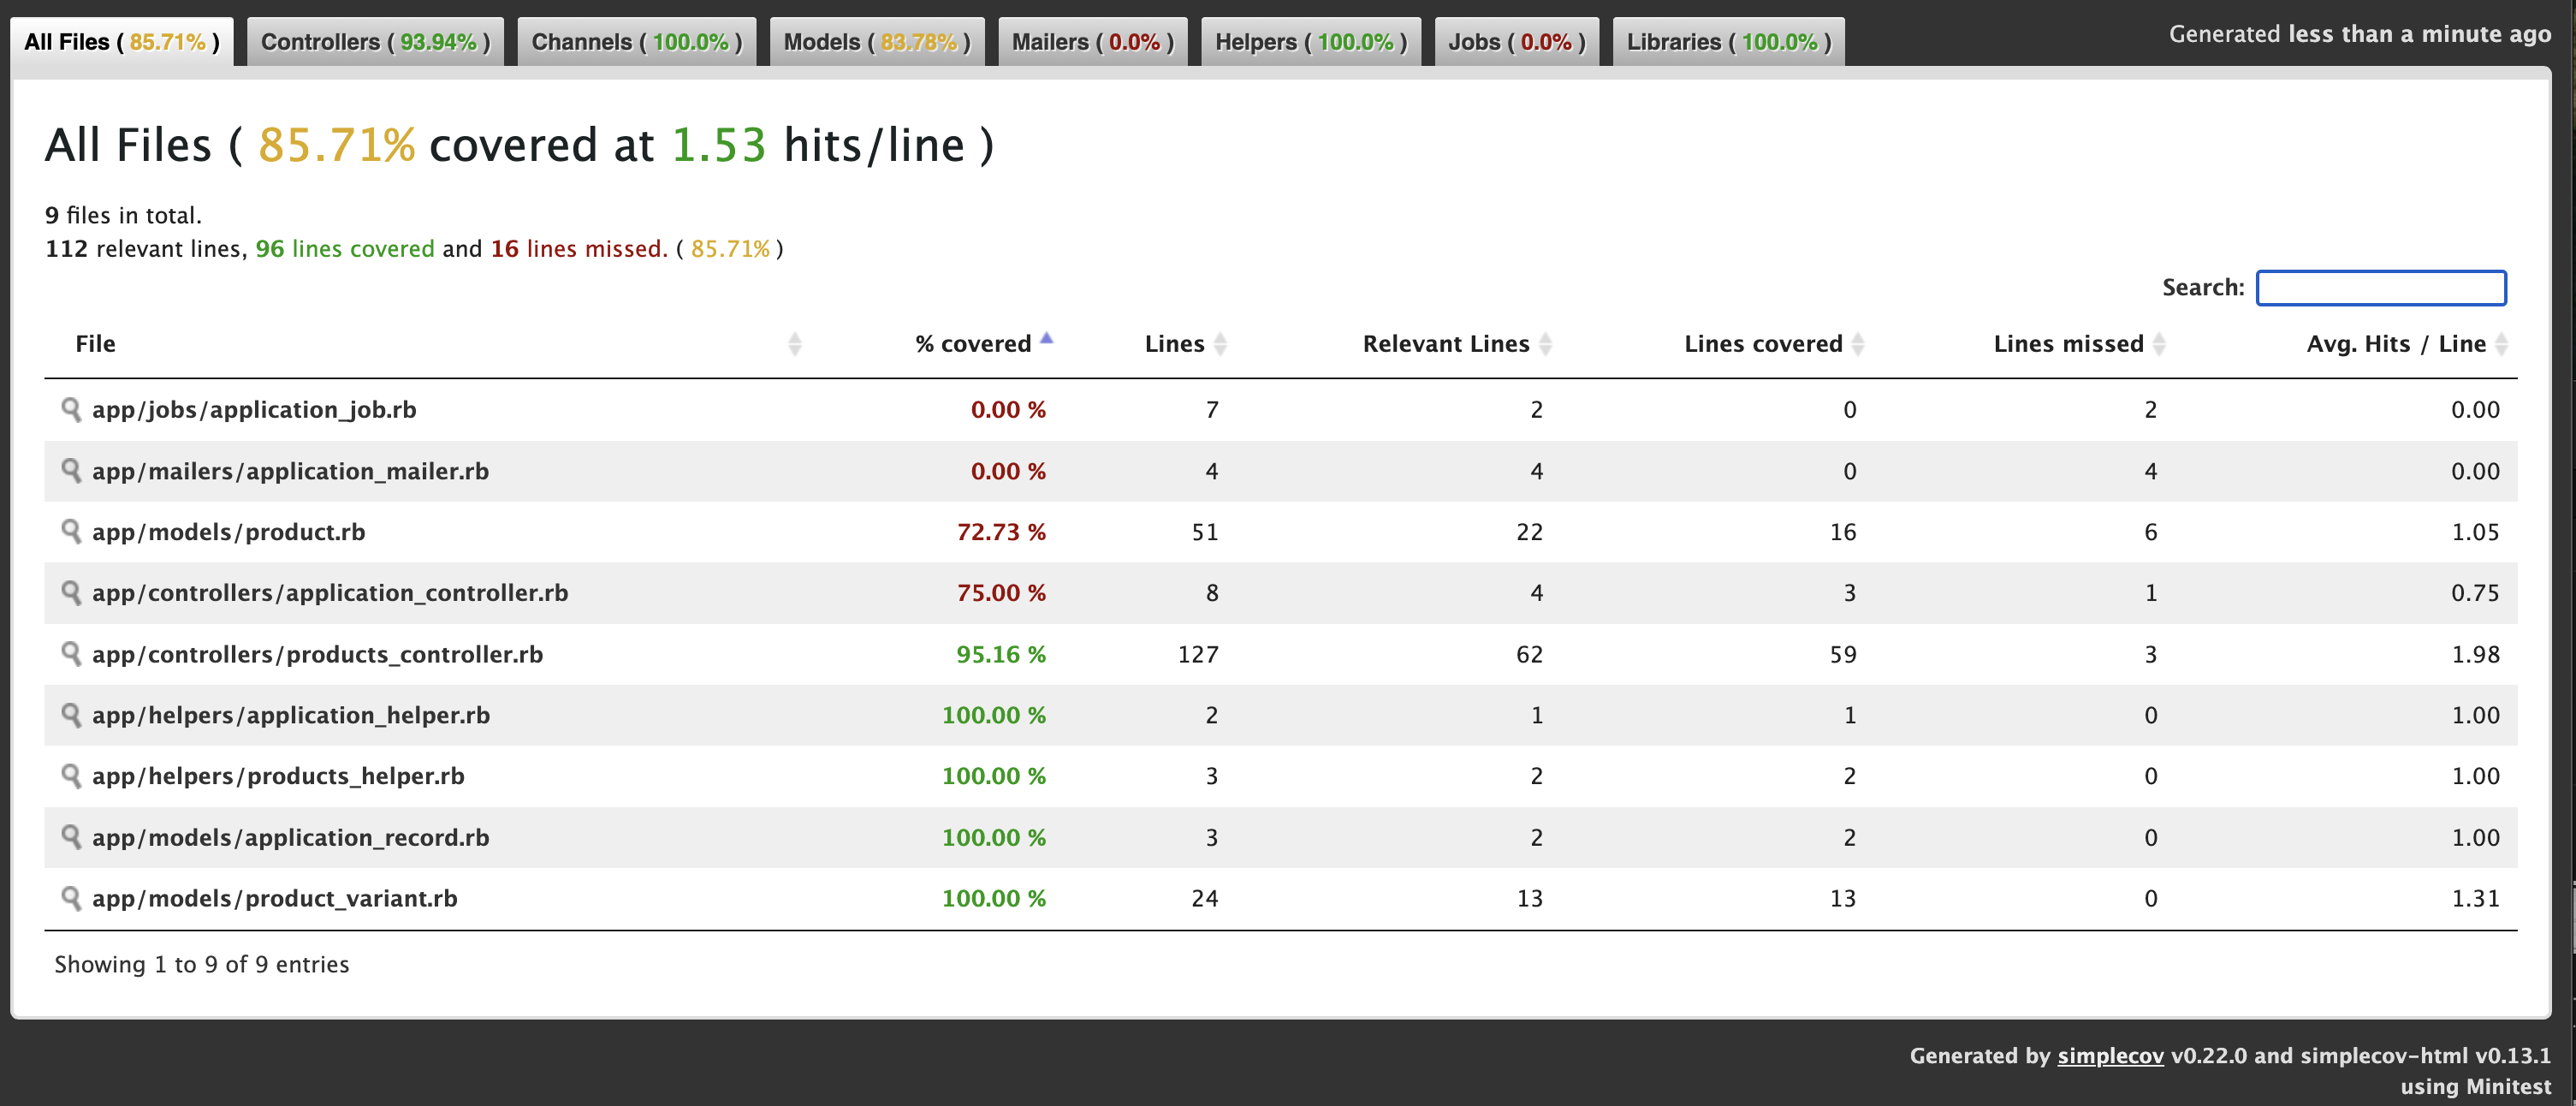
Check the post for more details: https://railsdrop.com/2025/05/05/rails-8-setup-simplecov-brakeman-for-test-coverage-security/
- Fuzz & Pen Testing: Use tools like ZAP Proxy, OWASP ZAP.
- Use RSpec tests for role restrictions, parameter whitelisting, and CSRF.
describe "Admin access" do
  it "forbids non-admins from deleting users" do
    delete admin_user_path(user)
    expect(response).to redirect_to(root_path)
  end
end
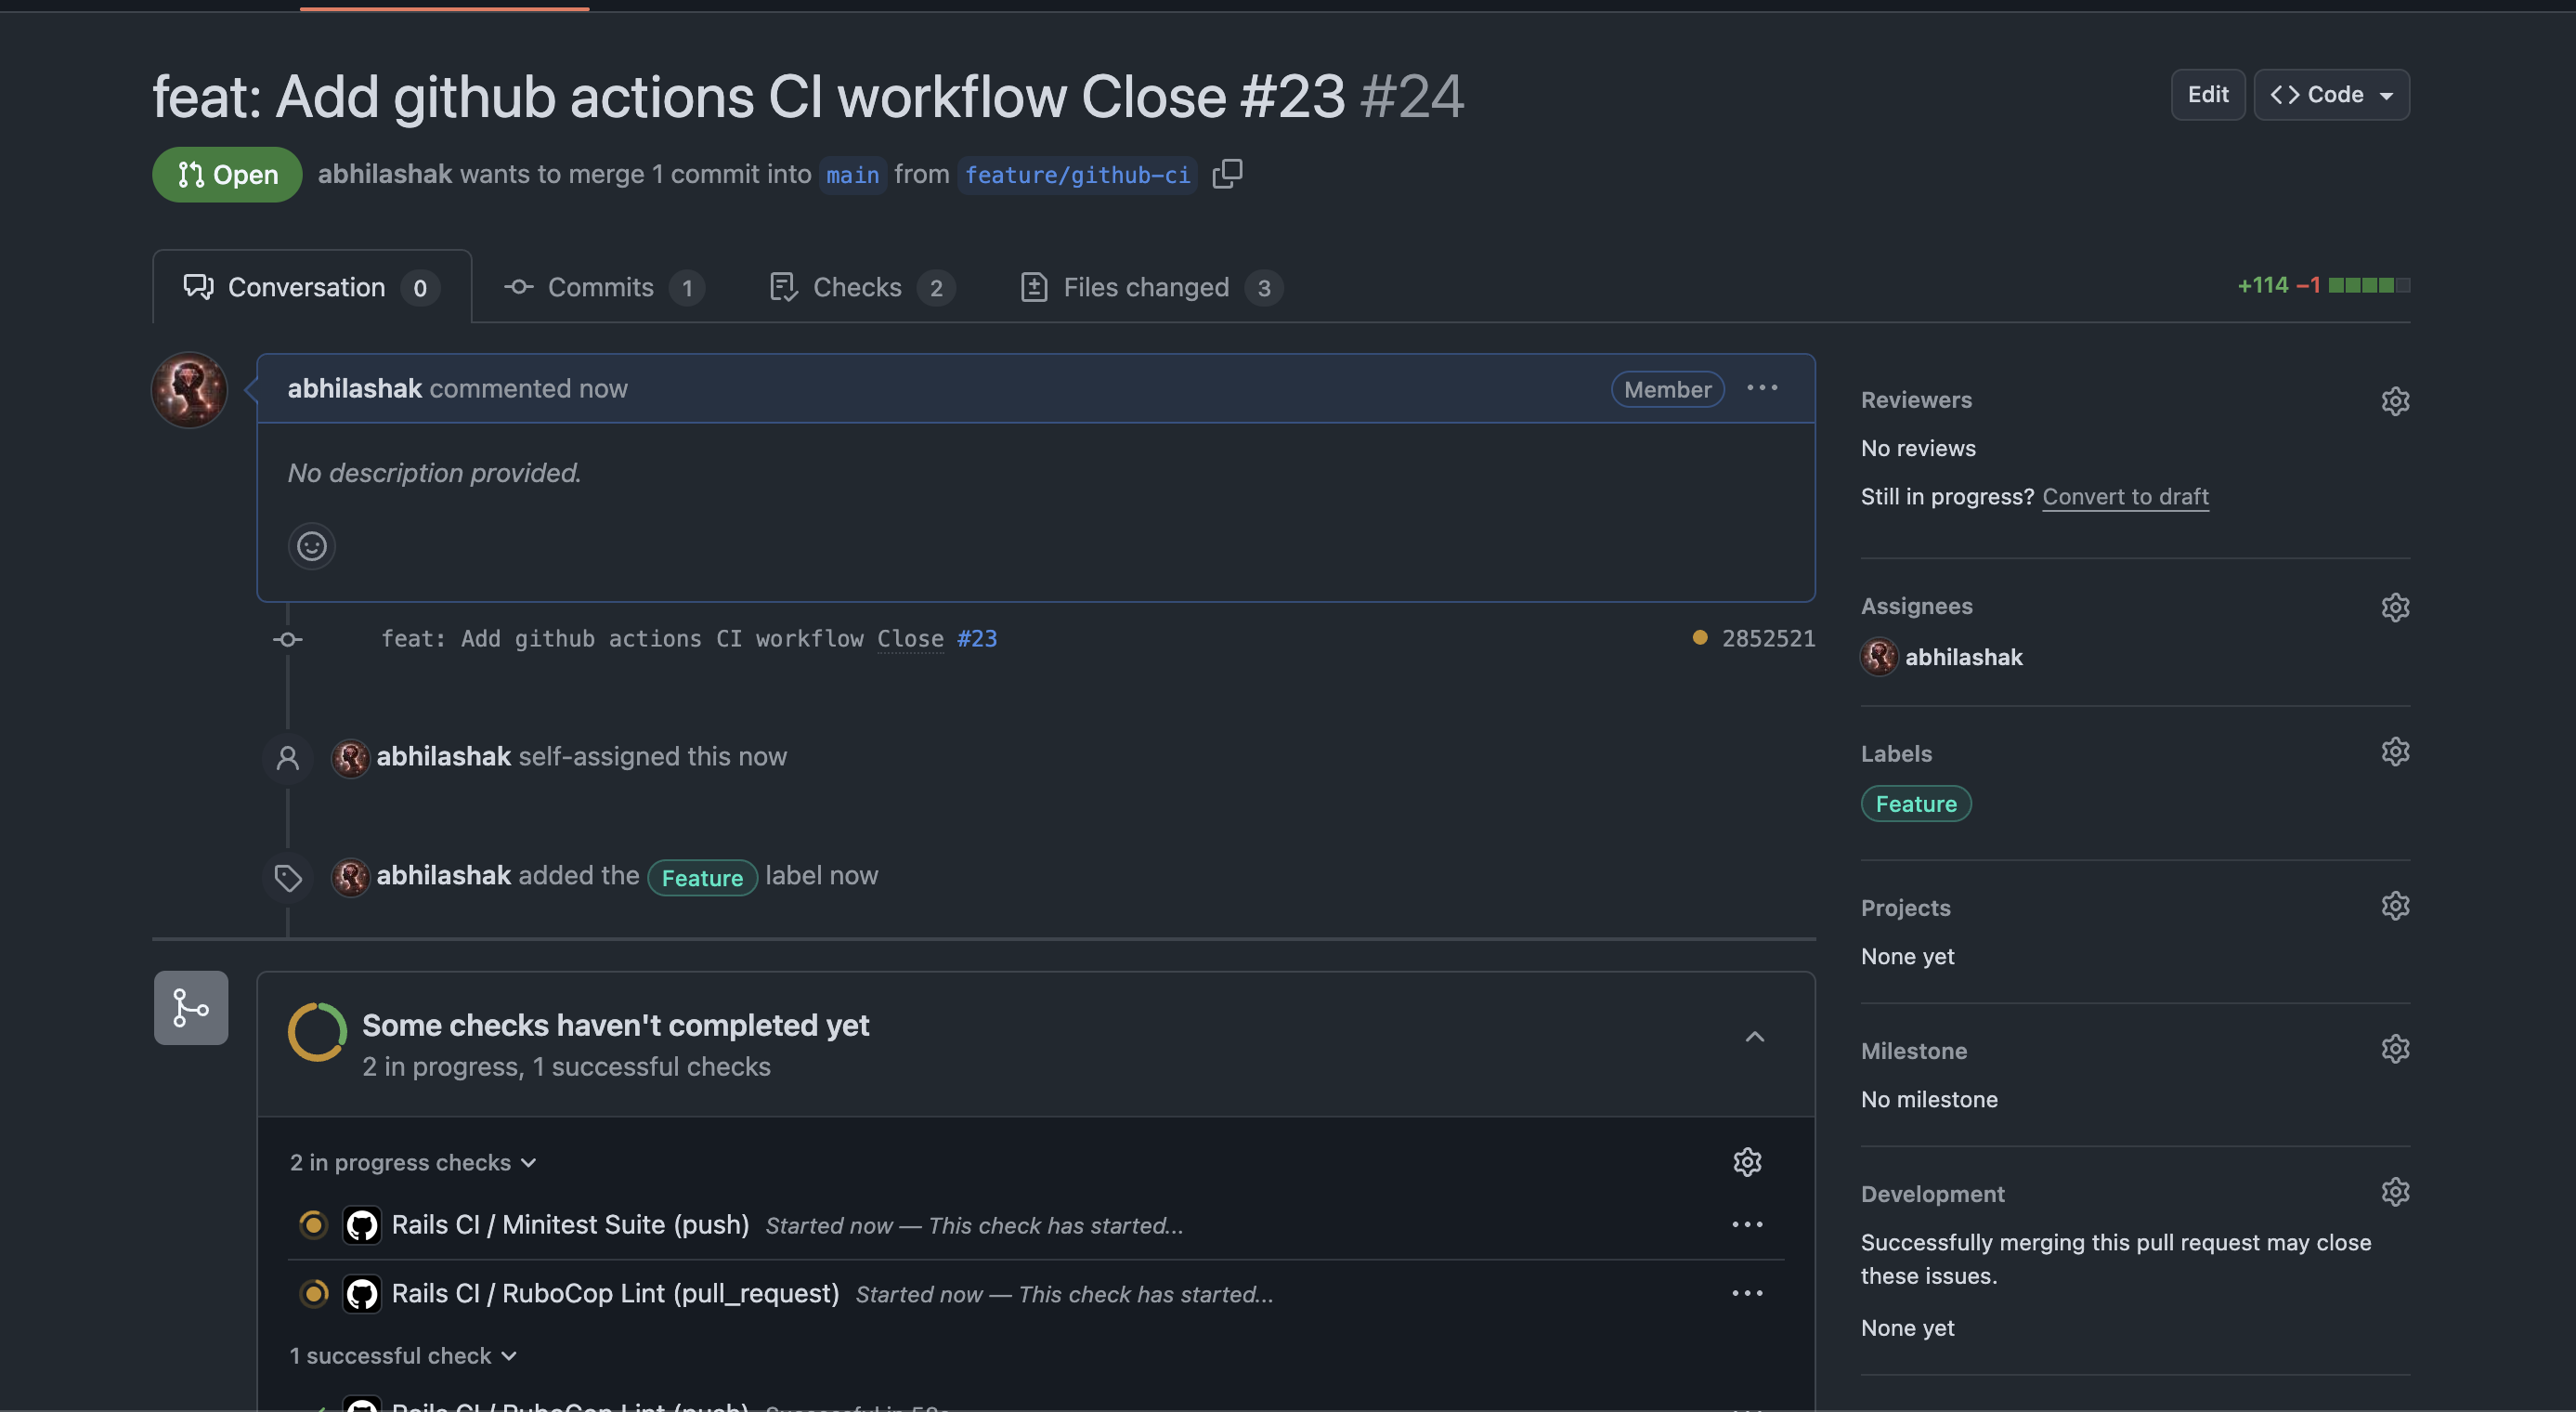
- Continuous Integration – Integrate scans in CI pipeline (GitHub Actions example):
jobs:
  security:
    runs-on: ubuntu-latest
    steps:
      - uses: actions/checkout@v2
      - name: Brakeman
        run: bundle exec brakeman -o brakeman-report.html
      - name: Bundler Audit
        run: bundle exec bundler-audit check --update
Read the post: Setup 🛠 Rails 8 App – Part 15: Set Up CI/CD ⚙️ with GitHub Actions for Rails 8
10. 🔑 API Security (Extra Measures)
- Use JWT or OAuth2 for stateless token authentication.
- Set appropriate CORS headers.
Gem: `rack-cors` (https://github.com/cyu/rack-cors)
Add in your Gemfile:
gem 'rack-cors'
# config/initializers/cors.rb
Rails.application.config.middleware.insert_before 0, Rack::Cors do
  allow do
    origins 'your-frontend.com'
    resource '*',
      headers: :any,
      expose: ['Authorization'],
      methods: [:get, :post, :patch, :put, :delete, :options]
  end
end
- Rate-limit endpoints with Rack::Attack
Include the Gem rack-attack (https://github.com/rack/rack-attack) to your Gemfile.
# In your Gemfile
gem 'rack-attack'
# config/initializers/rack_attack.rb

Rack::Attack.throttle('req/ip', limit: 60, period: 1.minute) do |req|
  req.ip
end
in Rails 8 we can use rate_limit for Controller actions like:
rate_limit to: 10, within: 1.minutes, only: :create, with: -> { redirect_to new_session_url, alert: "Try again later." }
- Pagination & Filtering: Prevent large payloads to avoid DoS.
📝 Summary: Best Practices Checklist
✅ Use Strong Parameters
✅ Escape output (no raw unless absolutely trusted)
✅ Sanitize user content
✅ Use Devise or Sorcery for auth
✅ Authorize every resource with Pundit or CanCanCan
✅ Store files safely and validate uploads
✅ Enforce HTTPS in production
✅ Regularly run Brakeman and bundler-audit
✅ Rate-limit APIs with Rack::Attack
✅ Keep dependencies up to date
🔐 Final Thought
Rails does a lot to keep you safe — but security is your responsibility. Follow these practices and treat every external input as potentially dangerous. Security is not a one-time setup — it’s an ongoing process.
Happy and secure coding! 🚀