Let’s move on to quick development of more react components now. Before that let’s check what we have now and understand it very clear.
📄 File 1:
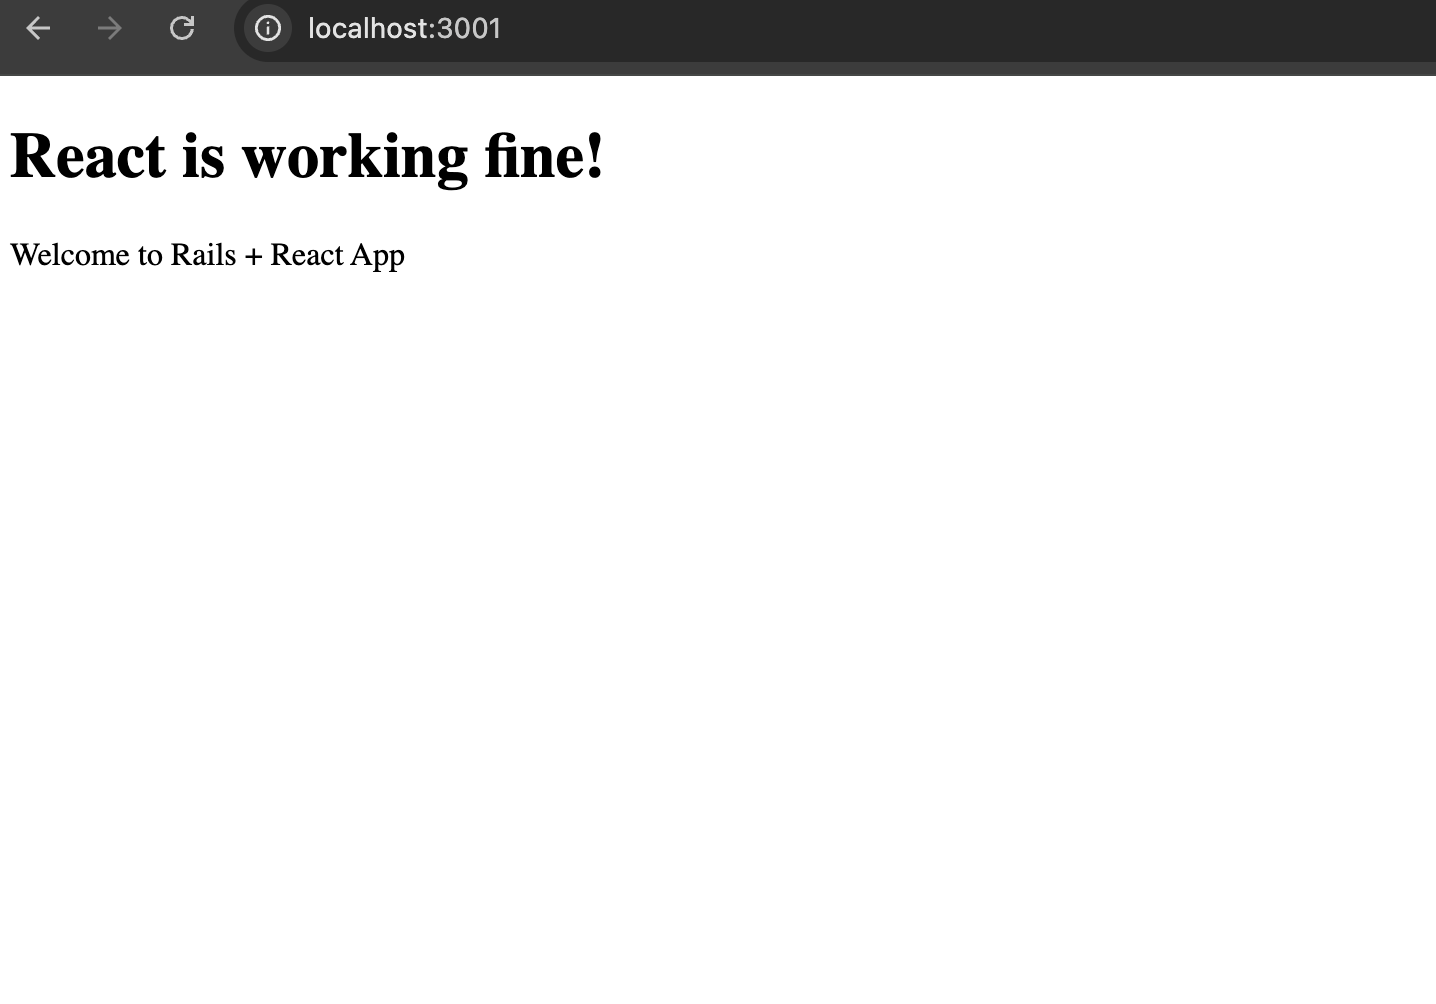
Our app/javascript/components/App.jsx file:
import React from 'react';

function App() {
  return (
    <div>
      <h1>React is working fine!</h1>
      <p>Welcome to Rails + React App</p>
    </div>
  );
}

export default App;
Let’s examine this React component step by step:
Line 1: Import React
import React from 'react';
import– ES6 module syntax to bring in external codeReact– The main React libraryfrom 'react'– Importing from the npm package named “react”- Why needed? Even though we use
--jsx=automatic, we still import React for any hooks or React features we might use.
Function Component: Line 3-9
A React function component is a simple JavaScript function that serves as a building block for user interfaces in React applications. These components are designed to be reusable and self-contained, encapsulating a specific part of the UI and its associated logic.
function App() {
  return (
    <div>
      <h1>React is working fine!</h1>
      <p>Welcome to Rails + React App</p>
    </div>
  );
}
🔍 Breaking this down:
Line 3: Component Declaration
function App() {
function App()– This is a React Function Component- Component naming – Must start with capital letter (
App, notapp) - What it is – A JavaScript function that returns JSX (user interface)
Line 4-8: JSX Return
return (
  <div>
    <h1>React is working fine!</h1>
    <p>Welcome to Rails + React App</p>
  </div>
);
return– Every React component must return something- JSX – Looks like HTML, but it’s actually JavaScript
<div>– Must have one parent element (React Fragment rule)<h1>&<p>– Regular HTML elements, but processed by React
Line 11: Export
export default App;
export default– ES6 syntax to make this component available to other filesApp– The component name we’re exporting- Why needed? So
application.jscan import and use this component
📄 File 2:
Our app/javascript/application.js file:
// Entry point for the build script in your package.json
import React from 'react';
import { createRoot } from 'react-dom/client';
import App from './components/App';

document.addEventListener('DOMContentLoaded', () => {
  const container = document.getElementById('react-root');

  if(container) {
    const root = createRoot(container);
    root.render(<App />);
  }
});
This is the entry point that connects React to your Rails app:
Imports: Line 2-4
import React from 'react';
import { createRoot } from 'react-dom/client';
import App from './components/App';
🔍 Breaking down each import:
Line 2:
import React from 'react';
- Same as before – importing the React library
Line 3:
import { createRoot } from 'react-dom/client';
{ createRoot }– Named import (notice the curly braces)react-dom/client– ReactDOM library for browser/DOM manipulationcreateRoot– New React 18+ API for rendering components to DOM
Line 4:
import App from './components/App';
App– Default import (no curly braces)./components/App– Relative path to our App component- Note: We don’t need
.jsxextension, esbuild figures it out
DOM Integration: Line 6-12
document.addEventListener('DOMContentLoaded', () => {
  const container = document.getElementById('react-root');

  if(container) {
    const root = createRoot(container);
    root.render(<App />);
  }
});
🔍 Step by step breakdown:
Line 6:
document.addEventListener('DOMContentLoaded', () => {
document.addEventListener– Standard browser API'DOMContentLoaded'– Wait until HTML is fully loaded() => {– Arrow function (ES6 syntax)- Why needed? Ensures the HTML exists before React tries to find elements
Line 7:
const container = document.getElementById('react-root');
const container– Create a variable to hold the DOM elementdocument.getElementById('react-root')– Find HTML element withid="react-root"- Where is it? In your Rails view file:
app/views/home/index.html.erb
Line 9:
if(container) {
- Safety check – Only proceed if the element exists
- Prevents errors – If someone visits a page without
react-rootelement
Line 10-11:
const root = createRoot(container);
root.render(<App />);
createRoot(container)– Create a React “root” at the DOM elementroot.render(<App />)– Render our App component inside the container<App />– JSX syntax for using our component (self-closing tag)
🎯 Key React Concepts You Just Learned:
1. Components
- Functions that return JSX
- Must start with capital letter
- Reusable pieces of UI
2. JSX
- Looks like HTML, actually JavaScript
- Must return single parent element
- Processed by esbuild into regular JavaScript
3. Import/Export
- Default exports:
export default App→import App from './App' - Named exports:
export { createRoot }→import { createRoot } from 'package'
4. React DOM
createRoot()– Modern way to mount React apps (React 18+)render()– Display components in the browser
5. Rails Integration
- Rails serves the HTML page
- React takes over the
#react-rootelement - esbuild bundles everything together
🚀 This pattern is the foundation of every React app! We create components, import them, and render them to the DOM.
📚 Step-by-Step React Learning with Todo List
Now let’s build a Todo List app step by step. I’ll explain each React concept thoroughly as we go. Here’s our learning roadmap:
Step 1: Understanding JSX and Basic Component Structure
First, let’s update our App.jsx to create the basic structure of our Todo app:
import React from 'react';

function App() {
  return (
    <div className="todo-app">
      <h1>My Todo List</h1>
      <p>Let's learn React by building a todo app!</p>

      {/* This is a JSX comment */}
      <div className="todo-container">
        <h2>Add a new todo</h2>
        <input type="text" placeholder="Enter a todo..." />
        <button>Add Todo</button>

        <h2>My Todos</h2>
        <ul>
          <li>Learn React basics</li>
          <li>Build a todo app</li>
          <li>Master React hooks</li>
        </ul>
      </div>
    </div>
  );
}

export default App;
🎯 Key Concepts Explained:
JSX (JavaScript XML):
- JSX lets you write HTML-like syntax directly in JavaScript
- It’s a syntax extension for JavaScript, not actual HTML
- JSX gets compiled to JavaScript function calls
- You can use
{}to embed JavaScript expressions inside JSX
Important JSX Rules:
- Use
classNameinstead ofclass(becauseclassis a reserved word in JavaScript) - You can use single quotes for className values in JSX. Both work perfectly fine:
// Both of these are valid:
<div className='todo-app'>    // Single quotes ✅
<div className="todo-app">    // Double quotes ✅
Quote Usage in JSX/JavaScript:
Single quotes vs Double quotes:
- JavaScript treats them identically
- It’s mostly a matter of personal/team preference
- The key is to be consistent throughout your project
Common conventions:
// Option 1: Single quotes for JSX attributes
<div className='todo-app'>
  <input type='text' placeholder='Enter todo...' />
</div>

// Option 2: Double quotes for JSX attributes
<div className="todo-app">
  <input type="text" placeholder="Enter todo..." />
</div>

// Option 3: Mixed (but stay consistent within each context)
const message = 'Hello World';  // Single for JS strings
<div className="todo-app">      // Double for JSX attributes
When you MUST use specific quotes:
// When the string contains the same quote type
<div className="It's a great day">        // Double quotes needed
<div className='He said "Hello"'>        // Single quotes needed

// Or use escape characters
<div className='It\'s a great day'>       // Escaping single quote
<div className="He said \"Hello\"">      // Escaping double quote
💡 Tip: Many teams use tools like Prettier or ESLint to automatically format and enforce consistent quote usage across the entire project.
- All tags must be closed (self-closing tags need
/at the end) - JSX comments use
{/* */}syntax - Return a single parent element (or use React Fragment
<>...</>)
Try updating our App.jsx with this code and see it in your browser!
Step 2: Introduction to State with useState
Now let’s add state to make our app interactive. State is data that can change over time.
import React, { useState } from 'react';

function App() {
  // useState Hook - creates state variable and setter function
  const [todos, setTodos] = useState([
    { id: 1, text: 'Learn React basics', completed: false },
    { id: 2, text: 'Build a todo app', completed: false },
    { id: 3, text: 'Master React hooks', completed: true }
  ]);

  const [inputValue, setInputValue] = useState('');

  return (
    <div className="todo-app">
      <h1>My Todo List</h1>

      <div className="todo-container">
        <h2>Add a new todo</h2>
        <input
          type="text"
          placeholder="Enter a todo..."
          value={inputValue}
          onChange={(e) => setInputValue(e.target.value)}
        />
        <button>Add Todo</button>

        <h2>My Todos ({todos.length})</h2>
        <ul>
          {todos.map(todo => (
            <li key={todo.id}>
              {todo.text} {todo.completed ? '✅' : '⏳'}
            </li>
          ))}
        </ul>
      </div>
    </div>
  );
}

export default App;
🎯 Key Concepts Explained:
useState Hook:
useStateis a React Hook that lets you add state to functional components- It returns an array with two elements:
[currentValue, setterFunction] const [todos, setTodos] = useState([])creates a state variabletodosand a functionsetTodosto update it- The initial value is passed as an argument to
useState
Controlled Components:
- The input field is now “controlled” by React state
value={inputValue}makes the input show what’s in stateonChange={(e) => setInputValue(e.target.value)}updates state when user types
Array.map() for Rendering Lists:
todos.map()transforms each todo into a JSX element- Each list item needs a unique
keyprop for React’s optimization {todo.text}embeds the todo text using JSX expressions
Try this code and notice how the input field now responds to typing!
Step 3: Event Handling and Adding Todos
Let’s make the “Add Todo” button work:
import React, { useState } from 'react';

function App() {
  const [todos, setTodos] = useState([
    { id: 1, text: 'Learn React basics', completed: false },
    { id: 2, text: 'Build a todo app', completed: false },
    { id: 3, text: 'Master React hooks', completed: true }
  ]);

  const [inputValue, setInputValue] = useState('');

  // Function to add a new todo
  const addTodo = () => {
    if (inputValue.trim() !== '') {
      const newTodo = {
        id: Date.now(), // Simple ID generation
        text: inputValue,
        completed: false
      };

      setTodos([...todos, newTodo]); // Spread operator to add new todo
      setInputValue(''); // Clear the input field
    }
  };

  // Function to handle Enter key press
  const handleKeyPress = (e) => {
    if (e.key === 'Enter') {
      addTodo();
    }
  };

  return (
    <div className="todo-app">
      <h1>My Todo List</h1>

      <div className="todo-container">
        <h2>Add a new todo</h2>
        <input
          type="text"
          placeholder="Enter a todo..."
          value={inputValue}
          onChange={(e) => setInputValue(e.target.value)}
          onKeyPress={handleKeyPress}
        />
        <button onClick={addTodo}>Add Todo</button>

        <h2>My Todos ({todos.length})</h2>
        <ul>
          {todos.map(todo => (
            <li key={todo.id}>
              {todo.text} {todo.completed ? '✅' : '⏳'}
            </li>
          ))}
        </ul>
      </div>
    </div>
  );
}

export default App;
🎯 Key Concepts Explained:
Event Handlers:
onClick={addTodo}– function runs when button is clickedonKeyPress={handleKeyPress}– function runs when key is pressed- Event handlers receive an event object (e) with information about the event
State Updates:
setTodos([...todos, newTodo])– creates a new array with all existing todos plus the new one- Important: Always create new arrays/objects instead of mutating existing ones
- React compares old and new state to determine if re-render is needed
Spread Operator (...):
...todosspreads out all elements of the todos array- This is the React way to add items to an array in state
Try adding new todos now!
🎯 Function Syntax Options in JavaScript:
const addTodo = () => {} is a function syntax – specifically an arrow function. Let me explain why it’s declared as const and the different ways to write functions in JavaScript.
1. Function Declaration (Traditional)
function addTodo() {
  // function body
}
2. Function Expression with Arrow Function
const addTodo = () => {
  // function body
};
3. Function Expression (Traditional)
const addTodo = function() {
  // function body
};
🤔 Why use const for functions?
Arrow functions are expressions, not declarations:
// This is a DECLARATION - creates a function named addTodo
function addTodo() { }

// This is an EXPRESSION - creates a function and assigns it to a variable
const addTodo = () => { };
Why const specifically?
// ❌ Could be reassigned accidentally
let addTodo = () => { };
addTodo = "oops"; // Function is now gone!

// ❌ Could be reassigned accidentally
var addTodo = () => { };
addTodo = null; // Function is now gone!

// ✅ Cannot be reassigned - prevents bugs
const addTodo = () => { };
addTodo = "something"; // ERROR: Assignment to constant variable
📚 Key Differences:
Function Declaration vs Arrow Function:
// Function Declaration
function addTodo() {
  console.log("Adding todo");
}

// Arrow Function (assigned to const)
const addTodo = () => {
  console.log("Adding todo");
};
Hoisting Behavior:
// ✅ This works - function declarations are "hoisted"
sayHello(); // "Hello!"

function sayHello() {
  console.log("Hello!");
}

// ❌ This doesn't work - arrow functions are not hoisted
sayGoodbye(); // Error: Cannot access 'sayGoodbye' before initialization

const sayGoodbye = () => {
  console.log("Goodbye!");
};
this Binding:
// Function declaration has its own 'this'
function regularFunction() {
  console.log(this); // 'this' can change based on how it's called
}

// Arrow function inherits 'this' from surrounding scope
const arrowFunction = () => {
  console.log(this); // 'this' is inherited from parent scope
};
🚀 In React Context:
In React functional components, we typically use arrow functions with const because:
- Prevents accidental reassignment – our function won’t get overwritten
- Consistent with modern JavaScript – ES6+ standard
- Cleaner syntax – less verbose than traditional function expressions
- Better for event handlers –
thisbehavior is more predictable
All these are equivalent in React:
// Option 1: Arrow function with const (most common)
const addTodo = () => {
  if (inputValue.trim() !== '') {
    // ... logic
  }
};

// Option 2: Traditional function declaration
function addTodo() {
  if (inputValue.trim() !== '') {
    // ... logic
  }
}

// Option 3: Function expression with const
const addTodo = function() {
  if (inputValue.trim() !== '') {
    // ... logic
  }
};
💡 Why React developers prefer arrow functions:
- Shorter syntax for simple functions
- Consistent variable declaration (everything uses
const) - No hoisting confusion – functions are defined before they’re used
- Better with modern tooling – ESLint, Prettier handle them well
So yes, const addTodo = () => {} is definitely a function! It’s just a modern way to write functions that prevents accidental reassignment and has cleaner syntax.
🎯 What is Hoisting?
Hoisting is a fundamental JavaScript concept that can be confusing at first. Let me explain it clearly with examples.
Hoisting is JavaScript’s behavior of moving declarations to the top of their scope during the compilation phase, before the code is executed.
Think of it like JavaScript “hoists” (lifts up) your variable and function declarations to the top of their scope.
📚 How Hoisting Works:
Function Declarations are Hoisted:
// This works even though we call the function before declaring it!
sayHello(); // Outputs: "Hello!"

function sayHello() {
  console.log("Hello!");
}
Behind the scenes, JavaScript treats it like this:
// JavaScript internally reorganizes it like this:
function sayHello() {
  console.log("Hello!");
}

sayHello(); // Now it makes sense!
Variable Declarations (with var) are Hoisted:
console.log(myVar); // Outputs: undefined (not an error!)
var myVar = "Hello";
console.log(myVar); // Outputs: "Hello"
Behind the scenes:
// JavaScript internally treats it like this:
var myVar; // Declaration is hoisted to the top
console.log(myVar); // undefined (declared but not assigned)
myVar = "Hello"; // Assignment stays in place
console.log(myVar); // "Hello"
🚫 What is NOT Hoisted:
let and const variables:
// ❌ This throws an error!
console.log(myLet); // ReferenceError: Cannot access 'myLet' before initialization
let myLet = "Hello";

// ❌ This also throws an error!
console.log(myConst); // ReferenceError: Cannot access 'myConst' before initialization
const myConst = "Hello";
Arrow Functions (Function Expressions):
// ❌ This throws an error!
sayGoodbye(); // ReferenceError: Cannot access 'sayGoodbye' before initialization

const sayGoodbye = () => {
  console.log("Goodbye!");
};
Function Expressions:
// ❌ This throws an error!
myFunc(); // TypeError: myFunc is not a function

var myFunc = function() {
  console.log("Hello!");
};
🎭 Visual Examples:
Example 1: Function Declaration Hoisting
// What you write:
console.log("1. Start");
myFunction(); // This works!
console.log("3. End");

function myFunction() {
  console.log("2. Inside function");
}

// Output:
// 1. Start
// 2. Inside function
// 3. End
Example 2: Variable Hoisting with var
// What you write:
console.log("Value is:", myVar); // undefined
var myVar = 42;
console.log("Value is:", myVar); // 42

// What JavaScript internally does:
var myVar; // Hoisted to top
console.log("Value is:", myVar); // undefined
myVar = 42; // Assignment stays here
console.log("Value is:", myVar); // 42
Example 3: Why let and const are different
// Temporal Dead Zone
console.log("Before declaration");

// ❌ This area is the "Temporal Dead Zone" for myLet
console.log(myLet); // ReferenceError!

let myLet = "Hello"; // Declaration and initialization
console.log(myLet); // "Hello"
🎯 Practical Implications:
Why Function Declarations work everywhere:
// This is valid JavaScript
function main() {
  helper(); // Can call helper before it's defined

  function helper() {
    console.log("Helper function");
  }
}
Why Arrow Functions must be defined first:
// ❌ This doesn't work
const main = () => {
  helper(); // Error! helper is not defined yet

  const helper = () => {
    console.log("Helper function");
  };
};

// ✅ This works
const main = () => {
  const helper = () => {
    console.log("Helper function");
  };

  helper(); // Now it works!
};
💡 Best Practices:
- Use
constandletinstead ofvarto avoid hoisting confusion - Define functions before using them (even though function declarations are hoisted)
- Use arrow functions for consistency and to avoid hoisting surprises
- Initialize variables when you declare them
🔗 Back to Our React Example:
// This is why we use const for arrow functions
const App = () => {
  // ✅ Good: Function defined before use
  const addTodo = () => {
    // function logic
  };

  // ❌ Bad: Would cause error if we tried to call it here
  // deleteTodo(); // Error!

  const deleteTodo = () => {
    // function logic
  };

  return (
    <div>
      <button onClick={addTodo}>Add</button>
      <button onClick={deleteTodo}>Delete</button>
    </div>
  );
};
Hoisting is JavaScript’s way of making function declarations available throughout their scope, but it doesn’t apply to modern variable declarations (
let,const) or arrow functions. That’s why we define our functions withconstand make sure to declare them before we use them!
Step 4: Toggling Todo Completion
Let’s add the ability to mark todos as complete/incomplete:
import React, { useState } from 'react';

function App() {
  const [todos, setTodos] = useState([
    { id: 1, text: 'Learn React basics', completed: false },
    { id: 2, text: 'Build a todo app', completed: false },
    { id: 3, text: 'Master React hooks', completed: true }
  ]);

  const [inputValue, setInputValue] = useState('');

  const addTodo = () => {
    if (inputValue.trim() !== '') {
      const newTodo = {
        id: Date.now(),
        text: inputValue,
        completed: false
      };

      setTodos([...todos, newTodo]);
      setInputValue('');
    }
  };

  // Function to toggle todo completion
  const toggleTodo = (id) => {
    setTodos(todos.map(todo =>
      todo.id === id
        ? { ...todo, completed: !todo.completed } // Toggle completed status
        : todo // Keep todo unchanged
    ));
  };

  const handleKeyPress = (e) => {
    if (e.key === 'Enter') {
      addTodo();
    }
  };

  return (
    <div className="todo-app">
      <h1>My Todo List</h1>

      <div className="todo-container">
        <h2>Add a new todo</h2>
        <input
          type="text"
          placeholder="Enter a todo..."
          value={inputValue}
          onChange={(e) => setInputValue(e.target.value)}
          onKeyPress={handleKeyPress}
        />
        <button onClick={addTodo}>Add Todo</button>

        <h2>My Todos ({todos.length})</h2>
        <ul>
          {todos.map(todo => (
            <li key={todo.id}>
              <span
                onClick={() => toggleTodo(todo.id)}
                style={{
                  textDecoration: todo.completed ? 'line-through' : 'none',
                  cursor: 'pointer',
                  color: todo.completed ? '#888' : '#000'
                }}
              >
                {todo.text}
              </span>
              {todo.completed ? ' ✅' : ' ⏳'}
            </li>
          ))}
        </ul>
      </div>
    </div>
  );
}

export default App;
🎯 Key Concepts Explained:
Array.map() for Updates:
todos.map()creates a new array where each todo is either updated or kept the sametodo.id === id ? { ...todo, completed: !todo.completed } : todo- This pattern is very common in React for updating items in arrays
Conditional Rendering:
todo.completed ? '✅' : '⏳'– ternary operator for conditional displaytextDecoration: todo.completed ? 'line-through' : 'none'– conditional styling
Arrow Functions in JSX:
onClick={() => toggleTodo(todo.id)}– arrow function to pass arguments to event handlers- Without the arrow function,
toggleTodo(todo.id)would execute immediately
Now you can click on todos to toggle their completion status!
🤔 What we’ve learned so far:
- ✅ JSX syntax and rules
- ✅ useState hook for state management
- ✅ Event handling (onClick, onChange, onKeyPress)
- ✅ Controlled components
- ✅ Array mapping for rendering lists
- ✅ Conditional rendering
- ✅ State updates with spread operator
Next Steps: In the following steps, we’ll cover:
- Deleting todos
- Component composition (breaking into smaller components)
- Props passing
- Filtering todos
- More advanced state management
Let’s see in Part 4. Happy React Development! 🚀