Hi, I’m Abhilash! A seasoned web developer with 15 years of experience specializing in Ruby and Ruby on Rails. Since 2010, I’ve built scalable, robust web applications and worked with frameworks like Angular, Sinatra, Laravel, Node.js, Vue and React.
Passionate about clean, maintainable code and continuous learning, I share insights, tutorials, and experiences here. Let’s explore the ever-evolving world of web development together!
Let’s transform our DesignStudioMobileApp from the default template into a proper design studio interface. I’ll create the folder structure and implement all the features that is requested (https://github.com/MIRA-Designs/DesignStudioMobileApp/issues/4).
Step 1: Create Assets Folder Structure 📁
mkdir -p assets/images
📁 Image Location:
Place our design studio image at: assets/images/featured-design.png
📝 Detailed Code Explanation:
1. Import Statements (Lines 8-19)
import React from 'react';
import {
  SafeAreaView,
  ScrollView,
  StatusBar,
  StyleSheet,
  Text,
  View,
  TextInput,
  Image,
  TouchableOpacity,
  useColorScheme,
  Alert,
} from 'react-native';
What Each Import Does:
React – Core React library for component creation
SafeAreaView – Renders content within safe area (avoids notch/home indicator)
ScrollView – Container that allows scrolling when content exceeds screen
StatusBar – Controls device status bar appearance
StyleSheet – Creates optimized styling objects
Text – Displays text (like <span> in HTML)
View – Basic container (like <div> in HTML)
TextInput – Input field for user text entry
Image – Displays images
TouchableOpacity – Touchable button with opacity feedback
useColorScheme – Hook to detect dark/light mode
Alert – Shows native alert dialogs
2. Component State and Handlers (Lines 21-37)
function App() {
  // Hook to detect if device is in dark mode
  const isDarkMode = useColorScheme() === 'dark';

  // Handler function for search input
  const handleSearch = (text: string) => {
    console.log('Search query:', text);
    // You can add search logic here later
  };

  // Handler function for category button press
  const handleCategoryPress = (category: string) => {
    Alert.alert('Category Selected', `You selected: ${category}`);
    // You can add navigation logic here later
  };
Explanation:
isDarkMode – Boolean that’s true when device is in dark mode
handleSearch – Function called when user types in search bar
Parameter:text: string – what user typed
Action: Logs to console (you can add real search later)
handleCategoryPress – Function called when category button is pressed
Parameter:category: string – which category was pressed
Welcome to my new series where I combine the power of Ruby with the discipline of Test-Driven Development (TDD) to tackle popular algorithm problems from LeetCode! 🧑💻💎 Whether you’re a Ruby enthusiast looking to sharpen your problem-solving skills, or a developer curious about how TDD can transform the way you approach coding challenges, you’re in the right place.
🎲 Episode 7: Minimum Size Subarray Sum
###########################################################
# #209
# Given an array of positive integers nums and a positive integer target, return the minimal length of a subarray
# whose @sum is greater than or equal to target. If there is no such subarray, return 0 instead.
#
# Example 1:
#
# Input: target = 7, nums = [2,3,1,2,4,3]
# Output: 2
# Explanation: The subarray [4,3] has the minimal length under the problem constraint.
# Example 2:
#
# Input: target = 4, nums = [1,4,4]
# Output: 1
# Example 3:
#
# Input: target = 11, nums = [1,1,1,1,1,1,1,1]
# Output: 0
#
#
# Constraints:
#
# 1 <= target <= 109
# 1 <= nums.length <= 105
# 1 <= nums[i] <= 104
#
###########################################################
# ❌ Fail
# frozen_string_literal: true

#######################################################
# #209
# Given an array of positive integers nums and a positive integer target, return the minimal length of a subarray
# whose sum is greater than or equal to target. If there is no such subarray, return 0 instead.
#
#######################################################
require 'minitest/autorun'
require_relative 'subarray_sum_min_size'

class TestSubArraySumMinSize < Minitest::Test
  def set_up; end

  def test_array_of_length_one
    assert_equal 0, SubArray.new([2], 3).min_size
    assert_equal 1, SubArray.new([2], 2).min_size
    assert_equal 0, SubArray.new([3], 4).min_size
  end
end
Source Code:
# frozen_string_literal: true

# disable rubocop GuardClause for better readability in the code
###########################################################
# #209
# Given an array of positive integers nums and a positive integer target, return the minimal length of a subarray
# whose @sum is greater than or equal to target. If there is no such subarray, return 0 instead.
# ............
#
###########################################################
class SubArray
   def min_size
   end
end
✗  ruby test_subarray_sum_min_size.rb
Run options: --seed 5914

# Running:

E

Finished in 0.000386s, 2590.6736 runs/s, 0.0000 assertions/s.

  1) Error:
TestSubArraySumMinSize#test_array_of_length_one:
ArgumentError: wrong number of arguments (given 2, expected 0)
    test_subarray_sum_min_size.rb:16:in 'BasicObject#initialize'
    test_subarray_sum_min_size.rb:16:in 'Class#new'
    test_subarray_sum_min_size.rb:16:in 'TestSubArraySumMinSize#test_array_of_length_one'

1 runs, 0 assertions, 0 failures, 1 errors, 0 skips
➜  minimum-size-subarray-sum git:(main) ✗
✅ Green: Making it pass
# Pass ✅
# frozen_string_literal: true

###########################################################
# #209
# Given an array of positive integers nums and a positive integer target, return the minimal length of a subarray
# whose sum is greater than or equal to target. If there is no such subarray, return 0 instead.
#
# Example 1:
#........
#
###########################################################
class SubArray
  def initialize(nums, target)
    @nums = nums
    @target = target
  end

  def min_size
    0 if @nums.length == 1 && @nums.first < @target
  end
end
# Solution for upto 5 Array Input Length ✅
# frozen_string_literal: true

# disable rubocop GuardClause for better readability in the code
# rubocop:disable Style/GuardClause
###########################################################
# ...............
###########################################################
class SubArray
  def initialize(nums, target)
    @nums = nums
    @target = target
    @min_length = 0 # default 0 -> solution not found
    @left_pos = 0
    @right_pos = 0
    @sum = nil
  end

  def min_size
    while @right_pos < @nums.length
      # first position where left and right positions are at starting point
      @sum = if @left_pos.zero? && @right_pos.zero?
               @nums[@right_pos]
             else
               # add elements inside the window
               @nums[@left_pos..@right_pos].sum
             end

      if solution_found?
        update_min_length

        return 1 if @min_length == 1 # best scenario found, stop here
      else
        @right_pos += 1 # increase window size by 1
      end
    end

    @min_length
  end

  private

  def update_min_length
    new_length = @right_pos - @left_pos + 1

    if min_length_empty? || min_or_equal_length?(new_length)
      @min_length = new_length
      @left_pos += 1
    end
  end

  def solution_found?
    @sum >= @target
  end

  def min_length_empty?
    @min_length.zero?
  end

  # if new length of subarray found is less than already found min length
  # or new length found is equal to previous min length (should decrease window size
  # by increasing left pos to find the less length subarray)
  def min_or_equal_length?(new_length)
    new_length <= @min_length
  end
end
# Solution 1 ✅
# frozen_string_literal: true

# disable rubocop GuardClause for better readability in the code
# rubocop:disable Style/GuardClause
###########################################################
# #209
#  .............
###########################################################
class SubArray
  def initialize(nums, target)
    @nums = nums
    @target = target
    @min_length = 0 # default 0 -> solution not found
    @left_pos = 0
    @right_pos = 0
    @sum = nil
  end

  def min_size
    while @right_pos < @nums.length
      @sum = calculate_sum

      if solution_found?
        update_min_length

        return 1 if @min_length == 1 # best scenario found, stop here
      else
        @right_pos += 1 # increase window size by 1
      end
    end

    @min_length
  end

  private

  def calculate_sum
    # first position where left and right positions are at starting point
    return @nums[@right_pos] if @left_pos.zero? && @right_pos.zero?

    # add elements inside the window
    @nums[@left_pos..@right_pos].sum
  end

  def update_min_length
    new_length = @right_pos - @left_pos + 1

    if min_length_empty? || min_or_equal_length?(new_length)
      @min_length = new_length
      @left_pos += 1
    end
  end

  def solution_found?
    @sum >= @target
  end

  def min_length_empty?
    @min_length.zero?
  end

  # if new length of subarray found is less than already found min length
  # or new length found is equal to previous min length (should decrease window size
  # by increasing left pos to find the less length subarray)
  def min_or_equal_length?(new_length)
    new_length <= @min_length
  end
end
# Solution 2 ✅
# frozen_string_literal: true

# disable rubocop GuardClause for better readability in the code
###########################################################
# #209
# .............
###########################################################
class SubArray
  def initialize(nums, target)
    @nums = nums
    @target = target
    @min_length = 0 # default 0 -> solution not found
    @left_pos = 0
    @right_pos = 0
    @sum = nil
  end

  def min_size
    while @right_pos < @nums.length
      @sum = calculate_sum

      if solution_found?
        update_min_length

        return 1 if @min_length == 1 # best scenario found, stop here
      else
        @right_pos += 1 # increase window size by 1
      end
    end

    @min_length
  end

  private

  def calculate_sum
    # first position where left and right positions are at starting point
    return @nums[@right_pos] if @left_pos.zero? && @right_pos.zero?

    # add elements inside the window
    @nums[@left_pos..@right_pos].sum
  end

  def update_min_length
    new_length = @right_pos - @left_pos + 1

    @min_length = new_length if min_length_empty? || min_length_greater?(new_length)
    @left_pos += 1
  end

  def solution_found?
    @sum >= @target
  end

  def min_length_empty?
    @min_length.zero?
  end

  # if new length of subarray found is less than already found min length
  # or new length found is equal to previous min length (should decrease window size
  # by increasing left pos to find the less length subarray)
  def min_length_greater?(new_length)
    @min_length > new_length
  end
end
🧮 Algorithm Complexity Analysis
Time Complexity: O(n²)
Our current algorithm has quadratic time complexity due to the calculate_sum method:
def calculate_sum(nums, left_pos, right_pos)
  # This line causes O(n) complexity in each iteration
  nums[left_pos..right_pos].sum
end
Solution: We should change this logic of repeated addition of numbers that are already added before. We can add the next Number (Right position) and substract the Left Number that is out of the window.
Space Complexity: O(1)
Only uses a constant number of variables regardless of input size
No additional data structures that grow with input
🚀 Optimized Version (O(n) Time):
Here’s how to make it linear time complexity:
Let’s Try to Optimize our solution with the Solution given above:
# frozen_string_literal: true

# disable rubocop GuardClause for better readability in the code
###########################################################
# ..................
###########################################################
class SubArray
  def initialize(nums, target)
    @nums = nums
    @target = target
    @min_length = 0 # default 0 -> solution not found
    @left_pos = 0
    @right_pos = 0
    @sum = 0
  end

  def min_size
    while @right_pos < @nums.length
      # Add the new element at right_pos to the current sum
      @sum += @nums[@right_pos]

      update_min_length if solution_found?

      @right_pos += 1 # always move right pointer
    end

    @min_length
  end

  private

  def update_min_length
    new_length = @right_pos - @left_pos + 1

    @min_length = new_length if min_length_empty? || min_length_greater?(new_length)

    # Shrink the window from the left as much as possible while maintaining sum >= target
    while @left_pos < @right_pos && (@sum - @nums[@left_pos]) >= @target
      @sum -= @nums[@left_pos]
      @left_pos += 1
      new_length = @right_pos - @left_pos + 1
      @min_length = new_length if min_length_greater?(new_length)
    end
  end

  def solution_found?
    @sum >= @target
  end

  def min_length_empty?
    @min_length.zero?
  end

  # if new length of subarray found is less than already found min length
  # or new length found is equal to previous min length (should decrease window size
  # by increasing left pos to find the less length subarray)
  def min_length_greater?(new_length)
    @min_length > new_length
  end
end
📊 Complexity Comparison:
Version
Time Complexity
Space Complexity
Why
Your Current
O(n²)
O(1)
Recalculates sum each time
Optimized
O(n)
O(1)
Maintains running sum
Key Optimization:
Instead of recalculating the sum each time:
# Your approach (O(n) each time)
nums[left_pos..right_pos].sum

# Optimized approach (O(1) each time)
current_sum += num        # Add new element
current_sum -= nums[left] # Remove old element
Our algorithm works correctly but can be optimized from O(n²) to O(n) time complexity!
LeetCode Submission (simplified version of 0(n)):
# @param {Integer} target
# @param {Integer[]} nums
# @return {Integer}
def min_sub_array_len(target, nums)
  return 0 if nums.empty?

  min_length = Float::INFINITY
  left = 0
  sum = 0

  nums.each_with_index do |num, right|
    sum += num

    # Shrink window from left as much as possible while maintaining sum >= target
    while sum >= target && left <= right
      min_length = [min_length, right - left + 1].min
      sum -= nums[left]
      left += 1
    end
  end

  min_length == Float::INFINITY ? 0 : min_length
end
Software development methodologies provide structured approaches to planning, managing, and executing software projects. Among these, the Waterfall model stands as one of the most traditional and well-known methodologies. In this comprehensive guide, I’ll explain software development methodologies in general and then focus specifically on the Waterfall model, including its phases, advantages, disadvantages, and practical examples.
Understanding Software Development Methodologies
Software development methodologies are frameworks used to structure, plan, and control the process of developing information systems. They define project steps, roles, responsibilities, activities, communication standards, and deliverables . The diversity in methodologies allows organizations to choose approaches that align with their specific needs and project requirements .
The choice of methodology depends on factors like project size, complexity, requirement stability, team size, and organizational culture .
The Waterfall Model: A Sequential Approach
The Waterfall model is the most classic and sequential method of software development, developed in 1970 . It follows a linear workflow where the development process is divided into distinct phases that must be completed sequentially, much like a waterfall flowing downward through several stages .
Waterfall Model Phases
Requirements Analysis: Gathering and documenting all system requirements
System Design: Creating architectural and detailed designs
Implementation: Writing the actual code
Testing: Verifying the system against requirements
Deployment: Releasing the product to users
Maintenance: Fixing issues and making updates
Diagram: Sequential phases of the Waterfall model
Key Characteristics of Waterfall
Linear and sequential: Each phase must be completed before the next begins
Document-heavy: Extensive documentation is produced at each stage
Fixed requirements: Requirements are frozen after the initial phase
Limited customer involvement: Mainly at the beginning (requirements) and end (testing)
Advantages of Waterfall
Simple and easy to understand: Its linear nature makes it accessible, especially for beginners
Clear milestones and deliverables: Each phase has defined outputs
Good for stable requirements: Works well when requirements are well-understood upfront
Easier to manage: Due to its structured nature
Comprehensive documentation: Helps in maintenance and future updates
Disadvantages of Waterfall
Inflexible to changes: Difficult to accommodate changing requirements
Late testing: Testing occurs only after implementation is complete
Delayed working software: No working product until late in the cycle
High risk: Errors in requirements may not be discovered until late
Limited customer feedback: Customers don’t see the product until it’s nearly complete
When to Use Waterfall
The Waterfall model is suitable for:
Projects with well-defined, unchanging requirements
Small to medium-sized projects
Projects where technology is well-understood
Situations where timeline and budget control is critical
Projects with predictable outcomes
Teams with inexperienced developers
Real-World Example: Building a Bridge
The Waterfall model works well for projects like bridge construction:
Just as you wouldn’t change bridge specifications midway through construction, Waterfall works best when requirements are fixed early on.
Variations of Waterfall
V-Model: An extension that emphasizes testing in parallel with development
Sashimi Model: Allows some overlap between phases
Comparison with Other Methodologies
Unlike Agile methodologies which embrace change, Waterfall assumes requirements can be fully defined upfront . While Agile is like jazz (improvisational), Waterfall is like classical music (precisely planned) .
Conclusion
The Waterfall model remains relevant for certain types of projects despite the popularity of Agile approaches. Its structured, document-driven approach works best when requirements are stable and well-understood. However, for projects with evolving requirements or needing frequent customer feedback, more flexible methodologies like Agile may be more appropriate.
Understanding the strengths and limitations of Waterfall helps teams select the right methodology for their specific project needs, balancing structure with flexibility as required.
Software development is not just about writing code; it’s about building high-quality, maintainable, and scalable systems that deliver value to users. To achieve this consistently, teams follow structured approaches known as software development methodologies. These methodologies provide a roadmap for planning, designing, developing, testing, and delivering software.
In this three-part blog series, we’ll explore key methodologies and best practices in software development, using Ruby and Ruby on Rails examples wherever appropriate.
🌐 What Are Software Development Methodologies?
Software development methodologies are structured processes or frameworks that guide the planning and execution of software projects. They help teams manage complexity, collaborate effectively, reduce risk, and deliver projects on time.
Common Goals of Any Methodology:
Define clear project scope and goals
Break down work into manageable tasks
Encourage communication among team members
Track progress and measure success
Deliver working software iteratively or incrementally
💼 Why Methodologies Matter
Without a methodology, software projects often suffer from unclear requirements, missed deadlines, buggy releases, or scope creep. A good methodology:
Increases team productivity
Ensures better quality and maintainability
Reduces time-to-market
Improves customer satisfaction
In Ruby and Rails projects, where rapid development is a key feature, following a methodology keeps things under control and makes collaboration more effective.
📖 A Brief Overview of Popular Software Development Methodologies
We’ll explore these in detail in Part 2, but here are the major ones:
1. Waterfall
A linear approach where each phase (Requirements → Design → Implementation → Testing → Deployment) happens one after another.
2. Agile
An iterative and incremental model that encourages adaptive planning, early delivery, and continuous improvement.
3. Scrum
A popular Agile framework that structures work in sprints and emphasizes team roles, ceremonies, and artifacts.
4. Kanban
A flow-based Agile method that uses visual boards to manage work and improve process efficiency.
5. Extreme Programming (XP)
Focuses on engineering excellence, including practices like pair programming, TDD, and continuous integration. Ruby and Rails communities highly embrace XP.
6. DevOps
Combines software development and IT operations to shorten the development lifecycle and deliver high-quality software continuously.
✨ Ruby On Rails: A Natural Fit for Agile and XP
Ruby and Rails were built with developer happiness and productivity in mind. They naturally complement Agile and XP methodologies.
Example:
Ruby on Rails encourages convention over configuration, which speeds up development.
It supports Test-Driven Development (TDD) out of the box via tools like RSpec and Minitest.
Features like scaffolding align well with the iterative nature of Agile.
🔹 Coming Up in Part 2
In the next part of this series, I’ll do a deep dive into each of the above methodologies, with pros, cons, and real-world use cases. I’ll also show examples of how Rails developers apply these in practice.
If you want to avoid the ActiveAdmin complexity entirely:
RailsAdmin:
gem 'rails_admin'
✅ No asset pipeline issues
✅ Works with Propshaft out of the box
❌ Less customizable than ActiveAdmin
Trestle:
gem 'trestle'
✅ Modern Bootstrap-based admin
✅ Better Rails 8 compatibility
❌ Smaller community
Adminterface (Deprecated):
🚫 No longer maintained (as shown in search results)
🏆 My Recommendation:
For our production app:Stick with Sprockets + ActiveAdmin 3.x
Why?
Stability – Battle-tested combination
Zero configuration issues
Full feature set available
Easy maintenance
The performance difference between Propshaft and Sprockets won’t significantly impact your admin interface, which is typically used by a small number of internal users.
🔮 Future Outlook:
ActiveAdmin v4 will eventually have better Propshaft support
Rails community is working on solutions
Node.js dependency trend for complex CSS is becoming standard anyway
Bottom Line: Don’t let the asset pipeline take over the application preferences. Our current Sprockets setup is perfectly fine for an admin interface! 🎯
The Reality Check:
We completely replaced Propshaft with Sprockets for the entire application.
Current State:
❌ Propshaft: Completely removed
✅ Sprockets: Handles ALL assets (main app + admin)
✅ Importmaps: Still working (unaffected)
✅ Hotwire/Turbo: Still working (unaffected)
🏗️ How ActiveAdmin Works:
ActiveAdmin is NOT a Rails Engine. It integrates directly into your app:
Routes: ActiveAdmin.routes(self) adds /admin routes to your app
Assets: ActiveAdmin’s CSS/JS becomes part of your asset pipeline
Controllers: ActiveAdmin generates controllers in your app’s namespace
It’s tightly coupled to your application, not isolated.
🤷♂️ So What Are Our Real Options?
Option 1: Accept Current Setup
What we have:
Modern Rails 8 with Importmaps + Hotwire ✅
Sprockets instead of Propshaft ❌ (but works fine)
Full-featured admin interface ✅
Option 2: Use activeadmin_assets Gem
# Replace current ActiveAdmin setup
gem 'activeadmin_assets'  # Pre-compiled assets
gem 'propshaft'           # Back to Rails 8 default
✅ Get Propshaft back
✅ Keep Rails 8 defaults
❌ Can’t customize admin styles
Option 3: Build Custom Admin
Keep your Rails 8 purity but build admin from scratch:
✅ Pure Rails 8
❌ Weeks of development time
🔍 What activeadmin_assets Actually Does:
The activeadmin_assets gem doesn’t replace ActiveAdmin – it provides pre-compiled static assets for ActiveAdmin to work with Propshaft.
But here’s the critical issue for you:
🚨 activeadmin_assets = NO Customization
If you use activeadmin_assets, you get:
✅ ActiveAdmin functionality
✅ Propshaft compatibility
❌ ZERO ability to customize styles/interface
The assets are pre-compiled and frozen – you can’t modify colors, layouts, or styling.
Since We Want Customization:
We’re actually in the BEST setup possible right now!
Our Current Setup Gives You:
✅ Full ActiveAdmin customization (styles, layouts, themes)
✅ Modern Rails 8 (Importmaps, Hotwire, Turbo)
✅ All ActiveAdmin features (filters, actions, forms)
❌ Sprockets instead of Propshaft (minor trade-off)
Customization Examples We Can Do:
Custom CSS themes and colors
Layout modifications
Custom JavaScript behaviors
Brand styling and logos
Advanced form customizations
🎯 Reality Check:
There’s no solution that gives us:
Full ActiveAdmin customization AND
Propshaft AND
Zero complexity
We have to pick 2 out of 3.
💡 My Honest Last Decision:
Keep our current setup! We’re already using:
Modern Rails 8 patterns (95% of your codebase)
Importmaps and Hotwire (exactly as intended)
Sprockets only affects asset serving (invisible to users)
The Propshaft vs Sprockets difference won’t affect your product’s success, but losing admin customization will limit our UX.
// Without React - you'd need to handle browser differences
function addEventListenerCrossBrowser(element, event, handler) {
  if (element.addEventListener) {
    element.addEventListener(event, handler); // Modern browsers
  } else if (element.attachEvent) {
    element.attachEvent('on' + event, handler); // Old IE
  }
}

// With React - it handles all browser differences for you
<button onClick={addTodo}>Add Todo</button>
2. Consistent API:
// React events work the same across all browsers
const handleClick = (e) => {
  e.preventDefault();    // Always works
  e.stopPropagation();   // Always works
  console.log(e.target); // Always works
};
3. Performance Optimization:
// React uses event delegation - attaches one listener to document
// and manages all events from there (more efficient)
<div>
  <button onClick={handleClick1}>Button 1</button>
  <button onClick={handleClick2}>Button 2</button>
  <button onClick={handleClick3}>Button 3</button>
  {/* React doesn't attach 3 separate listeners */}
</div>
What happens behind the scenes:
When you write:
<button onClick={addTodo}>Add Todo</button>
React internally:
Wraps the native click event in a SyntheticEvent
Normalizes the event across different browsers
Delegates the event handling to the document root
Calls your addTodo function with the synthetic event
Example of React’s event object:
const handleClick = (e) => {
  console.log(e.type);        // "click"
  console.log(e.target);      // The button element
  console.log(e.currentTarget); // The button element
  console.log(e.preventDefault); // Function to prevent default

  // React provides the native event if needed
  console.log(e.nativeEvent); // Original DOM event
};
💡 Common Mistakes:
❌ Don’t do this:
// Wrong - lowercase (HTML style)
<button onclick={addTodo}>Add Todo</button>

// Wrong - calling the function immediately
<button onClick={addTodo()}>Add Todo</button>

// Wrong - using string (HTML style)
<button onClick="addTodo()">Add Todo</button>
✅ Do this:
// Correct - camelCase and function reference
<button onClick={addTodo}>Add Todo</button>

// Correct - arrow function for parameters
<button onClick={() => deleteTodo(id)}>Delete</button>

// Correct - arrow function for event access
<button onClick={(e) => handleClick(e, id)}>Click</button>
React uses onClick (camelCase) instead of click (lowercase) because:
Consistency – All React props use camelCase
Synthetic Events – React wraps native events for better cross-browser support
Performance – React optimizes event handling with event delegation
Predictability – Same API across all browsers and components
The onClick you use in React is actually more powerful and reliable than the native onclick in HTML!
❓Questions
1. How Event Delegation Improves Performance?
Event delegation is a powerful optimization technique. Let me show you the difference:
Without Event Delegation (Traditional DOM):
// Imagine you have 1000 buttons - traditional approach
const buttons = document.querySelectorAll('button');
buttons.forEach(button => {
  button.addEventListener('click', handleClick); // 1000 event listeners!
});
With Event Delegation (React’s approach):
// React attaches ONE listener to the document root
document.addEventListener('click', (e) => {
  if (e.target.matches('button')) {
    handleClick(e); // Only one listener for all buttons!
  }
});
Performance Benefits:
Memory Usage:
// Without delegation: 1000 buttons = 1000 event listeners in memory
// With delegation: 1000 buttons = 1 event listener in memory
DOM Manipulation:
// Without delegation: Adding/removing elements requires managing listeners
const newButton = document.createElement('button');
newButton.addEventListener('click', handleClick); // Must remember to add
document.body.appendChild(newButton);

// With delegation: New elements automatically work
const newButton = document.createElement('button');
document.body.appendChild(newButton); // Automatically handles clicks!
Real React Example:
// Even with 1000 todos, React only has ONE click listener
<ul>
  {todos.map(todo => (
    <li key={todo.id}>
      <button onClick={() => deleteTodo(todo.id)}>Delete</button>
      <button onClick={() => editTodo(todo.id)}>Edit</button>
    </li>
  ))}
</ul>
// React manages all these clicks with ONE delegated listener
2. Event Parameter Naming – why always use ‘e’ for events?
We can absolutely use different names!e is just a convention, not a requirement.
// 'e' is short and widely recognized
const handleClick = (e) => {
  console.log(e.target);
};

// 'event' is more descriptive but longer
const handleClick = (event) => {
  console.log(event.target);
};

// Custom names work but might confuse other developers
const handleClick = (banana) => {
  console.log(banana.target); // Works but confusing!
};
Best Practice:
// Use 'e' for short inline handlers
<button onClick={(e) => e.preventDefault()}>Click</button>

// Use 'event' for longer, more complex handlers
const handleSubmit = (event) => {
  event.preventDefault();
  event.stopPropagation();
  // ... more logic
};
3. Event Methods and Properties Explained
Explain preventDefault, stopPropagation, currentTarget, target, type etc.
const Example = () => {
  const handleClick = (e) => {
    console.log('target:', e.target.tagName);        // What you clicked
    console.log('currentTarget:', e.currentTarget.tagName); // What has the listener
  };

  return (
    <div onClick={handleClick}>  {/* currentTarget will be DIV */}
      <button>Click me</button>  {/* target will be BUTTON */}
    </div>
  );
};
Let’s move on to quick development of more react components now. Before that let’s check what we have now and understand it very clear.
📄 File 1:
Our app/javascript/components/App.jsx file:
import React from 'react';

function App() {
  return (
    <div>
      <h1>React is working fine!</h1>
      <p>Welcome to Rails + React App</p>
    </div>
  );
}

export default App;
Let’s examine this React component step by step:
Line 1: Import React
import React from 'react';
import – ES6 module syntax to bring in external code
React – The main React library
from 'react' – Importing from the npm package named “react”
Why needed? Even though we use --jsx=automatic, we still import React for any hooks or React features we might use.
Function Component: Line 3-9
A React function component is a simple JavaScript function that serves as a building block for user interfaces in React applications. These components are designed to be reusable and self-contained, encapsulating a specific part of the UI and its associated logic.
function App() {
  return (
    <div>
      <h1>React is working fine!</h1>
      <p>Welcome to Rails + React App</p>
    </div>
  );
}
🔍 Breaking this down:
Line 3: Component Declaration
function App() {
function App() – This is a React Function Component
Component naming – Must start with capital letter (App, not app)
What it is – A JavaScript function that returns JSX (user interface)
Line 4-8: JSX Return
return (
  <div>
    <h1>React is working fine!</h1>
    <p>Welcome to Rails + React App</p>
  </div>
);
return – Every React component must return something
JSX – Looks like HTML, but it’s actually JavaScript
<div> – Must have one parent element (React Fragment rule)
<h1> & <p> – Regular HTML elements, but processed by React
Line 11: Export
export default App;
export default – ES6 syntax to make this component available to other files
App – The component name we’re exporting
Why needed? So application.js can import and use this component
📄 File 2:
Our app/javascript/application.js file:
// Entry point for the build script in your package.json
import React from 'react';
import { createRoot } from 'react-dom/client';
import App from './components/App';

document.addEventListener('DOMContentLoaded', () => {
  const container = document.getElementById('react-root');

  if(container) {
    const root = createRoot(container);
    root.render(<App />);
  }
});
This is the entry point that connects React to your Rails app:
Imports: Line 2-4
import React from 'react';
import { createRoot } from 'react-dom/client';
import App from './components/App';
🔍 Breaking down each import:
Line 2:
import React from 'react';
Same as before – importing the React library
Line 3:
import { createRoot } from 'react-dom/client';
{ createRoot } – Named import (notice the curly braces)
react-dom/client – ReactDOM library for browser/DOM manipulation
createRoot – New React 18+ API for rendering components to DOM
Line 4:
import App from './components/App';
App – Default import (no curly braces)
./components/App – Relative path to our App component
Note: We don’t need .jsx extension, esbuild figures it out
createRoot(container) – Create a React “root” at the DOM element
root.render(<App />) – Render our App component inside the container
<App /> – JSX syntax for using our component (self-closing tag)
🎯 Key React Concepts You Just Learned:
1. Components
Functions that return JSX
Must start with capital letter
Reusable pieces of UI
2. JSX
Looks like HTML, actually JavaScript
Must return single parent element
Processed by esbuild into regular JavaScript
3. Import/Export
Default exports:export default App → import App from './App'
Named exports:export { createRoot } → import { createRoot } from 'package'
4. React DOM
createRoot() – Modern way to mount React apps (React 18+)
render() – Display components in the browser
5. Rails Integration
Rails serves the HTML page
React takes over the #react-root element
esbuild bundles everything together
🚀 This pattern is the foundation of every React app! We create components, import them, and render them to the DOM.
📚 Step-by-Step React Learning with Todo List
Now let’s build a Todo List app step by step. I’ll explain each React concept thoroughly as we go. Here’s our learning roadmap:
Step 1: Understanding JSX and Basic Component Structure
First, let’s update our App.jsx to create the basic structure of our Todo app:
import React from 'react';

function App() {
  return (
    <div className="todo-app">
      <h1>My Todo List</h1>
      <p>Let's learn React by building a todo app!</p>

      {/* This is a JSX comment */}
      <div className="todo-container">
        <h2>Add a new todo</h2>
        <input type="text" placeholder="Enter a todo..." />
        <button>Add Todo</button>

        <h2>My Todos</h2>
        <ul>
          <li>Learn React basics</li>
          <li>Build a todo app</li>
          <li>Master React hooks</li>
        </ul>
      </div>
    </div>
  );
}

export default App;
🎯 Key Concepts Explained:
JSX (JavaScript XML):
JSX lets you write HTML-like syntax directly in JavaScript
It’s a syntax extension for JavaScript, not actual HTML
JSX gets compiled to JavaScript function calls
You can use {} to embed JavaScript expressions inside JSX
Important JSX Rules:
Use className instead of class (because class is a reserved word in JavaScript)
You can use single quotes for className values in JSX. Both work perfectly fine:
// Both of these are valid:
<div className='todo-app'>    // Single quotes ✅
<div className="todo-app">    // Double quotes ✅
Quote Usage in JSX/JavaScript:
Single quotes vs Double quotes:
JavaScript treats them identically
It’s mostly a matter of personal/team preference
The key is to be consistent throughout your project
Common conventions:
// Option 1: Single quotes for JSX attributes
<div className='todo-app'>
  <input type='text' placeholder='Enter todo...' />
</div>

// Option 2: Double quotes for JSX attributes
<div className="todo-app">
  <input type="text" placeholder="Enter todo..." />
</div>

// Option 3: Mixed (but stay consistent within each context)
const message = 'Hello World';  // Single for JS strings
<div className="todo-app">      // Double for JSX attributes
When you MUST use specific quotes:
// When the string contains the same quote type
<div className="It's a great day">        // Double quotes needed
<div className='He said "Hello"'>        // Single quotes needed

// Or use escape characters
<div className='It\'s a great day'>       // Escaping single quote
<div className="He said \"Hello\"">      // Escaping double quote
💡 Tip: Many teams use tools like Prettier or ESLint to automatically format and enforce consistent quote usage across the entire project.
All tags must be closed (self-closing tags need / at the end)
JSX comments use {/* */} syntax
Return a single parent element (or use React Fragment <>...</>)
Try updating our App.jsx with this code and see it in your browser!
Step 2: Introduction to State with useState
Now let’s add state to make our app interactive. State is data that can change over time.
import React, { useState } from 'react';

function App() {
  // useState Hook - creates state variable and setter function
  const [todos, setTodos] = useState([
    { id: 1, text: 'Learn React basics', completed: false },
    { id: 2, text: 'Build a todo app', completed: false },
    { id: 3, text: 'Master React hooks', completed: true }
  ]);

  const [inputValue, setInputValue] = useState('');

  return (
    <div className="todo-app">
      <h1>My Todo List</h1>

      <div className="todo-container">
        <h2>Add a new todo</h2>
        <input
          type="text"
          placeholder="Enter a todo..."
          value={inputValue}
          onChange={(e) => setInputValue(e.target.value)}
        />
        <button>Add Todo</button>

        <h2>My Todos ({todos.length})</h2>
        <ul>
          {todos.map(todo => (
            <li key={todo.id}>
              {todo.text} {todo.completed ? '✅' : '⏳'}
            </li>
          ))}
        </ul>
      </div>
    </div>
  );
}

export default App;
🎯 Key Concepts Explained:
useState Hook:
useState is a React Hook that lets you add state to functional components
It returns an array with two elements: [currentValue, setterFunction]
const [todos, setTodos] = useState([]) creates a state variable todos and a function setTodos to update it
The initial value is passed as an argument to useState
Controlled Components:
The input field is now “controlled” by React state
value={inputValue} makes the input show what’s in state
onChange={(e) => setInputValue(e.target.value)} updates state when user types
Array.map() for Rendering Lists:
todos.map() transforms each todo into a JSX element
Each list item needs a unique key prop for React’s optimization
{todo.text} embeds the todo text using JSX expressions
Try this code and notice how the input field now responds to typing!
Step 3: Event Handling and Adding Todos
Let’s make the “Add Todo” button work:
import React, { useState } from 'react';

function App() {
  const [todos, setTodos] = useState([
    { id: 1, text: 'Learn React basics', completed: false },
    { id: 2, text: 'Build a todo app', completed: false },
    { id: 3, text: 'Master React hooks', completed: true }
  ]);

  const [inputValue, setInputValue] = useState('');

  // Function to add a new todo
  const addTodo = () => {
    if (inputValue.trim() !== '') {
      const newTodo = {
        id: Date.now(), // Simple ID generation
        text: inputValue,
        completed: false
      };

      setTodos([...todos, newTodo]); // Spread operator to add new todo
      setInputValue(''); // Clear the input field
    }
  };

  // Function to handle Enter key press
  const handleKeyPress = (e) => {
    if (e.key === 'Enter') {
      addTodo();
    }
  };

  return (
    <div className="todo-app">
      <h1>My Todo List</h1>

      <div className="todo-container">
        <h2>Add a new todo</h2>
        <input
          type="text"
          placeholder="Enter a todo..."
          value={inputValue}
          onChange={(e) => setInputValue(e.target.value)}
          onKeyPress={handleKeyPress}
        />
        <button onClick={addTodo}>Add Todo</button>

        <h2>My Todos ({todos.length})</h2>
        <ul>
          {todos.map(todo => (
            <li key={todo.id}>
              {todo.text} {todo.completed ? '✅' : '⏳'}
            </li>
          ))}
        </ul>
      </div>
    </div>
  );
}

export default App;
🎯 Key Concepts Explained:
Event Handlers:
onClick={addTodo} – function runs when button is clicked
onKeyPress={handleKeyPress} – function runs when key is pressed
Event handlers receive an event object (e) with information about the event
State Updates:
setTodos([...todos, newTodo]) – creates a new array with all existing todos plus the new one
Important: Always create new arrays/objects instead of mutating existing ones
React compares old and new state to determine if re-render is needed
Spread Operator (...):
...todos spreads out all elements of the todos array
This is the React way to add items to an array in state
Try adding new todos now!
🎯 Function Syntax Options in JavaScript:
const addTodo = () => {} is a function syntax – specifically an arrow function. Let me explain why it’s declared as const and the different ways to write functions in JavaScript.
1. Function Declaration (Traditional)
function addTodo() {
  // function body
}
2. Function Expression with Arrow Function
const addTodo = () => {
  // function body
};
3. Function Expression (Traditional)
const addTodo = function() {
  // function body
};
🤔 Why use const for functions?
Arrow functions are expressions, not declarations:
// This is a DECLARATION - creates a function named addTodo
function addTodo() { }

// This is an EXPRESSION - creates a function and assigns it to a variable
const addTodo = () => { };
Why const specifically?
// ❌ Could be reassigned accidentally
let addTodo = () => { };
addTodo = "oops"; // Function is now gone!

// ❌ Could be reassigned accidentally
var addTodo = () => { };
addTodo = null; // Function is now gone!

// ✅ Cannot be reassigned - prevents bugs
const addTodo = () => { };
addTodo = "something"; // ERROR: Assignment to constant variable
📚 Key Differences:
Function Declaration vs Arrow Function:
// Function Declaration
function addTodo() {
  console.log("Adding todo");
}

// Arrow Function (assigned to const)
const addTodo = () => {
  console.log("Adding todo");
};
Hoisting Behavior:
// ✅ This works - function declarations are "hoisted"
sayHello(); // "Hello!"

function sayHello() {
  console.log("Hello!");
}

// ❌ This doesn't work - arrow functions are not hoisted
sayGoodbye(); // Error: Cannot access 'sayGoodbye' before initialization

const sayGoodbye = () => {
  console.log("Goodbye!");
};
this Binding:
// Function declaration has its own 'this'
function regularFunction() {
  console.log(this); // 'this' can change based on how it's called
}

// Arrow function inherits 'this' from surrounding scope
const arrowFunction = () => {
  console.log(this); // 'this' is inherited from parent scope
};
🚀 In React Context:
In React functional components, we typically use arrow functions with const because:
Prevents accidental reassignment – our function won’t get overwritten
Consistent with modern JavaScript – ES6+ standard
Cleaner syntax – less verbose than traditional function expressions
Better for event handlers – this behavior is more predictable
All these are equivalent in React:
// Option 1: Arrow function with const (most common)
const addTodo = () => {
  if (inputValue.trim() !== '') {
    // ... logic
  }
};

// Option 2: Traditional function declaration
function addTodo() {
  if (inputValue.trim() !== '') {
    // ... logic
  }
}

// Option 3: Function expression with const
const addTodo = function() {
  if (inputValue.trim() !== '') {
    // ... logic
  }
};
No hoisting confusion – functions are defined before they’re used
Better with modern tooling – ESLint, Prettier handle them well
So yes, const addTodo = () => {} is definitely a function! It’s just a modern way to write functions that prevents accidental reassignment and has cleaner syntax.
🎯 What is Hoisting?
Hoisting is a fundamental JavaScript concept that can be confusing at first. Let me explain it clearly with examples.
Hoisting is JavaScript’s behavior of moving declarations to the top of their scope during the compilation phase, before the code is executed.
Think of it like JavaScript “hoists” (lifts up) your variable and function declarations to the top of their scope.
📚 How Hoisting Works:
Function Declarations are Hoisted:
// This works even though we call the function before declaring it!
sayHello(); // Outputs: "Hello!"

function sayHello() {
  console.log("Hello!");
}
Behind the scenes, JavaScript treats it like this:
// JavaScript internally reorganizes it like this:
function sayHello() {
  console.log("Hello!");
}

sayHello(); // Now it makes sense!
Variable Declarations (with var) are Hoisted:
console.log(myVar); // Outputs: undefined (not an error!)
var myVar = "Hello";
console.log(myVar); // Outputs: "Hello"
Behind the scenes:
// JavaScript internally treats it like this:
var myVar; // Declaration is hoisted to the top
console.log(myVar); // undefined (declared but not assigned)
myVar = "Hello"; // Assignment stays in place
console.log(myVar); // "Hello"
🚫 What is NOT Hoisted:
let and const variables:
// ❌ This throws an error!
console.log(myLet); // ReferenceError: Cannot access 'myLet' before initialization
let myLet = "Hello";

// ❌ This also throws an error!
console.log(myConst); // ReferenceError: Cannot access 'myConst' before initialization
const myConst = "Hello";
Arrow Functions (Function Expressions):
// ❌ This throws an error!
sayGoodbye(); // ReferenceError: Cannot access 'sayGoodbye' before initialization

const sayGoodbye = () => {
  console.log("Goodbye!");
};
Function Expressions:
// ❌ This throws an error!
myFunc(); // TypeError: myFunc is not a function

var myFunc = function() {
  console.log("Hello!");
};
🎭 Visual Examples:
Example 1: Function Declaration Hoisting
// What you write:
console.log("1. Start");
myFunction(); // This works!
console.log("3. End");

function myFunction() {
  console.log("2. Inside function");
}

// Output:
// 1. Start
// 2. Inside function
// 3. End
Example 2: Variable Hoisting with var
// What you write:
console.log("Value is:", myVar); // undefined
var myVar = 42;
console.log("Value is:", myVar); // 42

// What JavaScript internally does:
var myVar; // Hoisted to top
console.log("Value is:", myVar); // undefined
myVar = 42; // Assignment stays here
console.log("Value is:", myVar); // 42
Example 3: Why let and const are different
// Temporal Dead Zone
console.log("Before declaration");

// ❌ This area is the "Temporal Dead Zone" for myLet
console.log(myLet); // ReferenceError!

let myLet = "Hello"; // Declaration and initialization
console.log(myLet); // "Hello"
🎯 Practical Implications:
Why Function Declarations work everywhere:
// This is valid JavaScript
function main() {
  helper(); // Can call helper before it's defined

  function helper() {
    console.log("Helper function");
  }
}
Why Arrow Functions must be defined first:
// ❌ This doesn't work
const main = () => {
  helper(); // Error! helper is not defined yet

  const helper = () => {
    console.log("Helper function");
  };
};

// ✅ This works
const main = () => {
  const helper = () => {
    console.log("Helper function");
  };

  helper(); // Now it works!
};
💡 Best Practices:
Use const and let instead of var to avoid hoisting confusion
Define functions before using them (even though function declarations are hoisted)
Use arrow functions for consistency and to avoid hoisting surprises
Initialize variables when you declare them
🔗 Back to Our React Example:
// This is why we use const for arrow functions
const App = () => {
  // ✅ Good: Function defined before use
  const addTodo = () => {
    // function logic
  };

  // ❌ Bad: Would cause error if we tried to call it here
  // deleteTodo(); // Error!

  const deleteTodo = () => {
    // function logic
  };

  return (
    <div>
      <button onClick={addTodo}>Add</button>
      <button onClick={deleteTodo}>Delete</button>
    </div>
  );
};
Hoisting is JavaScript’s way of making function declarations available throughout their scope, but it doesn’t apply to modern variable declarations (let, const) or arrow functions. That’s why we define our functions with const and make sure to declare them before we use them!
Step 4: Toggling Todo Completion
Let’s add the ability to mark todos as complete/incomplete:
Location:~/react/DesignStudioMobileApp Git Branch:main Project: React Native app with default template
✅ Created React Native app with default template
✅ Renamed app from “DesignStudioApp” to “DesignStudioMobileApp”
✅ Fixed registration errors in iOS AppDelegate
✅ Renamed project folder to match app name
✅ Clean git history with 2 meaningful commits
✅ App running successfully on iOS simulator
Ready for Next Steps:
Our DesignStudioMobileApp is ready for development!
Pending work options:
🧭 Add navigation between screens (React Navigation)
🎨 Create custom UI components for design studio features
📸 Add camera/image functionality for capturing designs
💾 Set up state management (Redux/Zustand)
🎯 Build specific features like project gallery, design tools, etc.
📱 Customize the welcome screen and app styling
🔥 Why My MacBook Heats Up when do react native development:
Our laptop heating up when running npx react-native run-ios is actually very common in React Native development. Here’s why this happens and how to reduce it:
1. Multiple Heavy Processes Running Simultaneously:
Metro Bundler – JavaScript bundling and hot reloading
Xcode Build System – Compiling iOS native code
iOS Simulator – Running a virtual iPhone with full OS
Node.js processes – Package management and tooling
CocoaPods – iOS dependency management
2. Resource-Intensive Operations:
JavaScript compilation and transformation
iOS native code compilation (Objective-C/Swift)
File watching for hot reload (monitoring thousands of files)
This combination should reduce CPU usage by 30-50% and make your laptop run much cooler! 🎉
Quick tip: The heating is normal for React Native development, but these optimizations should make it much more manageable. Monitor Activity Monitor to see the CPU reduction! 📊
Alternative: Could use plain objects, but StyleSheet is better
Lines 22-24:
container: {
  flex: 1,
},
container – Style name (can be anything you want)
flex: 1 – Takes up all available space
CSS equivalent:flex: 1 makes the View expand to fill the screen
Purpose: Ensures the app content fills the entire screen
Line 28: Export Statement 📤
export default App;
export default – Makes the App component available to other files
Purpose: Allows index.js to import and register this component
Required: Without this, React Native can’t find your app component
🔄 How It All Works Together:
Flow of Execution:
Import dependencies → Get required React Native components
Define App component → Create the main component function
Detect color scheme → Check if user prefers dark/light mode
Render UI → Return JSX that describes the screen
Apply styles → Style the container to fill screen
Export component → Make it available to React Native
Visual Structure:
📱 Phone Screen
├── 📊 StatusBar (adapts to dark/light mode)
└── 📦 View (container that fills screen)
    └── 🎉 NewAppScreen (welcome screen with React Native content)
Key Concepts:
Concept
Explanation
Example
JSX
HTML-like syntax in JavaScript
<View> instead of <div>
Components
Reusable UI pieces
<StatusBar>, <View>
Props
Data passed to components
barStyle="dark-content"
Hooks
Functions that add React features
useColorScheme()
Styles
CSS-like styling for React Native
StyleSheet.create()
React Native vs Web Differences:
Web (HTML/CSS)
React Native
Purpose
<div>
<View>
Container
CSS files
StyleSheet
Styling
Media queries
useColorScheme()
Responsive design
Manual status bar
<StatusBar>
System UI control
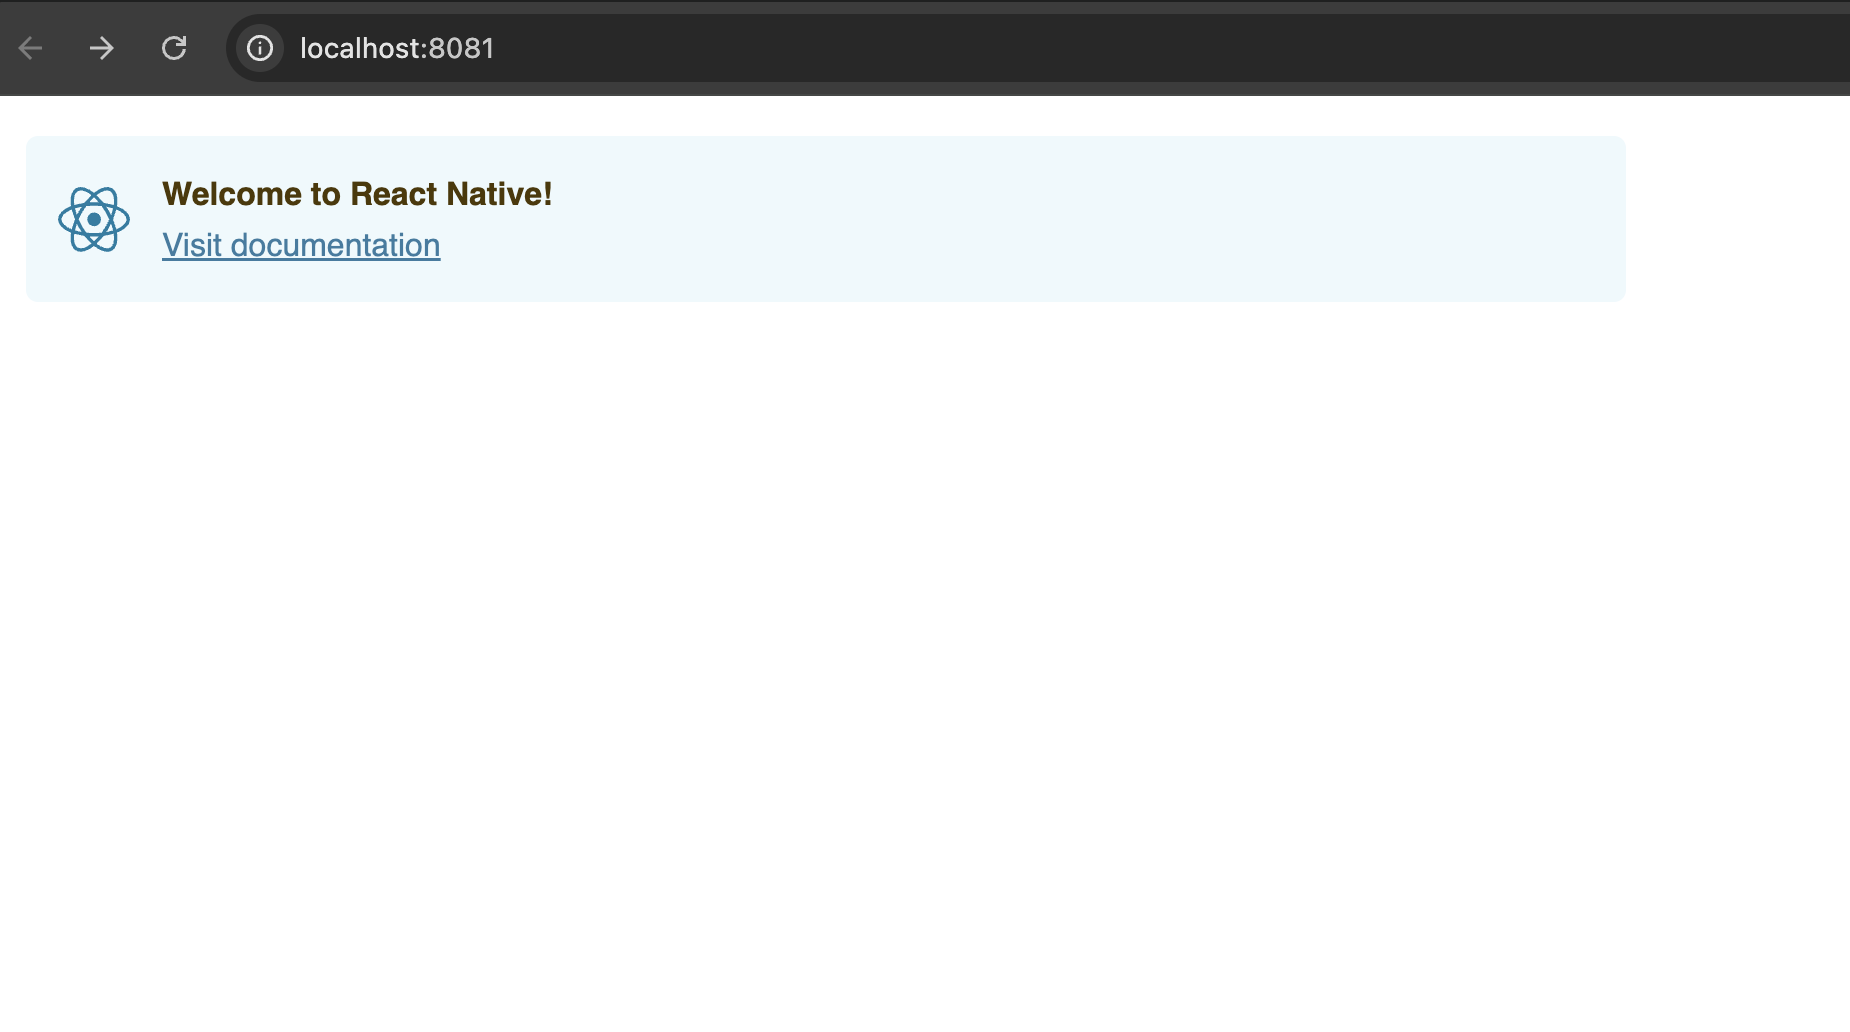
🎯 What You’re Seeing on Screen:
When you run this app, you see:
✅ React Native logo
✅ “Welcome to React Native” text
✅ Links to documentation
✅ Step-by-step instructions
✅ Status bar that adapts to your phone’s theme
This is the default template – a starting point for building our DesignStudioMobileApp! 🚀
⚛️ Functional vs Class Components in React
Type
Introduced In
Simpler Syntax
Supports Hooks
Uses this?
Functional Component
React since beginning, became more powerful in React 16.8
✅ Yes
✅ Yes
❌ No
Class Component
React 0.13+
❌ Verbose
❌ Old pattern
✅ Yes
🧩 1. Functional Component (Modern)
✅ What is it?
A JavaScript function that returns JSX. As of React 16.8, functional components can manage state and side effects using Hooks (useState, useEffect, etc.).
Before React 16.8, only class components could have state or lifecycle methods.
Functional components were stateless-only.
💡 Then came Hooks (React 16.8):
Gave functional components full power: state, side effects, refs, context.
Made class components mostly obsolete for new code.
🧠 Which One Should You Use?
✅ Use Functional Components unless:
You’re working with legacy code
You’re learning how React evolved
A library forces you into class-style APIs (rare now)
✅ TL;DR
Feature
Functional Component
Class Component
Syntax
Simple function
Class with extends Component
State support
✅ Yes (via Hooks)
✅ Yes
Lifecycle methods
✅ Yes (via Hooks like useEffect)
✅ Yes (componentDidMount, etc)
this keyword
❌ No
✅ Yes
Modern React choice
⭐ Preferred
Deprecated for new apps
Absolutely! Let’s go over the most important React Hooks that turned functional components into full-featured building blocks, just like class components (and even more powerful!).
⚛️ React Hooks — Power Tools for Functional Components
Introduced in React 16.8, Hooks let you:
Use state, side effects, context, refs, etc.
Without writing a class component
🧰 Essential React Hooks (with Examples)
1️⃣ useState — Manage Local Component State 🧠
📌 When to Use:
To store and update component-level state (like a counter, input field value, toggle, etc.)
The guide is for creating a React Native app for our design studio web application made with Ruby On Rails 8. Let me start by explaining the fundamentals and then walk you through the entire setup process.
What is React Native? 🤔
React Native is a framework developed by Facebook (now Meta) that allows you to build mobile applications using JavaScript and React. It enables you to write code once and deploy it on both iOS and Android platforms.
Why Use React Native? 🎯
Key Benefits:
Cross-Platform Development: Write once, run on both iOS and Android
Code Reusability: Share up to 90% of code between platforms
Native Performance: Uses native components, not webviews
Hot Reloading: See changes instantly during development
Large Community: Extensive libraries and community support
Cost-Effective: Faster development with smaller teams
Facebook Backing: Strong ecosystem and continuous updates
React Native vs React: Key Differences 📊
Aspect
React
React Native
Target Platform
Web browsers
Mobile devices (iOS/Android)
DOM
Virtual DOM
Native components
Styling
CSS
StyleSheet API (CSS-like)
Components
HTML elements (<div>, <p>, etc.)
Native components (<View>, <Text>, etc.)
Navigation
React Router
React Navigation
Deployment
Web servers
App stores
Development
Browser dev tools
Mobile simulators/devices
Setting Up Your React Native Development Environment 🛠️
Let me guide you through creating your React Native app step by step:
Step 1: Install Prerequisites
First, let’s check your current setup and install the necessary tools: Ran tool
We’ll need to install several tools. Let me guide you through each one:
1. Node.js & npm/yarn
# Check if Node.js is installed
node --version
npm --version

# If not installed, download from https://nodejs.org/
# Or install via Homebrew (recommended for macOS):
brew install node
2. React Native CLI
npm install -g @react-native-community/cli
3. For iOS Development (macOS only):
# Install Xcode from Mac App Store

# Install CocoaPods
# Homebrew
brew install cocoapods

# Later
# Update with Homebrew
brew upgrade cocoapods

# OR use ruby gem
sudo gem install cocoapods
4. For Android Development:
Install Android Studio
Set up Android SDK
Configure environment variables
Step 2: Create Your React Native App
Let’s navigate to our react folder and create the app. Let’s create our React Native app for the design studio.
Run these commands in our terminal:
# Navigate to your react directory
cd ~/react

# Create a new React Native app
npx react-native init DesignStudioApp

# Navigate to the new app directory
cd DesignStudioApp
🎉 Our DesignStudioApp has been created successfully!
What Happened
The React Native CLI successfully:
✅ Downloaded the template
✅ Copied template files
✅ Processed the template
✅ Installed dependencies
✅ Initialized Git repository
✅ CocoaPods is Already Installed!
CocoaPods version 1.16.2_1 is properly installed via Homebrew in our system.
CocoaPods manages dependencies for your Xcode projects.
You specify the dependencies for your project in a simple text file: your Podfile. CocoaPods recursively resolves dependencies between libraries, fetches source code for all dependencies, and creates and maintains an Xcode workspace to build your project. The latest released Xcode versions and the prior version are supported.
✅ Complete Installation: All necessary files are present
# Let's Verify CocoaPods is Working
pod --version
1.16.2
Now Let’s Try Installing iOS Dependencies 📱
Since CocoaPods is working, let’s try to install the iOS dependencies for our DesignStudioApp:
cd DesignStudioApp/ios && pod install
....
[Hermes] Using release tarball from URL: https://repo1.maven.org/maven2/com/facebook/react/react-native-artifacts/0.80.1/react-native-artifacts-0.80.1-hermes-ios-debug.tar.gz
Step 3: Understanding the Project Structure 📁
After creating the app, you’ll see this structure:
DesignStudioApp/
├── android/          # Android-specific code
├── ios/              # iOS-specific code
├── node_modules/     # Dependencies
├── src/              # Your app source code (you'll create this)
├── App.tsx           # Main app component
├── index.js          # Entry point
├── package.json      # Dependencies and scripts
├── metro.config.js   # Metro bundler configuration
└── ...
Step 4: Key Files Explained 📝
App.tsx – Main component (like App.js in React web) index.js – Entry point that registers your app package.json – Dependencies and scripts android/ & ios/ – Platform-specific native code
Step 5: Running Your App (No XCode installed) 🚀
For iOS Simulator:
# Make sure you're in the DesignStudioApp directory
npx react-native run-ios
Install Xcode: Xcode Component Selection for React Native Development 🛠️
For React Native development, you should select BOTH:
✅ Required Components:
macOS15.5 (built-in) – ✅ Select this
iOS 18.5 – ✅ Select this (Essential for React Native)
# Install iOS Dependencies Again
cd DesignStudioApp && cd ios && pod install
🎉 CocoaPods Installation Complete!
All iOS dependencies have been successfully installed!
What Just Happened ✅
✅ 74 dependencies installed from Podfile
✅ 73 total pods installed successfully
✅ React Native modules all configured
✅ Hermes engine installed (JavaScript engine)
✅ Xcode workspace created
Hermes is an open-source JavaScript engine optimized for React Native. For many apps, using Hermes will result in improved start-up time, decreased memory usage, and smaller app size when compared to JavaScriptCore. Hermes is used by default by React Native and no additional configuration is required to enable it.
Important Note 📝
The system created a .xcworkspace file – this is what you’ll use instead of .xcodeproj from now on.
# Step 5: Now Let's Run Your App on iOS!

✗ npx react-native run-ios
info Found Xcode workspace "DesignStudioApp.xcworkspace"
info No booted devices or simulators found. Launching first available simulator...
info Launching iPhone 16 Pro (iOS 18.5)
info Building (using "xcodebuild -workspace DesignStudioApp.xcworkspace -configuration Debug -scheme DesignStudioApp -destination id=XXXX-XXXXX-XXXX-XXXX
Step 1: Install iOS Dependencies 📦
Open your terminal and run these commands:
# Navigate to your app directory
cd ~/react/DesignStudioApp

# Install iOS dependencies
cd ios && pod install && cd ..
This will install all the necessary iOS libraries and dependencies.
Step 2: Run the iOS App 📱
Option A: Use React Native CLI (Recommended)
Open a new terminal window (keep Metro running in the first one) and run:
cd ~/react/DesignStudioApp
npx react-native run-ios
Option B: Use Xcode Directly
# Open the iOS project in Xcode
cd ~/react/DesignStudioApp
xed ios/DesignStudioApp.xcworkspace
Then press the “Run” button (▶️) in Xcode.
What Should Happen 🎯
iOS Simulator opens – A virtual iPhone will appear
App builds – You’ll see build progress in terminal
App launches – Your DesignStudioApp will open in the simulator
Metro connects – The app connects to the development server
Expected Output 📱
You should see the default React Native welcome screen with:
React Native logo
“Welcome to React Native” message
Various getting started links
Debug information
Common Issues & Solutions 🔧
Issue 1: “No iOS Simulator Available”
# List available simulators
xcrun simctl list devices

# If no simulators, create one in Xcode:
# Xcode > Window > Devices and Simulators > Create Simulator
Issue 2: “Build Failed”
# Clean and rebuild
cd ~/react/DesignStudioApp
npx react-native run-ios --clean
Issue 3: “Metro not responding” – not used metro
# Reset Metro cache
npx react-native start --reset-cache
Quick Commands Summary 📝
# Terminal 1: Start Metro
cd ~/react/DesignStudioApp
npx react-native start

# Terminal 2: Run iOS app
cd ~/react/DesignStudioApp
npx react-native run-ios
What You’ll See 👀
Your app should display:
React Native welcome screen
“Welcome to React Native” text
Various learning resources
Debug information
Testing Your App 🧪
Once running, you can:
⌘+D – Open developer menu
⌘+R – Reload the app
⌘+T – Open new simulator
Shake gesture – Open dev menu on device
Next Steps After Success 🚀
Once your app is running:
Edit App.tsx – Make changes to see hot reload
Add navigation – React Navigation
Add UI components – For your design studio
Add features – Camera, image picker, etc.
Run These Commands Now! 💻
Open your terminal and execute:
cd ~/react/DesignStudioApp
cd ios && pod install && cd ..
npx react-native run-ios
This should launch your DesignStudioApp in the iOS simulator! 🎉
NPX is a package runner tool that comes with npm (Node Package Manager). It was introduced in npm version 5.2.0 and is now a standard part of the npm ecosystem.
NPX Full Name:
NPX = Node Package eXecute
It’s a command-line tool for executing npm packages
How NPX Works 🔧
Basic Concept:
Instead of installing packages globally, npx allows you to:
Run packages directly without installing them permanently
# Old way - install globally first
npm install -g create-react-app
create-react-app my-app

# NPX way - run directly
npx create-react-app my-app
2. Always Latest Version
# NPX ensures you get the latest version
npx create-react-app my-app

# vs global install might be outdated
npm install -g create-react-app  # Might be old version
create-react-app my-app
# Force download (ignore local/global)
npx --ignore-existing create-react-app my-app

# Use specific version
npx create-react-app@4.0.0 my-app

# Check what would be executed
npx --version create-react-app

# Run from specific package
npx -p typescript tsc --init
# Start Metro bundler
npx react-native start

# Run on iOS
npx react-native run-ios

# Run on Android
npx react-native run-android
Other Useful Commands:
# Check React Native version
npx react-native --version

# Upgrade React Native
npx react-native upgrade

# Doctor (check environment)
npx react-native doctor
Benefits Summary 🎉
For Developers:
✅ Cleaner system – No global package clutter
✅ Always updated – Latest versions automatically
✅ Faster setup – No pre-installation needed
✅ Less conflicts – No version conflicts
For Projects:
✅ Consistent environments – Everyone uses same versions
✅ Easier setup – New team members can start quickly
✅ Better CI/CD – Consistent builds
Pro Tips 💡
Use NPX for project creation – Always use npx for scaffolding tools
Check before installing globally – Ask yourself: “Do I need this globally?”
Use specific versions when needed – npx package@version
Great for CI/CD – Ensures consistent tool versions
NPX is essentially a way to “try before you buy” – run packages without the commitment of installing them permanently! It’s become an essential tool in modern JavaScript development. 🚀
Let’s see in Part 2.. Happy React Native Development 🚀